Removal Procedure
- Raise and support the vehicle. Refer to Lifting and Jacking the Vehicle in General Information.
- Remove propeller shaft. Refer to Propeller Shaft Replacement in Propeller Shaft.
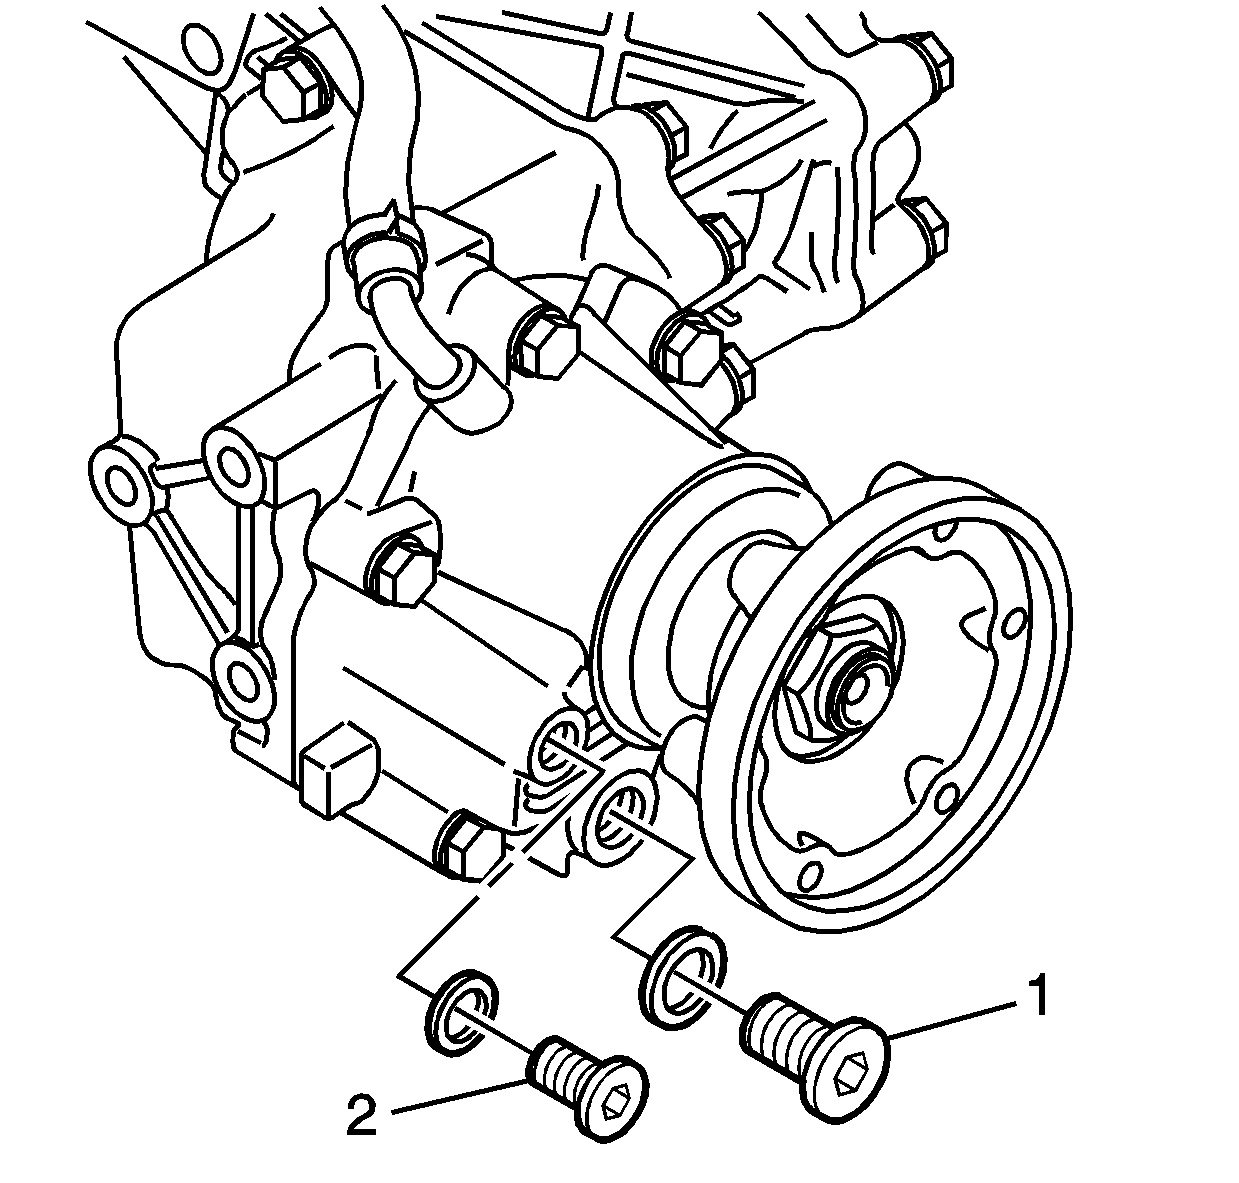
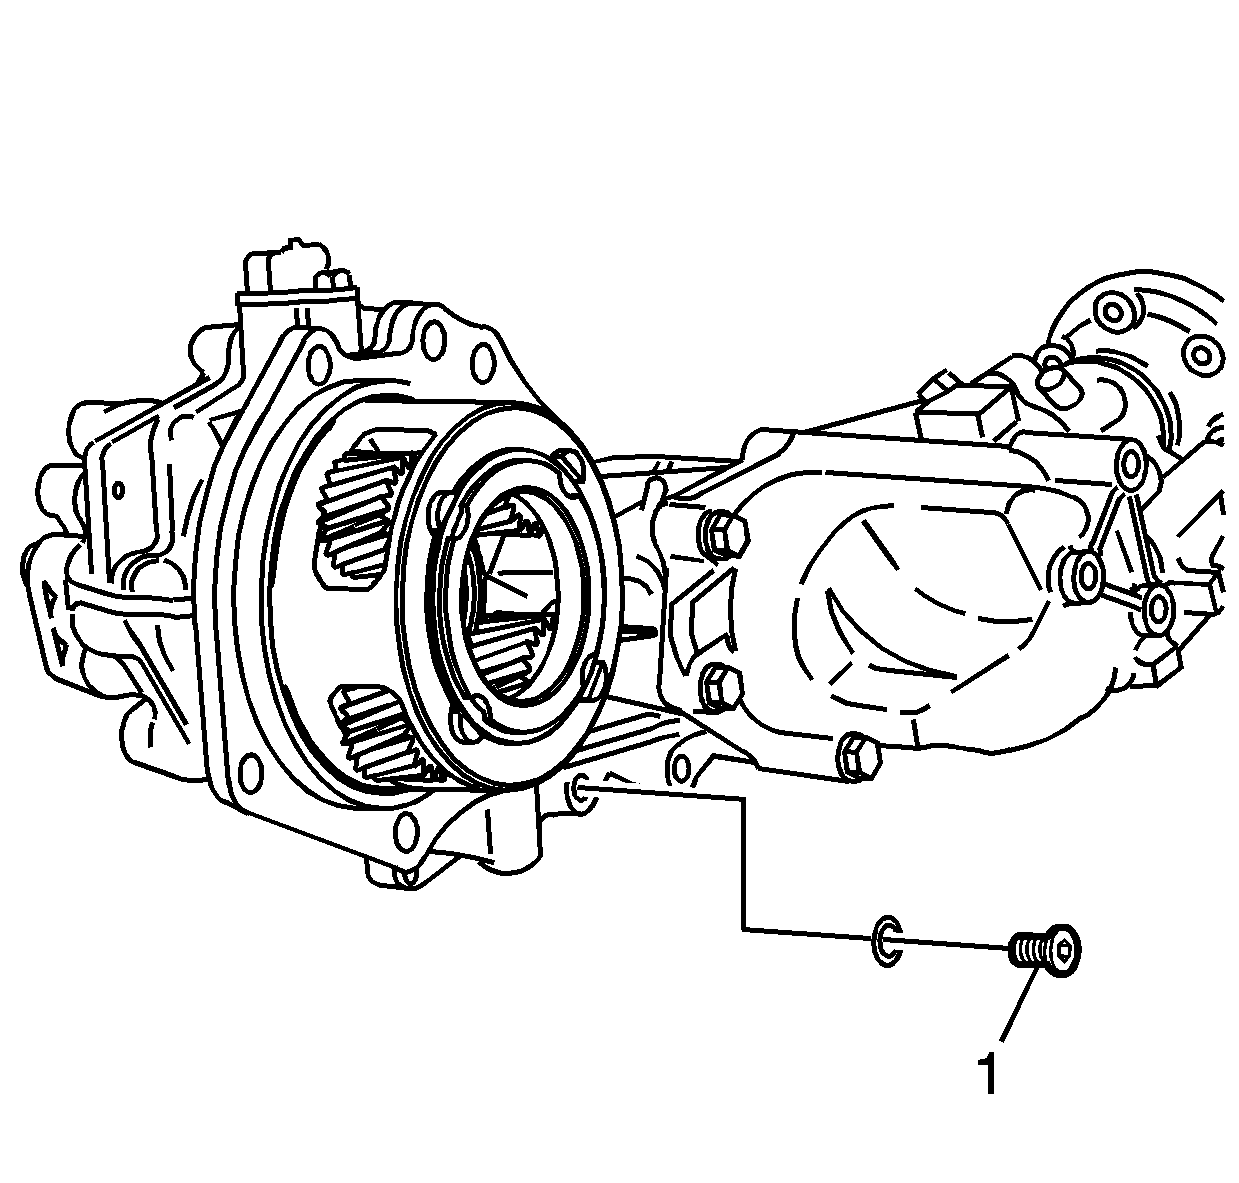
- Remove the drain plug (1) and washer from the extension housing. Allow the gear oil to drain.
- Remove the drain plug (1) and washer from the case. Allow the transmission fluid to drain.
- Disconnect the electrical connector from the speed sensor.
- Remove the transfer case lower brace bolts.
- Remove the transfer case lower brace.
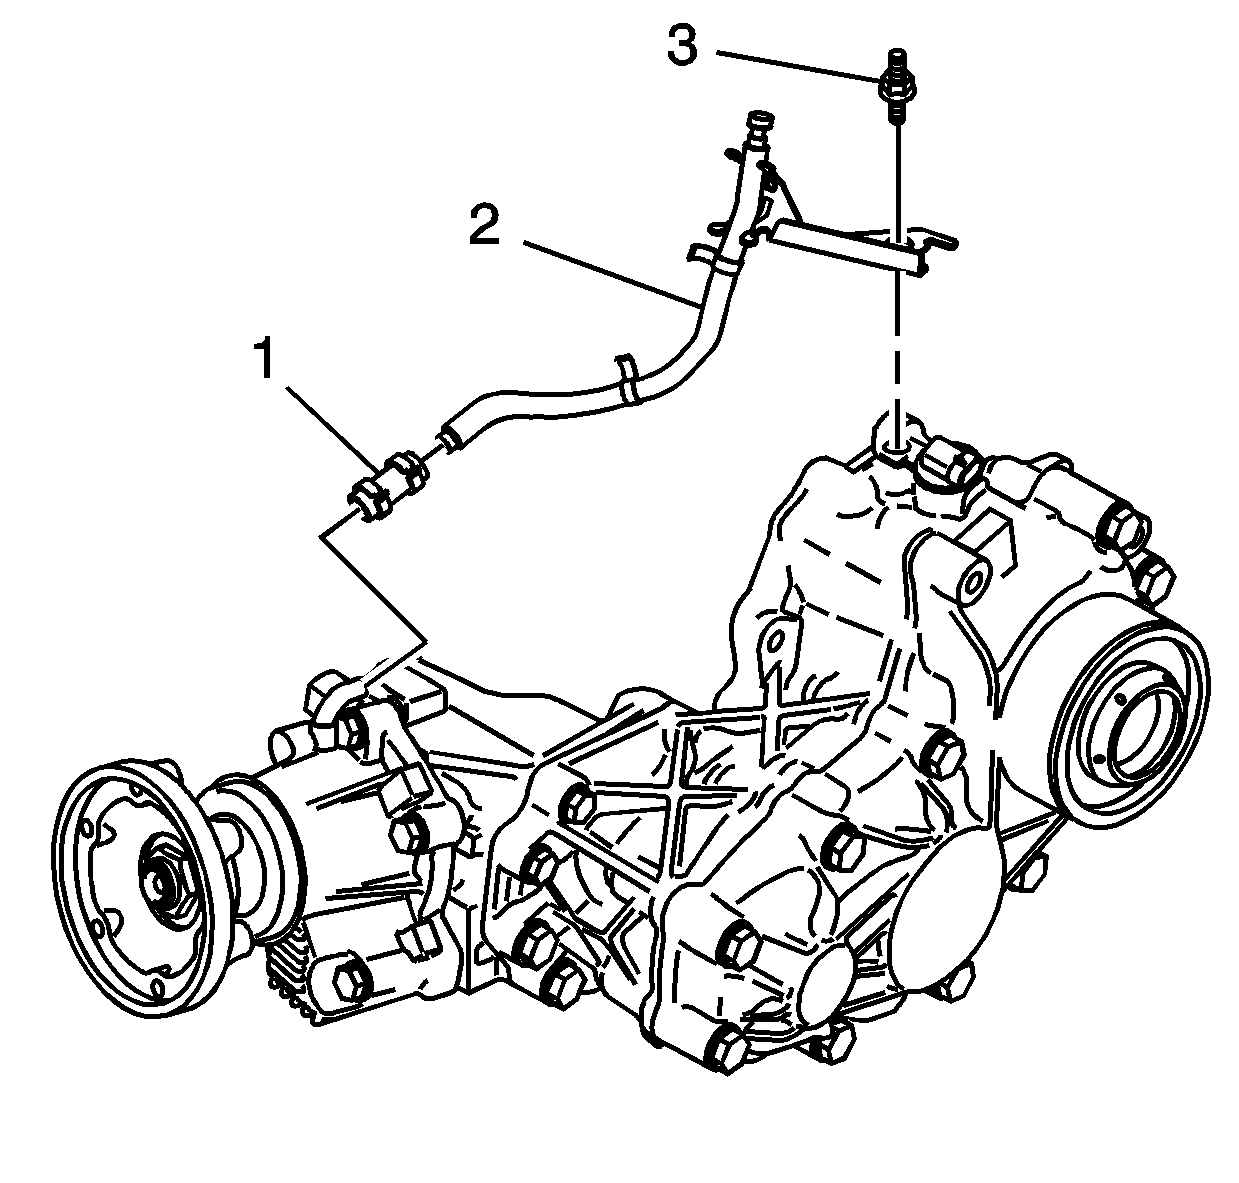
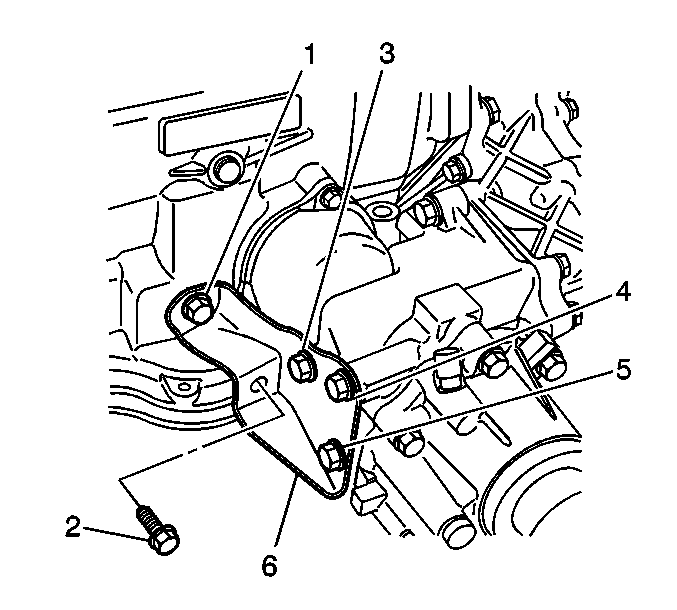
- Disconnect the clamp from the extension housing vent hose coupling (1).
- Remove the bolt (3) retaining the vent hose bracket to the transfer case.
- Remove the vent hose coupling, vent hose (2), and bracket from the transfer case.
- Remove the transaxle. Refer to Transmission Replacement in Automatic Transaxle - 4T65-E.
- Remove the output shaft retaining ring (1).
- Rotate the transaxle 90 degrees.
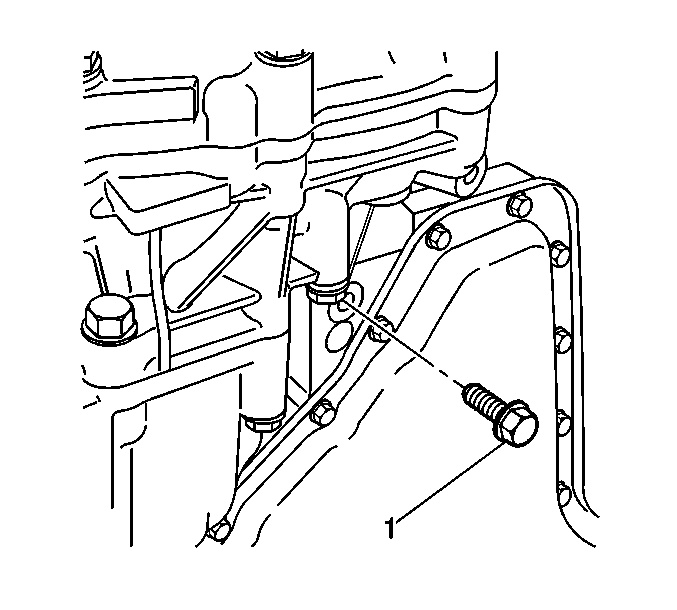
- Remove the transfer case lower brace bolt (1).
- Rotate the transaxle 90 degrees to the installed position.
- Remove the transfer case side brace bolts (1, 2, 3, 4, 5). Remove the side brace (6).
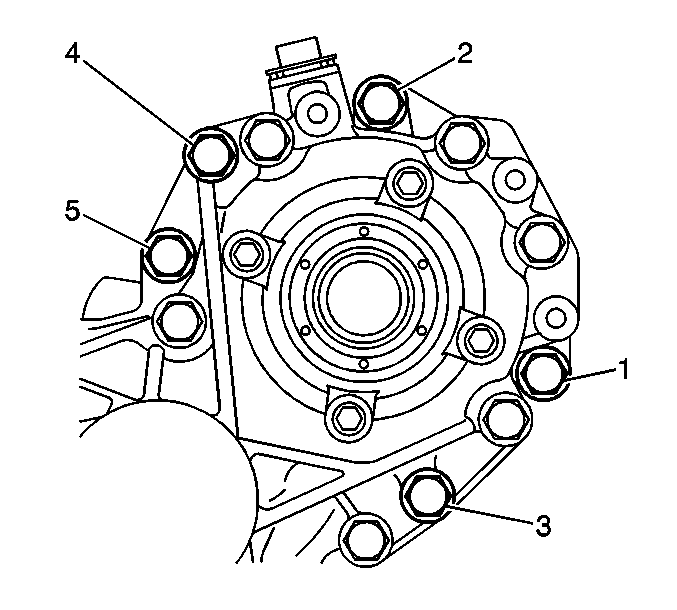
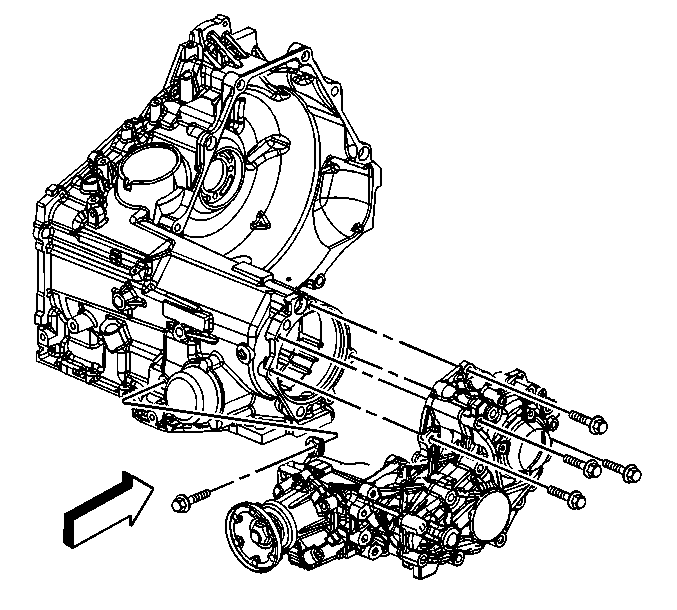
- Remove the transfer case-to-transaxle bolts (1, 2, 3, 4, 5).
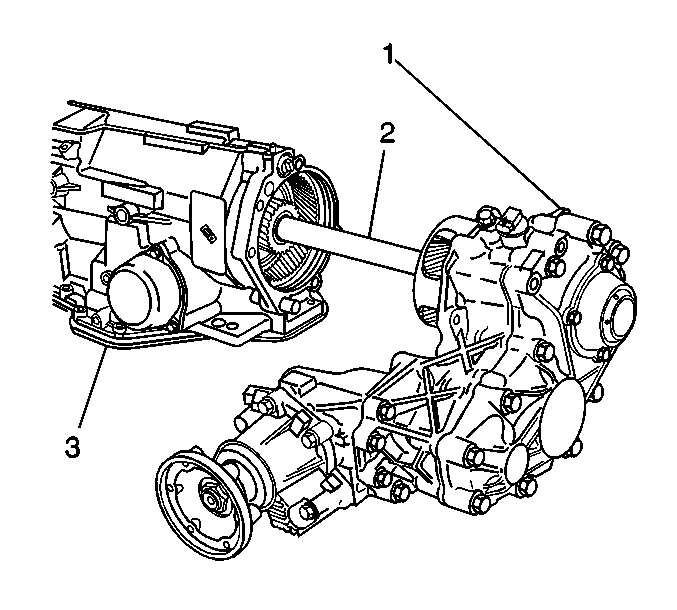
- Remove the transfer case assembly (1) from the transaxle (3). Note that the transaxle output shaft (2) withdraws from the transaxle with the transfer case assembly.
- Remove the output shaft (2). Refer to Transfer Case Removal in Automatic Transaxle - 4T65-E Unit Repair.
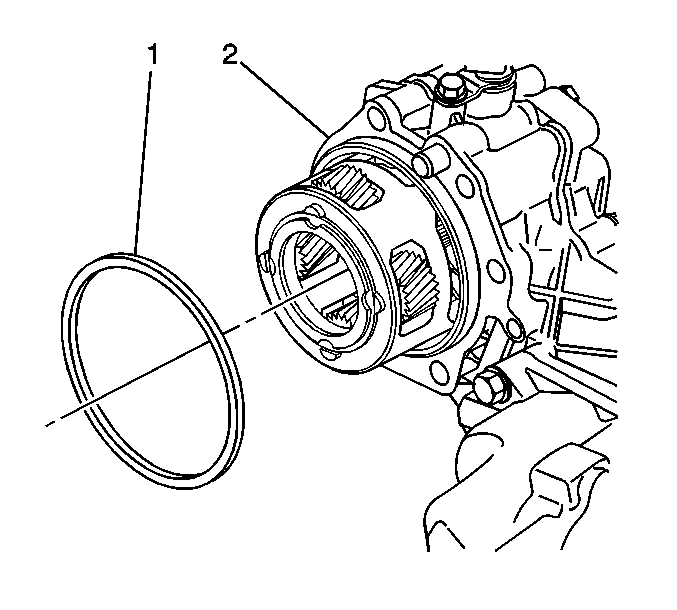
- Remove the transfer case O-ring seal (1) from the transfer case (2).
Important: Transmission oil circulates between the transmission assembly and the transfer case differential carrier and three helical gear set. In situations where transmission related failures circulate fiber type debris, such as clutch friction disc material into the transfer case, the helical gear portion of the transfer case must be disassembled, cleaned, and inspected for damage. In situations where transmission or transfer case related failures circulate metal type debris, such as bearing material, repair or overhaul of both components may be required.

Caution: This component weighs approximately 60 lbs. Personal injury may result if you lift the component improperly.
Installation Procedure
- Perform the transmission-to-transfer case end play check. Refer to Transmission to Transfer Case End Play Check in Automatic Transaxle - 4T65-E Unit Repair.
- Install the O-ring (1) seal to the transfer case.
- Rotate the transaxle so that the bottom pan is facing the floor.
- Install the transfer case assembly to the transaxle.
- Install the transfer case-to-transaxle bolts and tighten the bolts in the following sequence:
- Tighten the transfer case-to-transaxle bolts (1) and (2).
- Tighten the transfer case-to-transaxle bolt (3).
- Tighten the transfer case-to-transaxle bolts (4) and (5).
- Install the transfer case side brace (6).
- Install the transfer case side brace-to-transaxle bolts. Hand tighten bolts.
- Tighten the bolts in the following sequence (1, 2, 3, 4, 5).
- Rotate the transaxle 90 degrees.
- Install the transfer case lower brace-to-transaxle bolt (1).
- Install the output shaft to the transmission. Refer to Output Shaft Assemble in Automatic Transaxle 4T65-E Unit Repair.
- Install a new output shaft retaining ring (1).
- Install the transaxle. Refer to Transmission Replacement in Automatic Transaxle - 4T65-E.
- Install the vent hose (2) and coupling (1) to the extension housing.
- Connect the clamp to the vent hose coupling.
- Install the vent hose bracket and bolt/stud (3) to the transfer case.
- Connect the electrical connector to the speed sensor.
- Install propeller shaft . Refer to Propeller Shaft Replacement in Propeller Shaft.
- Install the transfer case lower brace.
- Install the transfer case lower brace bolts.
- Install the lubricant drain plug (1) and gasket to the case.
- Inspect the transmission fluid level. Refer to Transmission Fluid Check in Automatic Transaxle - 4T65-E.
- Install the lubricant drain plug (1) and gasket to the extension housing.
- Remove the extension housing fill plug (2) and gasket.
- Fill the extension housing with synthetic gear oil GM P/N United States 12378514 GM P/N Canada 88901045. Refer to Transfer Case Fluid Replacement .
- Install the fill plug and gasket to the extension housing.
- Lower the vehicle.
Important: The end play clearance between the transmission and transfer case internal components is adjusted by selection of the proper size selective washer (located behind the transmission sun gear). The transmission-to-transfer case washer selection procedure must be performed each time a transmission and/or transfer case assembly or the internal components (excluding gaskets and seals) are replaced.

Notice: Use the correct fastener in the correct location. Replacement fasteners must be the correct part number for that application. Fasteners requiring replacement or fasteners requiring the use of thread locking compound or sealant are identified in the service procedure. Do not use paints, lubricants, or corrosion inhibitors on fasteners or fastener joint surfaces unless specified. These coatings affect fastener torque and joint clamping force and may damage the fastener. Use the correct tightening sequence and specifications when installing fasteners in order to avoid damage to parts and systems.
Tighten
| • | First pass 35 N·m (26 lb ft). |
| • | Final pass an additional 160 degrees. |
Tighten
| • | First pass 35 N·m (26 lb ft). |
| • | Final pass an additional 70 degrees. |
Tighten
Tighten the transfer case-to-transaxle bolts (4) and (5) to 40 N·m
(30 lb ft).
Tighten
Tighten transfer case side brace bolts to 47 N·m (35 lb ft).
Tighten
Tighten transfer case lower brace bolt to 47 N·m (35 lb ft).
Tighten
Tighten the bolt/stud to 10 N·m (106 lb in).
Tighten
Tighten the brace bolts to 47 N·m (35 lb ft).
Tighten
Tighten the drain plug to 32 N·m (24 lb ft).
Tighten
Tighten the drain plug to 32 N·m (24 lb ft).
Tighten
Tighten the extension housing fill plug to 32 N·m (24 lb ft).
