Rear Seat Cushion Cover Replacement AQ4 - Captains Chair
Removal Procedure
- Remove the second row captains chair. Refer to Rear Seat Replacement .
- Remove the finish covers. Refer to Seat Trim Replacement - Side .
- Remove the seat riser. Refer to Rear Seat Riser Replacement .
- Remove the rear seat adjuster. Refer to Rear Seat Adjuster Replacement .
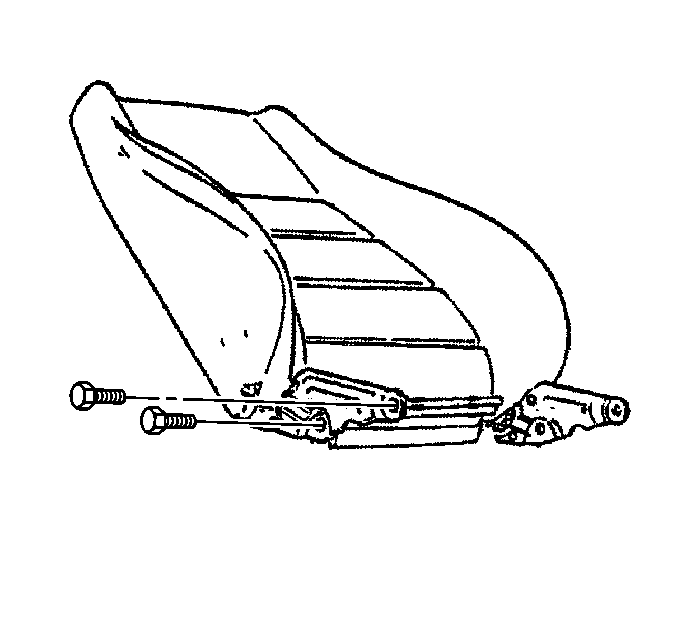
- Remove the recliner bolts.
- Separate the rear seat cushion from the rear seat back.
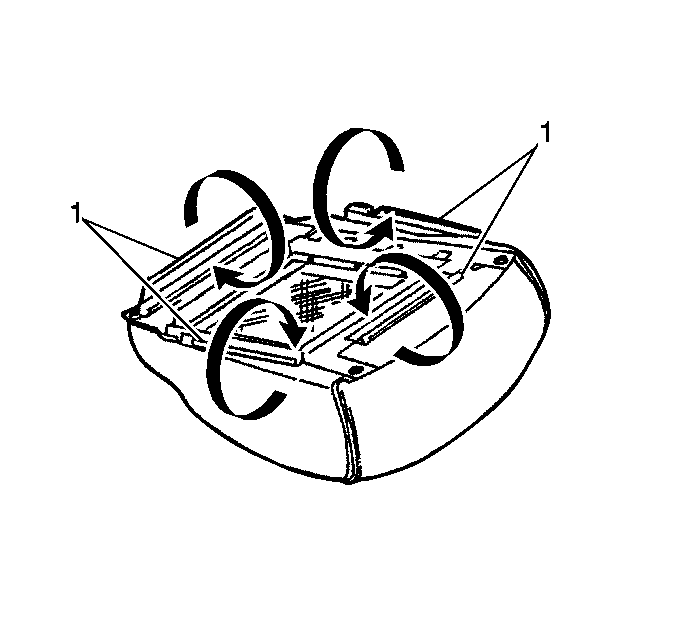
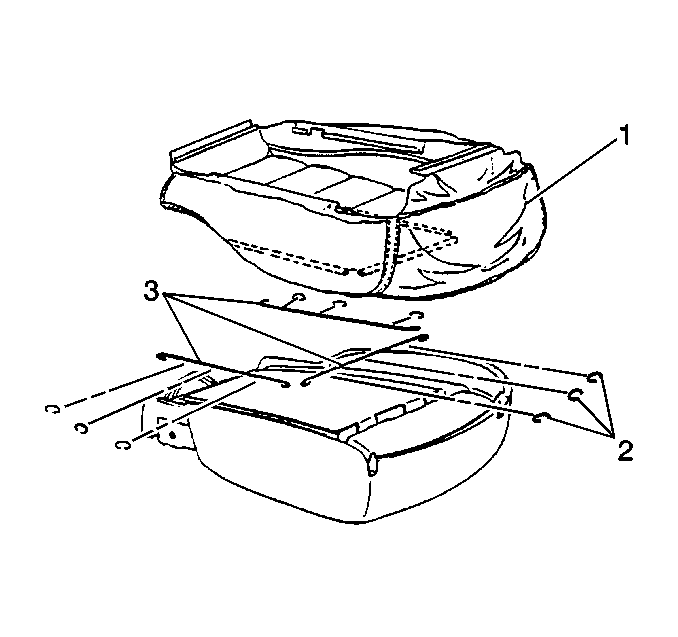
- Remove the seat cushion cover retainers (1) from the seat frame.
- Remove the rear seat cushion cover retainer rings (2).
- Separate the rear seat cushion cover away from the foam pad while separating the hook and loop retainers.
- Remove the rear seat cushion cover from the foam pad.
Installation Procedure
- Install the rear seat cushion cover to the foam pad.
- Secure the rear seat cushion cover to the foam pad using retainer rings (2) and the hook and loop retainers.
- Install the seat cushion cover retainers (1) to the seat frame.
- Install the rear seat cushion to the rear seat back.
- Install the recliner bolts.
- Install the rear seat adjuster. Refer to Rear Seat Adjuster Replacement .
- Install the seat riser. Refer to Rear Seat Riser Replacement .
- Install the finish covers. Refer to Seat Trim Replacement - Side .
- Install the second row captain's chair. Refer to Rear Seat Replacement .


Notice: Use the correct fastener in the correct location. Replacement fasteners must be the correct part number for that application. Fasteners requiring replacement or fasteners requiring the use of thread locking compound or sealant are identified in the service procedure. Do not use paints, lubricants, or corrosion inhibitors on fasteners or fastener joint surfaces unless specified. These coatings affect fastener torque and joint clamping force and may damage the fastener. Use the correct tightening sequence and specifications when installing fasteners in order to avoid damage to parts and systems.
Tighten
Tighten the bolts to 32 N·m (24 lb ft).
Rear Seat Cushion Cover Replacement AL4 - Rear Bucket
Removal Procedure
- Remove the second row bucket seat. Refer to Rear Seat Replacement .
- Remove the finish covers. Refer to Seat Trim Replacement - Side .
- Remove the seat riser. Refer to Rear Seat Riser Replacement .
- Remove the rear seat adjuster. Refer to Rear Seat Adjuster Replacement .
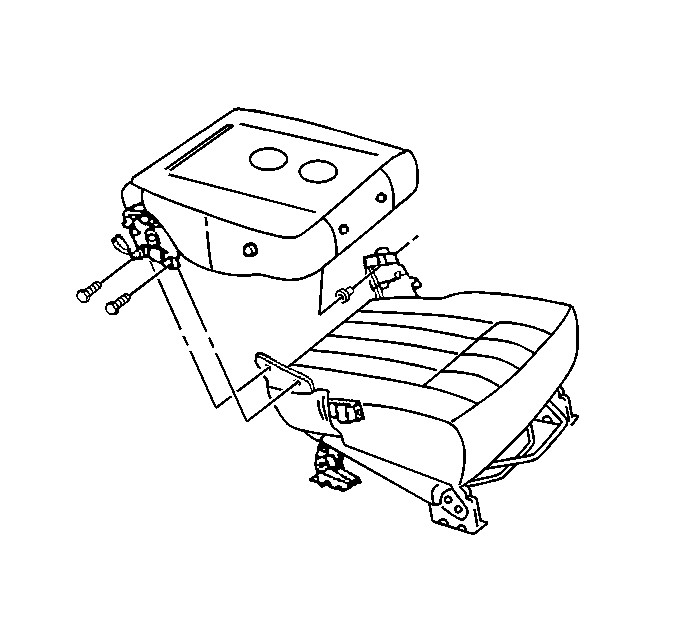
- Remove the recliner bolts.
- Separate the rear seat cushion from the rear seat back.
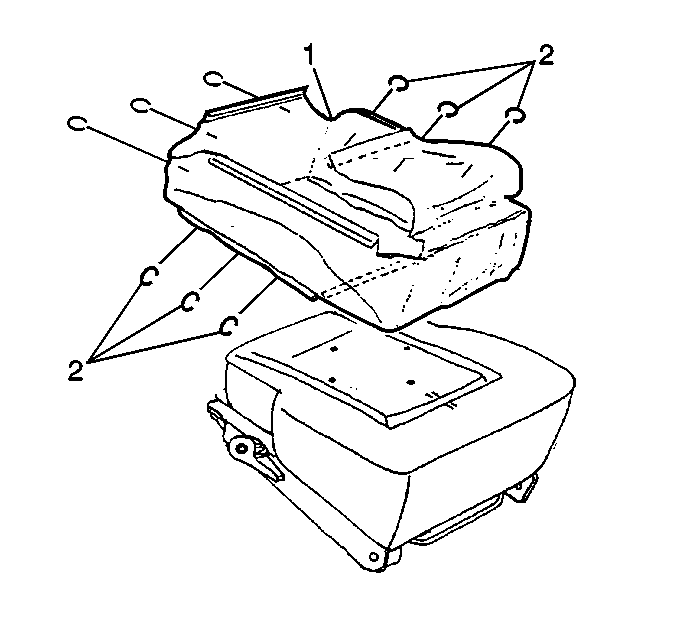
- Remove the seat cushion cover retainers (1) from the seat frame.
- Remove the rear seat cushion cover retainer rings (2).
- Separate the rear seat cushion cover away from the foam pad while separating the hook and loop retainers.
- Remove the rear seat cushion cover (1) from the foam pad.

Installation Procedure
- Install the rear seat cushion cover (1) to the foam pad.
- Secure the rear seat cushion cover to the foam pad using retainer rings (2) and the hook and loop retainers.
- Install the seat cushion cover retainers (1) to the seat frame.
- Install the rear seat cushion to the rear seat back.
- Install the recliner bolts.
- Install the rear seat adjuster. Refer to Rear Seat Adjuster Replacement .
- Install the seat riser. Refer to Rear Seat Riser Replacement .
- Install the finish covers. Refer to Seat Trim Replacement - Side .
- Install the second row bucket seat. Refer to Rear Seat Replacement .


Notice: Use the correct fastener in the correct location. Replacement fasteners must be the correct part number for that application. Fasteners requiring replacement or fasteners requiring the use of thread locking compound or sealant are identified in the service procedure. Do not use paints, lubricants, or corrosion inhibitors on fasteners or fastener joint surfaces unless specified. These coatings affect fastener torque and joint clamping force and may damage the fastener. Use the correct tightening sequence and specifications when installing fasteners in order to avoid damage to parts and systems.
Tighten
Tighten the bolts to 32 N·m (24 lb ft).
Rear Seat Cushion Cover Replacement AT5 - 60/40 Split Bench
Removal Procedure
- Remove the second row 60/40 split bench seat. Refer to Rear Seat Replacement .
- Remove the finish covers. Refer to Seat Trim Replacement - Side .
- Remove the seat riser. Refer to Rear Seat Riser Replacement .
- Remove the rear seat adjuster. Refer to Rear Seat Adjuster Replacement .
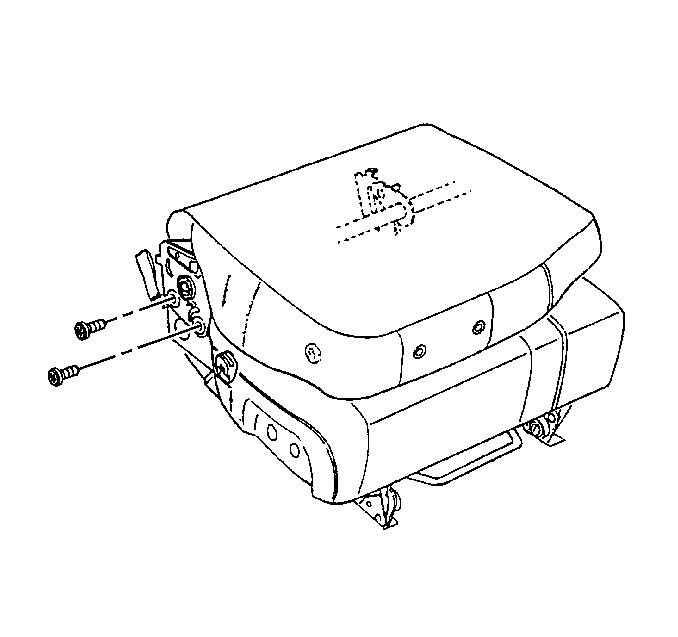
- Remove the recliner bolts.
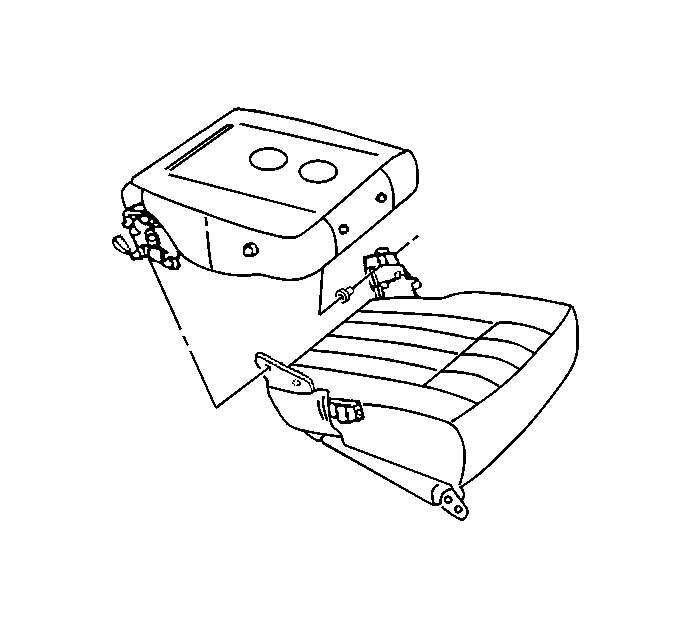
- Separate the rear seat cushion from the rear seat back.
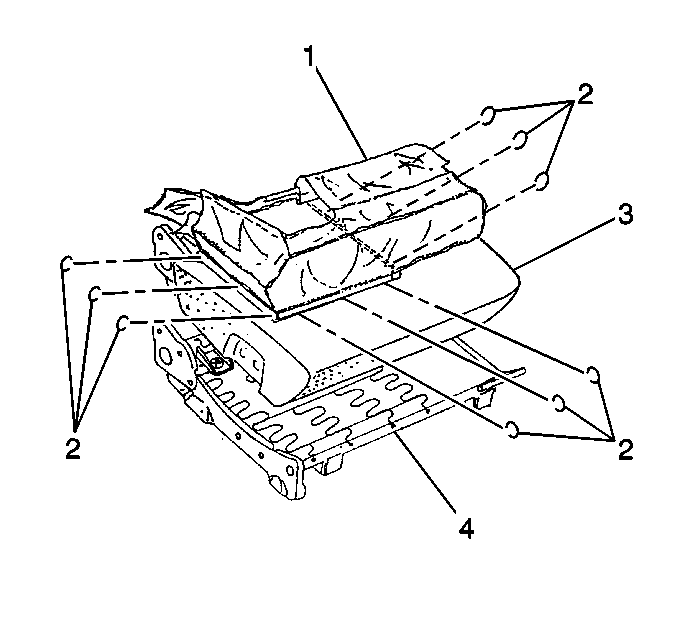
- Remove the J retainers (1) that secure the seat cushion cover from the seat frame.
- Remove the rear seat cushion cover retainer rings (2).
- Separate the rear seat cushion cover (1) away from the foam pad (3) while separating the hook and loop retainers.
- Remove the rear seat cushion cover (1) from the foam pad.

Installation Procedure
- Install the rear seat cushion cover (1) to the foam pad.
- Secure the rear seat cushion cover (1) to the foam pad (3) using retainer rings (2) and the hook and loop retainers.
- Install the J retainers (1) to secure the seat cushion cover to the seat frame.
- Install the rear seat cushion to the rear seat back.
- Install the recliner bolts.
- Install the rear seat adjuster. Refer to Rear Seat Adjuster Replacement .
- Install the seat riser. Refer to Rear Seat Riser Replacement .
- Install the finish covers. Refer to Seat Trim Replacement - Side .
- Install the second row 60/40 split bench seat. Refer to Rear Seat Replacement .


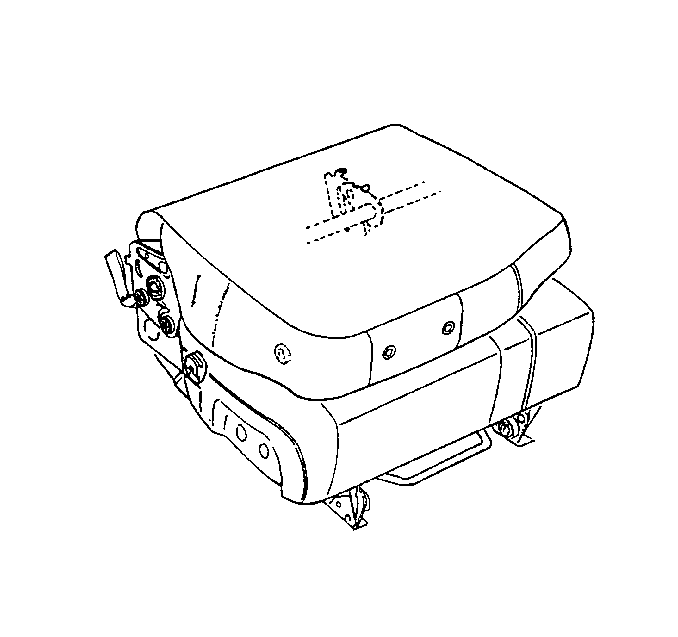
Notice: Use the correct fastener in the correct location. Replacement fasteners must be the correct part number for that application. Fasteners requiring replacement or fasteners requiring the use of thread locking compound or sealant are identified in the service procedure. Do not use paints, lubricants, or corrosion inhibitors on fasteners or fastener joint surfaces unless specified. These coatings affect fastener torque and joint clamping force and may damage the fastener. Use the correct tightening sequence and specifications when installing fasteners in order to avoid damage to parts and systems.
Tighten
Tighten the bolts to 32N·m (24 lb ft).
Rear Seat Cushion Cover Replacement AM9 - 50/50 Split Bench
Removal Procedure
- Remove the second row 50/50 split bench seat. Refer to Rear Seat Replacement .
- Remove the finish covers. Refer to Seat Trim Replacement - Side .
- Remove the seat riser. Refer to Rear Seat Riser Replacement .
- Remove the rear seat adjuster. Refer to Rear Seat Adjuster Replacement .
- Remove the recliner bolts.
- Separate the rear seat cushion from the rear seat back.
- Remove the J retainers (1) that secure the seat cushion cover to the seat frame.
- Remove the rear seat cushion cover retainer rings (2).
- Separate the rear seat cushion cover (1) away from the foam pad (3) while separating the hook and loop retainers.
- Remove the rear seat cushion cover (1) from the foam pad (3).


Installation Procedure
- Install the rear seat cushion cover (1) to the foam pad (3).
- Secure the rear seat cushion cover (1) to the foam pad (3) using retainer rings and the hook and loop retainers.
- Install the J retainers (1) to secure the seat cushion cover to the seat frame.
- Install the rear seat cushion to the rear seat back.
- Install the recliner bolts.
- Install the rear seat adjuster. Refer to Rear Seat Adjuster Replacement .
- Install the seat riser. Refer to Rear Seat Riser Replacement .
- Install the finish covers. Refer to Seat Trim Replacement - Side .
- Install the second row 50/50 split bench seat. Refer to Rear Seat Replacement .


Notice: Use the correct fastener in the correct location. Replacement fasteners must be the correct part number for that application. Fasteners requiring replacement or fasteners requiring the use of thread locking compound or sealant are identified in the service procedure. Do not use paints, lubricants, or corrosion inhibitors on fasteners or fastener joint surfaces unless specified. These coatings affect fastener torque and joint clamping force and may damage the fastener. Use the correct tightening sequence and specifications when installing fasteners in order to avoid damage to parts and systems.
Tighten
Tighten the bolts to 32 N·m (24 lb ft).
