For 1990-2009 cars only
Removal Procedure
- Open the sliding door in order to gain access to the center roller bracket pin.
- Support the rear of the sliding door.
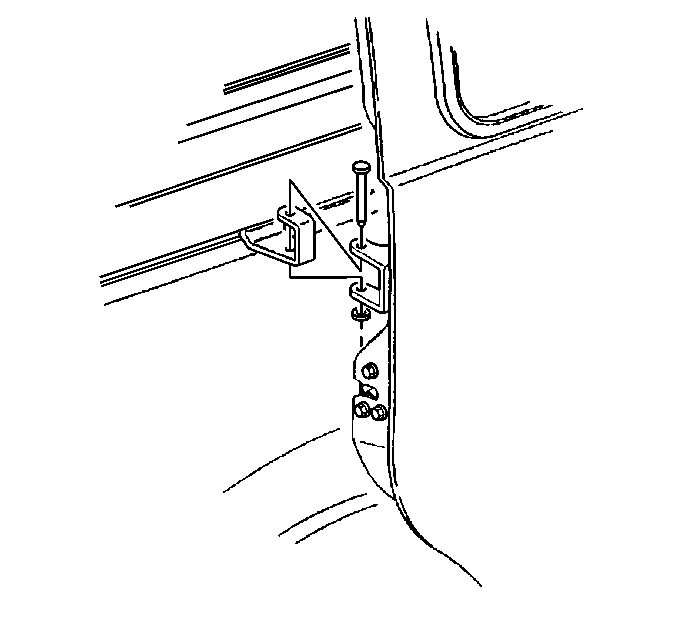
- Remove the pin from the center roller bracket.
- Position the center roller bracket to the front radius of the sliding door center track.
- Release cable tension. Refer to Rear Side Door Actuator Cable Tension Adjustment .
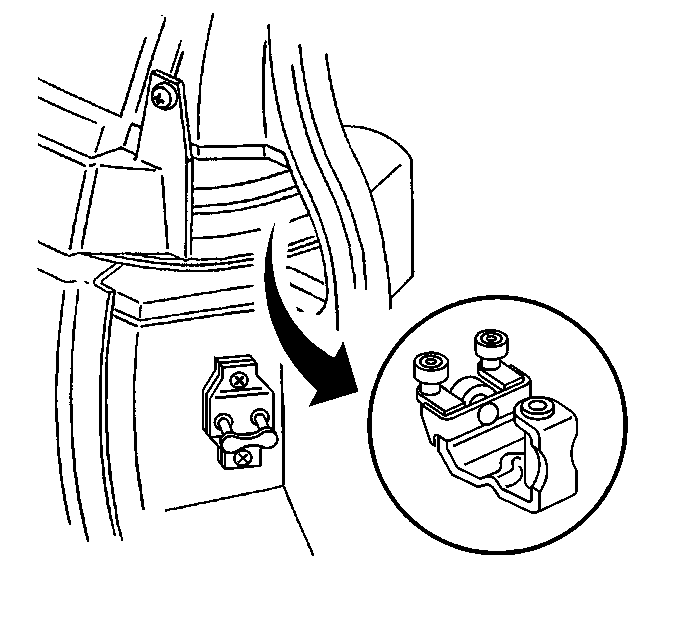
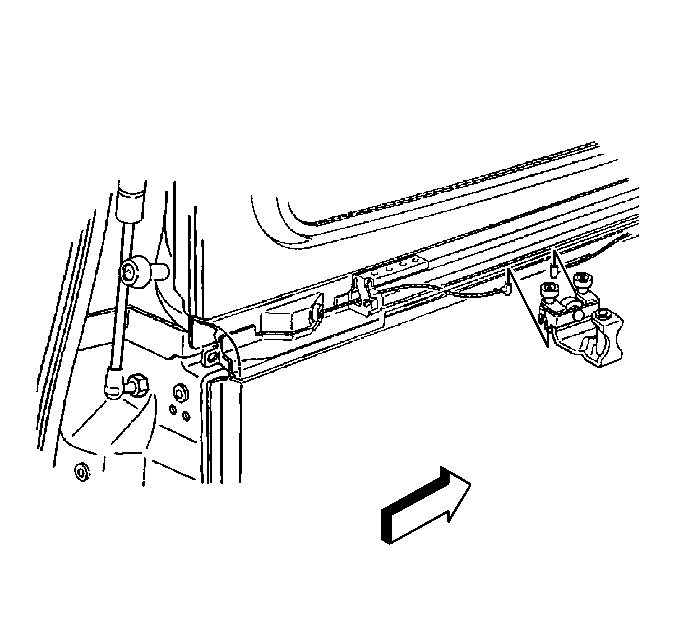
- Remove the cable from the rear roller bracket.
- Lift the center roller bracket upwards and remove the bracket from the center track.
- Detach the cable ends (power sliding door only).
Installation Procedure
- Attach the cable ends.
- Position the sliding door center roller bracket to the front radius of the sliding door center track.
- Lower the sliding door center roller bracket to sliding door center track down and into the sliding door center track.
- Install the cable to the rear roller bracket.
- Adjust cable tension. Refer to Rear Side Door Actuator Cable Tension Adjustment .
- Position the sliding door center roller bracket to the rear of the track or until the pin holes are aligned.
- Install the pin to the sliding door center roller bracket.
- Remove the support from the power sliding door.
- Manually open and close the rear sliding door in order to verify the door's fit and the door's latch/unlatch operation.
- Test the cable tension again after manually moving the door.
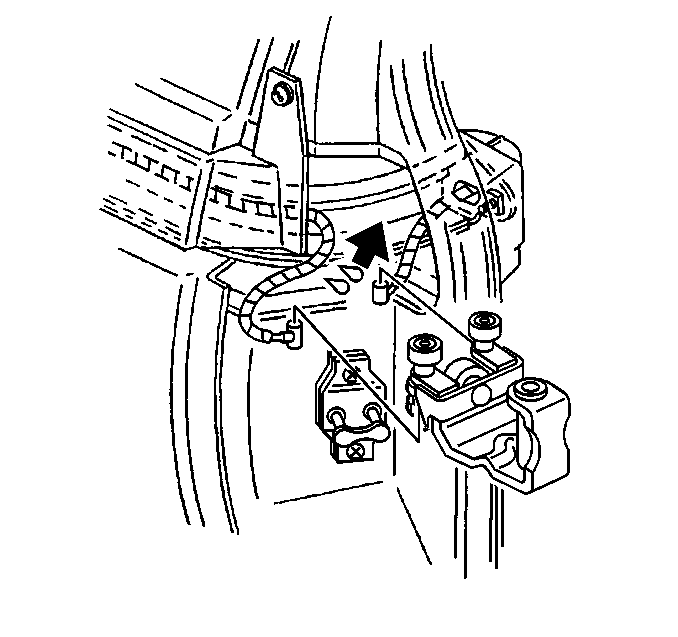
Important: Ensure that the power sliding door cable barrels are properly installed into the sliding door center roller bracket cable retaining items located on the roller bracket.
