- Turn the luggage carrier side rails upside down on a clean, flat surface.
- Install the luggage carrier cross rails to the luggage carrier.
- Install the luggage carrier cross rail screws to the luggage carrier.
- Apply masking tape to all attaching areas of the roof.
- Measure 140 mm (5.512 in) in from the right rear edge of the roof as specified:
- Measure 35 mm (1.378 in) in from the right side rear edge of the roof as specified:
- Use the measurements as a location for the right rear luggage carrier attaching hole.
- Align the assembled luggage carrier to the right rear luggage carrier.
- With help from an assistant, install the luggage carrier to the roof, retaining the location of the right rear edge measurement.
- Tape the luggage carrier to the roof in order to retain the location of the luggage carrier to the roof.
- Use the luggage carrier as a template for locating the drill locations for the attachment of the side rails to the roof.
- Clearly mark the location of the attaching holes.
- With help from an assistant, remove the luggage carrier from the roof.
- Use a 4 mm (9.016 in) drill bit in order to drill pilot holes at the marked locations.
- Check the clearance between the pilot holes and the clearance holes in the roof structure immediately under the luggage carrier pilot holes.
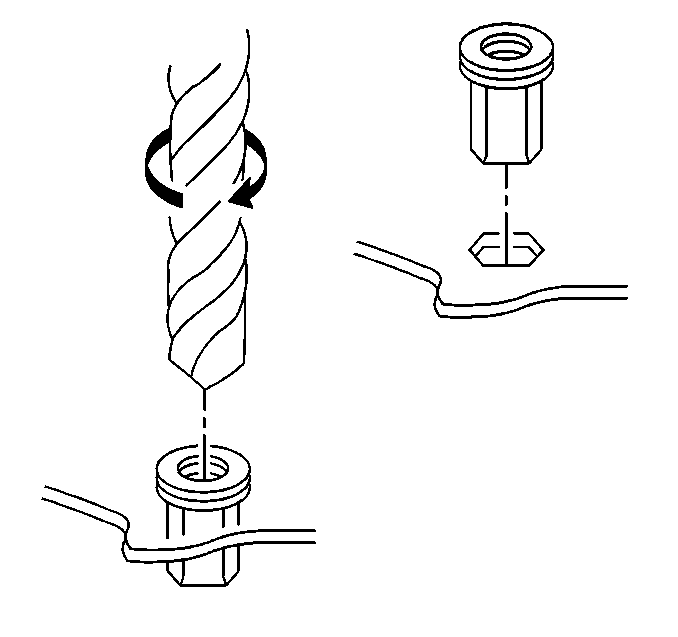
- Use a 10 mm (0.39 in) drill bit in order to drill out the pilot holes at the marked locations of the attaching holes.
- Remove the tape from the roof.
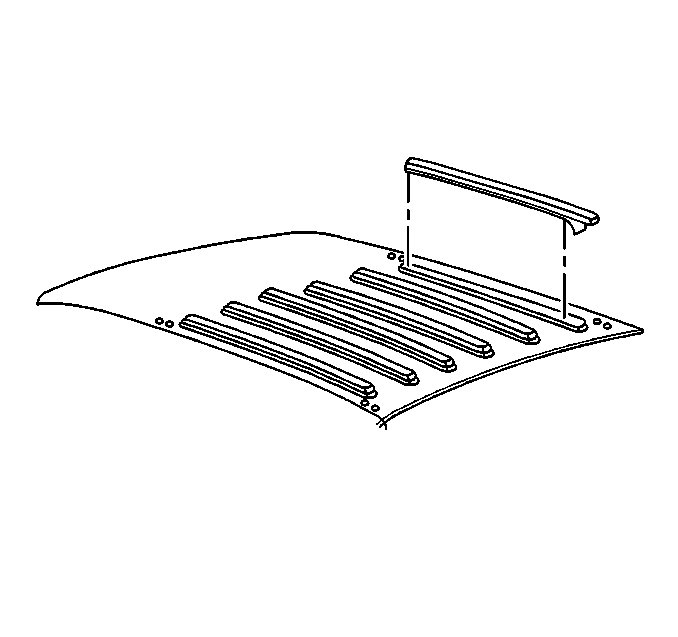
- Align the luggage carrier slats to the raised portions of the roof.
- Use the top as alignment marks for the luggage carrier slats.
- Install the luggage carrier slats to the roof. Refer to Luggage Carrier Slats Replacement .
- Apply touch up paint around the attaching hole as needed.
- Use a rivnut tool, or equivalent, in order to install the rivnut to the attaching hole.
- With help from an assistant, install the luggage carrier to the roof.
- Install the front and the rear luggage carrier mounting screws.
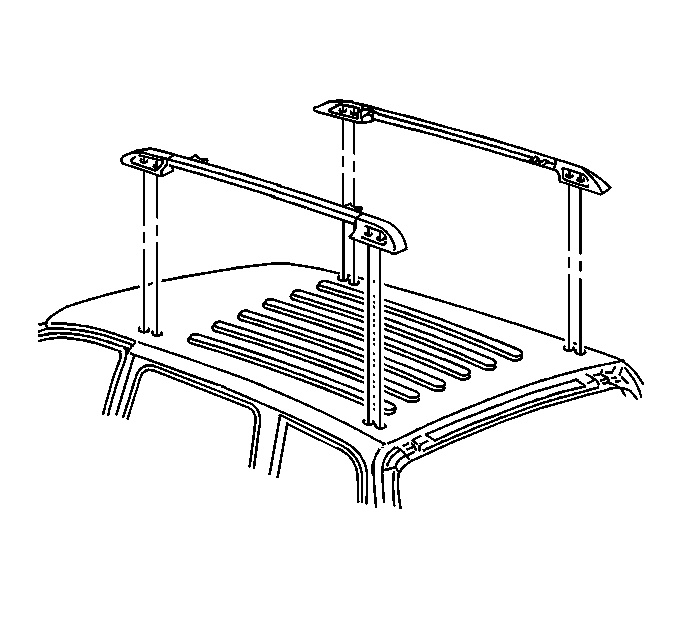
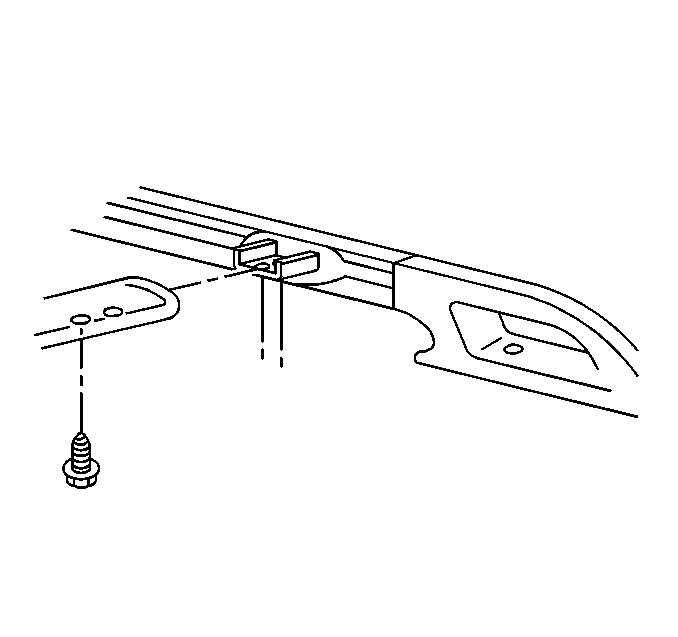
Notice: Use the correct fastener in the correct location. Replacement fasteners must be the correct part number for that application. Fasteners requiring replacement or fasteners requiring the use of thread locking compound or sealant are identified in the service procedure. Do not use paints, lubricants, or corrosion inhibitors on fasteners or fastener joint surfaces unless specified. These coatings affect fastener torque and joint clamping force and may damage the fastener. Use the correct tightening sequence and specifications when installing fasteners in order to avoid damage to parts and systems.
Tighten
Tighten the screws to 2 N·m (18 lb in).
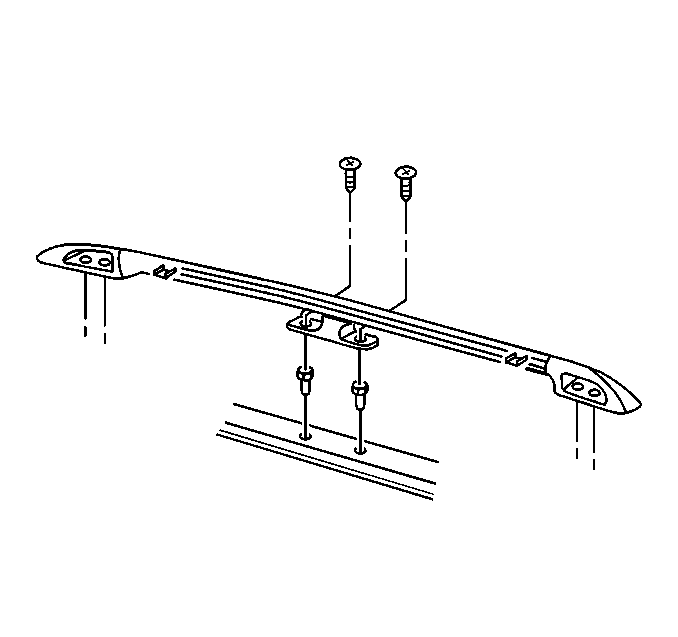
Ensure that the luggage carrier is equally spaced to all sides of the roof.
Important: Ensure that the rack is properly located since there are clearance holes in the roof structure immediately under the luggage carrier attaching holes.
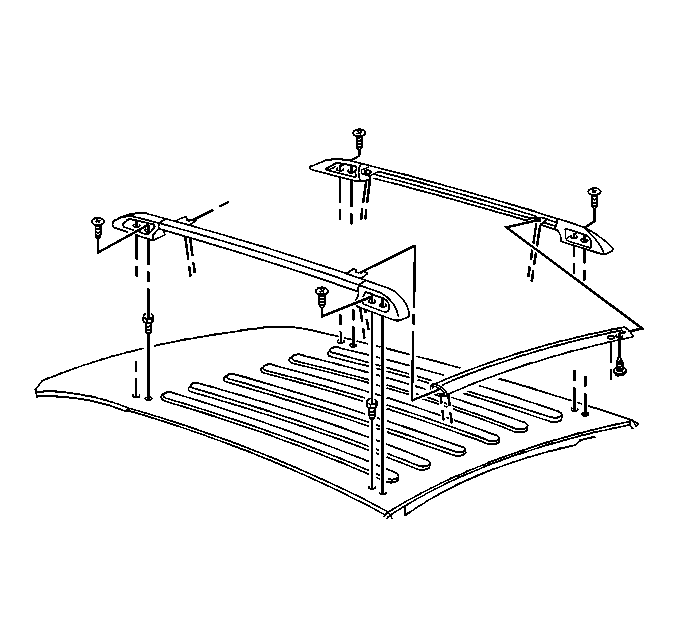
Important: Remove and install the luggage carrier as an assembled luggage carrier.
Important: Ensure that the drill depth is carefully controlled. Failure to do so may result in drilling through the headliner panel. You may have to remove the headliner panel before drilling the holes.
Important: Remove and install the luggage carrier as an assembled luggage carrier.
Tighten
Tighten the screws to 6 N·m (53 lb in).
