Air Conditioning (AC) Refrigerant Filter Replacement for Chevrolet Venture - 4WD 2003
Tools Required
J 39400-A Halogen Leak Detector

Removal Procedure
- Recover the refrigerant from the A/C system. Refer to Refrigerant Recovery and Recharging .
- Raise and support the vehicle. Refer to Lifting and Jacking the Vehicle in General Information.
- Remove the air baffle bolts.
- Remove the air baffle.
- Loosen the A/C refrigerant filter flare nuts.
- Remove the A/C refrigerant filter from the evaporator inlet tube.
- Discard the O-rings.
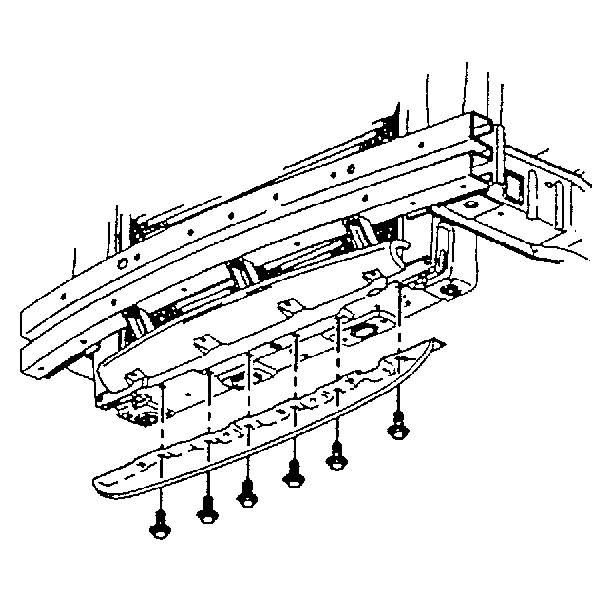
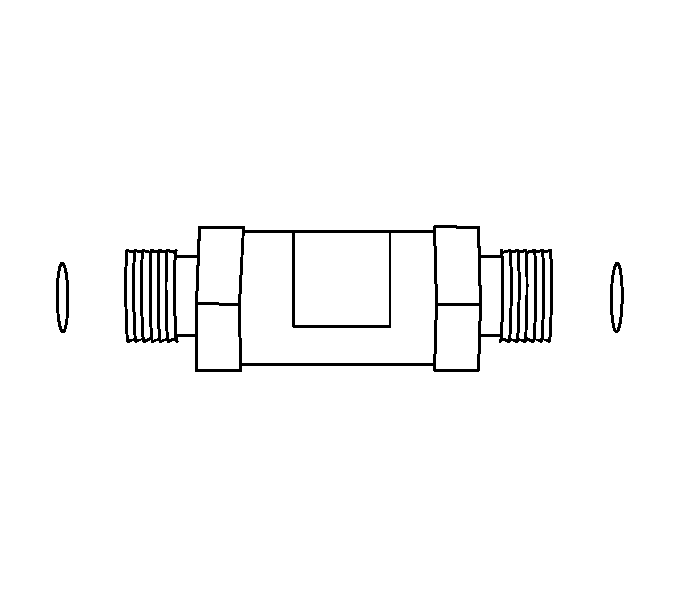
Important: Immediately cap or tape the open evaporator inlet tube and the condenser in order to prevent contamination.
Installation Procedure
- Remove the cap or the tape from the evaporator inlet tube and condenser.
- Lubricate and install new O-rings to each end of the evaporator inlet tube. Refer to O-Ring Replacement .
- Install the A/C refrigerant filter to the evaporator inlet tube with the arrow pointing toward the evaporator.
- Install the air baffle.
- Install the air baffle bolts.
- Lower the vehicle.
- Evacuate and recharge the A/C system. Refer to Refrigerant Recovery and Recharging .
- Leak test the fittings of the component using J 39400-A .
Notice: Use the correct fastener in the correct location. Replacement fasteners must be the correct part number for that application. Fasteners requiring replacement or fasteners requiring the use of thread locking compound or sealant are identified in the service procedure. Do not use paints, lubricants, or corrosion inhibitors on fasteners or fastener joint surfaces unless specified. These coatings affect fastener torque and joint clamping force and may damage the fastener. Use the correct tightening sequence and specifications when installing fasteners in order to avoid damage to parts and systems.
Important: Fully seat the A/C filter to the ferrules in order to ensure that the O-rings seat inside the filter housing.
Tighten
Tighten the nuts to 15 N·m (11 lb ft).
Tighten
Tighten the bolts to 20 N·m (15 lb ft).
