Sliding Rear Side Door Adjustment for Chevrolet Venture - 4WD 2003
In and Out Adjustments
- Remove the sliding door garnish molding. Refer to Rear Side Door Garnish Molding Replacement in Interior Trim.
- Remove the close-out panel on the center rear of the sliding door inner trim panel in order to access the sliding door center roller bracket bolts.
- Loosen one sliding door lower roller bracket bolt.
- Loosen one sliding door lower bracket bolt.
- Adjust the front edge of the sliding door up or down as needed.
- Tighten the loosened sliding door lower bracket bolt.
- Tighten the loosened sliding door upper roller bracket bolt.
- Loosen one sliding door center roller bracket bolt.
- Adjust the rear edge of the sliding door in or out as needed.
- Tighten the loosened sliding door center roller bracket bolt.
- Install the close-out panel on the center rear of sliding door inner trim panel in order to cover the sliding door center roller bracket bolts.
- Install the plastic plugs on the lower front sliding door inner trim panel in order to cover the sliding door lower roller bracket bolts.
Important: When adjusting either the manual or the power sliding door, loosen only one bolt at a time on the sliding door lower roller bracket and the sliding door center roller bracket. Failure to loosen one bolt at a time may result in a complete loss of sliding door alignment.
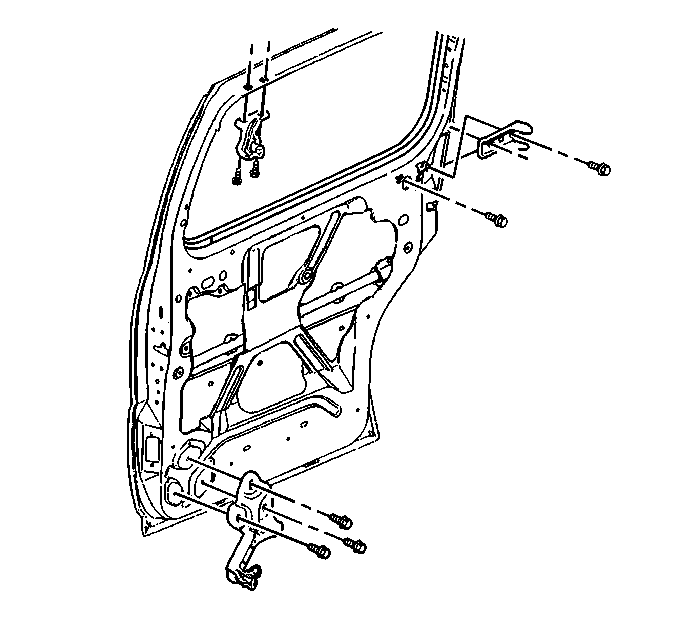
Notice: Use the correct fastener in the correct location. Replacement fasteners must be the correct part number for that application. Fasteners requiring replacement or fasteners requiring the use of thread locking compound or sealant are identified in the service procedure. Do not use paints, lubricants, or corrosion inhibitors on fasteners or fastener joint surfaces unless specified. These coatings affect fastener torque and joint clamping force and may damage the fastener. Use the correct tightening sequence and specifications when installing fasteners in order to avoid damage to parts and systems.
Tighten
Tighten the bolt to 25 N·m (18 lb ft).
Tighten
Tighten the bolt to 25 N·m (18 lb ft).
Tighten
Tighten the bolt to 25 N·m (18 lb ft).
Up and Down Adjustment Procedure
- Remove the lower front plastic plugs on the sliding door inner trim panel in order to access the sliding door lower roller bracket to door bolts.
- Remove the close-out panel on the center rear of the sliding door inner trim panel in order to access the sliding door center roller bracket bolts.
- Loosen one sliding door lower roller bracket bolt.
- Adjust the front edge of the sliding door up or down as needed.
- Tighten the loosened sliding door lower roller bracket to door bolt.
- Loosen the sliding door center roller bracket bolt.
- Adjust the rear edge of the sliding door up or down as needed.
- Tighten the loosened sliding door center roller bracket bolt.
- Install the close-out panel on the center rear of sliding door inner trim panel in order to cover the sliding door center roller bracket bolts.
- Install the plastic plugs on the lower front sliding door inner trim panel in order to cover the sliding door lower roller bracket bolts.
Important: When adjusting either the manual or the power sliding door, loosen only one bolt at a time on the sliding door lower roller bracket and the sliding door center roller bracket. Failure to loosen one bolt at a time may result in a complete loss of sliding door alignment.
Notice: Use the correct fastener in the correct location. Replacement fasteners must be the correct part number for that application. Fasteners requiring replacement or fasteners requiring the use of thread locking compound or sealant are identified in the service procedure. Do not use paints, lubricants, or corrosion inhibitors on fasteners or fastener joint surfaces unless specified. These coatings affect fastener torque and joint clamping force and may damage the fastener. Use the correct tightening sequence and specifications when installing fasteners in order to avoid damage to parts and systems.
Tighten
Tighten the bolt to 25 N·m (18 lb ft).
Tighten
Tighten the bolt to 25 N·m (18 lb ft).
