For 1990-2009 cars only
Removal Procedure
- Disconnect the negative battery cable.
- Recover the refrigerant. Refer to Refrigerant Recovery and Recharging .
- Remove the air cleaner housing assembly.
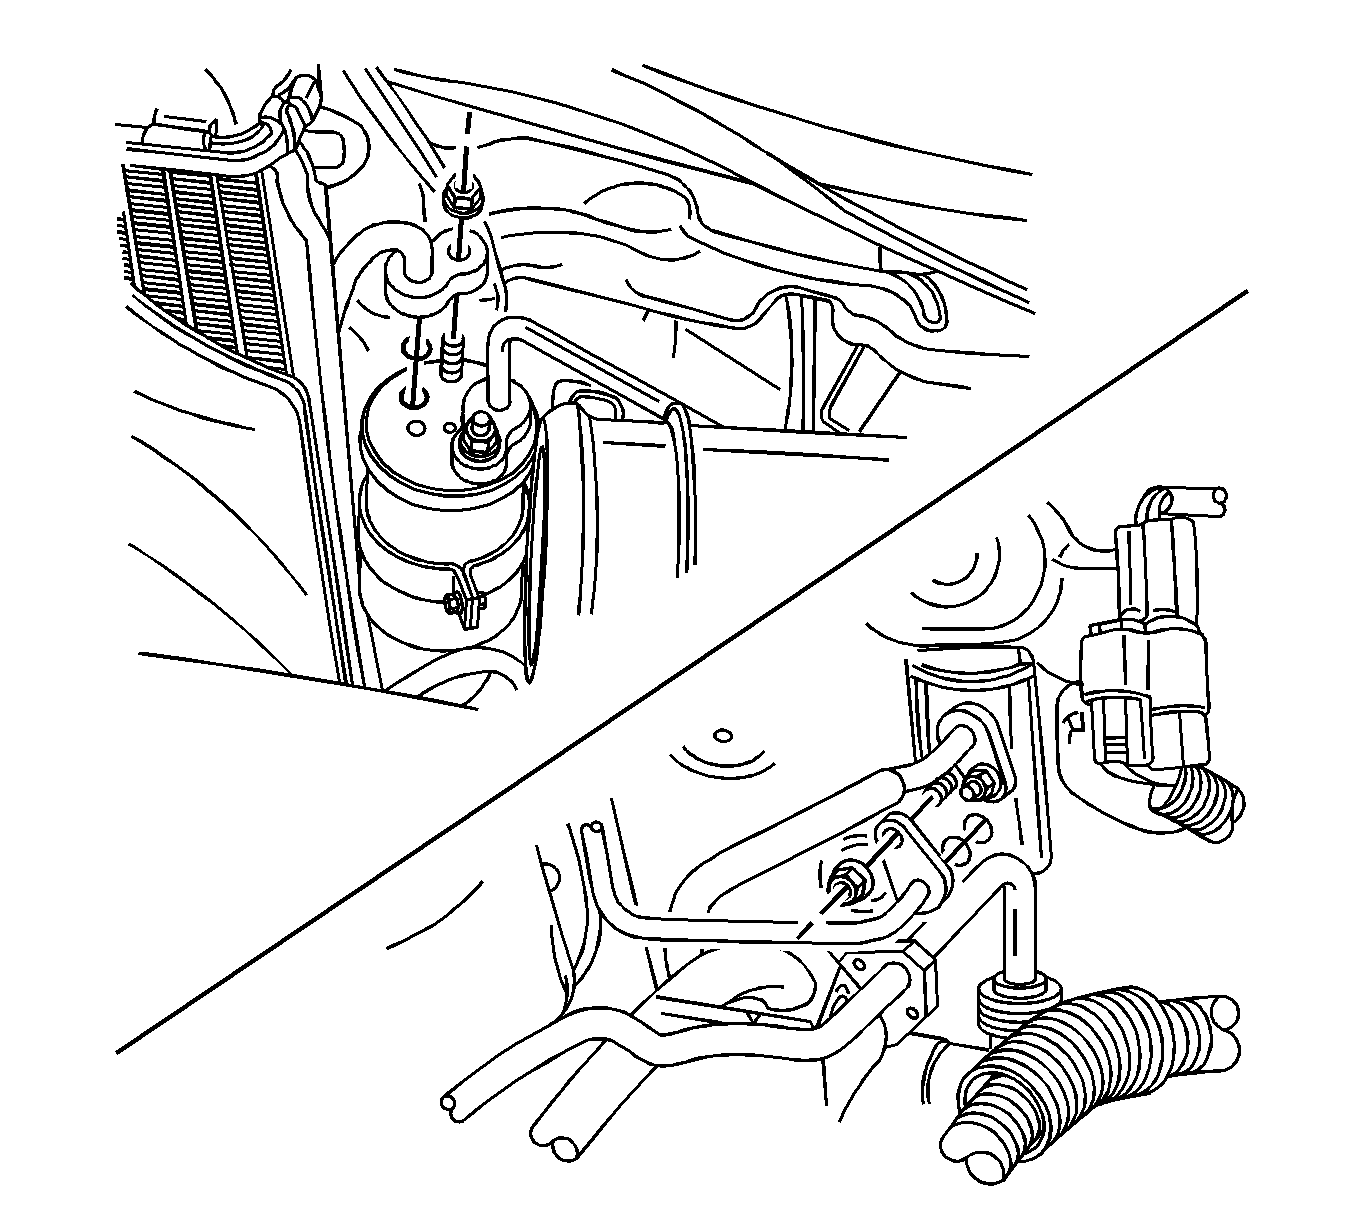
- Remove the nut on the flange of the receiver-drier.
- Remove the O-ring and discard it.
- Remove the air conditioning (A/C) pressure sensor. Refer to Air Conditioning (A/C) Refrigerant Pressure Sensor Replacement .
- Remove the 2 nuts on the flange of the evaporator.
- Remove the O-ring and discard it.
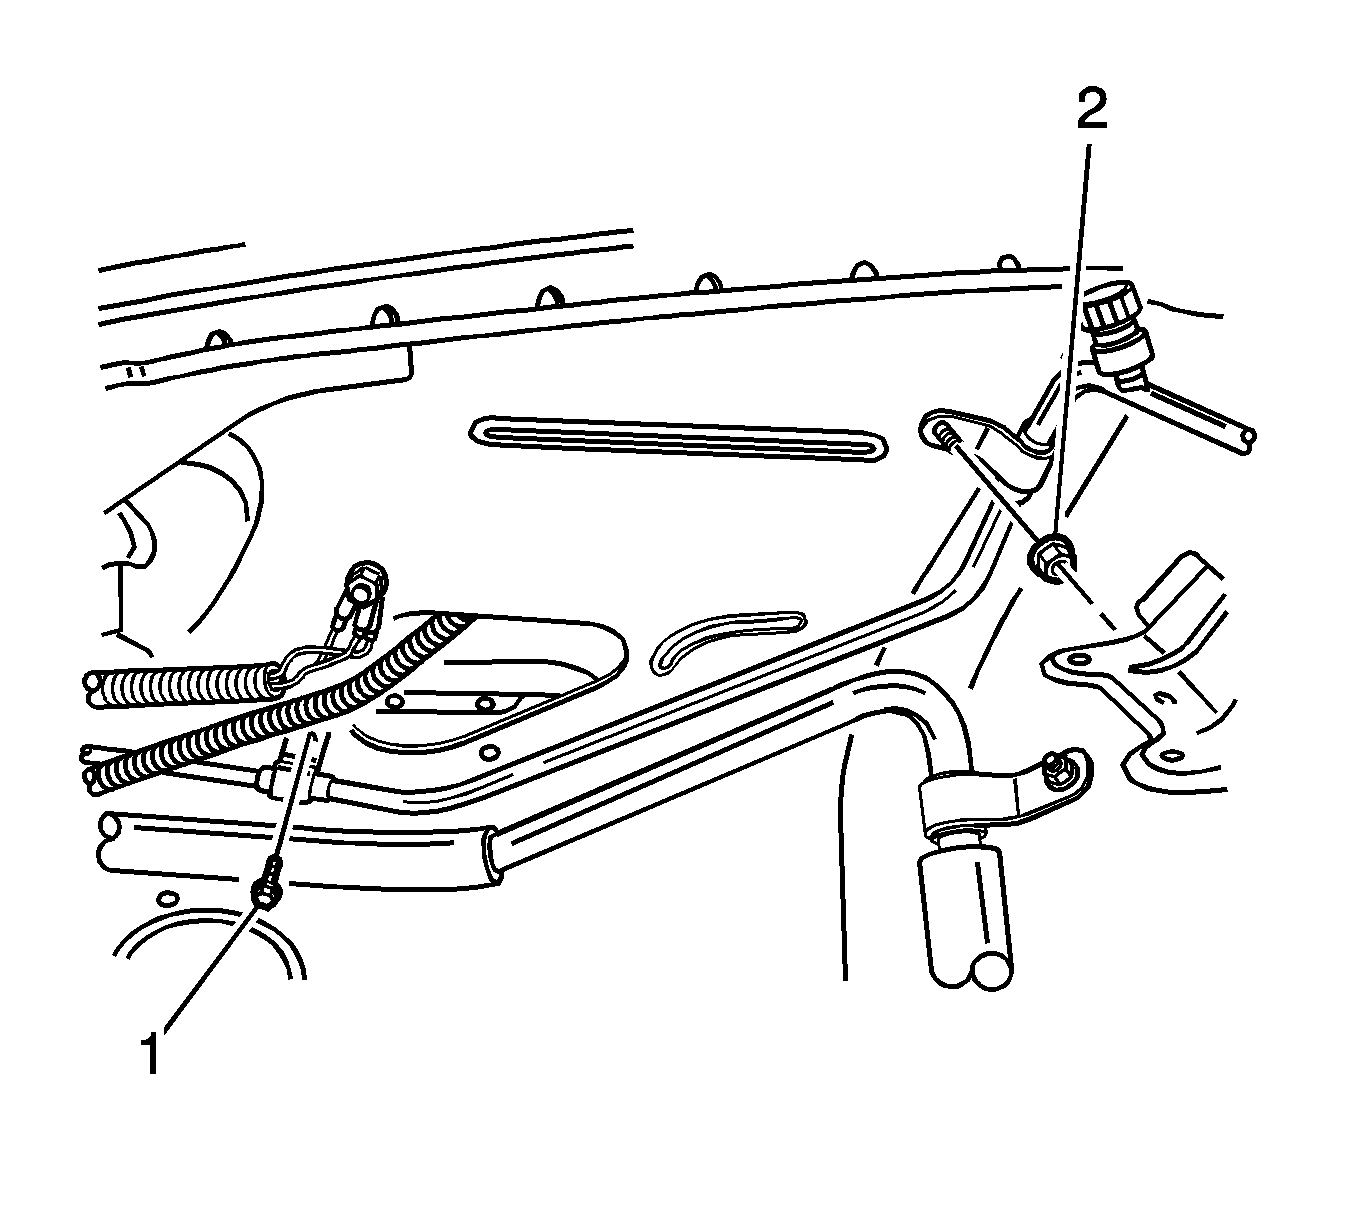
- Remove the bolt (1) and the nut (2) that secure the high pressure pipe.
- Remove the high pressure pipe, receiver-drier-to-evaporator.
Caution: Refer to Battery Disconnect Caution in the Preface section.


Installation Procedure
- Position the high pressure pipe, receiver-drier-to-evaporator, into the vehicle.
- Install the bolt (1) and the nut (2) that secure the high pressure pipe.
- Install a new O-ring seal to the pipe at the evaporator flange.
- Install the 2 nuts on the evaporator flange.
- Install the A/C pressure sensor. Refer to Air Conditioning (A/C) Refrigerant Pressure Sensor Replacement .
- Install a new O-ring seal to the pipe at the receiver-drier.
- Install the nut on the receiver-drier flange.
- Install the air cleaner housing assembly.
- Evacuate and recharge the A/C system. Refer to Refrigerant Recovery and Recharging .
- Connect the negative battery cable.


Notice: Refer to Fastener Notice in the Preface section.
Tighten
Tighten the nuts to 14 N·m (10 lb ft).
Tighten
Tighten the nut to 14 N·m (10 lb ft).
