For 1990-2009 cars only
Removal Procedure
- Remove the front retainer from the number 1 bow. Refer to Folding Top Cover Number 1 Bow Retainer Replacement.
- Disconnect the folding top cover rear retainer from the vehicle. Refer to Folding Top Cover Rear Retainer Replacement.
- Remove the left and right side front weatherstrips and retainers. Refer to Folding Top Side Front Weatherstrip Replacement and Folding Top Side Front Weatherstrip Retainer Replacement.
- Remove the left and right side rear weatherstrips and retainers. Refer to Folding Top Side Rear Weatherstrip Replacement and Folding Top Side Rear Weatherstrip Retainer Replacement.
- Position the folding top to the closed position with the rear compartment lid open.
- Remove the right and left folding top cover rear fabric retainers and seals from around the rear latch striker pins.
- Remove the right and left folding top rear locating pins. Refer to Folding Top Rear Locating Pin Replacement.
- Drill out the rivet retaining the folding top cover fabric to the right and left folding top rear side rails.
- Remove the elastic straps from the upstop on the right and left folding top side rail assemblies.
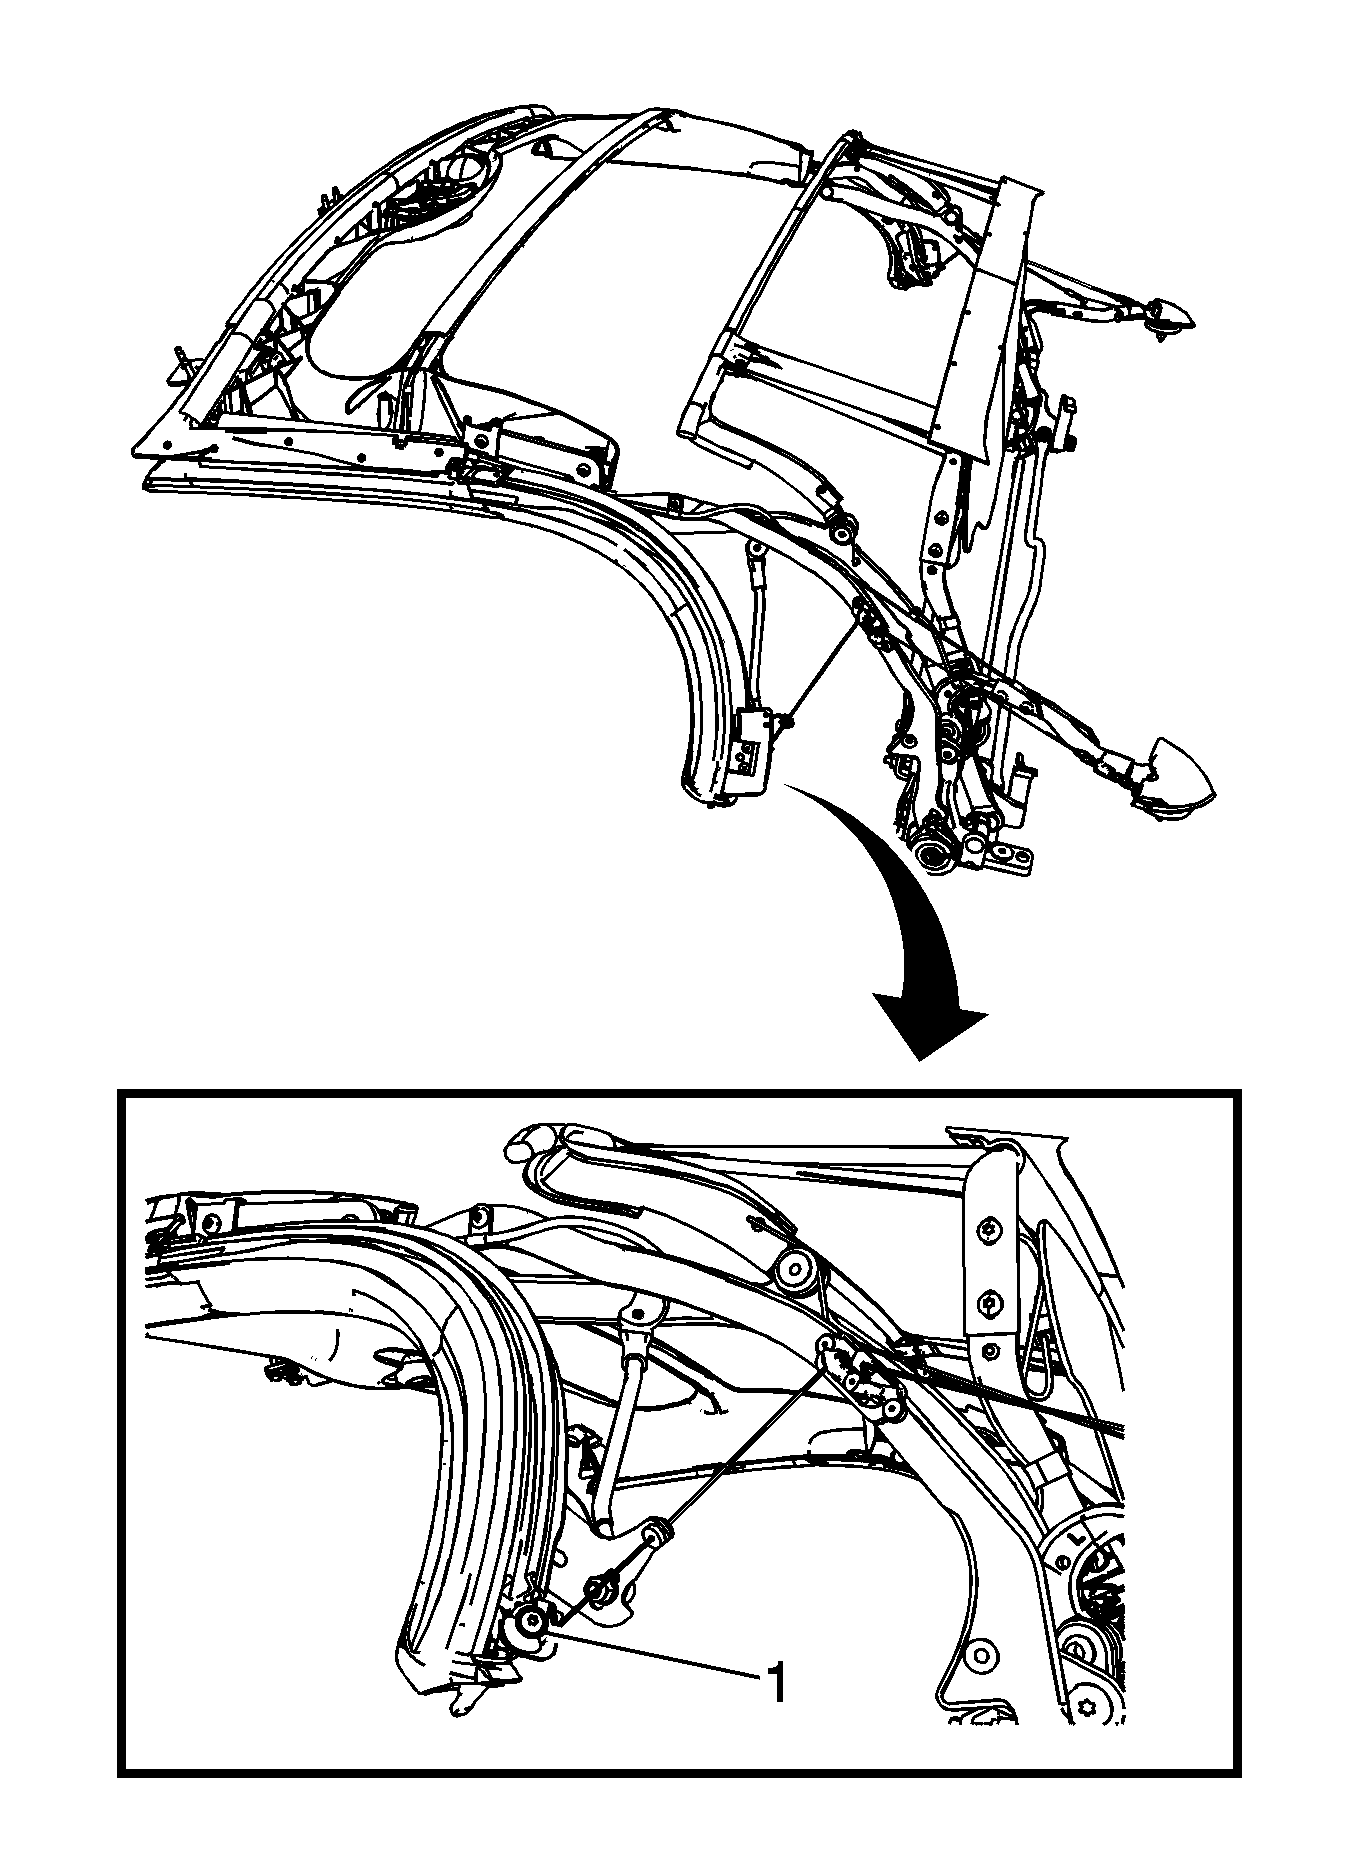
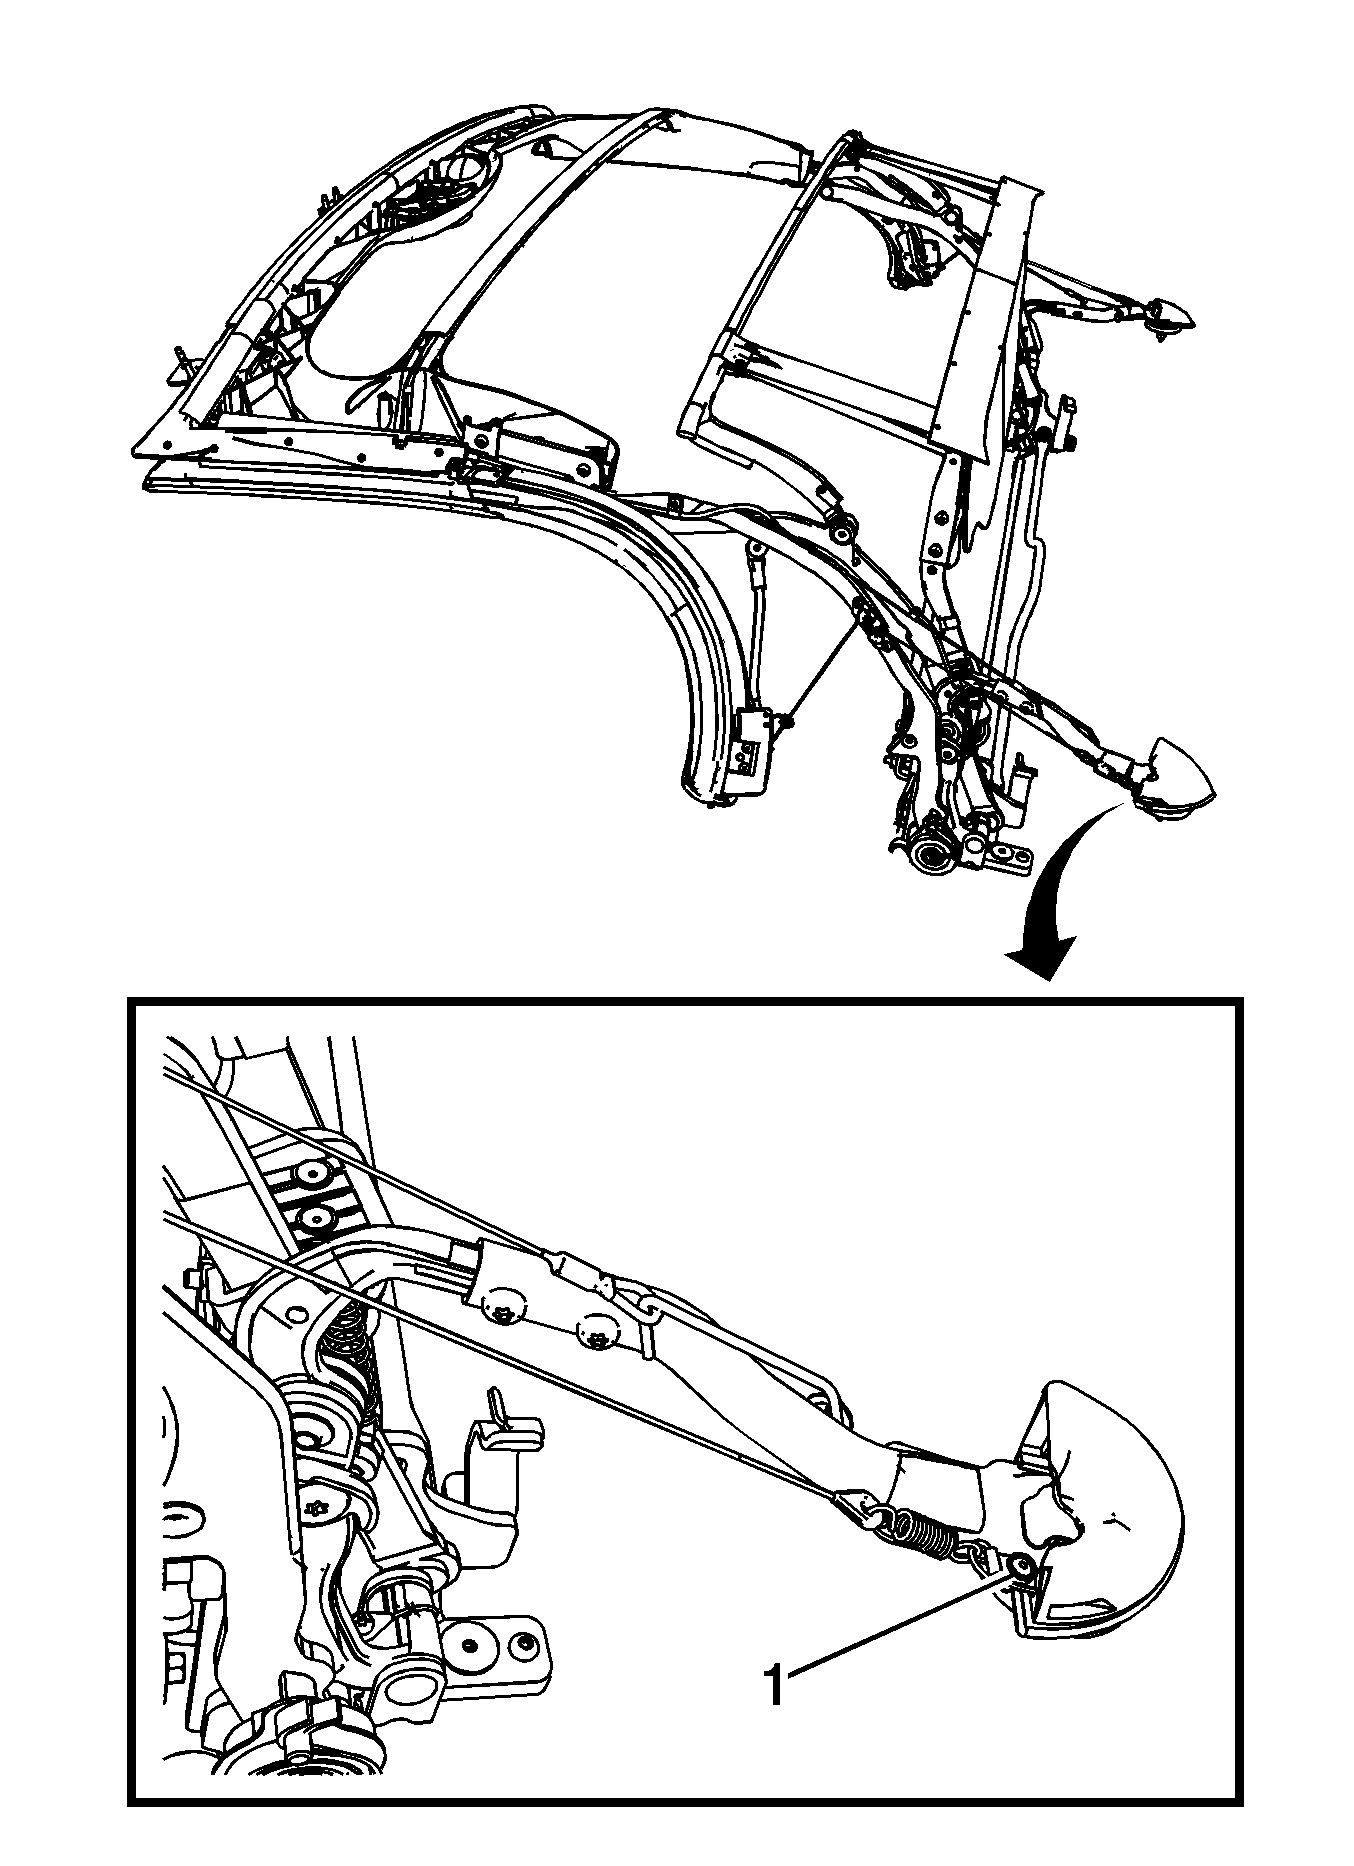
- Remove the cable roller (1) from the right and left side rail by removing the screw.
- Slide the outer layer of the folding top cover fabric top off the right and left folding top rear latch striker retainers.
- Drill out the rivet holding the inner layer of the folding top cover fabric to the right and left folding top rear latch striker retainers.
- Slide the inner layer of the folding top cover fabric off the right and left folding top rear latch striker retainers.
- Fold back the folding top cover fabric by detaching the glued section from the front and side rails as necessary.
- Remove the screws that retain the front inner folding top cover pad to each side of the number 1 bow.
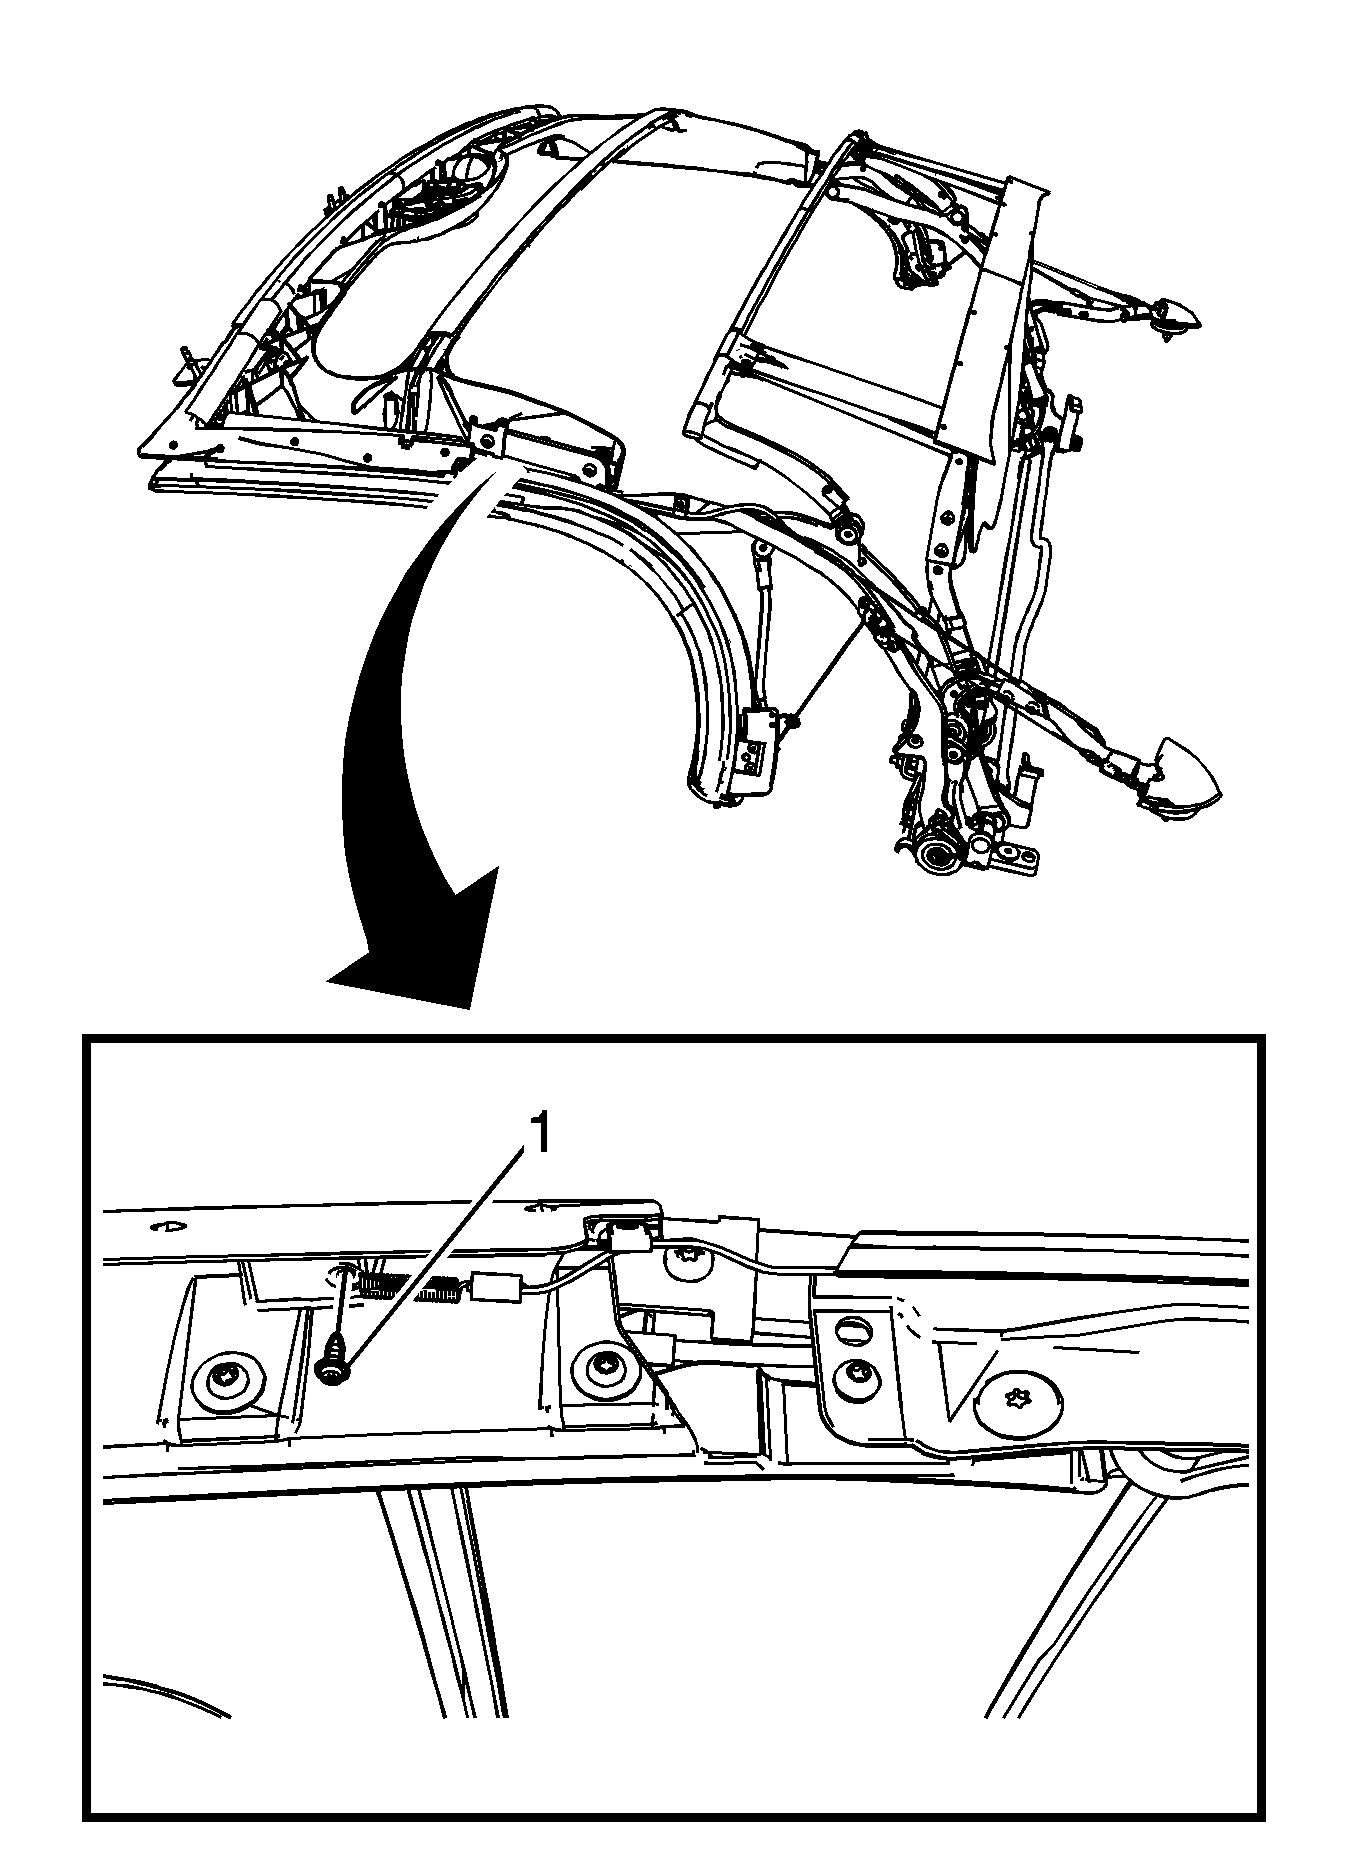
- Remove the screw (1) that secures the right and left front side tension springs to the underside of the number 1 bow.
- Remove the P-clip that secures the side tension cable to each side of the number 1 bow by drilling out the rivets.
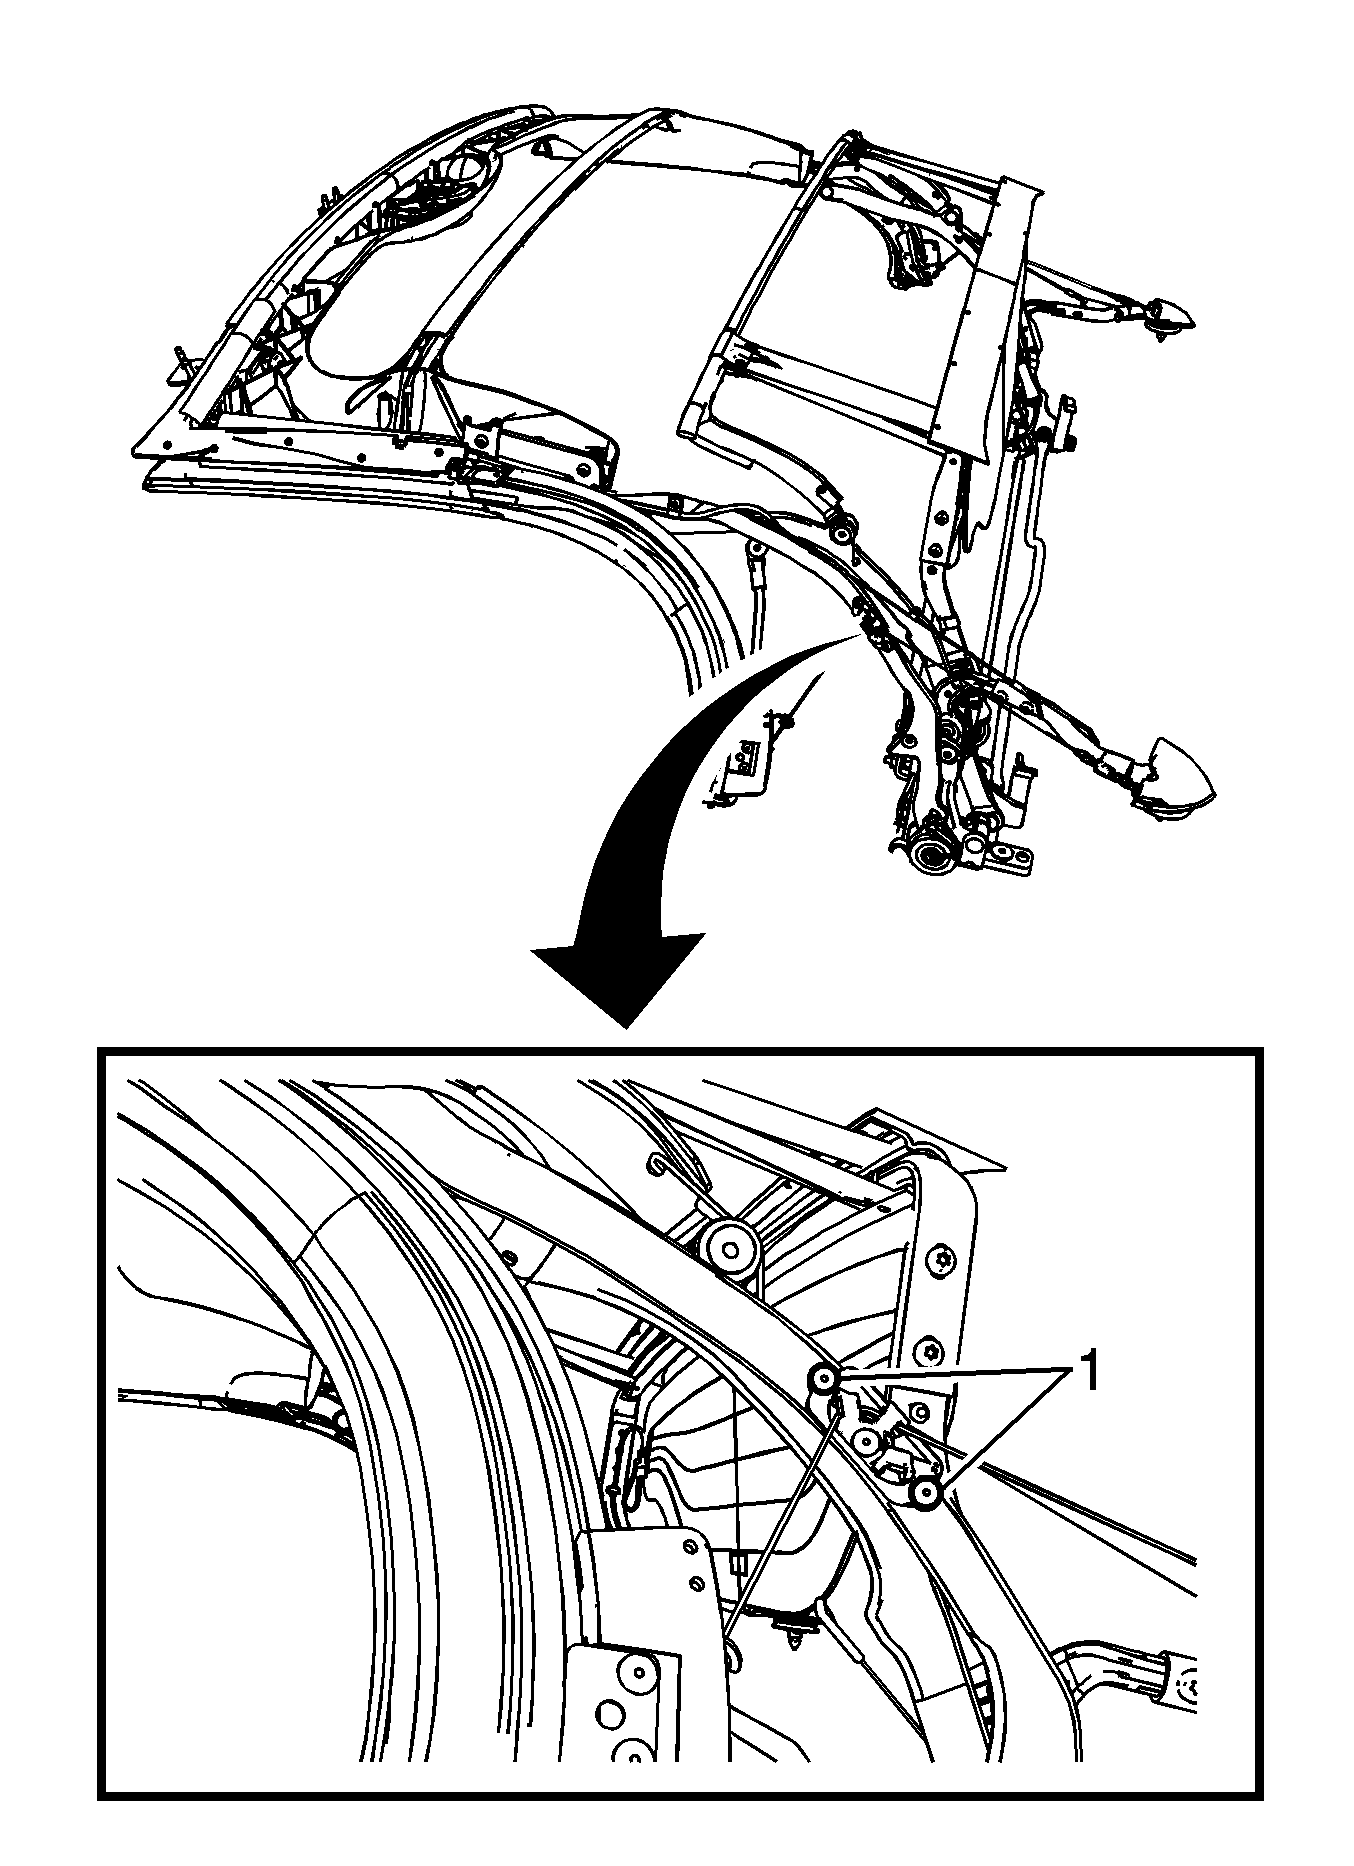
- Remove the guide bracket (1) attached to the right and left side rail assemblies by drilling out the rivets.
- Drill out the rivet that secures the right and left folding top fabric cloth straps to the folding top cover side inner tension cables.
- Remove the D-ring (1) that attaches the rear spring to the end of the right and left side rail assembly arms by drilling out the rivet.
- Position the rear window to expose the rear of the number 4 bow.
- Drill out the rivet used to secure the plastic retainer to the folding top cover at the number 4 bow position.
- Disengage the plastic retainer from the number 4 bow.
- Pull the fabric back from the number 1 bow.
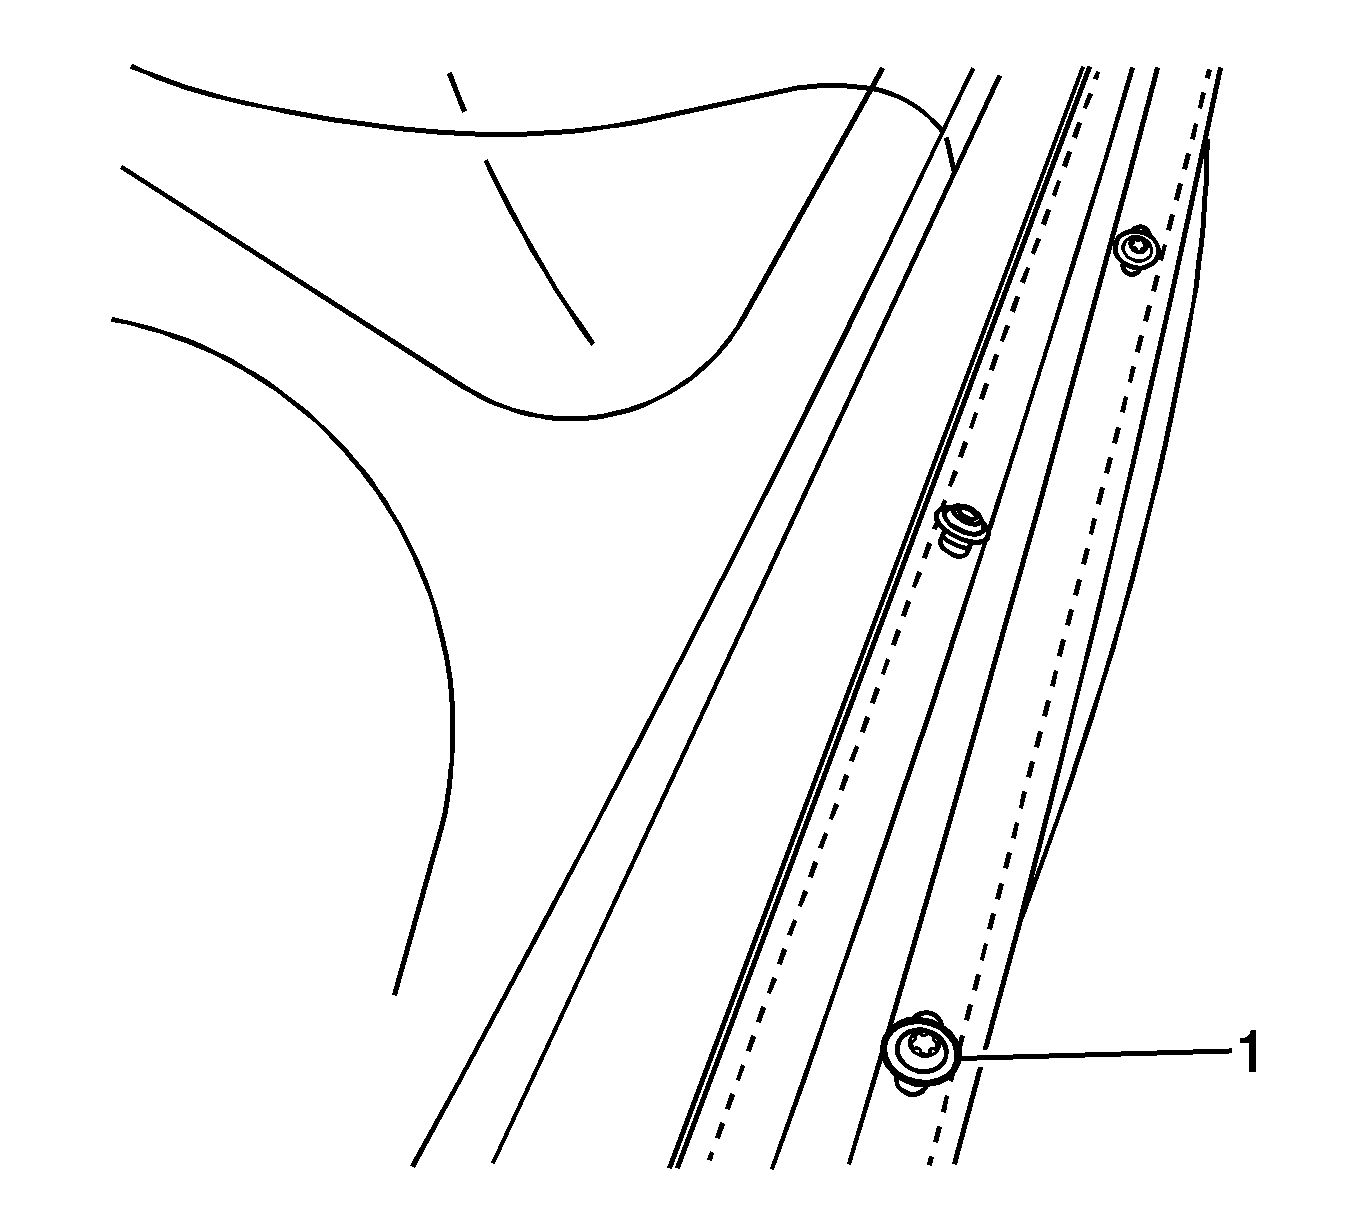
- Pull back the top cover from the number 2 bow, remove the screws (1) that attach the top cover assembly to the casting.
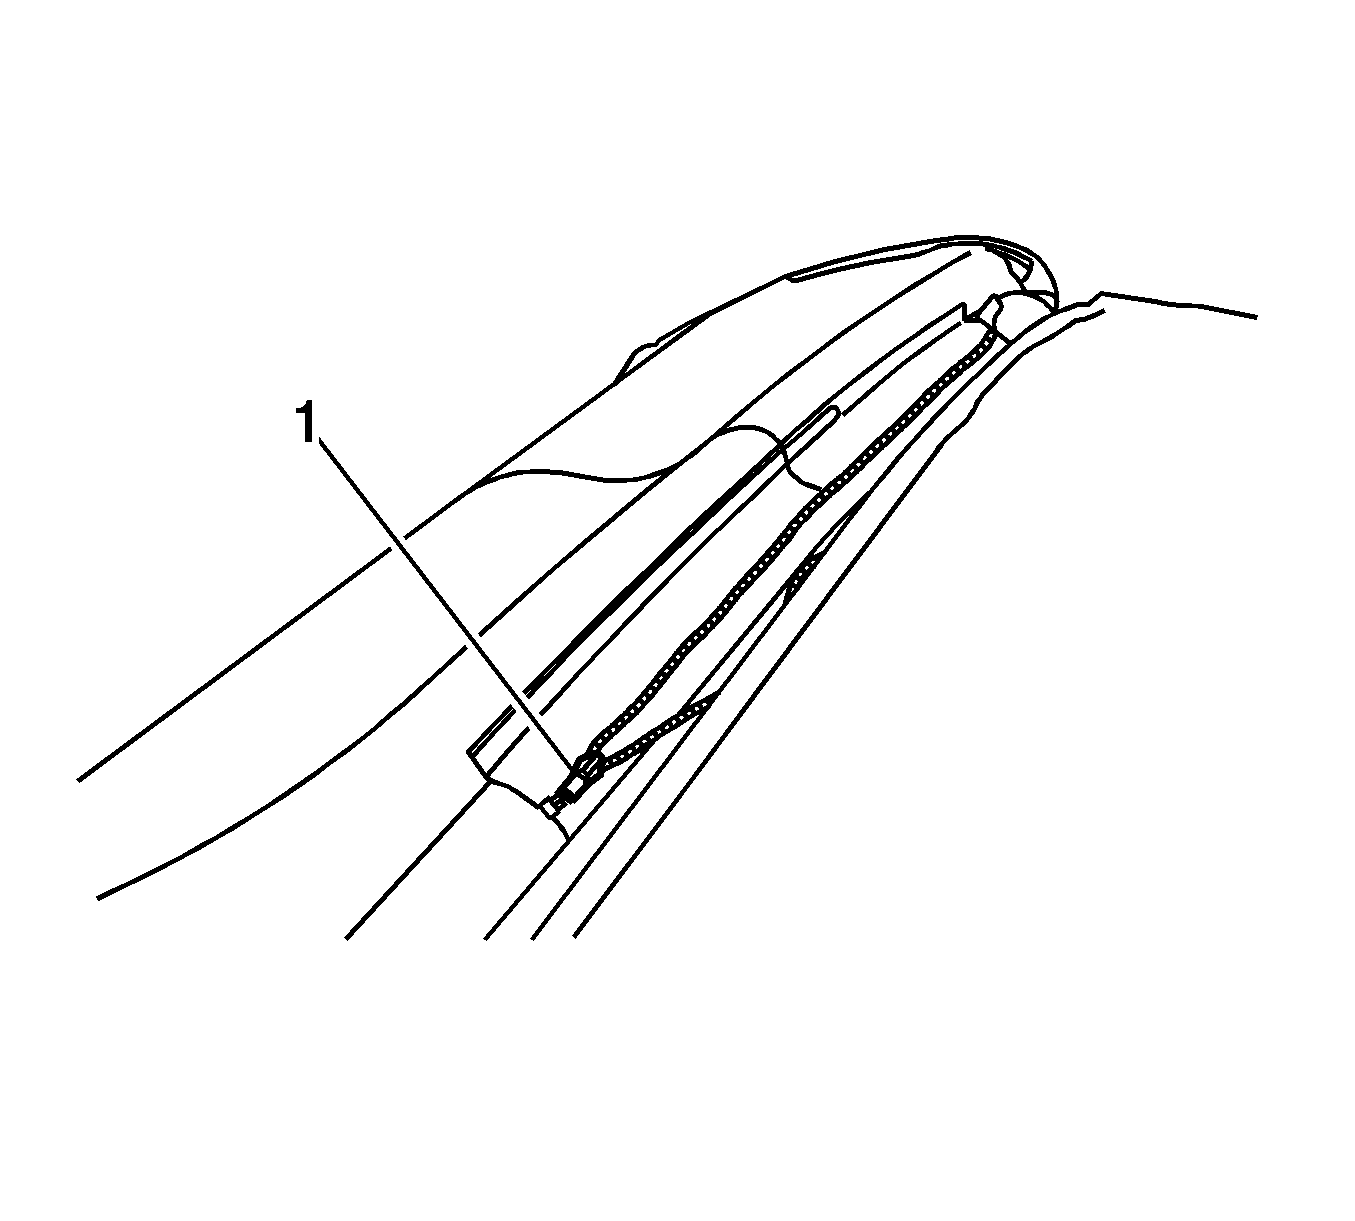
- Pull back the top cover to the number 3 bow, unzip (1) the top cover from the headliner.
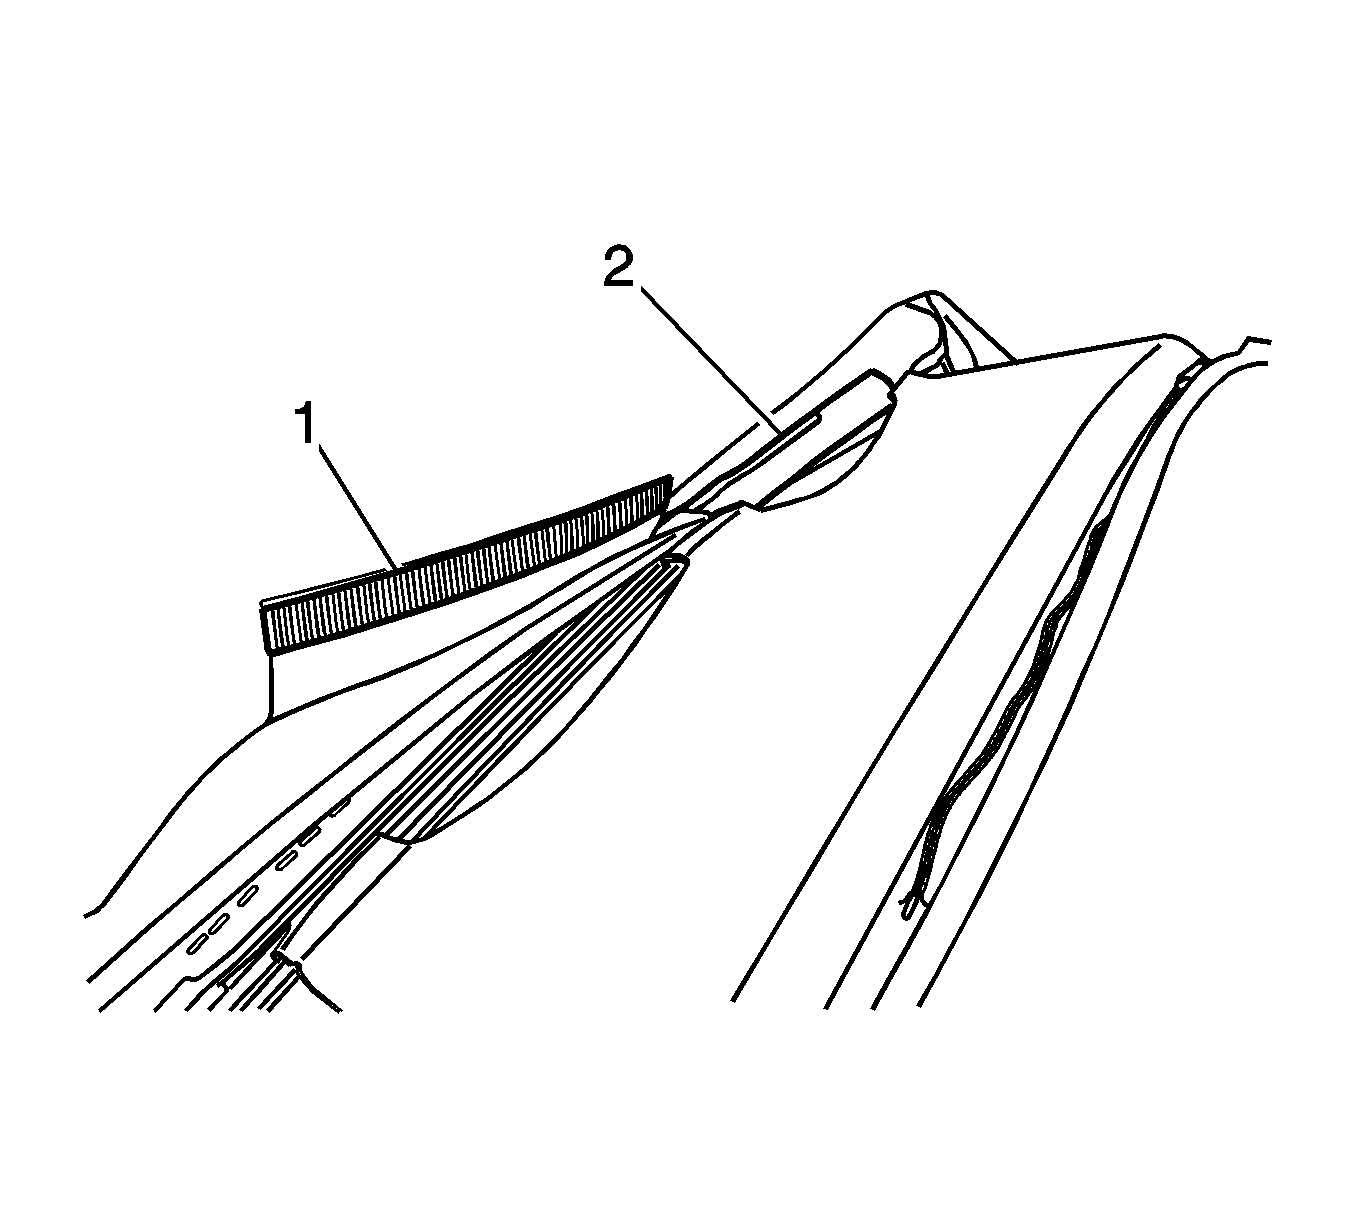
- Pull back the top cover to the number 4 bow, release the hook (1) and loop (2) fasteners.
- If the replacement folding top cover did not come with the folding top cover rear retainer attached, it will be necessary to remove the staples and transfer the rear retainer to the new folding top cover.
Note: Do Not remove the headliner from the vehicle to do this procedure.
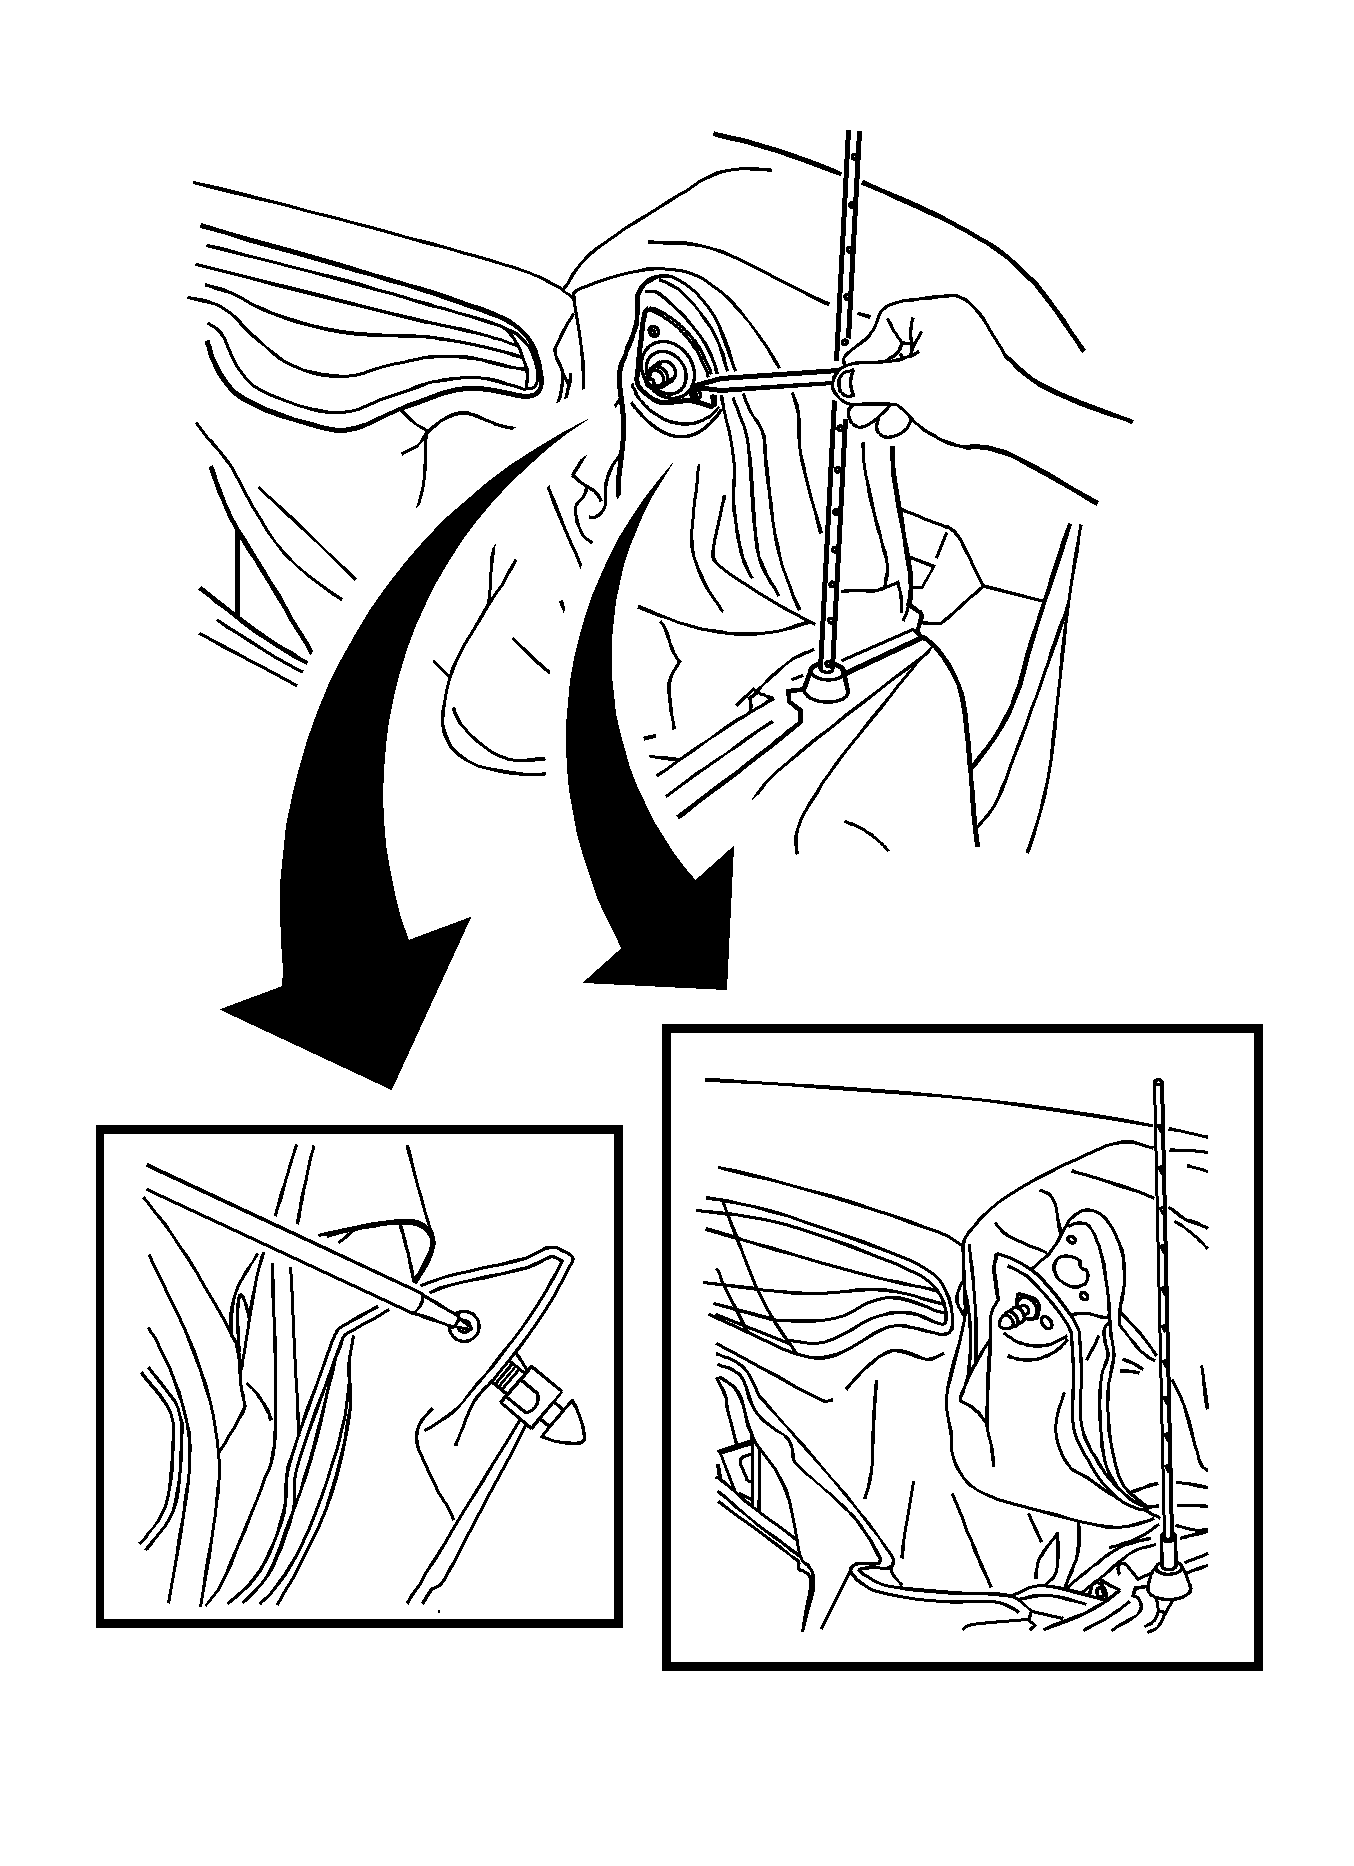
Note: The folding top rear latch striker pin is not required to be removed.
Note: Rivets or staples for the inner layer of the folding top cover fabric will not have to be installed.
Note: The folding top fabric is secured to the front and side rails by glue.
Installation Procedure
- Engage the folding top cover retainer to the number 4 bow.
- Install the rivets to the folding top cover retainer to the number 4 bow.
- If not included on the folding top cover service part, position the original folding top cover rear retainer to the vehicle.
- Install the hook (1) and loop (2) fasteners to the number 4 bow.
- Zip (1) the top cover to the headliner at the number 3 bow.
- Install the screws (1) that attach the top cover assembly to the casting.
- Reposition the top cover fabric to the front bow and side rails.
- Install the rivet retaining the D-rings (1) that attaches the spring to the end of the right and left side rail assembly arms.
- Install the rivet that secures the right and left folding top fabric cloth straps to the folding top cover side inner tension cables.
- Install the rivets retaining the guide brackets (1) to the right and left side rail assemblies.
- Install the rivet retaining the P-clip that secures the right and left side tension cables to the number 1 bow.
- Install the screw (1) that secures the right and left front side tension springs to the underside of the number 1 bow and tighten to 2 N·m (18 lb in).
- Install the screws that retain the front inner folding top cover pad to each side of the number 1 bow and tighten to 2 N·m (18 lb in).
- Slide the outer layer of the folding top cover fabric onto the right and left folding top cover rear latch striker retainers.
- Install the cable roller (1) to the right and left side rails. Tighten the screws to 3 N·m (26 lb in)
- Install the elastic straps to the upstop on the right and left folding top side rail assemblies.
- Install the rivet retaining the folding top cover fabric to the right and left folding top rear side rails.
- Install the right and left folding top rear locating pins. Refer to Folding Top Rear Locating Pin Replacement.
- Install the right and left folding top cover rear fabric retainers and seals around the rear latch striker pins.
- Position the folding top fabric to the number 1 bow and glue in position using standard 3M trim cement and then install the retainer. Refer to Folding Top Cover Number 1 Bow Retainer Replacement.
- If not included on the folding top cover service part, position the folding top cover fabric to the folding top cover retainer and staple into position, allowing for adjustment of the fabric.
- Inspect the folding top and fabric for proper fit.
- Complete stapling the folding top fabric to the folding top cover rear retainer and install the retainer. Refer to Folding Top Cover Rear Retainer Replacement.
- Install the left and right side rear weatherstrips and retainers. Refer to Folding Top Side Rear Weatherstrip Replacement and Folding Top Side Rear Weatherstrip Retainer Replacement.
- Install the left and right side front weatherstrips and retainers. Refer to Folding Top Side Front Weatherstrip Replacement and Folding Top Side Front Weatherstrip Retainer Replacement.
- Inspect the folding top for proper fit and operation. Refer to Folding Top Adjustment.


Note: Use the short rivet provided in the installation kit for this location. The longer rivets will not allow the rear fabric retainers to be installed.

Caution: Refer to Fastener Caution in the Preface section.


Note: Rivets or staples for the inner layer of the folding top cover fabric will not have to be installed.

Note: Cover the interior trim before spraying the standard 3M trim cement.
