For 1990-2009 cars only
Warning: Refer to Approved Equipment for Collision Repair Warning in the Preface section.
Warning: Refer to Collision Sectioning Warning in the Preface section.
Note: When determining the area to perform the sectioning near a riv-nut within the recommended areas, choose a location that centers the sleeve through the hole. This will ensure that riv-nut fasteners remain straight during installation.
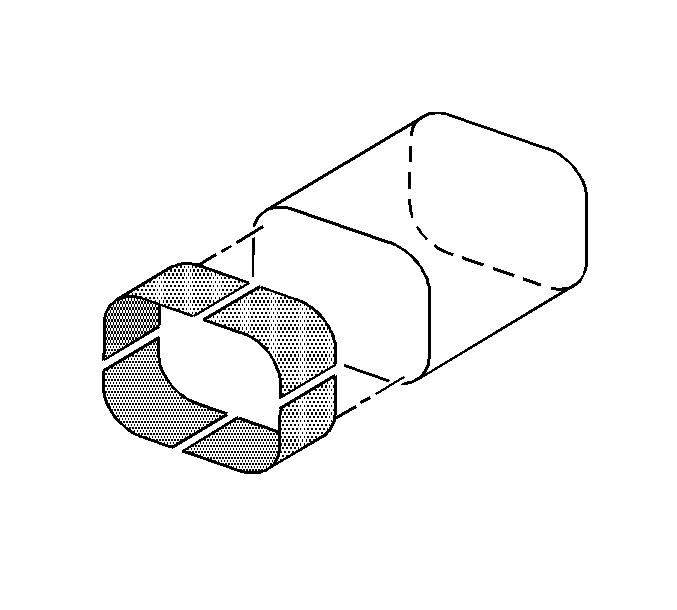
- From the new section of frame rail, measure, mark, and cut 50 mm (2 in) of frame rail to be used as a sleeve (backing plate) for the sectioning joint.
- Cut through each side of the sleeve to create 4 individual L-shaped pieces that can be installed in the existing frame rail.
- Install the 4 pieces, one at a time.
- Trim the pieces as necessary, to provide a flush fit along the inner surface of the existing frame rail.
- Clean and prepare all of the welded surfaces.
- Apply GM-approved weld-thru coating or equivalent as necessary. Refer to Anti-Corrosion Treatment and Repair.
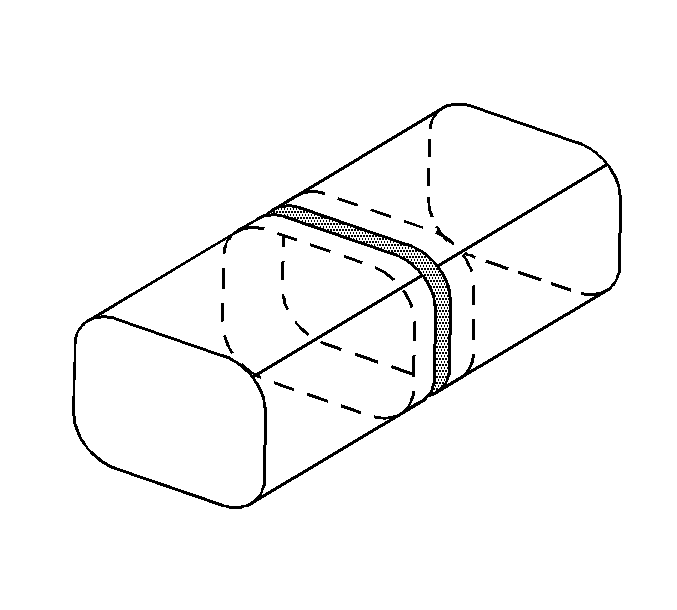
- Using a metal inert gas (MIG) welder, tack weld the 4 pieces to the inner surface of the existing frame rail.
- Grind the sleeve as necessary to allow for accurate alignment of the new frame rail section.
- Install the new frame rail section to the existing frame rail to create the butt joint while maintaining a gap of one and one half frame rail metal thickness at the sleeve butt-joint.
- Inspect the new frame rail section using three-dimensional measurements.
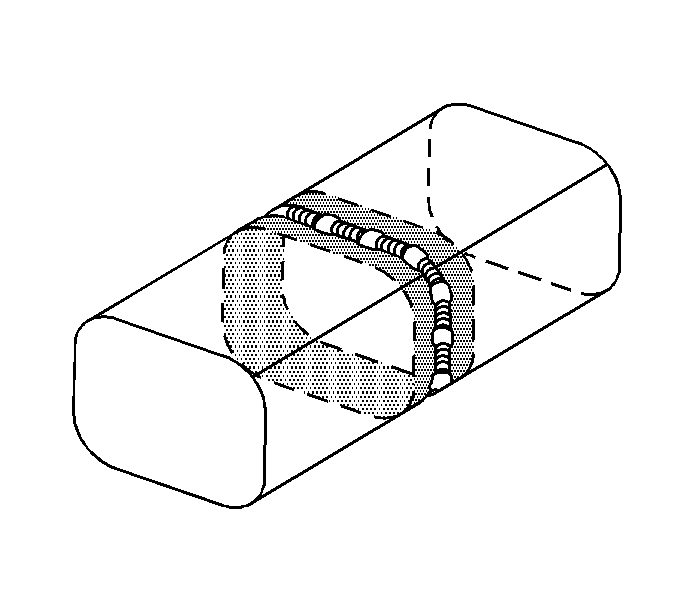
- Using a MIG welder, weld completely around the sleeve joint.


Note: Use a 50 mm (2 in) stitch weld to avoid minimal heat distortion.
