GM Service Manual Online
For 1990-2009 cars only

Instrument Panel Trim Pad Replacement With RPO UV6
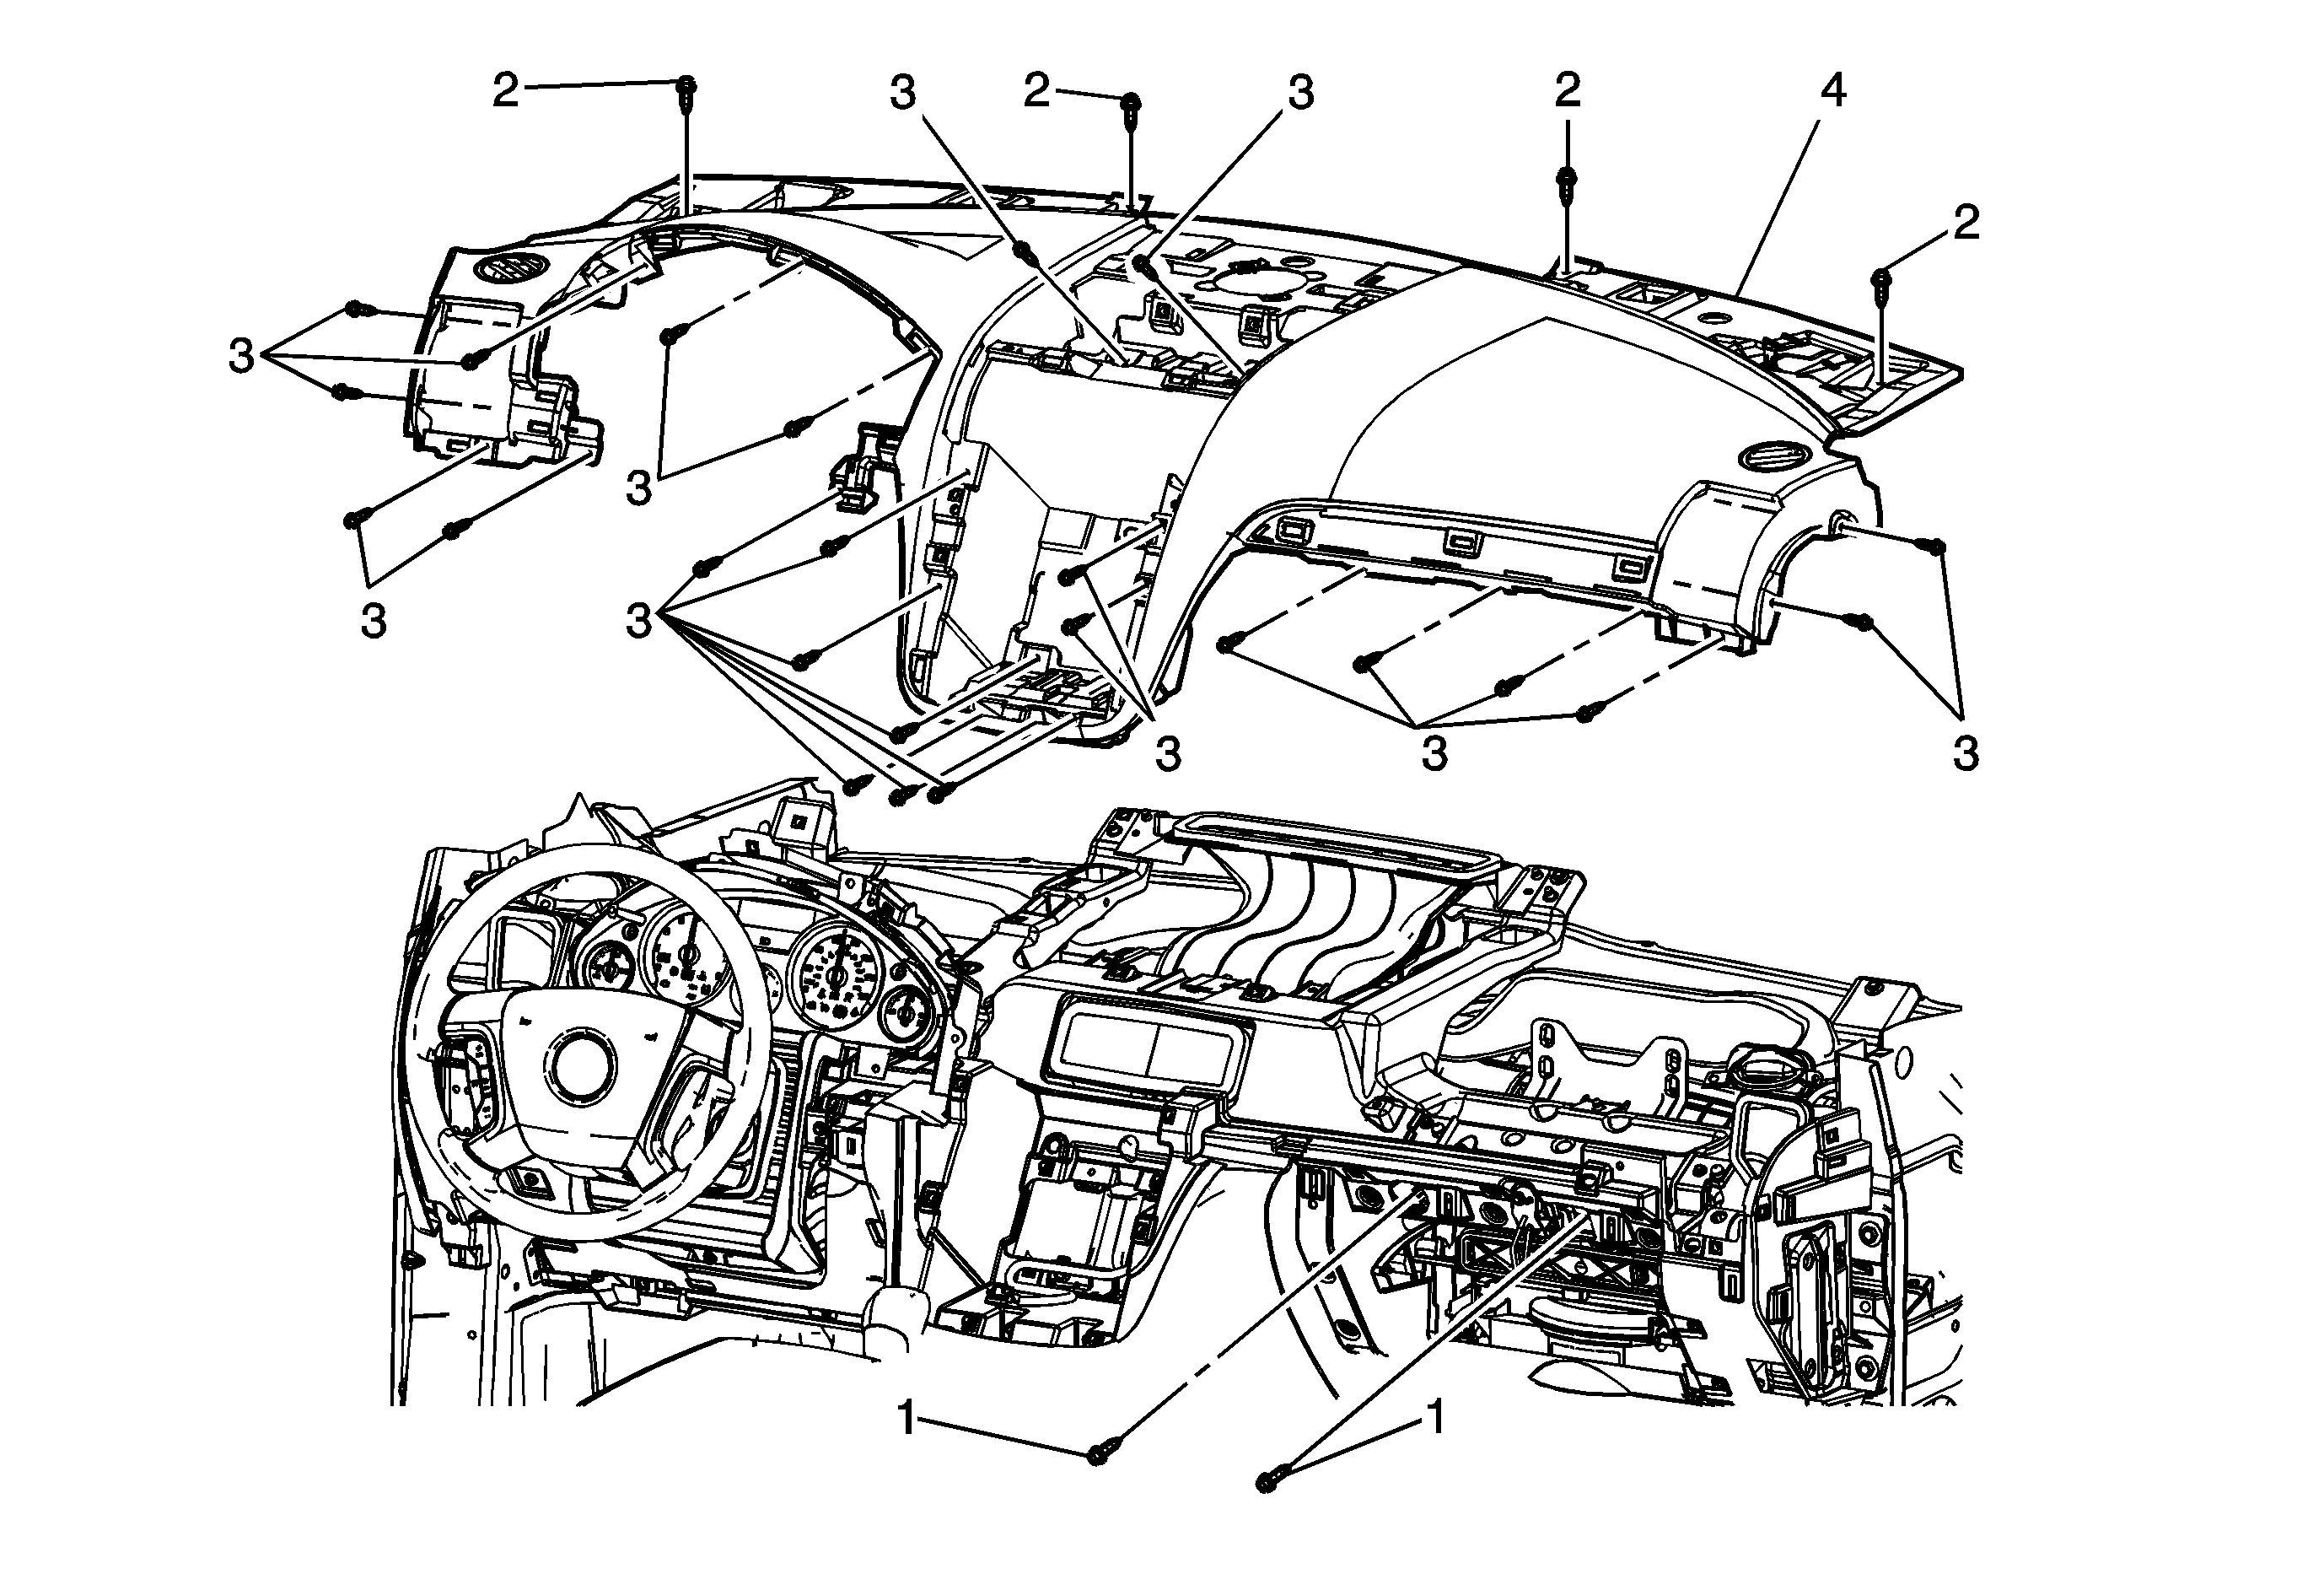

Object Number: 1848125  Size: MF

Callout

Component Name

Preliminary Procedures

  1. Disable the SIR system. Refer to SIR Disabling and Enabling .
  2. Remove the instrument panel heads up display module. Refer to Instrument Cluster Head Up Display Replacement .
  3. Remove the instrument panel outer trim covers. Refer to Instrument Panel Outer Trim Cover Replacement .
  4. Remove the instrument panel cluster trim plate bezel. Refer to Instrument Panel Cluster Trim Plate Bezel Replacement .
  5. Remove the radio. Refer to Radio Replacement .
  6. Remove the radio front speaker. Refer to Radio Front Speaker Replacement .
  7. Remove the instrument panel compartment trim panel. Refer to Instrument Panel Compartment Trim Plate Replacement .

1

Instrument Panel Inflatable Restraint Bolt (Qty: 2)

Notice: Refer to Fastener Notice in the Preface section.

Tighten
9 N·m (80 lb in)

2

Instrument Panel Trim Pad Bolt (Qty: 4)

Tighten
2 N·m (18 lb in)

3

Instrument Panel Trim Pad Screw (Qty: 22)

Tighten
2 N·m (18 lb in)

4

Instrument Panel Trim Pad Assembly

Procedures

  1. Prior to removing the trim pad from the instrument panel assembly, note the routing of the wiring to ensure proper reinstallation.
  2. Disconnect all electrical connections.
  3. With the aid of an assistant, remove the trim panel from the vehicle.
  4. When replacing the instrument panel trim pad, transfer all necessary components.

Instrument Panel Trim Pad Replacement Without RPO UV6
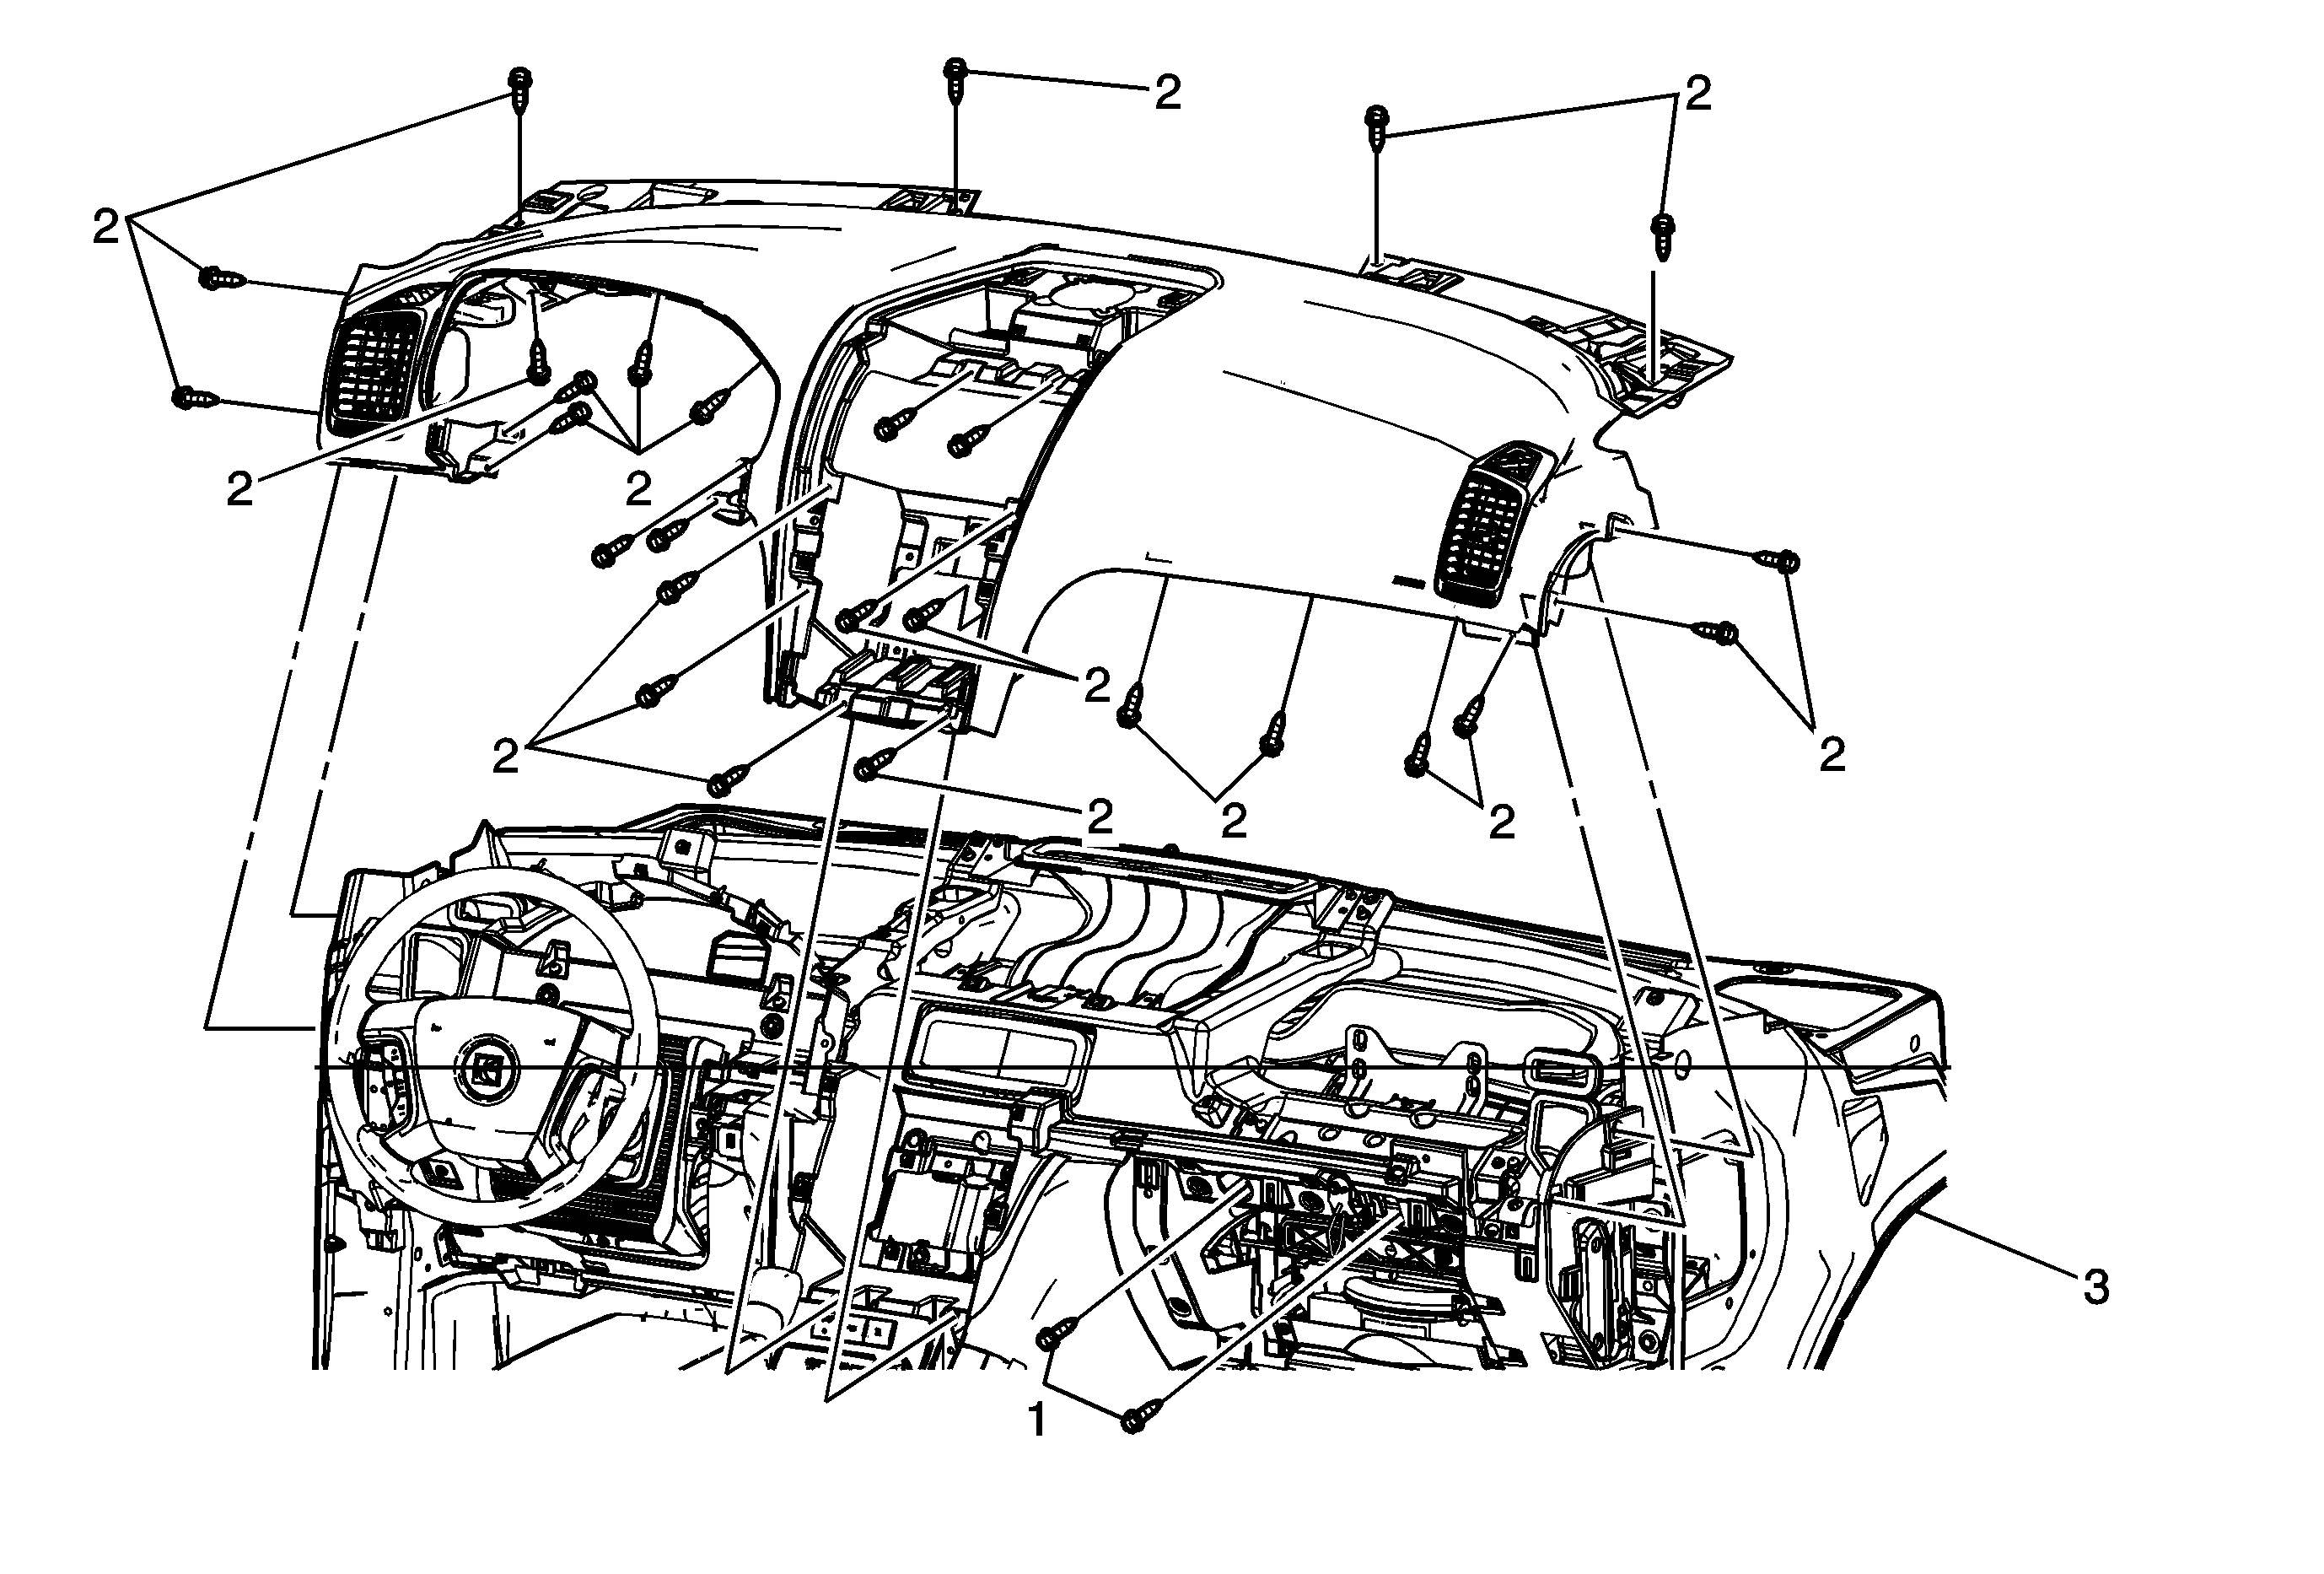

Object Number: 1853531  Size: MF

Callout

Component Name

Preliminary Procedures

  1. Disable the SIR system. Refer to SIR Disabling and Enabling .
  2. Remove the instrument panel upper trim panel with defroster nozzle. Refer to Instrument Panel Upper Trim Panel with Windshield Defroster Nozzle Grille Replacement .
  3. Remove the instrument panel outer trim covers. Refer to Instrument Panel Outer Trim Cover Replacement .
  4. Remove the instrument panel cluster trim plate bezel. Refer to Instrument Panel Cluster Trim Plate Bezel Replacement .
  5. Remove the radio. Refer to Radio Replacement .
  6. Remove the radio front speaker. Refer to Radio Front Speaker Replacement .
  7. Remove the instrument panel compartment trim panel. Refer to Instrument Panel Compartment Trim Plate Replacement .

1

Instrument Panel Inflatable Restraint Bolt (Qty: 2)

Notice: Refer to Fastener Notice in the Preface section.

Tighten
9 N·m (80 lb in)

2

Instrument Panel Trim Pad Screw (Qty: 22)

Tighten
2 N·m (18 lb in)

3

Instrument Panel Trim Pad Assembly

Procedures

  1. Prior to removing the trim pad from the instrument panel assembly, note the routing of the wiring to ensure proper reinstallation.
  2. Disconnect all electrical connections.
  3. With the aid of an assistant, remove the trim panel from the vehicle.
  4. When replacing the instrument panel trim pad, transfer all necessary components.