For 1990-2009 cars only
Removal Procedure
Important: The following procedure indicates servicing the left side of the vehicle. Servicing the right side of the vehicle is similar.
- Raise and support the vehicle. Refer to Lifting and Jacking the Vehicle .
- Remove the rear shock absorber. Refer to Shock Absorber Replacement .
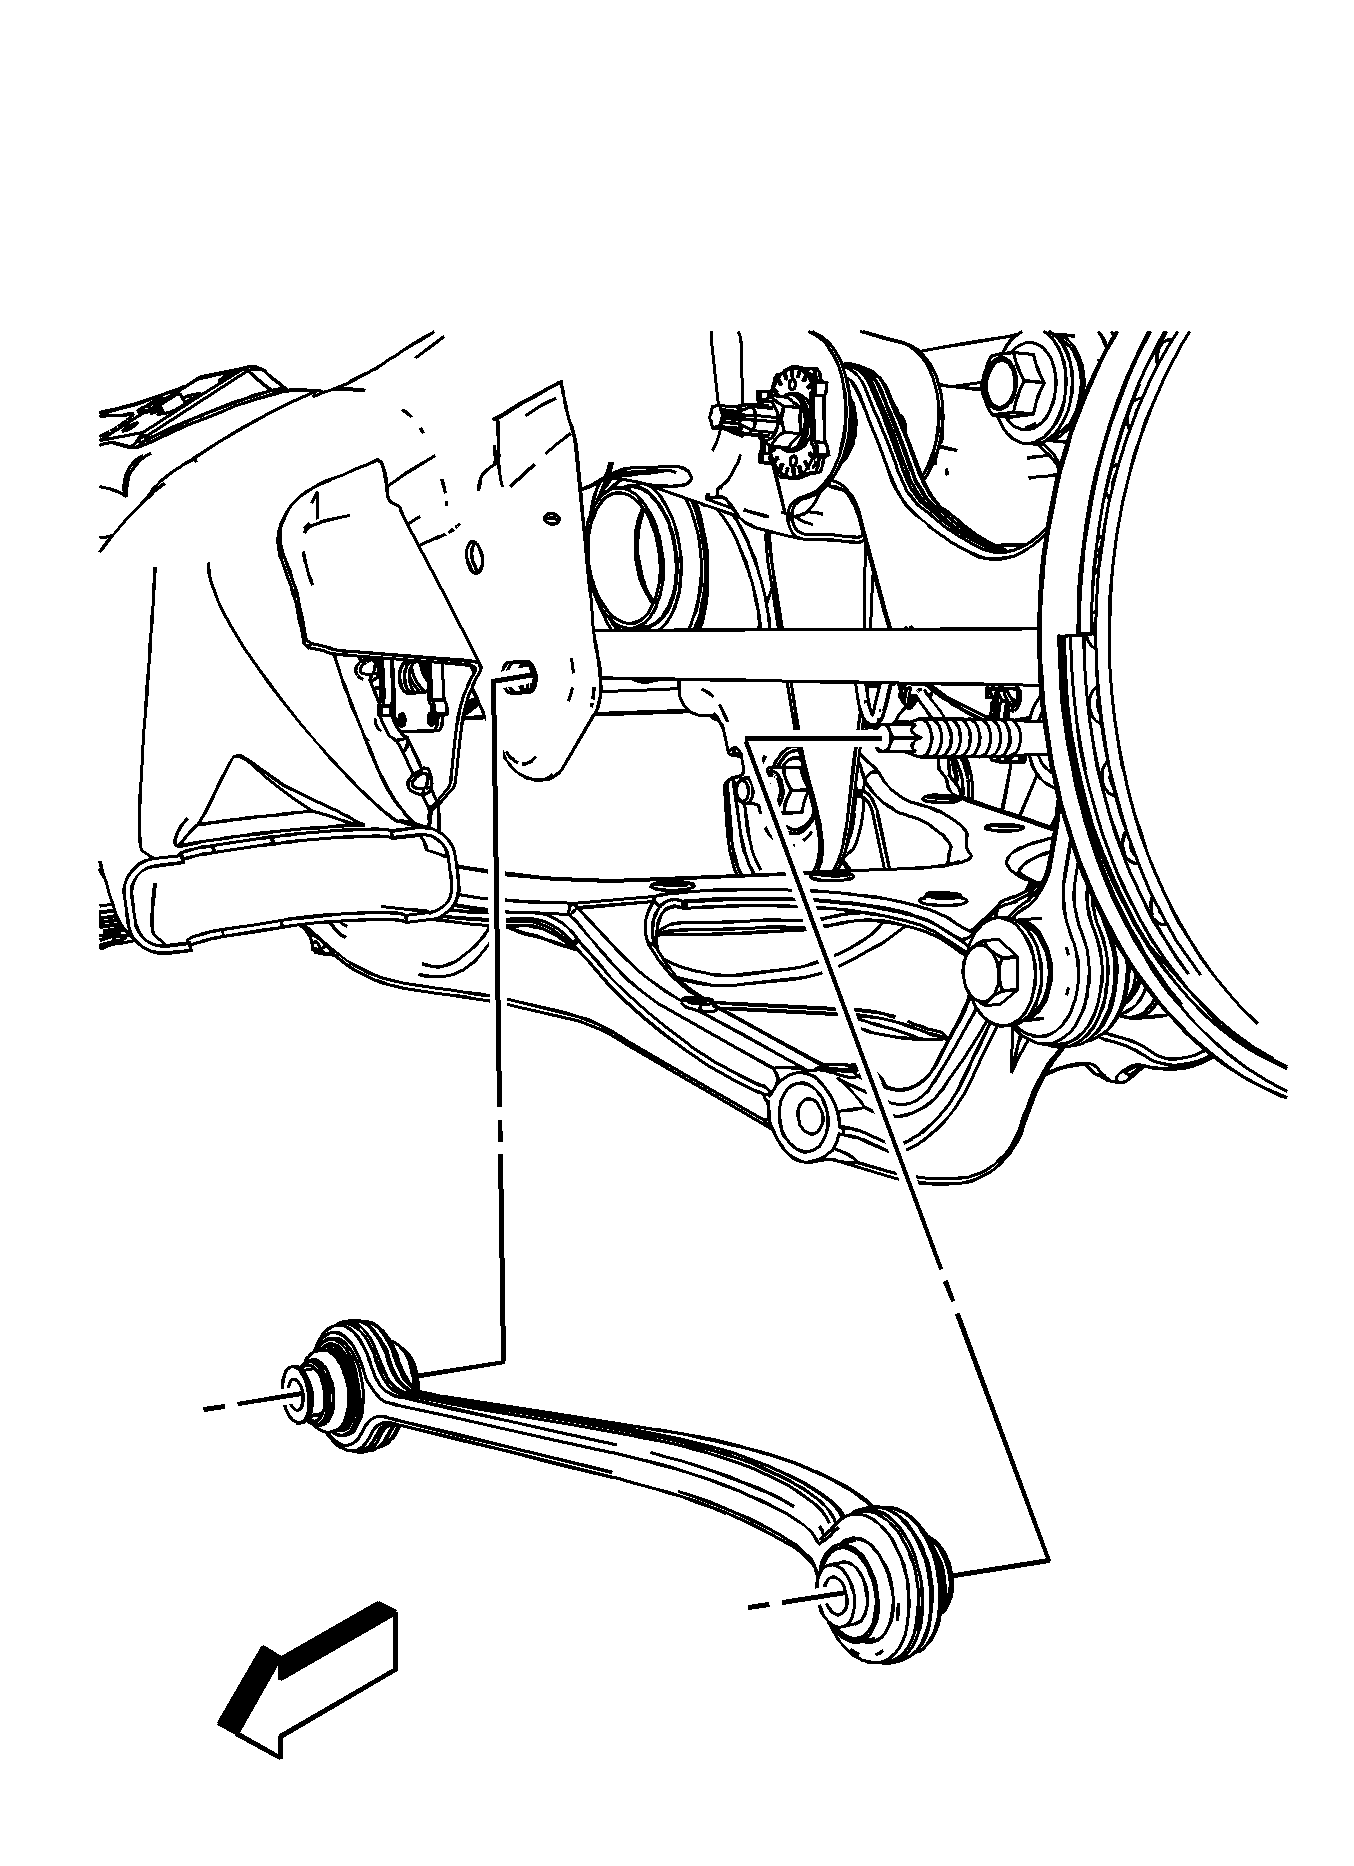
- Remove the retaining nut from the adjuster link to the knuckle.
- Install a wrench to hold the adjuster cam bolt.
- Mark a point of reference on the adjuster cam and the mounting bracket.
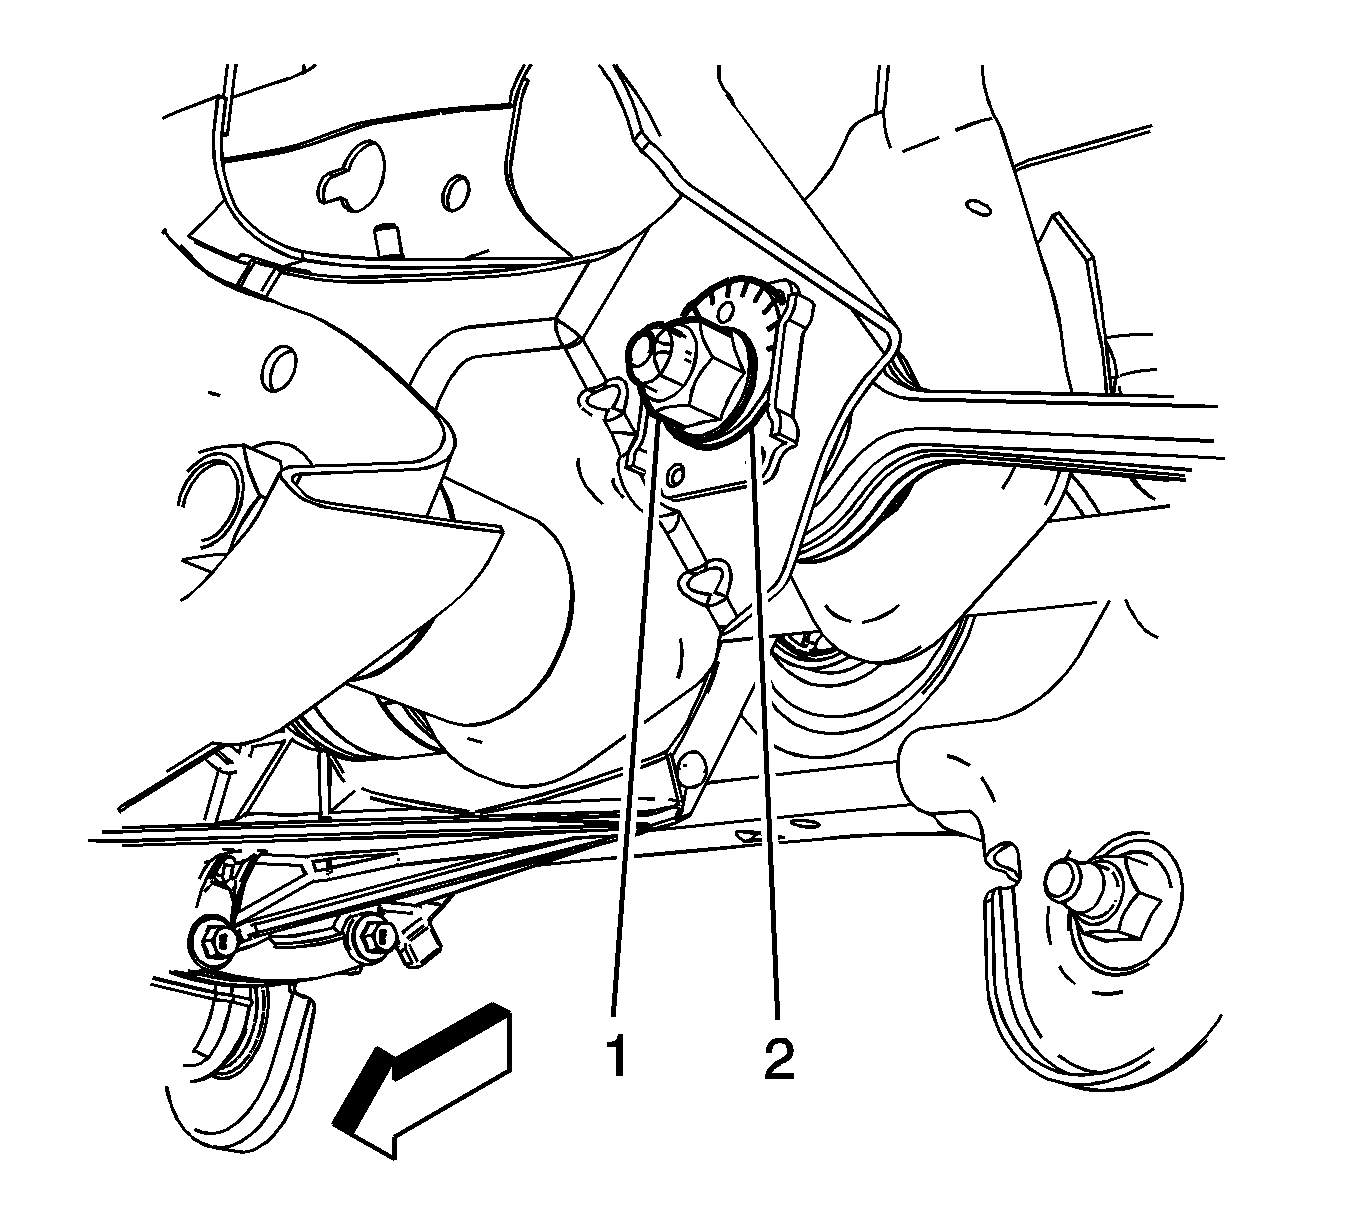
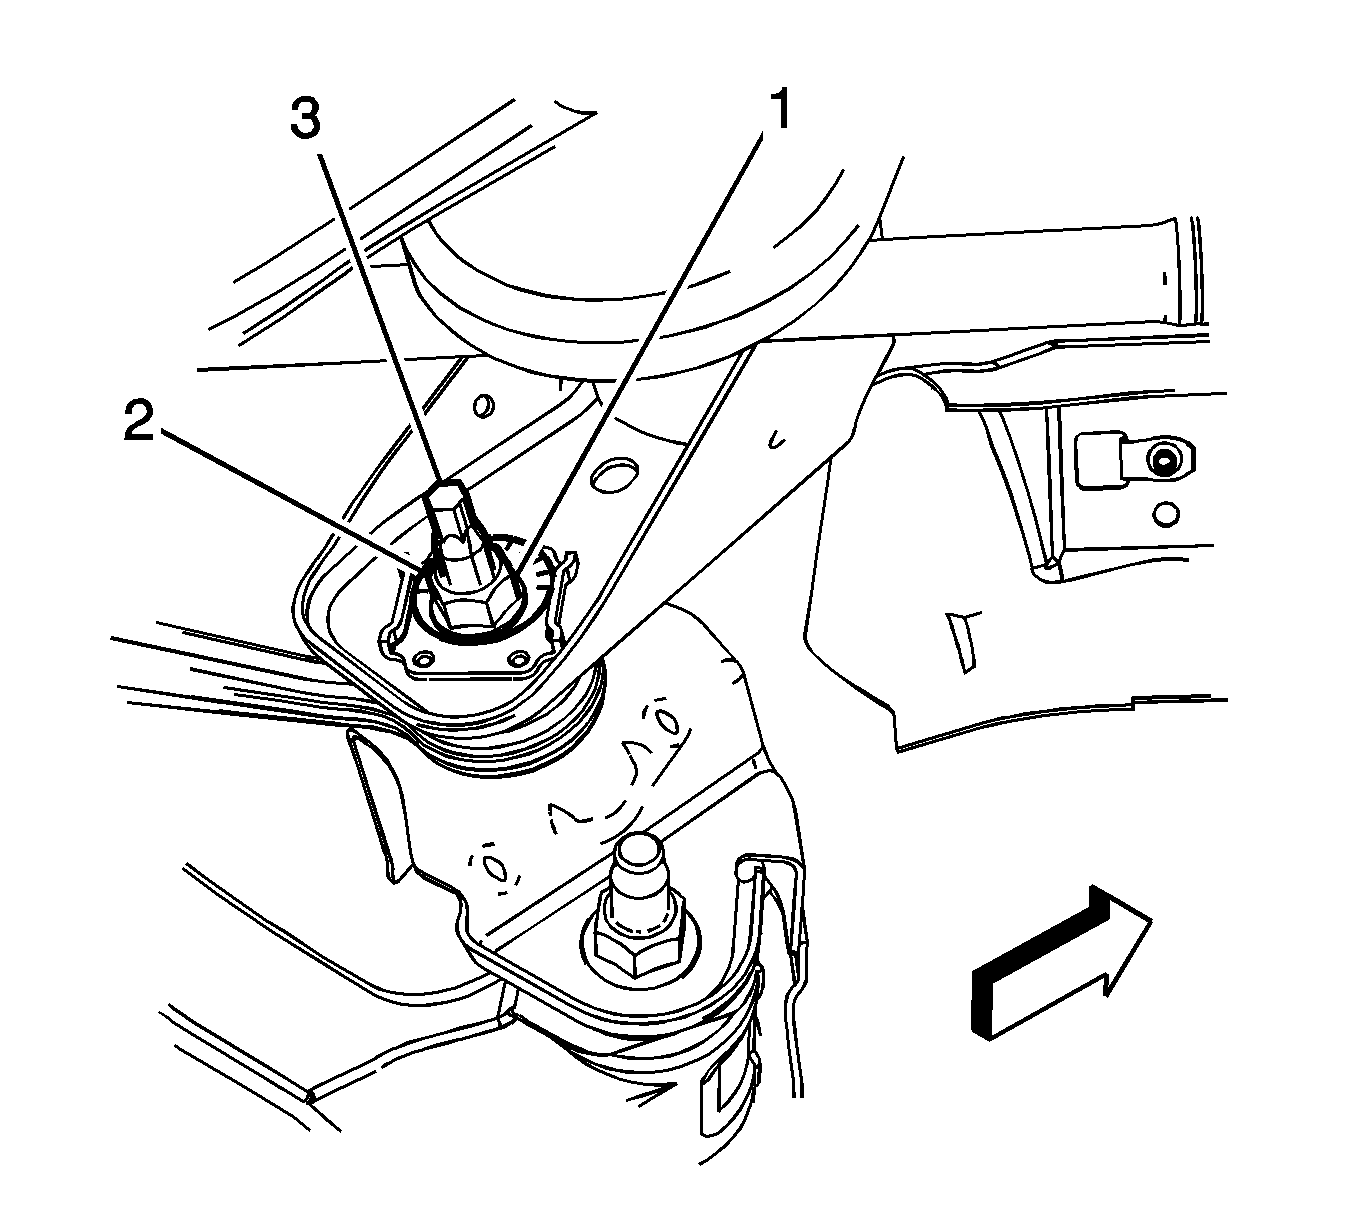
- Remove the front adjuster nut (1) and the adjuster cam (2).
- Remove the rear adjuster nut (1), adjuster cam (2).
- Maneuver the adjuster bolt (3) so as to remove it from the mounting bracket.
- Remove the adjuster link from the knuckle and the mounting bracket,
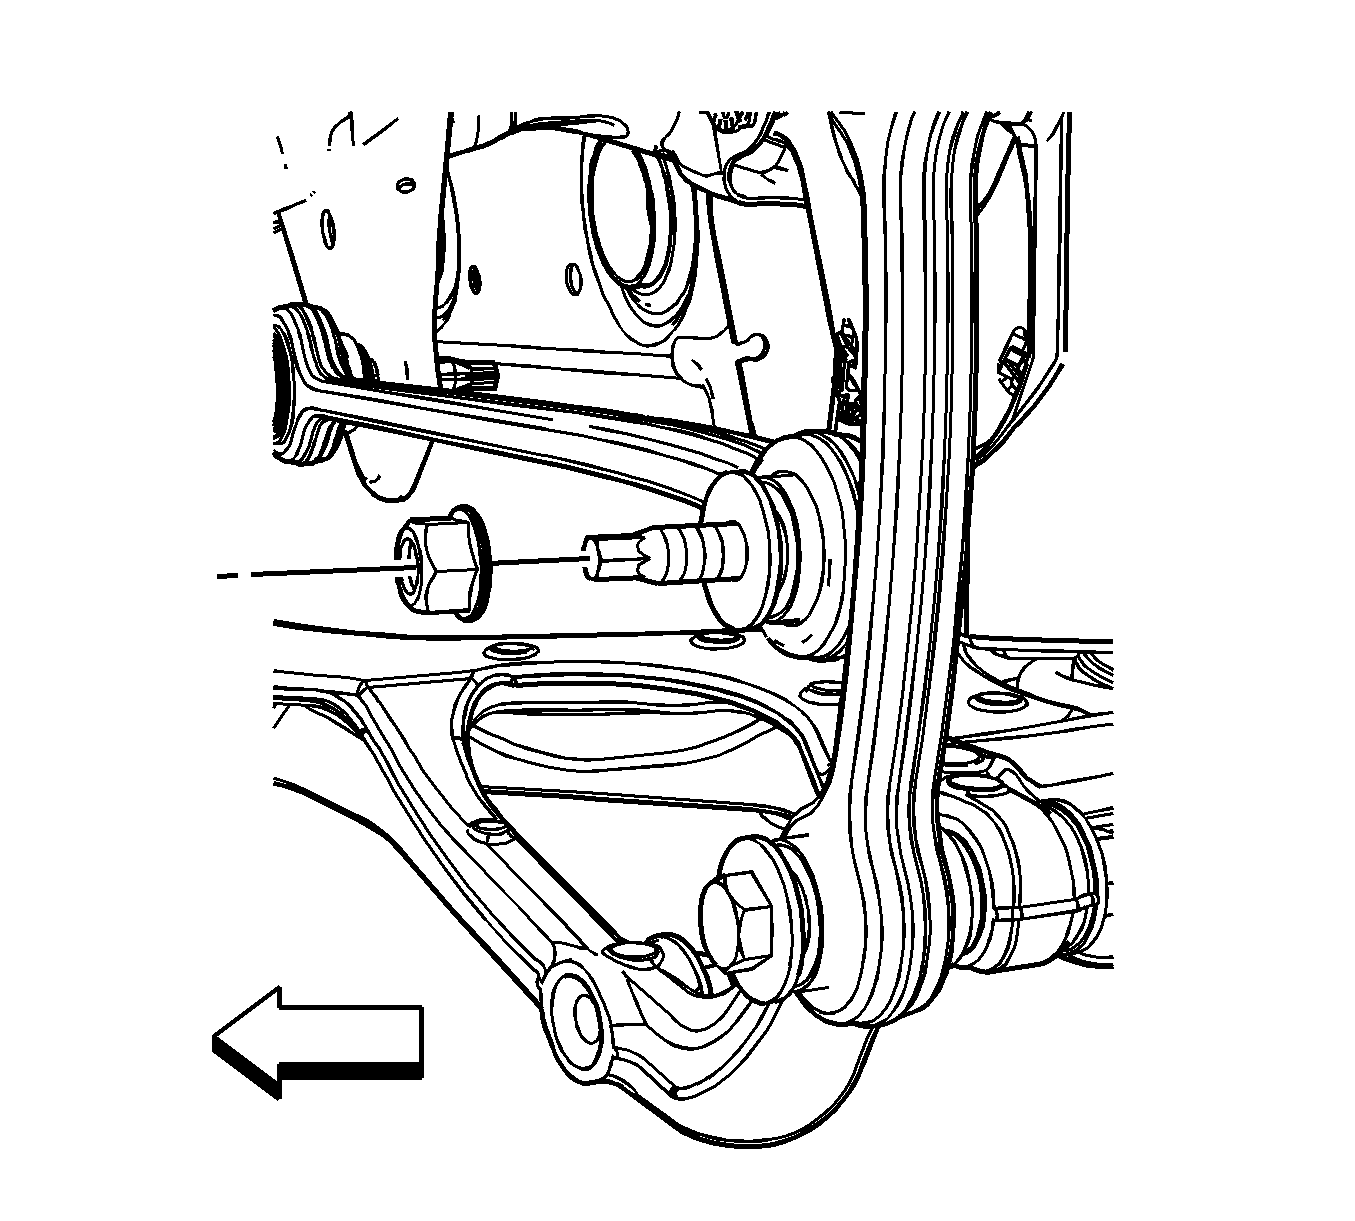
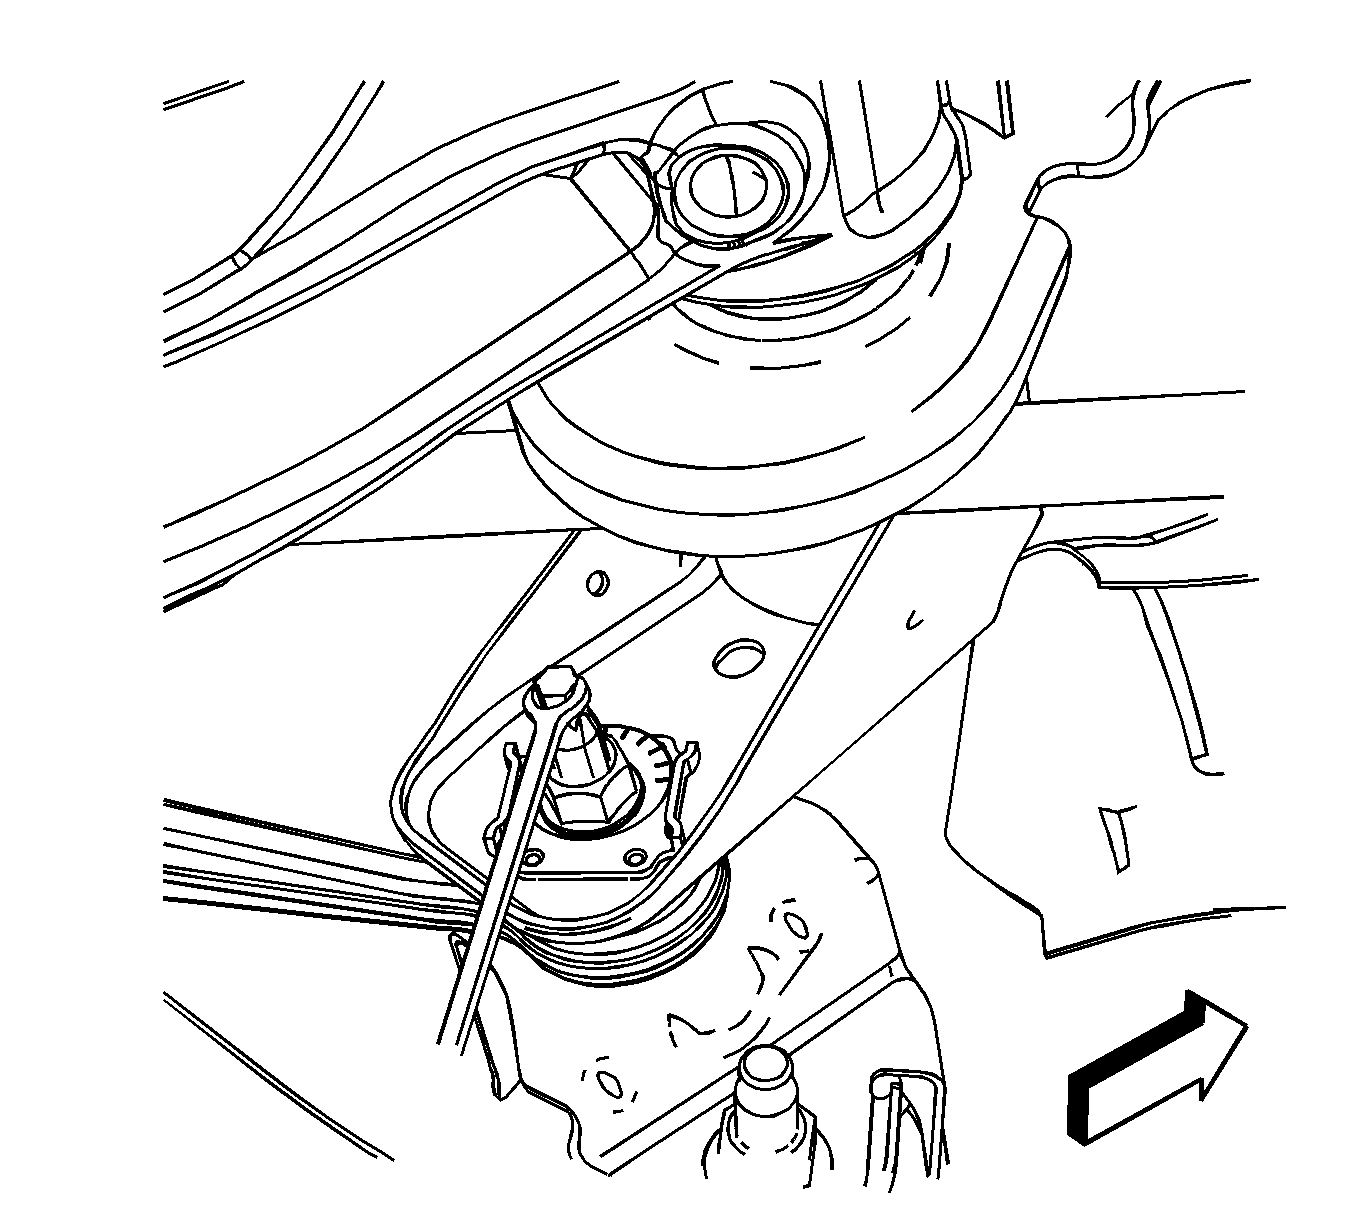
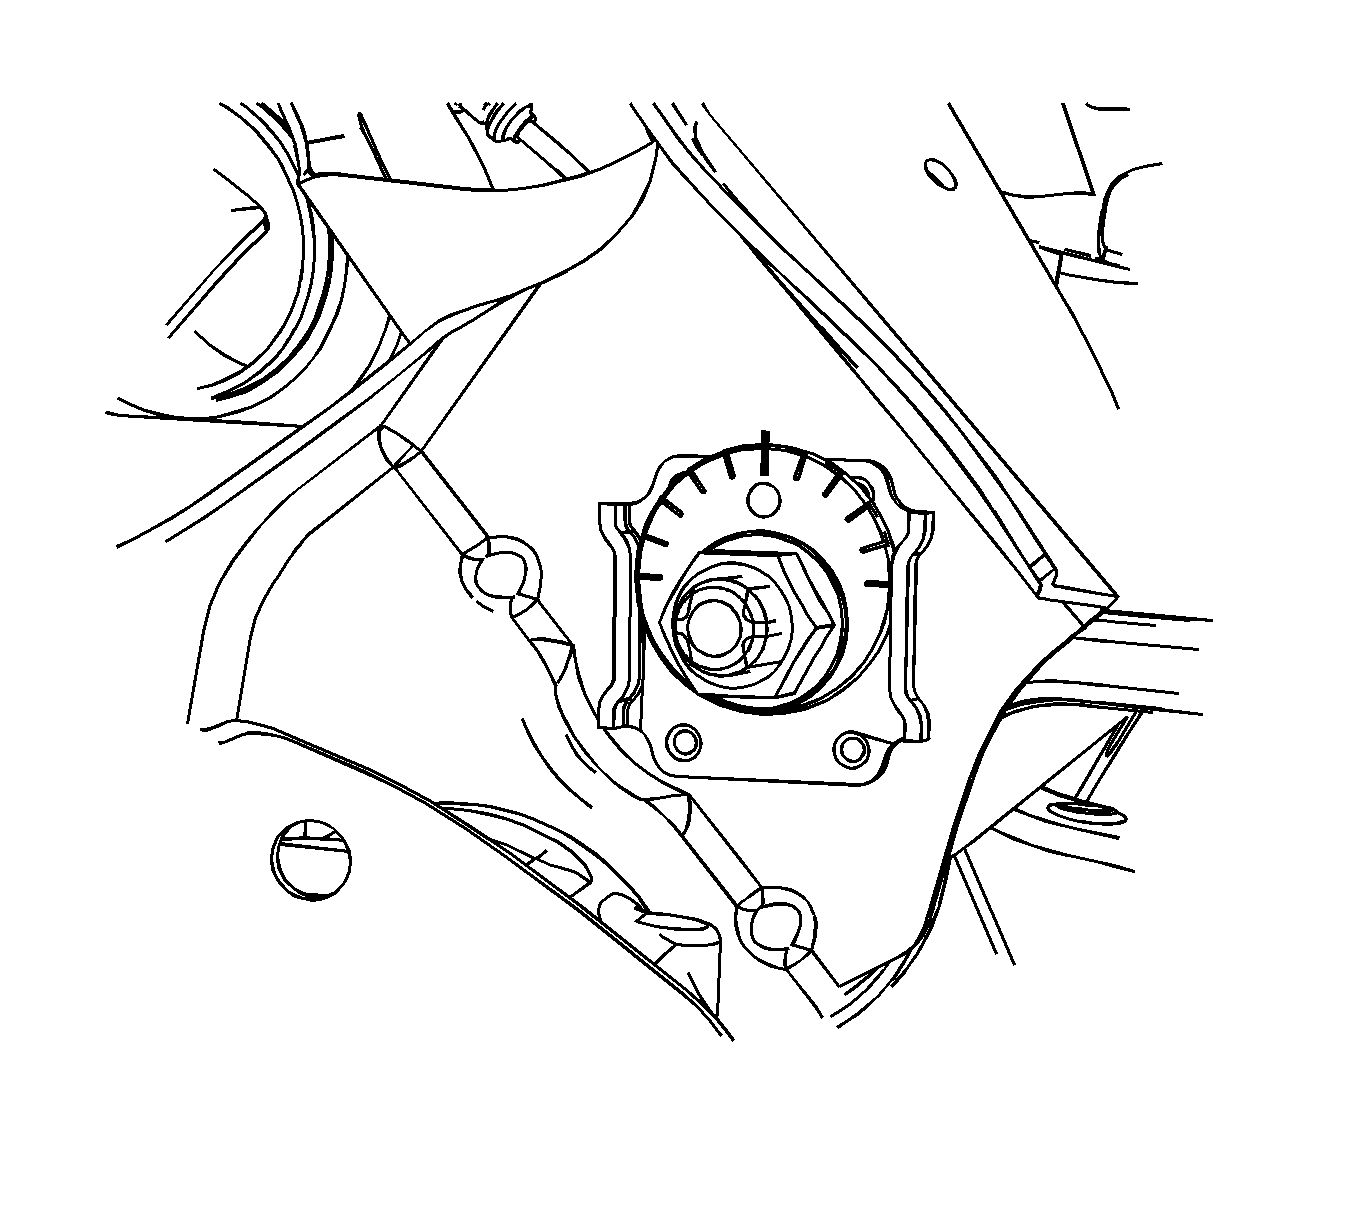
Important: In steps 5 and 6, if servicing other suspension components, mark the relationship of the adjuster cams to the mounting brackets to aid in the re-installation of the adjustment link.
Installation Procedure
- Install the adjuster link on the knuckle and in the mounting bracket.
- Install the adjuster bolt (3) in the mounting bracket and adjuster link.
- Install the rear adjuster cam (2) and adjuster nut (1). Finger tighten the nut at this time.
- Install the front adjuster cam (2) and the adjuster nut (1). Finger tighten the nut at this time.
- Install the retaining nut for the adjuster link.
- Install the rear shock absorber. Refer to Shock Absorber Replacement .
- Align the reference marks on the adjuster cam and the mounting bracket.
- Install a wrench to hold the adjuster cam bolt.
- Tighten the adjuster cam nuts.
- Remove the support and lower the vehicle.
- Align the rear suspension. Refer to Wheel Alignment Specifications .


Notice: Refer to Fastener Notice in the Preface section.

Tighten
Tighten the retaining nut to 75 N·m (55 lb ft) plus 60 degrees.

Important: If servicing other suspension components, align the relationship marks on the adjuster cam and the mounting brackets to aid in the re-installation of the adjustment link.

Tighten
Tighten the adjuster cam nuts to 140 N·m (103 lb ft).
