Water Dripping from A-Pillars or Rear Dome/Reading Lamp (Apply Sealer/Lengthen Drain)

| Subject: | Water Dripping from "A" Pillars or Rear Dome/Reading Lamp (Apply Sealer/Lengthen Drain) |
| Models: | 2008 Buick Enclave |
| 2007-2008 GMC Acadia |
| 2007-2008 Saturn OUTLOOK |
| with 2-Panel Sunroof (Power Tilt/Sliding Front Panel, Fixed Rear Panel with Power Sunscreen) (RPO C3U) |
This bulletin is being revised to add additional repair information and Warranty Information. Please discard Corporate Bulletin Number 07-08-57-002D (Section 08 -- Body and Accessories).
Condition
Some customers may comment on water dripping/leaking from the rear dome/reading lamp (located just rearward of the fixed glass) or from either " A" pillars.
Cause
The above conditions may be caused by any of the following:
- The stationary glass roof drains may allow too much water for the drain system and thus overflows onto the headliner and into the vehicle.
- Heat from the roof may cause the right or left middle sunroof drain tubes to shrink and come off at its attaching point on the module.
- A drain hose may not be fully seated.
- A drain hose may be improperly routed.
- There may be a void in the sealer under the roof ditch molding.
- The end of one of the front drains may be plugged with grease from the sunroof or debris may be caught in the cross hatch at the end of the drain tubes.
Correction
For Acadia/Outlook built prior to VIN 7J153734, Enclave built prior to VIN 8J102237, complete Corrections 1 through 4 using the procedures found below.
For Acadia/Outlook/Enclave built prior to VIN 8J166747, complete Corrections 2 through 4 using the procedures found below.
- Plug stationary sunroof drain holes.
- Add sunroof drain hose extensions.
- Check all drain hose connections.
- Check the drain hose routing between the "B" and "C" pillar for correct routing.
- Check the roof ditch molding for water leak.
- Check for plugged sunroof drains drains.
For Vehicles Built After the Above VINs:
Normal water test and diagnosis should be done for water leaks 5 and 6.
Procedures
Plug Stationary Sunroof Drain Holes
- Lower the headliner following the procedure in SI.
- Loosen the front sunroof module bolts half way. Remove the sunroof drains. Remove the remaining sunroof module bolts and lower the rear of the sunroof module assembly following procedures in SI.
- Seal the four holes in the roof sheet metal from inside the vehicle. Refer to the illustration above.
- Clean the four holes in the roof sheet metal and fill with a small amount of windshield urethane sealant.
- Reinstall the sunroof module.
- After the repair, run a second water test for leaks.
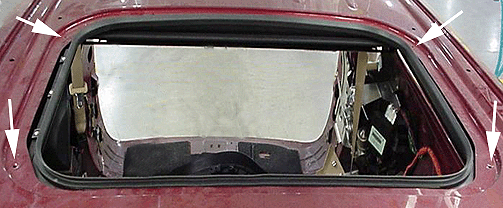
Important: The sunroof fixed rear panel glass has been removed for illustration purposes.
Add Sunroof Drain Hose Extensions
Extend both middle drain tubes by adding sunroof drain tube extensions.
- Lower the headliner following procedures in SI.
- Add a tube assembly (drain extension) to each middle sunroof drain. Refer to the illustration above.
- The drain hose should be straight with a slight downward angle to the rear of the vehicle.
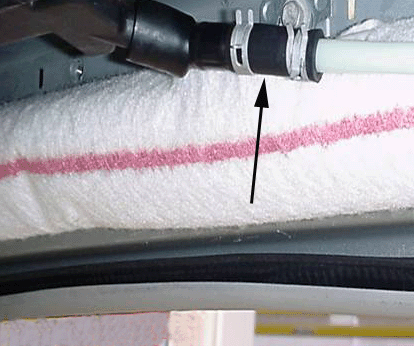
Important: Make sure there are no dips in the hose after the extension has been added. Refer to the illustration. In some cases it may be necessary to trim off some of the drain tube to eliminate the dip in the drain tubing.
Check All Drain Hose Connections
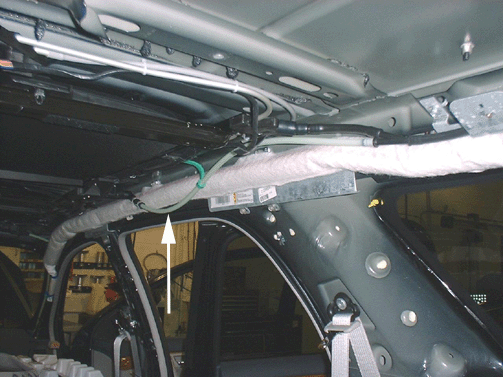
Check the front and rear sunroof drain hose connections to make sure they are fully seated.
Check Drain Hose Routing Between "B" and "C" Pillar for Proper Routing
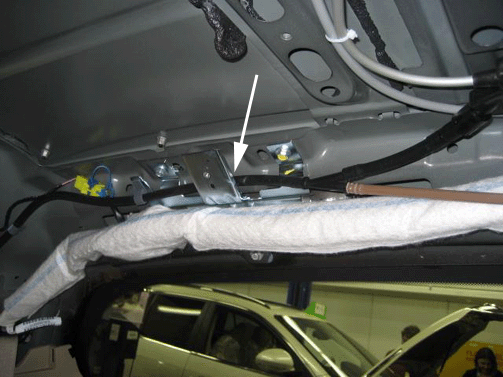
- After installing the extensions, make sure that the hose is routed in back of the air bag bracket. (Figure 1 is the incorrect routing, Figure 2 shows the correct routing).
- Also make sure that there are no bends pointing upward in the drain tubes.
Figure 1
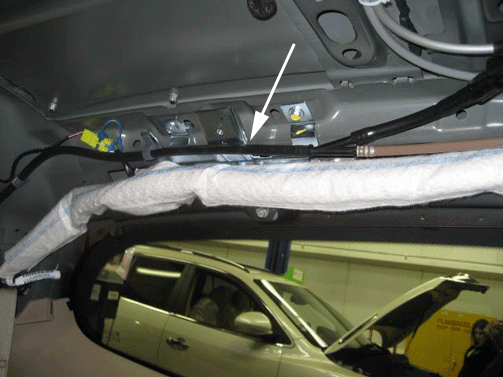
Figure 2
Check Roof Ditch Molding for Water Leak
Listed below are where the leaks may occur and what they may look like.
Remove the roof ditch molding, clean the affected area and seal the void with KENT High Tech Clear Seam Sealer, 5 oz. tube P/N 10200.
After the repair, run a second water test for leaks.
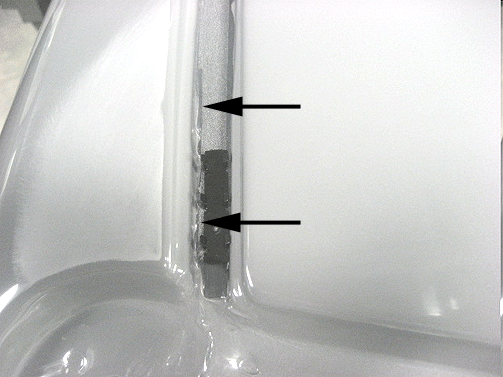
Most leaks are on the outboard side of the ditch.
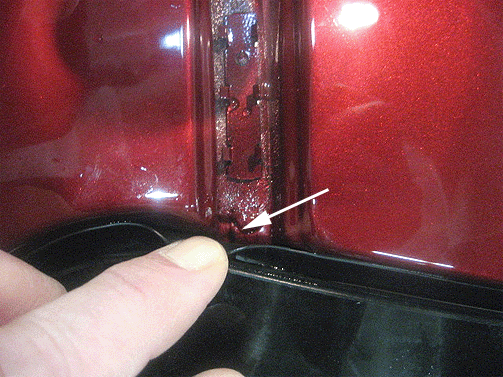
Pins holes near at the front.
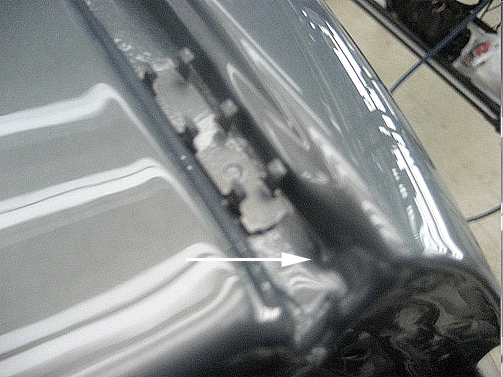
Rear of the vehicle with pin holes.
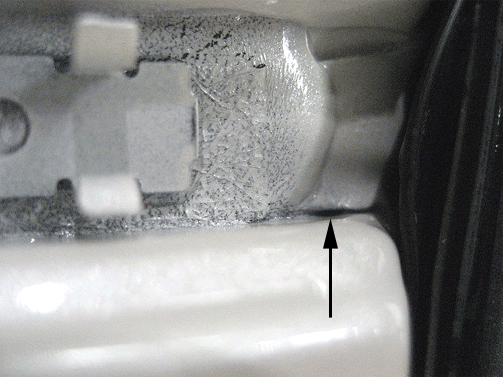
Leak point at the rear.
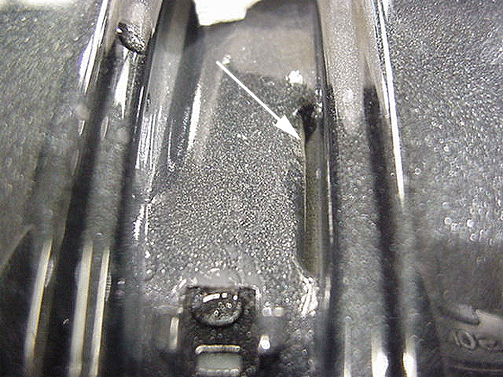
Leak point at the rear.
Front Drain Hoses Plugged
If the sunroof water trough assembly does not overflow onto the headliner, do not perform the following repair.
- Pour water into the sunroof trough assembly to verify that the front drains are not plugged.
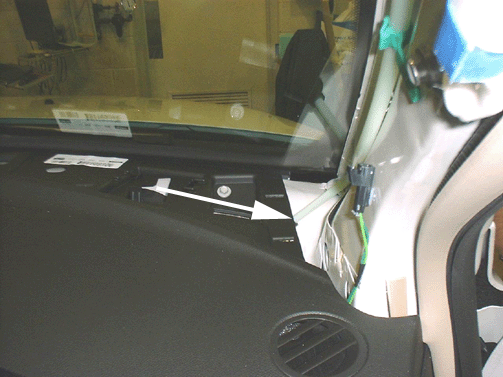
- Remove the "A" pillar trim and defroster outlet grille to gain access to the end of the drain tubes.
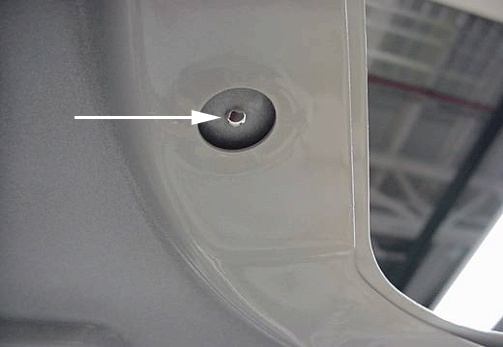
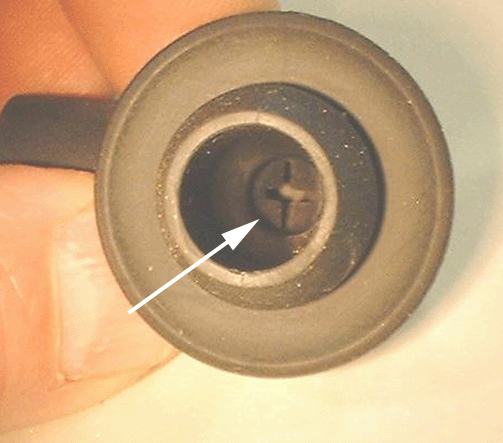
- Remove the rubber grommet at the end of the drain tube. Refer to the illustration above.
- Using a knife, carefully remove the cross hatch inside the grommet and reinstall. Another solution is to utilize a 3/8 in spot weld drill bit to remove the cross hatch. Refer to the illustration above.
- After the repair, run a second water test for leaks.
Parts Information
Important: Both the windshield urethane and Kent High Tech clear can be used for multiple repairs. Material allowance to be charged per tube used, not per repair.
Part Number | Description | Material Allowance |
|---|---|---|
25930220 | Tube Asm-Sun Rf Hsg RR Dm One kit has one rear drain tube extension. Order two per vehicle. | NA |
08609 P10545 | 3M™ Windo-Weld™ Super Fast Urethane Or Kent™ Speed Set™ Windshield Sealant | $20.00 per tube |
P10200 | Kent High Tech™ Clear | $10.00 |
Warranty Information
For vehicles repaired under warranty, use:
Labor Operation | Description | Labor Time |
|---|---|---|
C9818* | Lower Sunroof Module Assembly and Seal Four Drain Holes Under Roof Stationary Glass. Add Extensions to Sunroof Drain Hoses | 2.8 hrs |
C9835* | Lower Headlining Trim Panel and add sunroof drain extensions | 2.3 hrs |
C9820* | Removal of cross hatch inside drain tube | 0.6 hr |
B7680* | Roof panel joint finish molding-Right | 0.3 hr |
B7681* | Roof panel joint finish molding-Left | 0.3 hr |
*This labor operation number is for bulletin use only. This number will not be published in the Labor Time Guide. | ||
