GM Service Manual Online
For 1990-2009 cars only

Front Fender Wheel Opening Molding Replacement Acadia
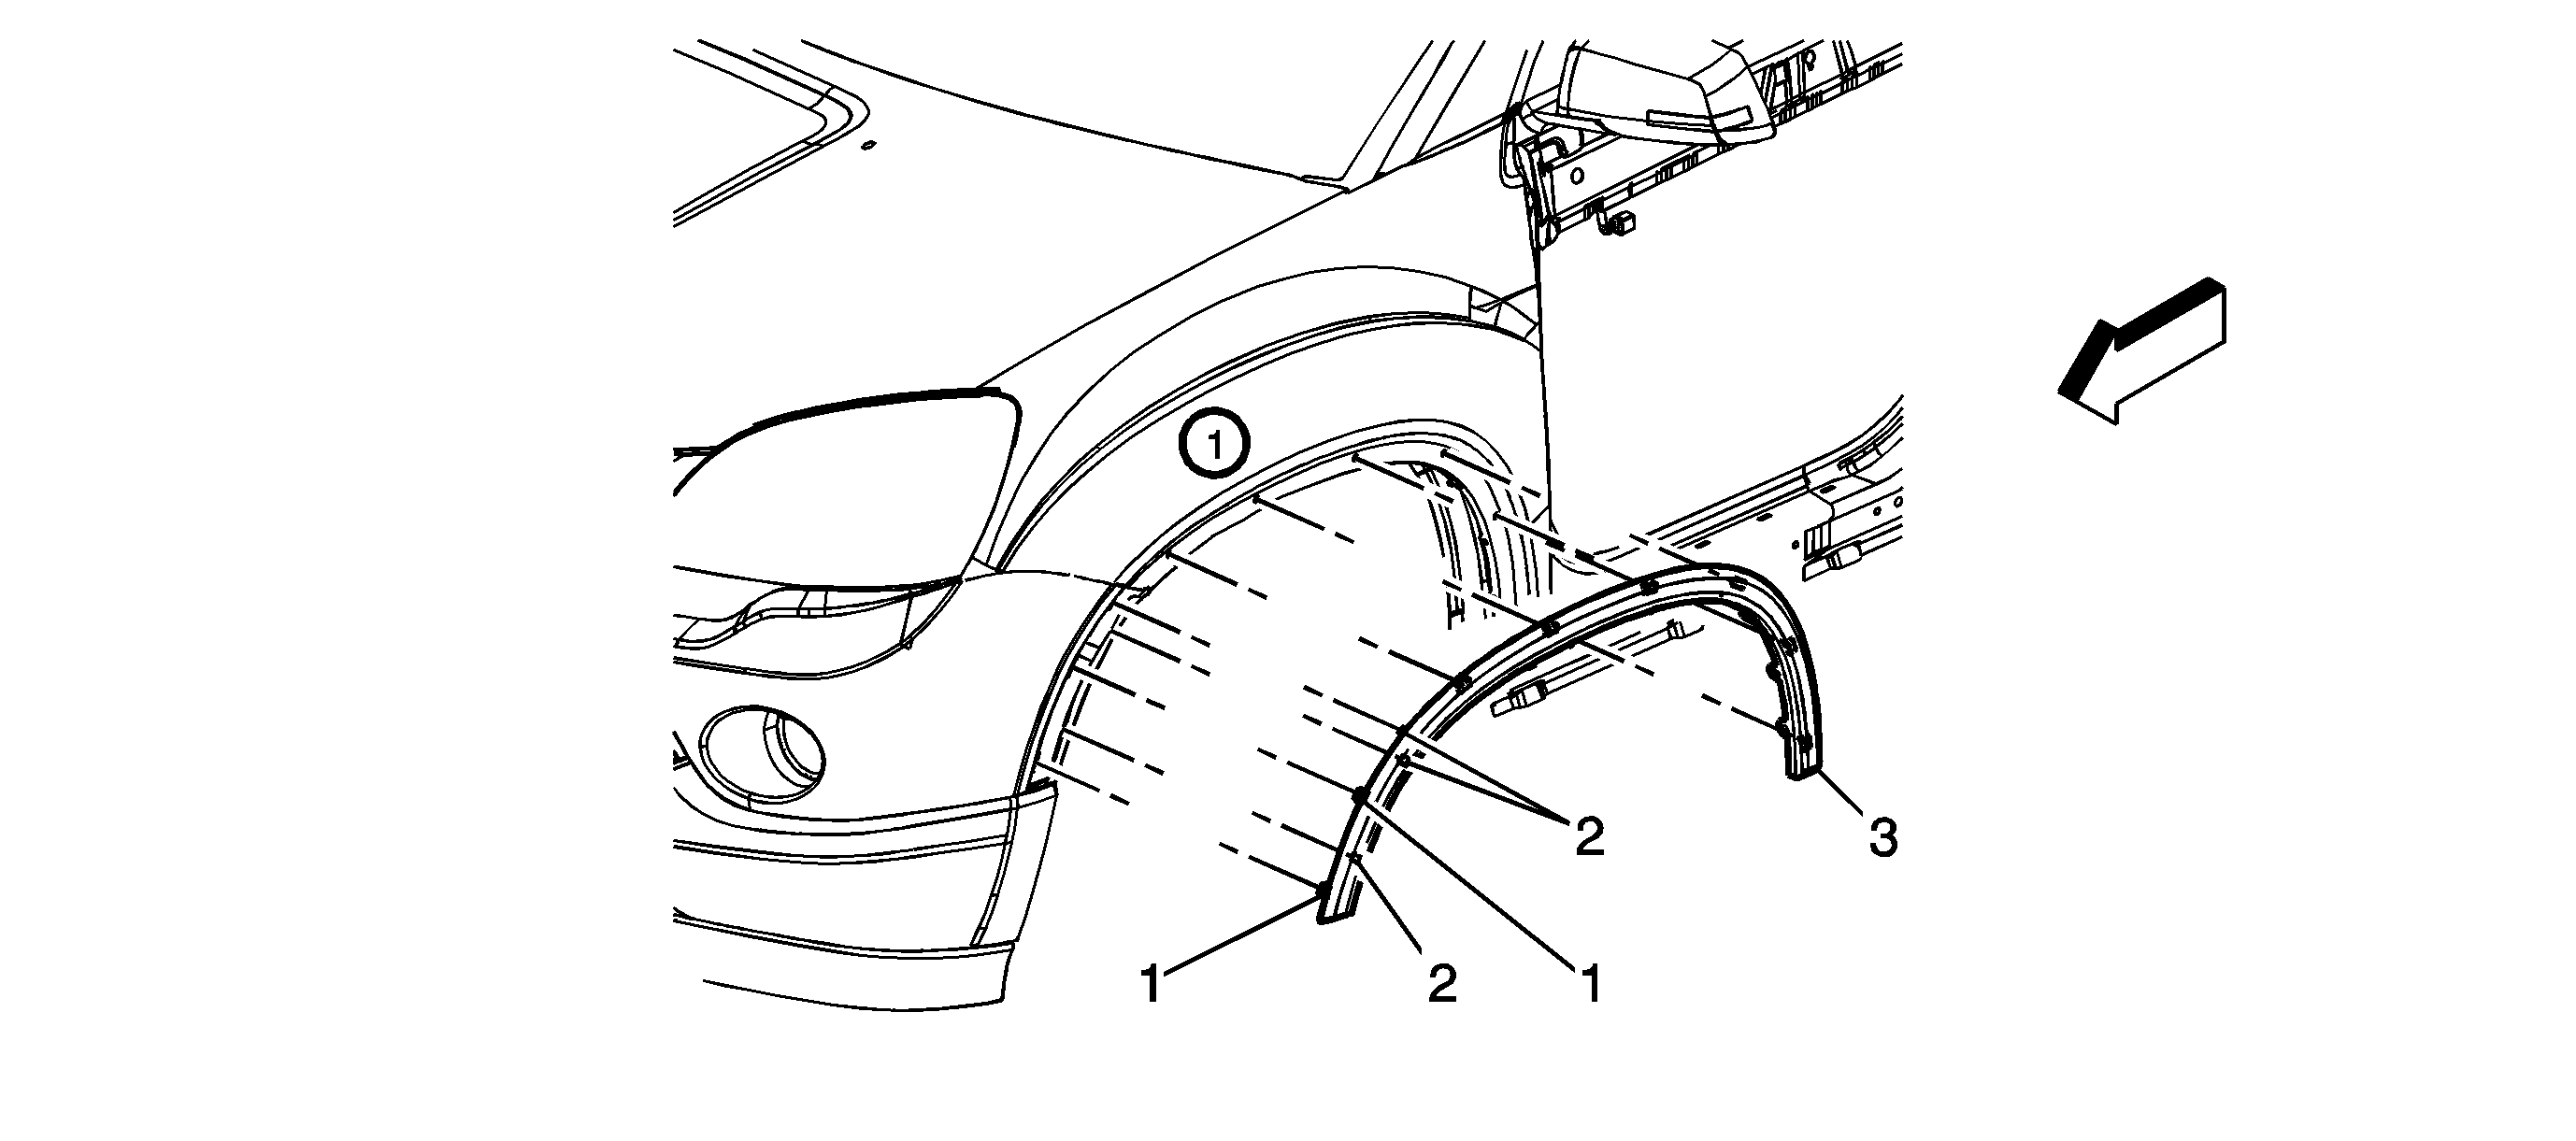

Object Number: 1847041  Size: SF

Callout

Component Name

Preliminary Procedures

    Notice: Refer to Exterior Trim Emblem Removal Notice in the Preface section.

  1. Using a 50/50 mixture of isopropyl alcohol and clean drinkable water and a clean towel, remove the left over adhesive residue from the flare.
  2. Wipe the fender with a clean dry towel.
  3. Peel the adhesive tape backing from the fender wheel molding.
  4. Secure the fender wheel molding starting at the center and working outward.
  5. Completely wet out the fender wheel molding.

1

Integral Tabs (Qty: 9)

2

Integral Clips (Qty: 2)

3

Front Wheelhouse Molding

Front Fender Wheel Opening Molding Replacement Enclave
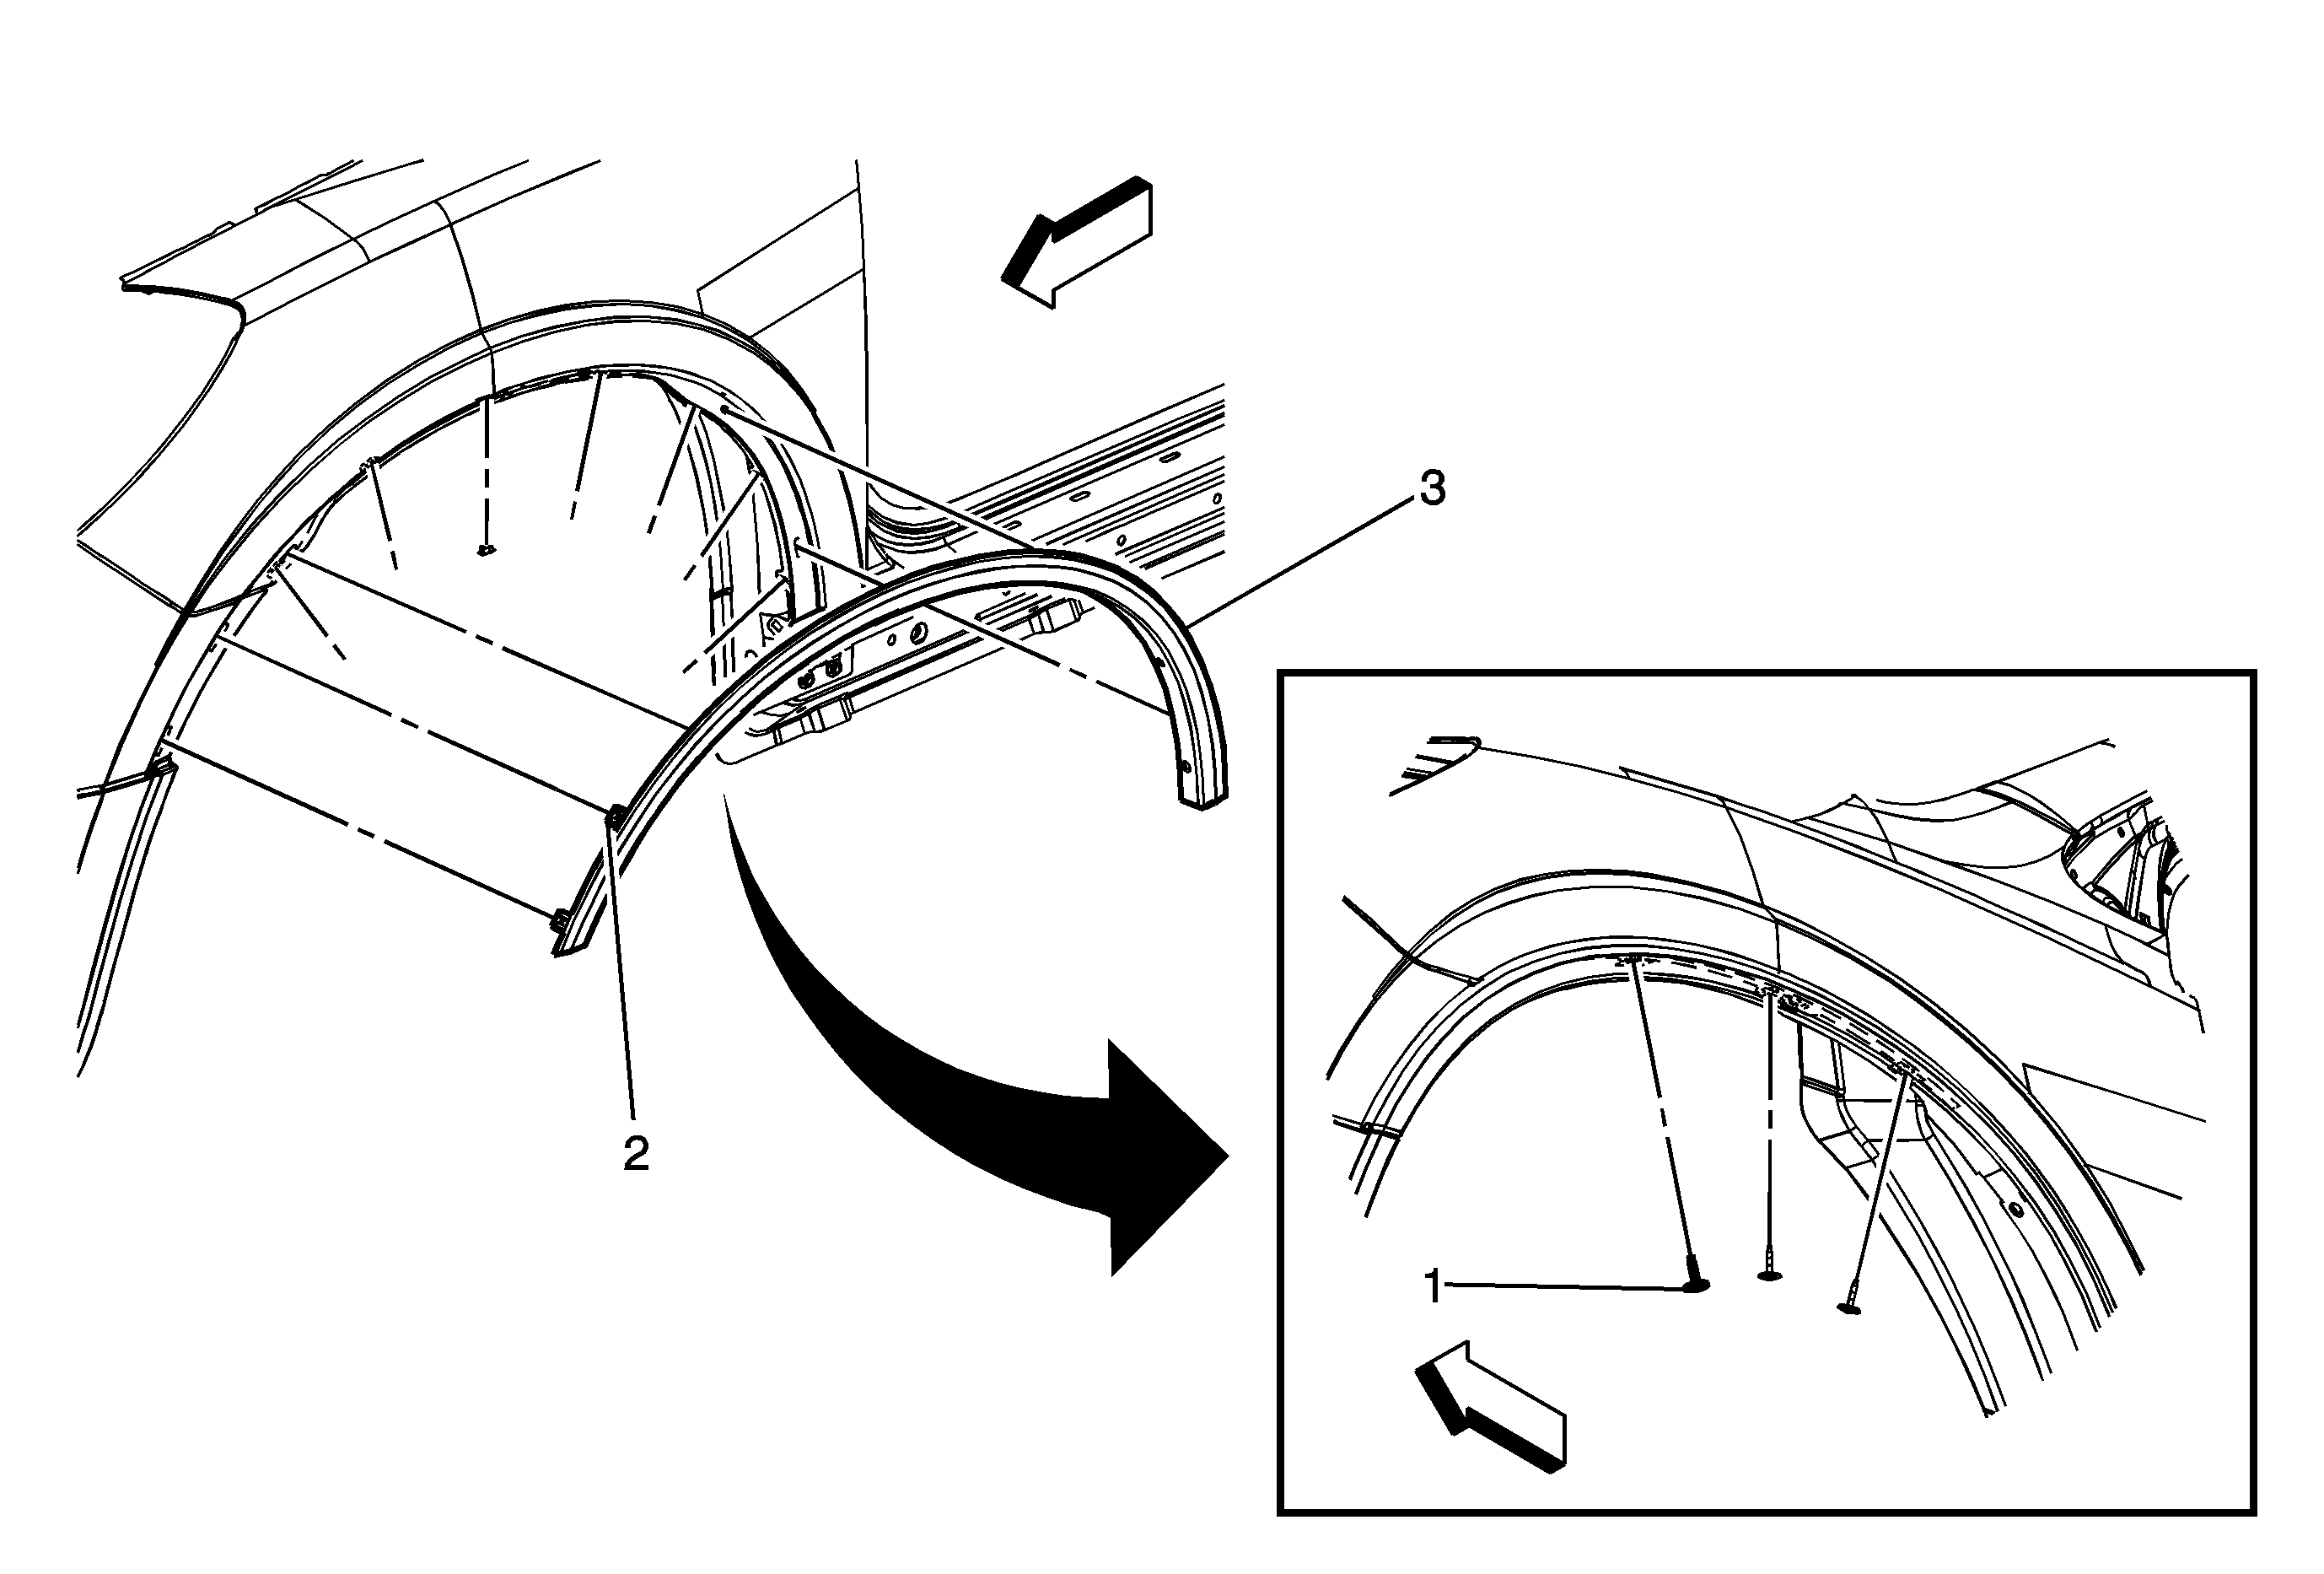

Object Number: 1866709  Size: MF

Callout

Component Name

Preliminary Procedures

  1. Release the five forward and six rearward wheelhouse liner screws to allow for the repositioning of the liner.
  2. Remove the five screws from the front portion of the wheelhouse liner to fender flange.
  3. Remove the three upper fender molding to fender flange push pin retainers.
  4. Remove the six rearward flare to fender flange screws.
  5. Release the retainer clips, three forward and two rearward from the fender flange.

1

Front Wheel Opening Molding Screw (Qty: 5)

Notice: Refer to Fastener Notice in the Preface section.

Tighten
1.5 N·m (13 lb )

2

Retainer Clips (Qty: 5)

Tip
Release the clips from inside the fender flange.

3

Front Wheel Opening Molding Assembly

Front Fender Wheel Opening Molding Replacement OUTLOOK


Object Number: 1847041  Size: SF

Callout

Component Name

Notice: Refer to Exterior Trim Emblem Removal Notice in the Preface section.

Preliminary Procedure

  1. Using a 50/50 mixture of isopropyl alcohol and clean drinkable water and a clean towel, remove the left over adhesive residue from the flare.
  2. Wipe the fender with a clean dry towel.
  3. Peel the adhesive tape backing from the fender flare.
  4. Secure the fender flare starting at the center and working outward.
  5. Completely wet out the fender flare.

1

Integral Tab (Qty: 9)

2

Integral Clip (Qty: 2)

3

Front Wheelhouse Liner