Dash/Instrument Panel Foam Closeout Seal Distorted, Wavy, Loose and/or Seal Could Partially Cover VIN Plate (Replace Instrument Panel Outer Seal)

| Subject: | Dash/Instrument Panel Foam Closeout Seal Distorted, Wavy, Loose and/or Seal Could Partially Cover VIN Plate (Replace Instrument Panel Outer Seal) |
| Models: | 2004-2007 Chevrolet Colorado |
| 2004-2007 GMC Canyon |
Condition

Some customers may comment on a distorted, wavy, loose seal around the dash/instrument panel (IP) and the IP seal could partially cover the VIN plate as shown above.
Cause
The adhesive backing on the IP outer seal may become loose.
Correction
Replace the IP outer seal using the procedure listed below:
- Disable the SIR system. Refer to SIR Disabling and Enabling in SI.
- Remove the left and right windshield garnish moldings. Refer to Windshield Pillar Garnish Molding Replacement in SI.
- Remove the three upper IP trim covers and nuts located on the top of the IP pad.
- Remove the knee bolster trim panel. Refer to Driver Knee Bolster Panel Replacement in SI.
- Remove the knee bolster. Refer to Knee Bolster Replacement in SI.
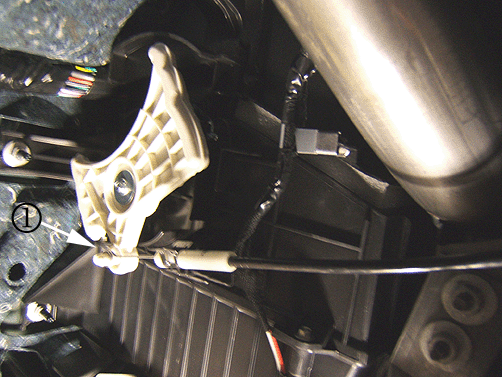
- Disconnect the HVAC mode cable (1) from the mode control cam.
- Disconnect the steering column electrical connectors.
- Remove the four steering column bolts and position the steering column assembly down onto the drivers floor.
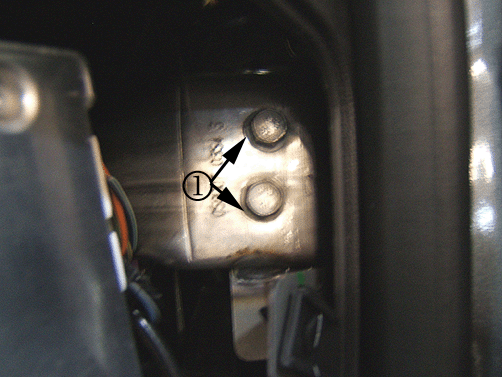
- Remove the two carrier bolts (1) from the brake pedal/steering column support bracket.
- Remove the left IP end trim panel.
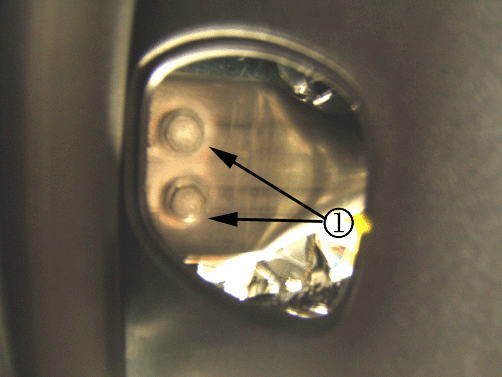
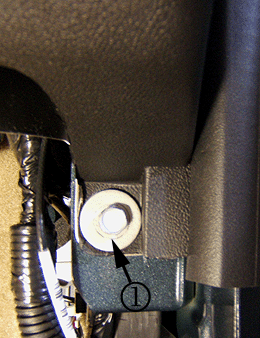
- Remove the two left carrier bolts (1).
- Remove the right IP end trim panel.
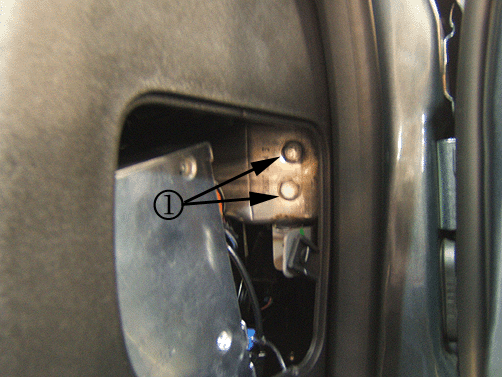
- Remove the two right carrier bolts (1).
- Remove the right front door sill plate. Refer to Front Door Sill Plate Replacement in SI.
- Remove the right hinge pillar trim panels. Refer to Body Hinge Pillar Trim Panel Replacement - Right Side in SI.
- Remove the right lower carrier bolt (1).
- Remove the lower center IP extension. Refer to Instrument Panel Lower Center Trim Replacement in SI.
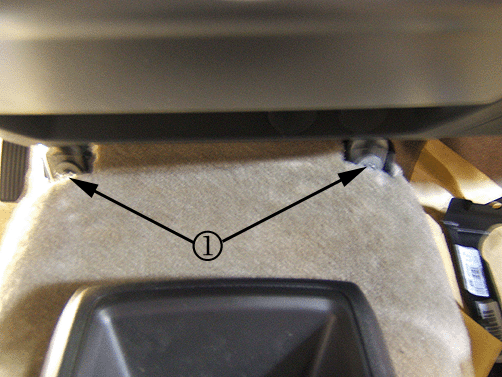
- Remove the two center lower carrier bolts (1).
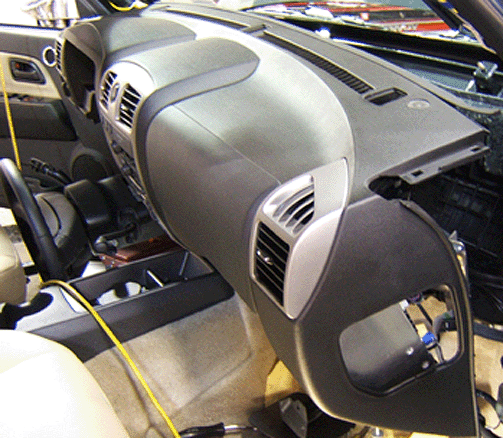
- Reposition the complete IP carrier assembly as shown above.
- Remove the old IP outer seal and discard.
- Cover and protect the rear and top of the IP panel before cleaning.
- Using a shop towel with Acrysol™ or equivalent applied, clean the IP pad sealing edge ONLY .
- Install the new IP outer seal starting at the right side of the instrument panel and working toward the left side while pushing down on the seal.
- Remove the cover and reposition the IP carrier assembly back into position with the help of an assistant.
- Verify the IP outer seal is not seen in the VIN plate area.
- Install the two right side IP carrier bolts and tighten.
- Install the right side IP end trim panel.
- Install the right lower carrier bolt and tighten.
- Install the right front door sill plate. Refer to Front Door Sill Plate Replacement in SI.
- Install the right hinge pillar trim panel. Refer to Body Hinge Pillar Trim Panel Replacement - Right Side in SI.
- Install the two lower center IP carrier bolts and tighten.
- Install the lower center IP extension. Refer to Instrument Panel Lower Center Trim Replacement in SI.
- Install the two carrier bolts to the brake pedal/steering column support bracket.
- Install the steering column and the four steering column bolts.
- Tighten the steering column bolts.
- Connect the steering column electrical connectors.
- Connect the HVAC mode cable to the mode control cam.
- Install the knee bolster. Refer to Knee Bolster Replacement in SI.
- Install the knee bolster trim panel. Refer to Driver Knee Bolster Panel Replacement in SI.
- Install the three upper IP nuts located on the top of the IP and tighten.
- Install the three upper IP trim covers located on the top of the IP.
- Install the two left side IP carrier bolts and tighten.
- Install the left side IP end trim panel.
- Install the left windshield garnish molding. Refer to Windshield Pillar Garnish Molding Replacement in SI.
- Enable the SIR system. Refer to SIR Disabling and Enabling in SI.
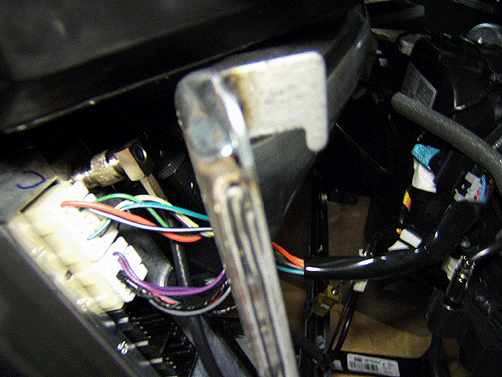
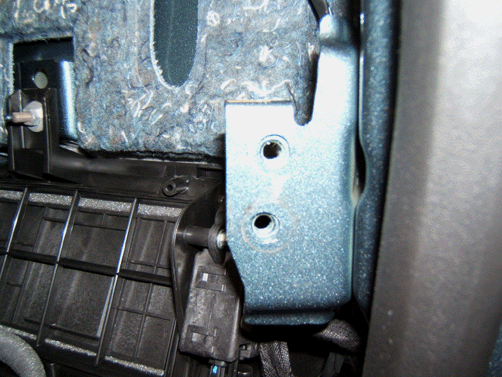
Important: You may need an assistant to help lift up and pull back on the IP carrier assembly to release the attaching hook from the right side bracket. The hook on the IP carrier and the sheet metal bracket are shown above.
Tip
A heat gun may be used to help remove the old seal and glue, if necessary.
Important: The notched portion of the seal is for the VIN plate. Make sure the adhesive backing on the foam seal is adhering to the IP pad edge. If the seal is not adhering, reclean the sealing area with denatured alcohol and install the seal.
Tighten
Tighten the bolts to 20 N·m (15 lb ft).
Tighten
Tighten the bolt to 9 N·m (80 lb in).
Tighten
Tighten the bolts to 9 N·m (80 lb in).
Tighten
Tighten the bolts to 20 N·m (15 lb ft).
Tighten
Tighten the bolts to 27 N·m (20 lb ft).
Tighten
Tighten the nuts to 9 N·m (80 lb in).
Tighten
Tighten the bolts to 20 N·m (15 lb ft).
Parts Information
Part Number | Description | Qty |
|---|---|---|
15197840 | Seal, IP Outer | 1 |
Warranty Information
For vehicles repaired under warranty, use:
Labor Operation | Description | Labor Time |
|---|---|---|
C9790* | I/P Outer Seal - Replace | 1.2 hrs |
*This is a unique labor operation for bulletin use only. This number will not be published in the Labor Time Guide. | ||
