For 1990-2009 cars only
Removal Procedure
Warning: Refer to Fuel and Evaporative Emission Pipe Warning in the Preface section.
Warning: Refer to Gasoline/Gasoline Vapors Warning in the Preface section.
Caution: Refer to Fuel and Evaporative Emission Hose/Pipe Connection Cleaning Caution in the Preface section.
Caution:
• Do not attempt to straighten kinked nylon pipes. Replace any kinked nylon pipes in order to prevent damage to the vehicle. • Do not attempt to repair sections of nylon pipes. Replace damaged nylon pipes. • Replace the vapor hoses/pipes with original equipment or parts that meet GM specifications.
- Remove the fuel tank. Refer to Fuel Tank Replacement.
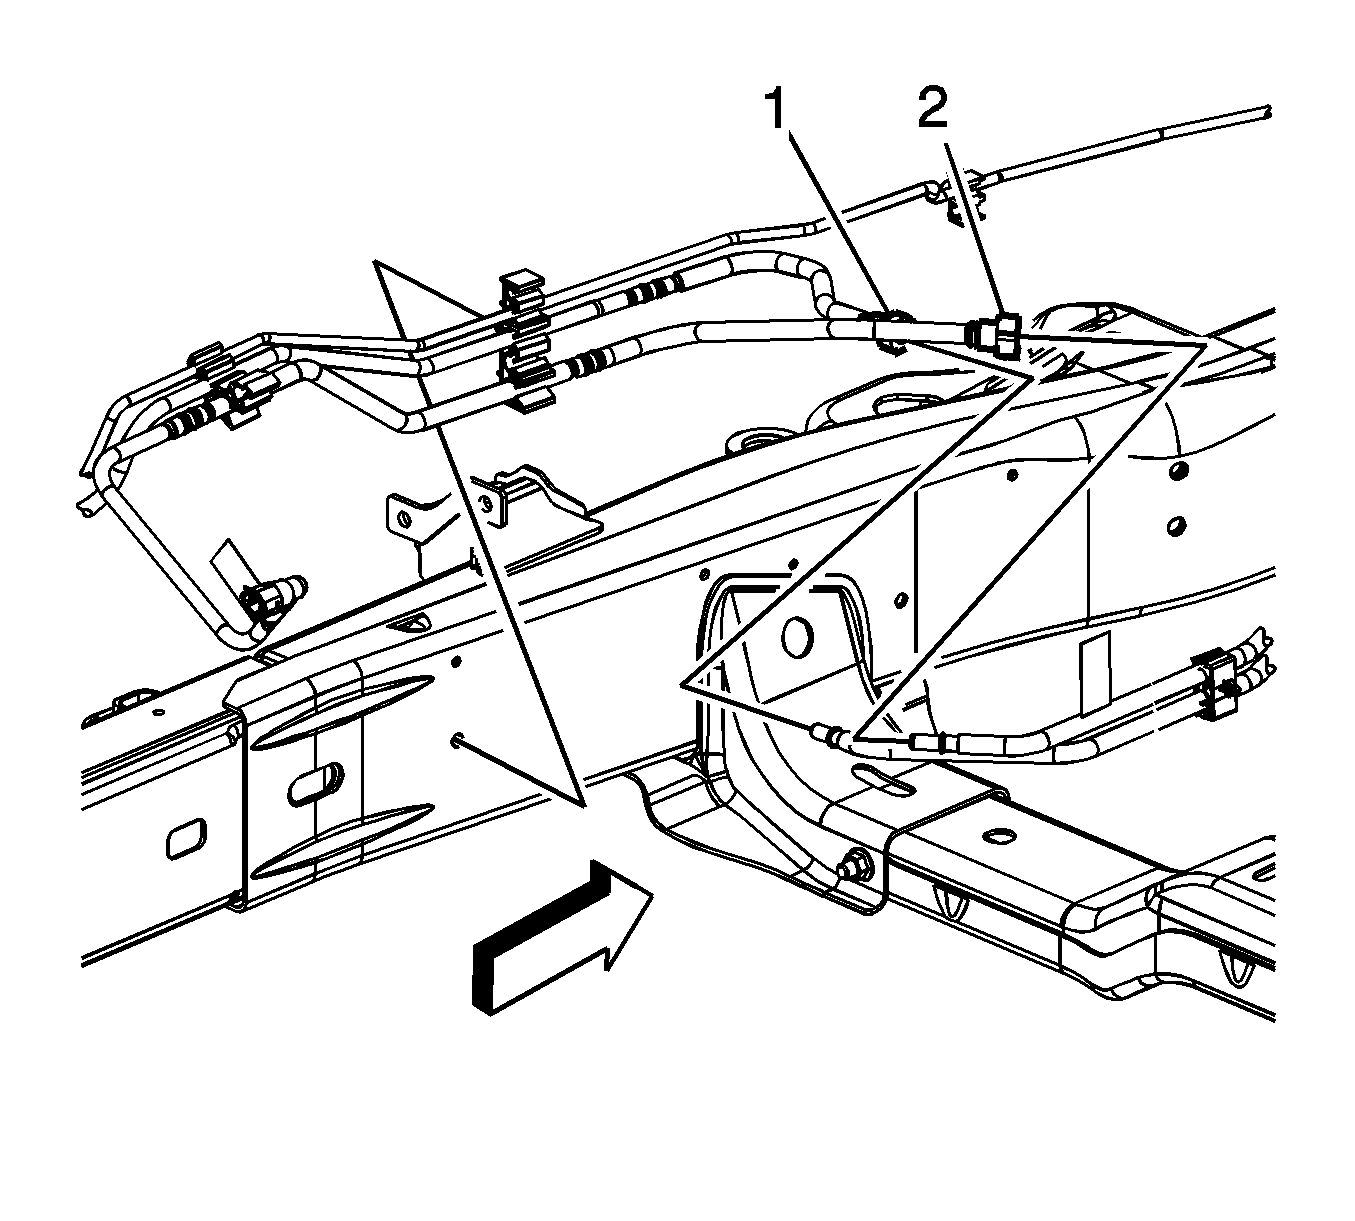
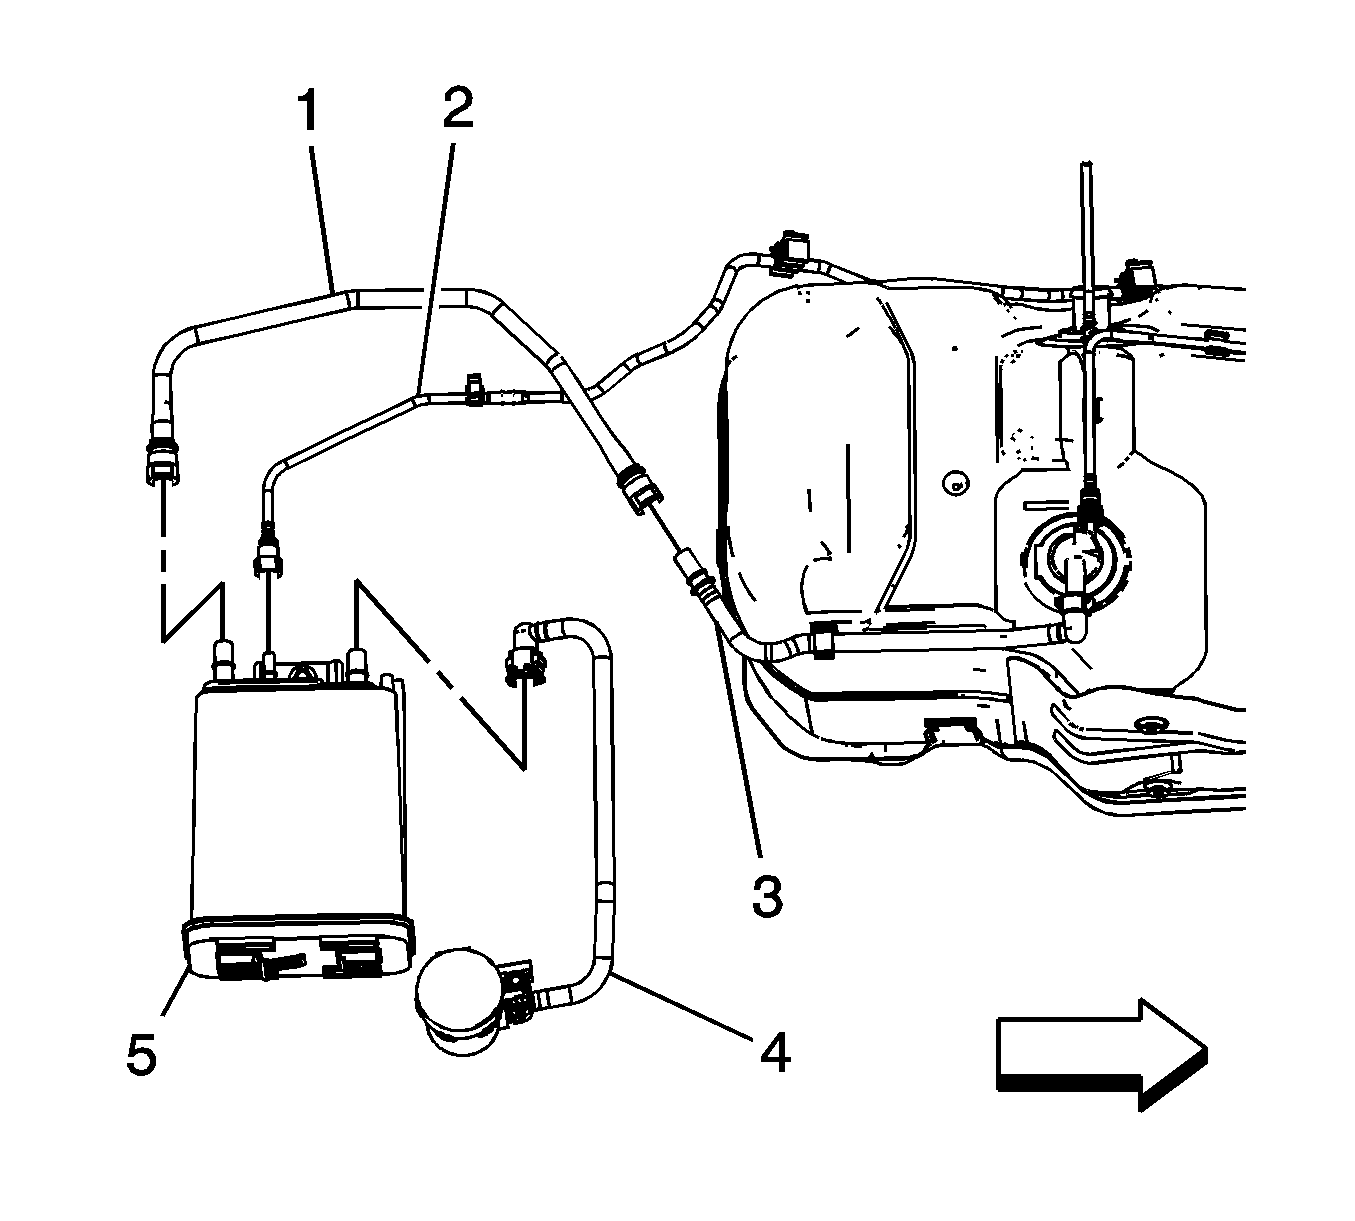
- Disconnect the chassis evaporative emission (EVAP) line quick connect fitting (1) from the engine EVAP line. Refer to Plastic Collar Quick Connect Fitting Service.
- Disconnect the chassis EVAP line (2) quick connect fitting from the EVAP canister (5). Refer to Plastic Collar Quick Connect Fitting Service.
- Disengage the chassis EVAP line from the frame clips.
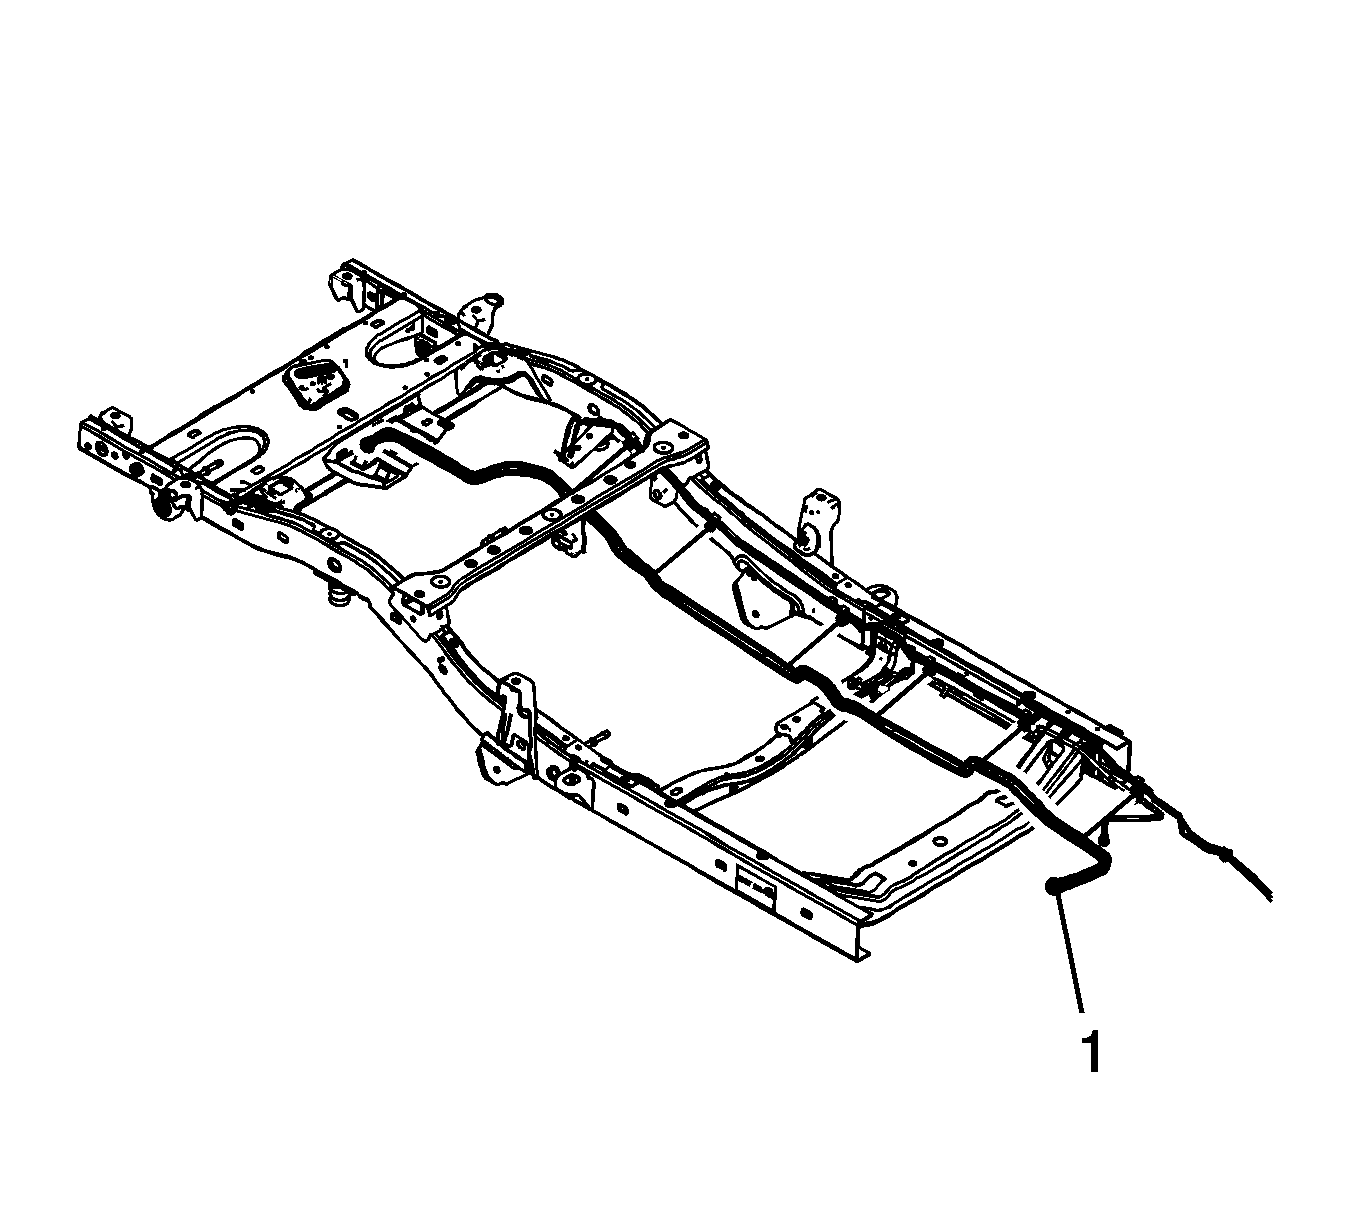
- Remove the chassis EVAP line (1) from the vehicle.


Installation Procedure
- Position the chassis EVAP line (1) to the vehicle along the frame.
- Secure the chassis EVAP line to the frame clips.
- Connect the chassis EVAP line (2) quick connect fitting to the EVAP canister (5). Refer to Plastic Collar Quick Connect Fitting Service.
- Connect the chassis EVAP line quick connect fitting (1) to the engine EVAP line. Refer to Plastic Collar Quick Connect Fitting Service.
- Install the fuel tank. Refer to Fuel Tank Replacement.


