For 1990-2009 cars only
- Lubricate the balance shaft bearing journals with clean engine oil.
- Install NEW balance shaft assemblies with the counterweight down to prevent damage to the balance shaft bearings.
- Install NEW left balance shaft assembly retaining bolts. Tighten the NEW left balance shaft assembly retaining bolts to 10 N·m (89 lb in).
- Install the balance shaft chain guide.
- Install the balance shaft chain guide bolts. Tighten the balance shaft chain guide bolts to 10 N·m (89 lb in).
- Install the balance shaft chain onto the balancer sprockets and crankshaft sprocket.
- Rotate the crankshaft until the left hand balance shaft sprocket timing mark is at 12:00. The right hand balance shaft sprocket timing mark should be at 2:30. The crankshaft sprocket mark should be at 4:30. Make sure the 3 timing marks on the sprockets (1) line up with a dark link on the chain. Every 11 crankshaft rotations, 3 of the 5 dark links on the chain will line up with the timing marks.
- Rotate the retainer plate clockwise while holding the chain onto the crankshaft sprocket.
- Install NEW right balance shaft assembly retaining bolts. Tighten the NEW right balance shaft assembly retaining bolts to 12 N·m (106 lb in).
- Install the balance shaft chain tensioner and bolts. Tighten the balance shaft chain tensioner bolts to 10 N·m (89 lb in).
- Remove the small tool from the link plate hole in order to regain chain tension.
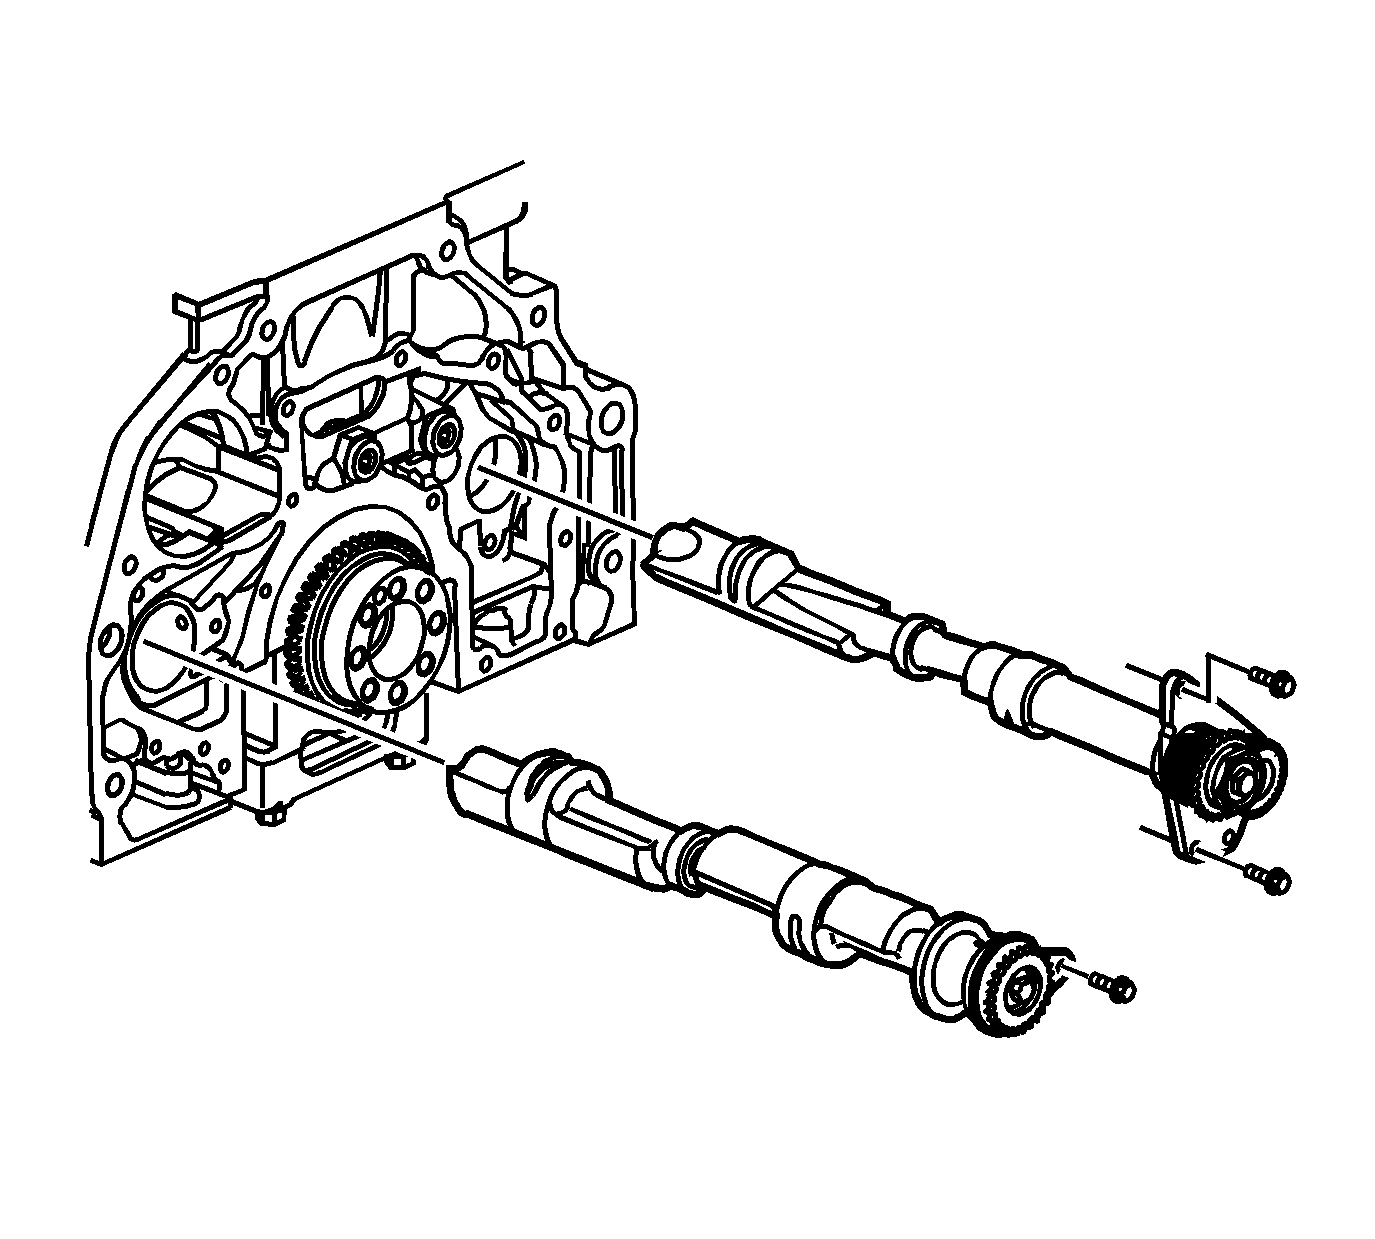
Note: Do not disassemble the balance shaft assemblies. Remove and install the balance shafts as complete assemblies.
Caution: Refer to Fastener Caution in the Preface section.
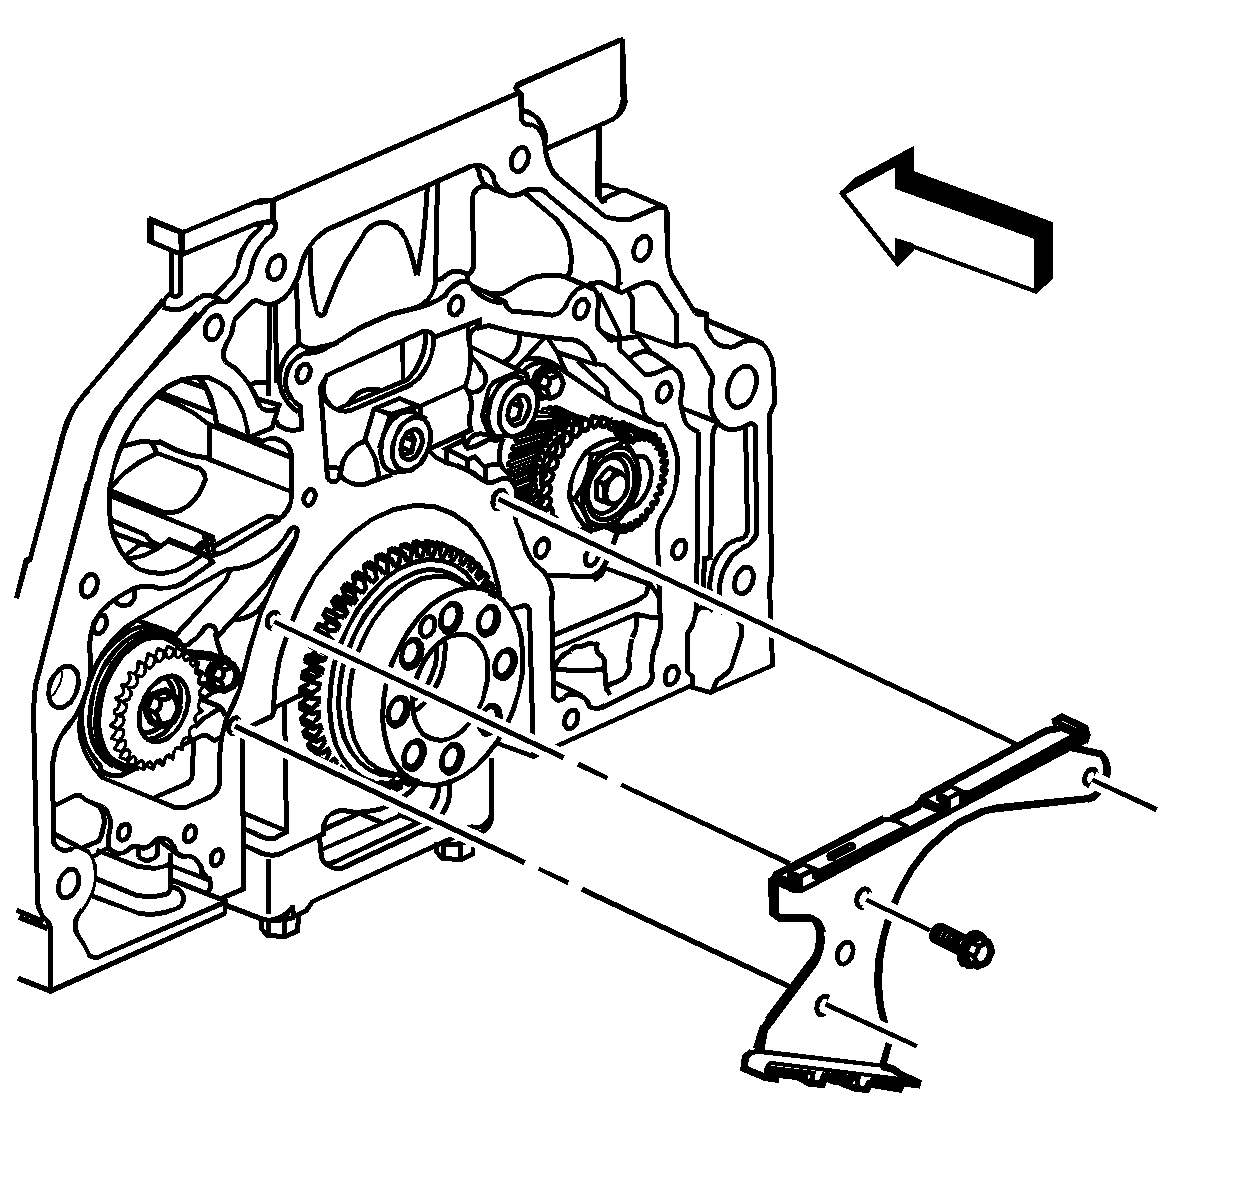
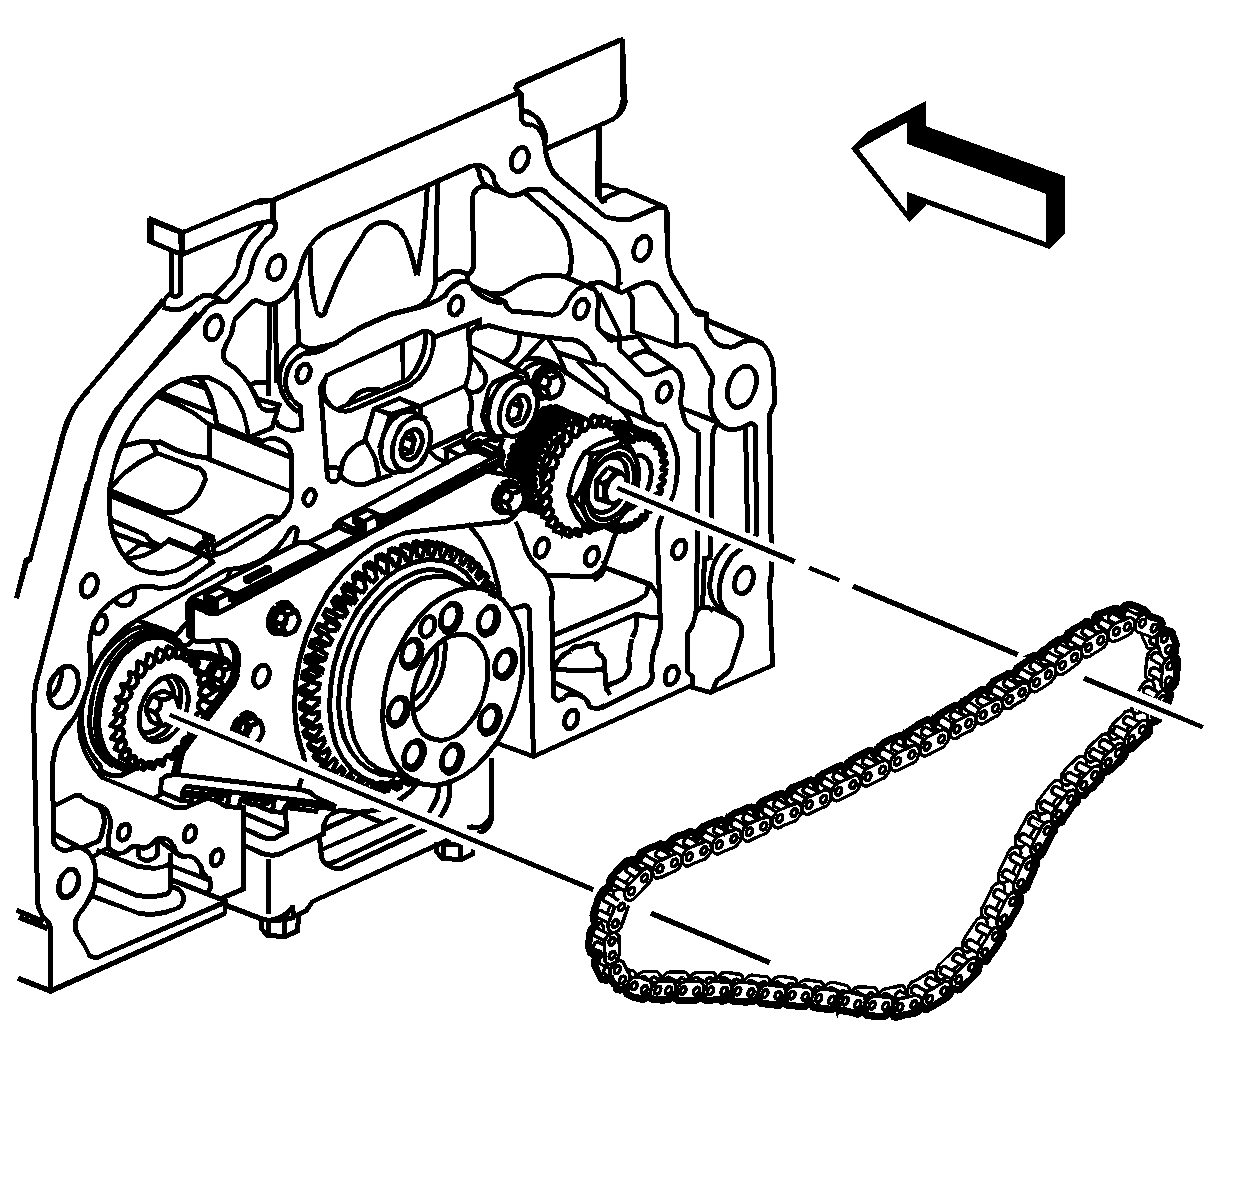
Note: Rotate the right balance shaft retainer plate counter-clockwise to allow chain installation over all 3 sprockets.
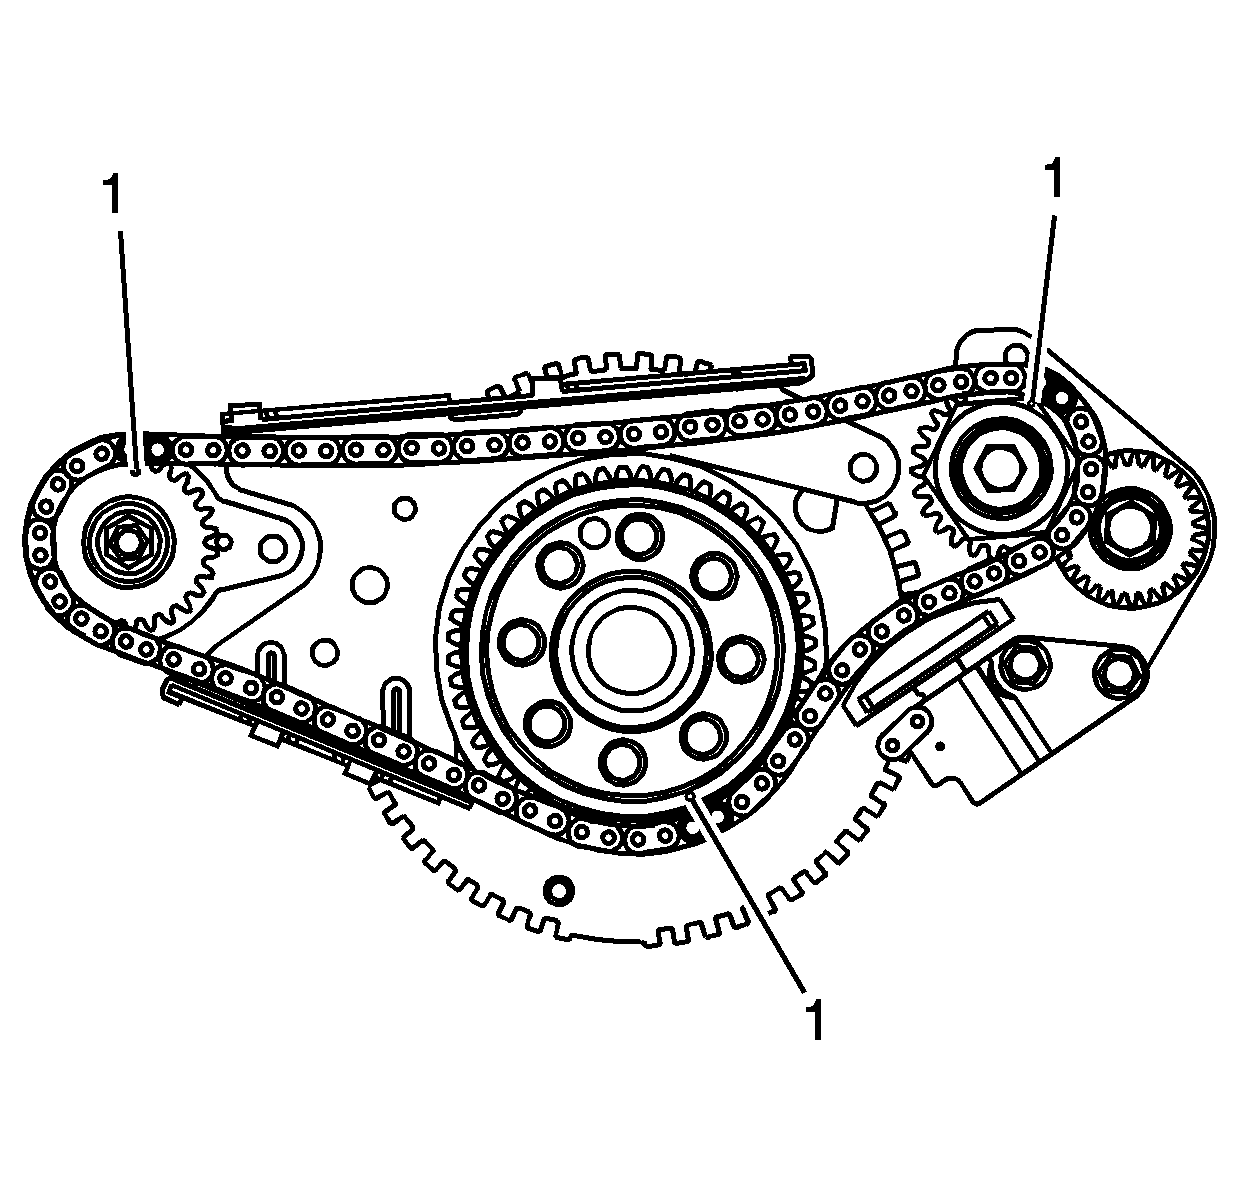
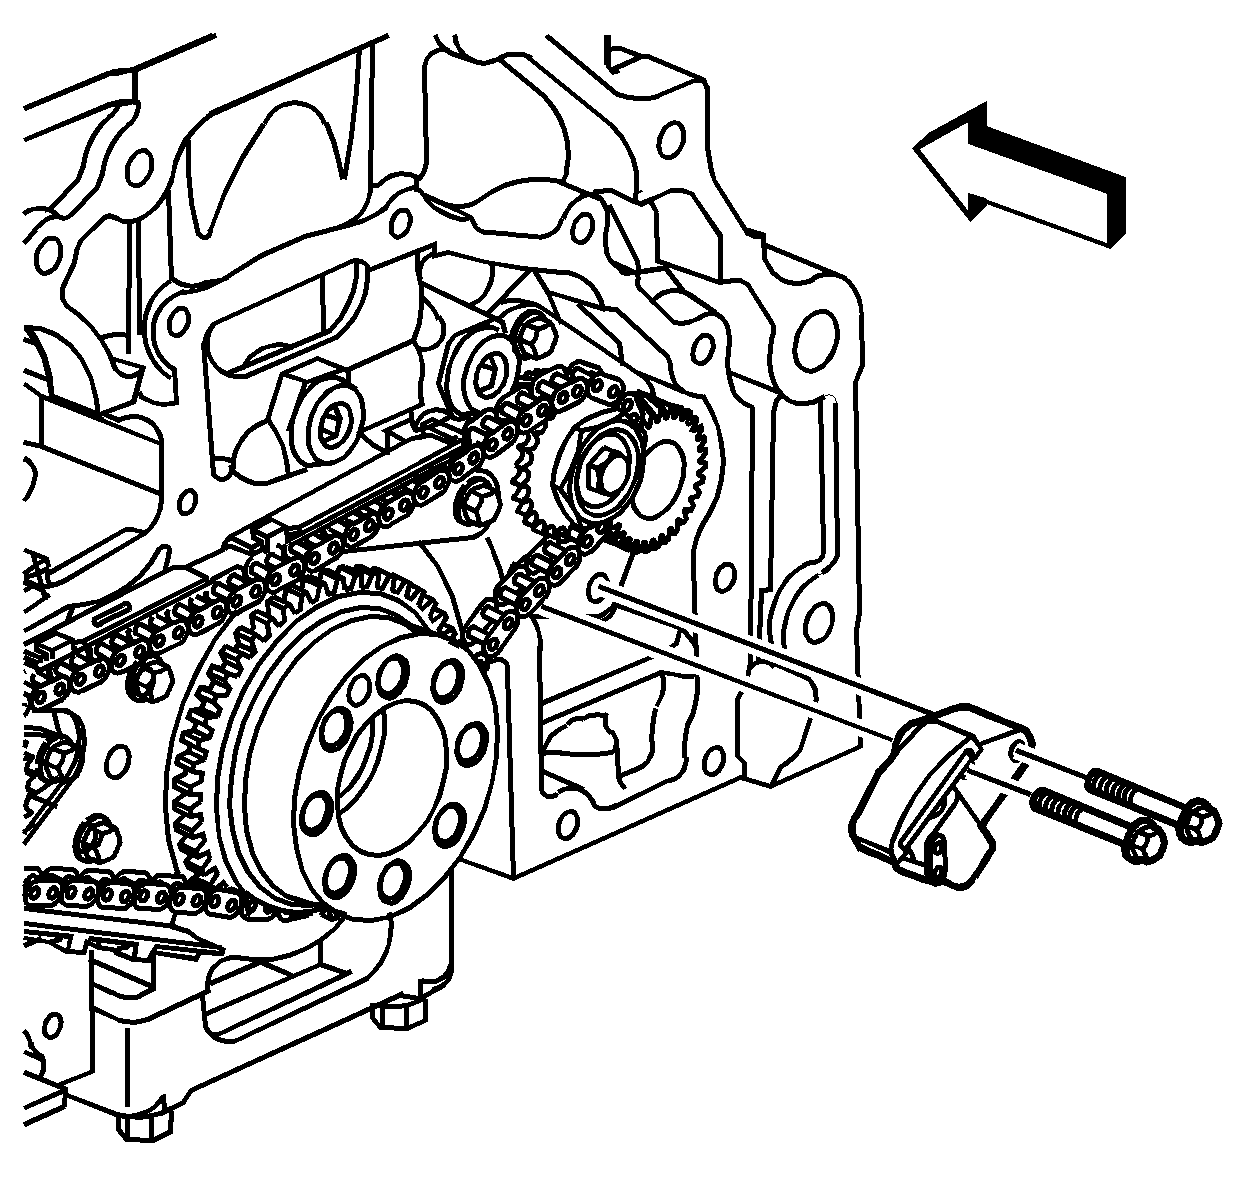
Note: Do not force the tensioner to the next notch by pushing up on the tensioner shoe. This will over-tension the chain and may result in a whine noise.
