For 1990-2009 cars only
Reverse/5th Gear Synchronizer
- Install the springs to the inserts and slide the inserts into the reverse gear outer blocking ring.
- Install the reverse/5th gear inner blocking ring (278) to the reverse/5th gear internal blocking ring (277).
- Turn the inner ring (278) to attach to the internal ring (277). Align the tabs 90 degrees from the slots.
- Install the 5th gear outer blocking ring on the reverse/5th gear internal and inner rings. Align the outer ring lugs to be in between the locking tabs on the inner ring.
- Install the reverse/5th rings to the reverse gear outer blocking ring.
- Rotate both the inner and internal rings to lock the inner ring tabs to the reverse gear outer blocking ring.
- While pushing the 3 inserts, install the 5th/reverse blocking ring assembly to the 5th/reverse synchronizer sleeve. The shoulder of the sleeve with the step goes forward. The rings are installed from the rear side.
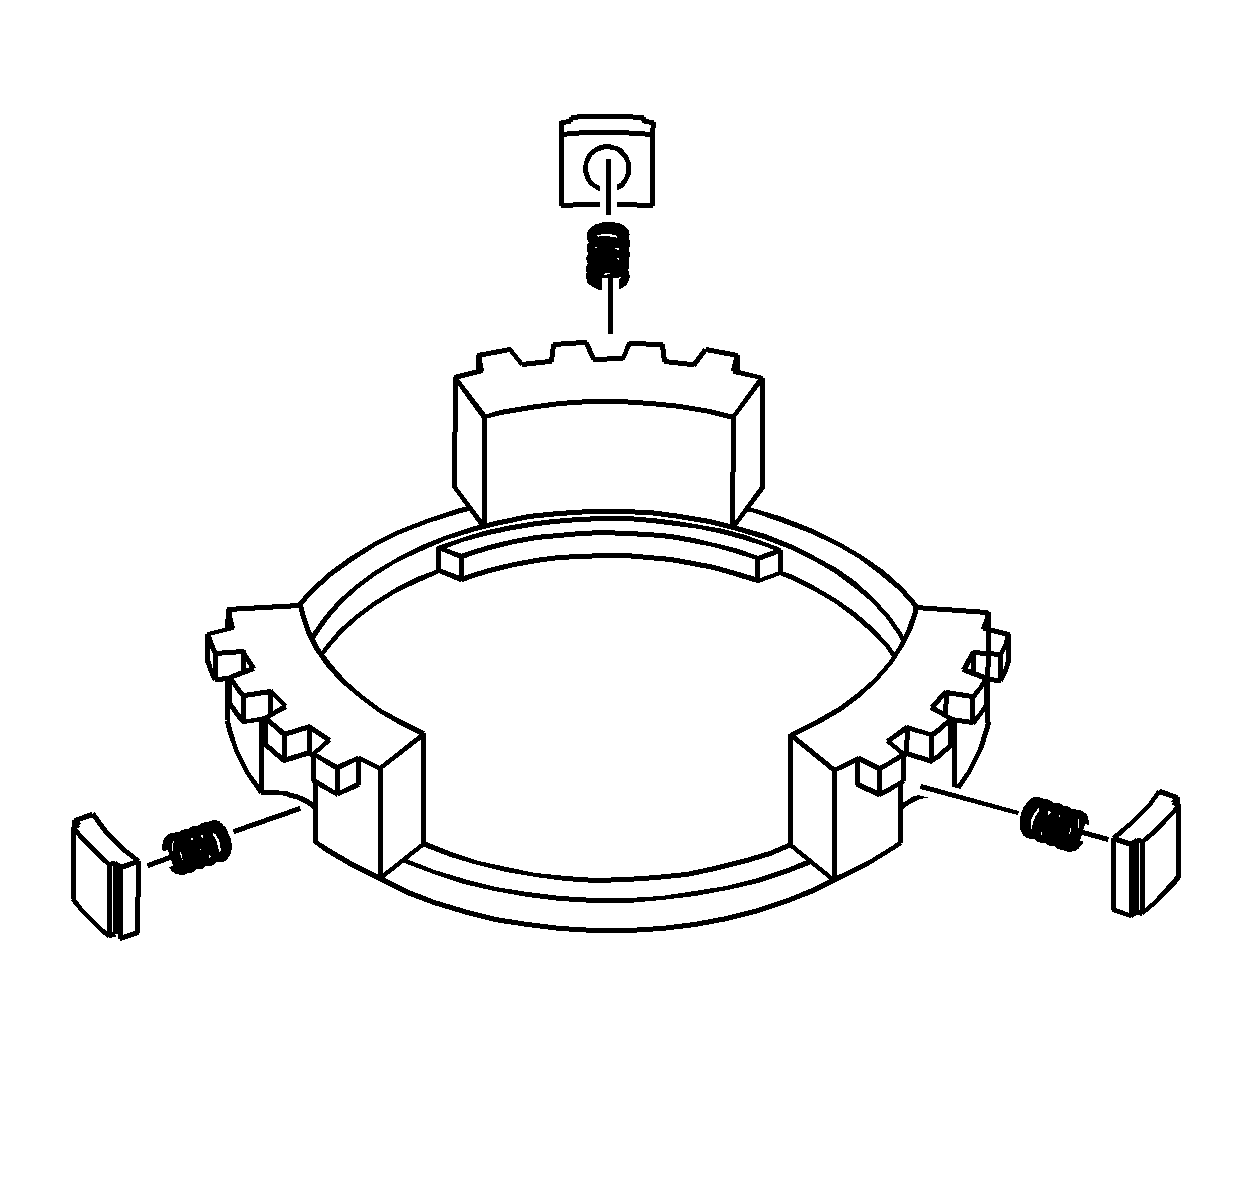
Important: Lubricate the synchronizer parts with transmission fluid during assembly.
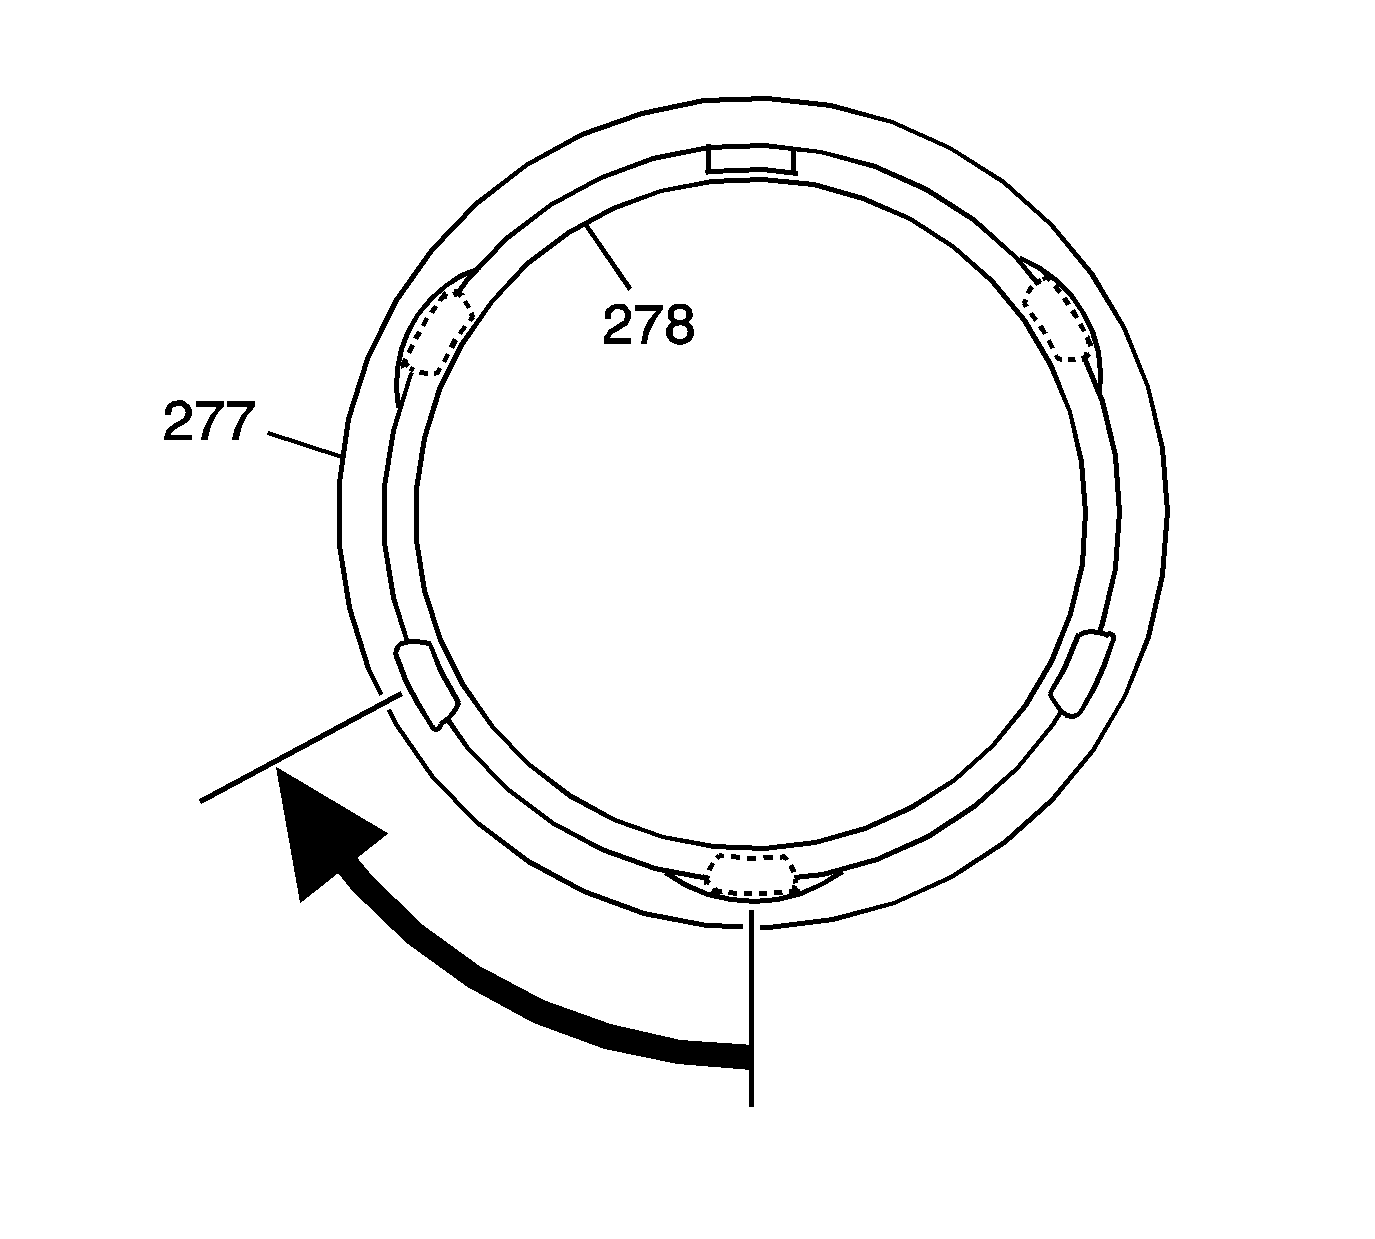
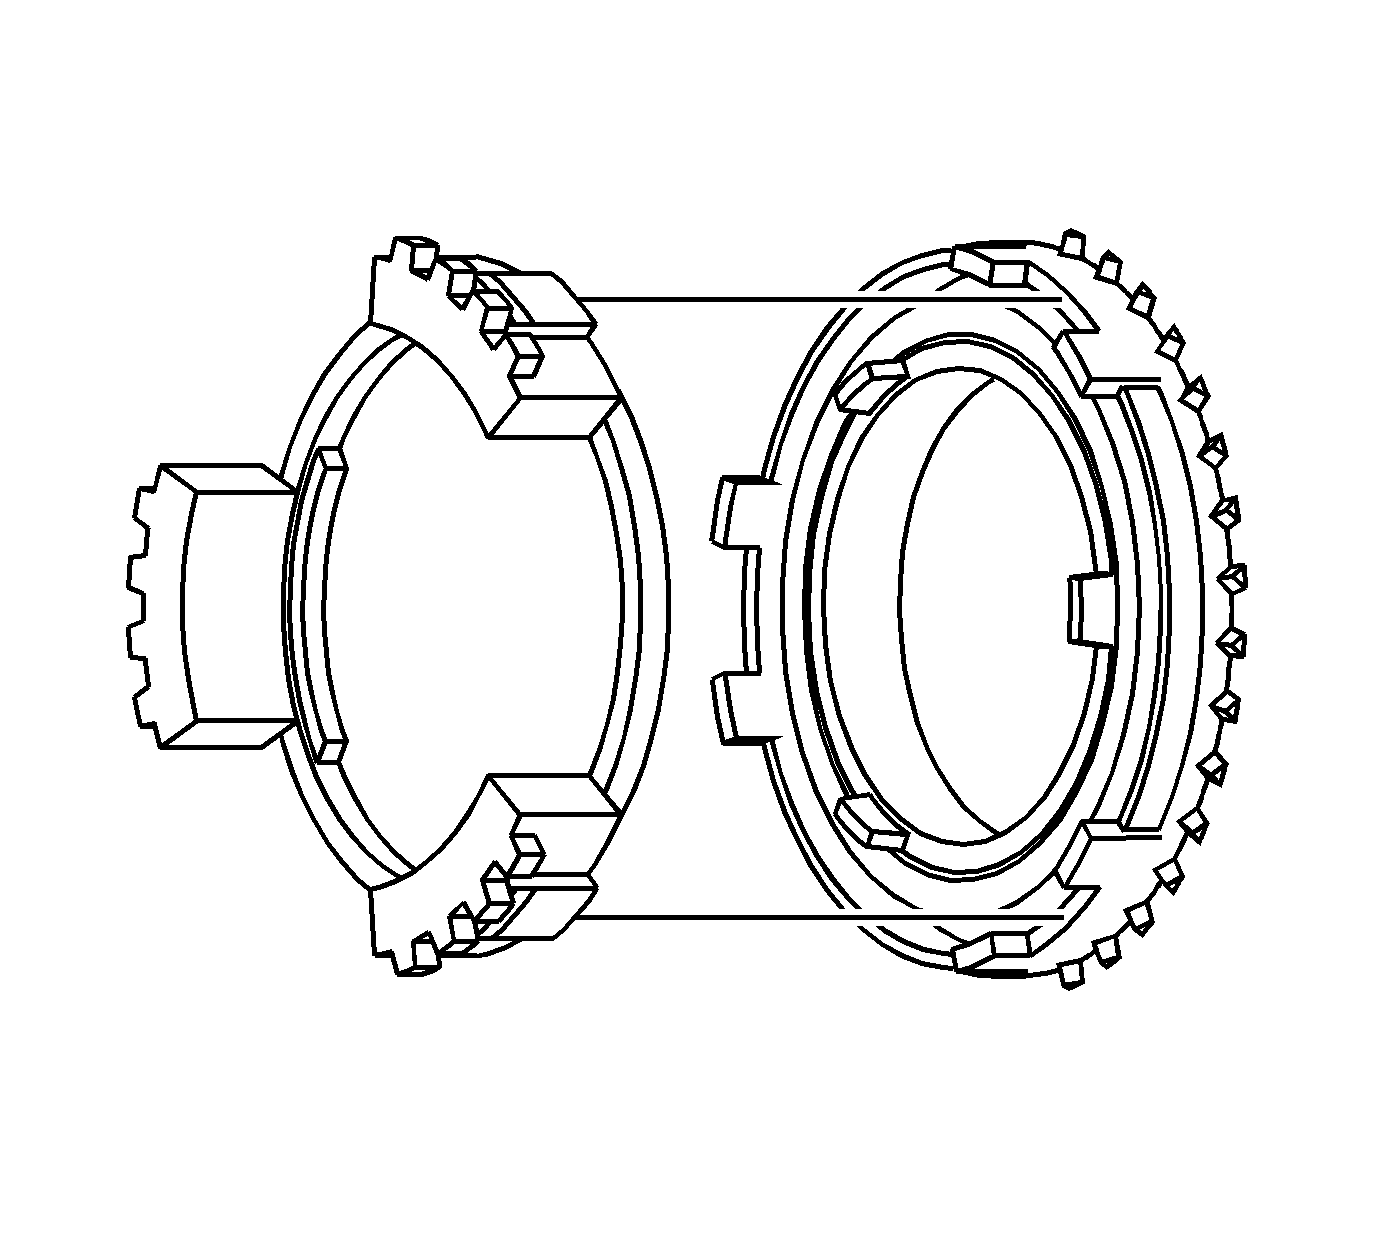
| • | The outer ring lugs align the reverse ring lugs. |
| • | The inner ring locking tabs will be in the release position on the reverse ring. |
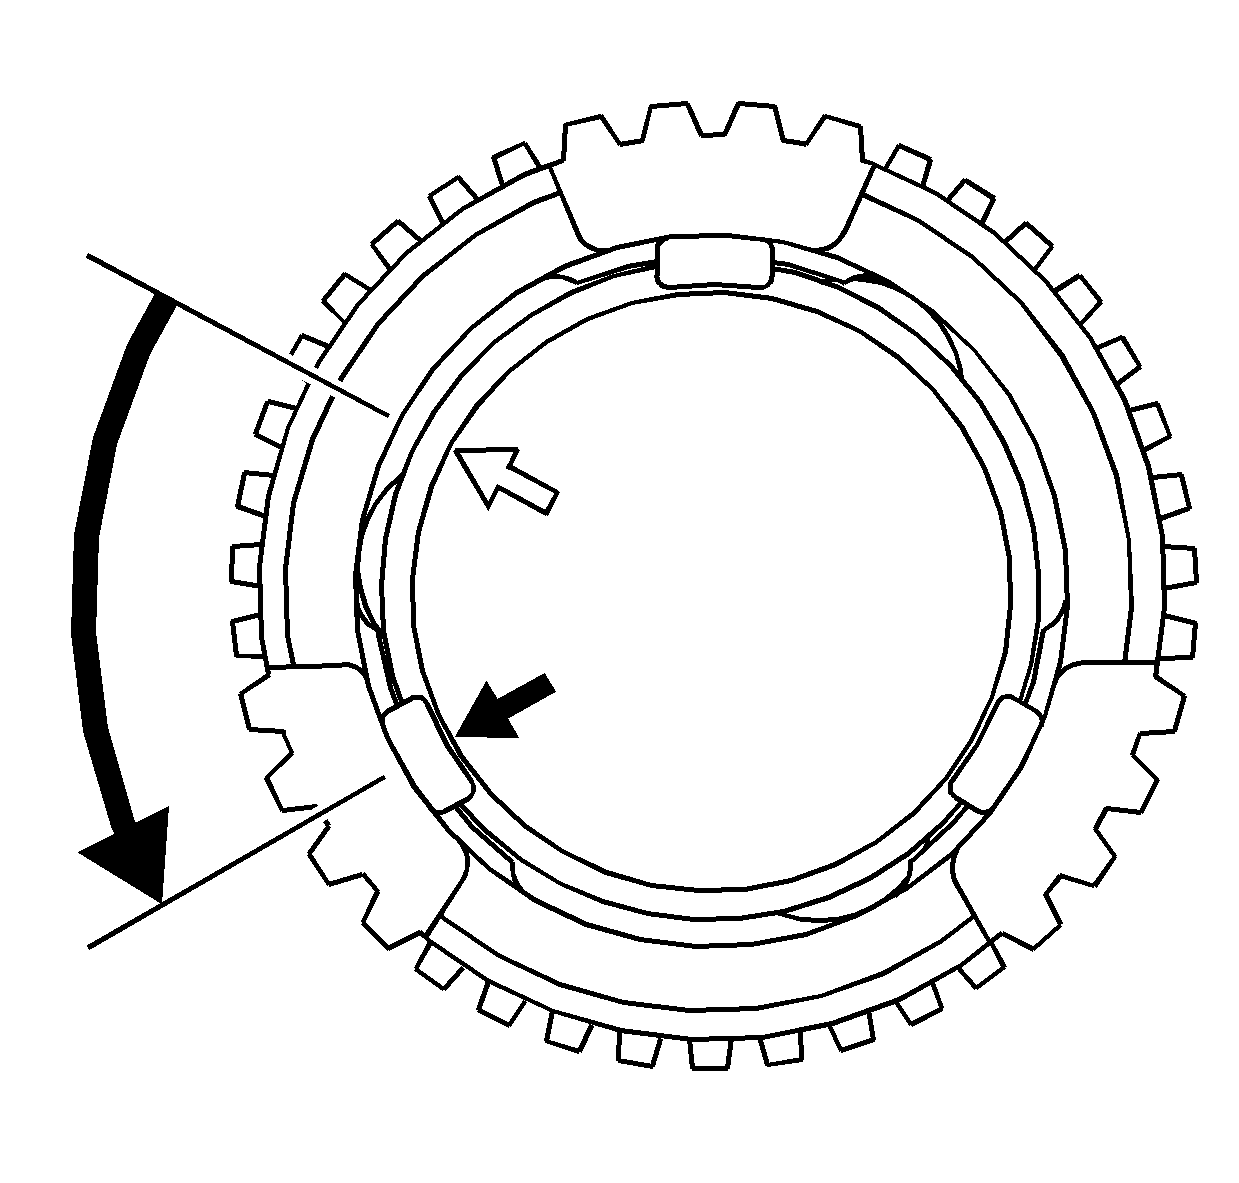
| • | The inner ring should still be locked to the internal ring. |
| • | All of the 5th/reverse blocking rings should stay together as an assembly if properly locked. |
3rd/4th Gear Synchronizer
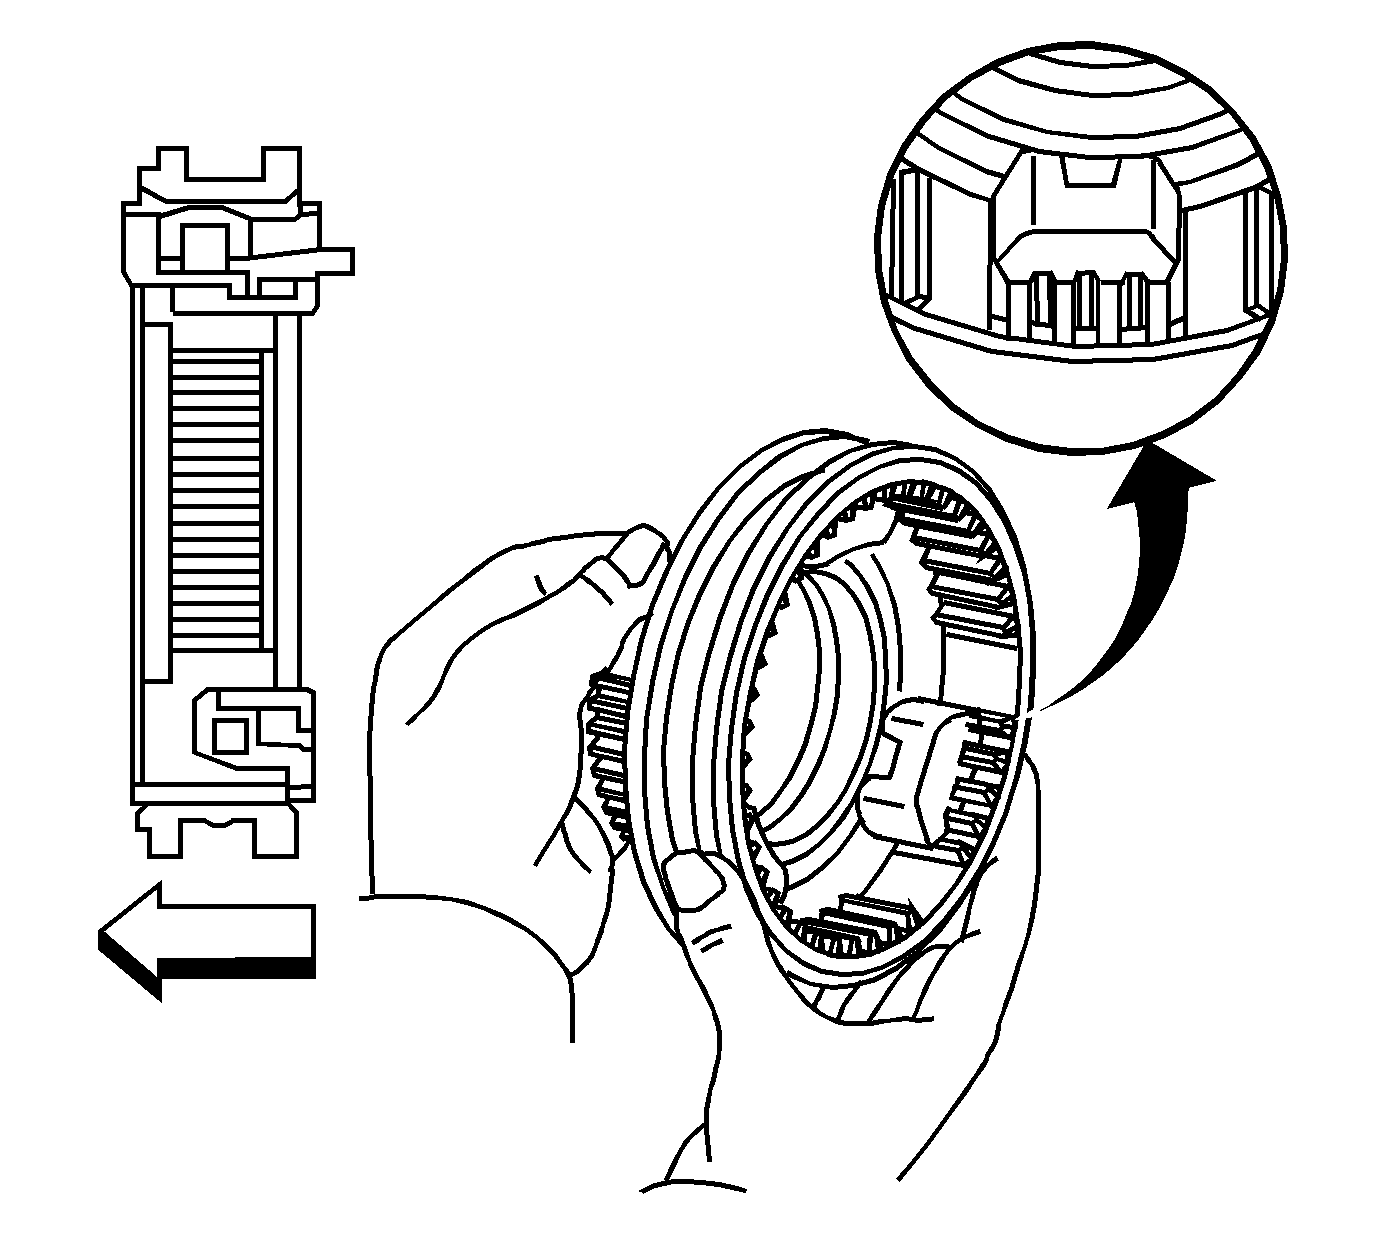
- Install the synchronizer spring in the hole of a new 3rd/4th gear synchronizer hub.
- Slide the insert in while pushing down on the spring.
- Install the 3rd/4th synchronizer sleeve on the hub while pushing in the inserts.
- Install the following components to the 3rd/4th gear synchronizer hub (235):
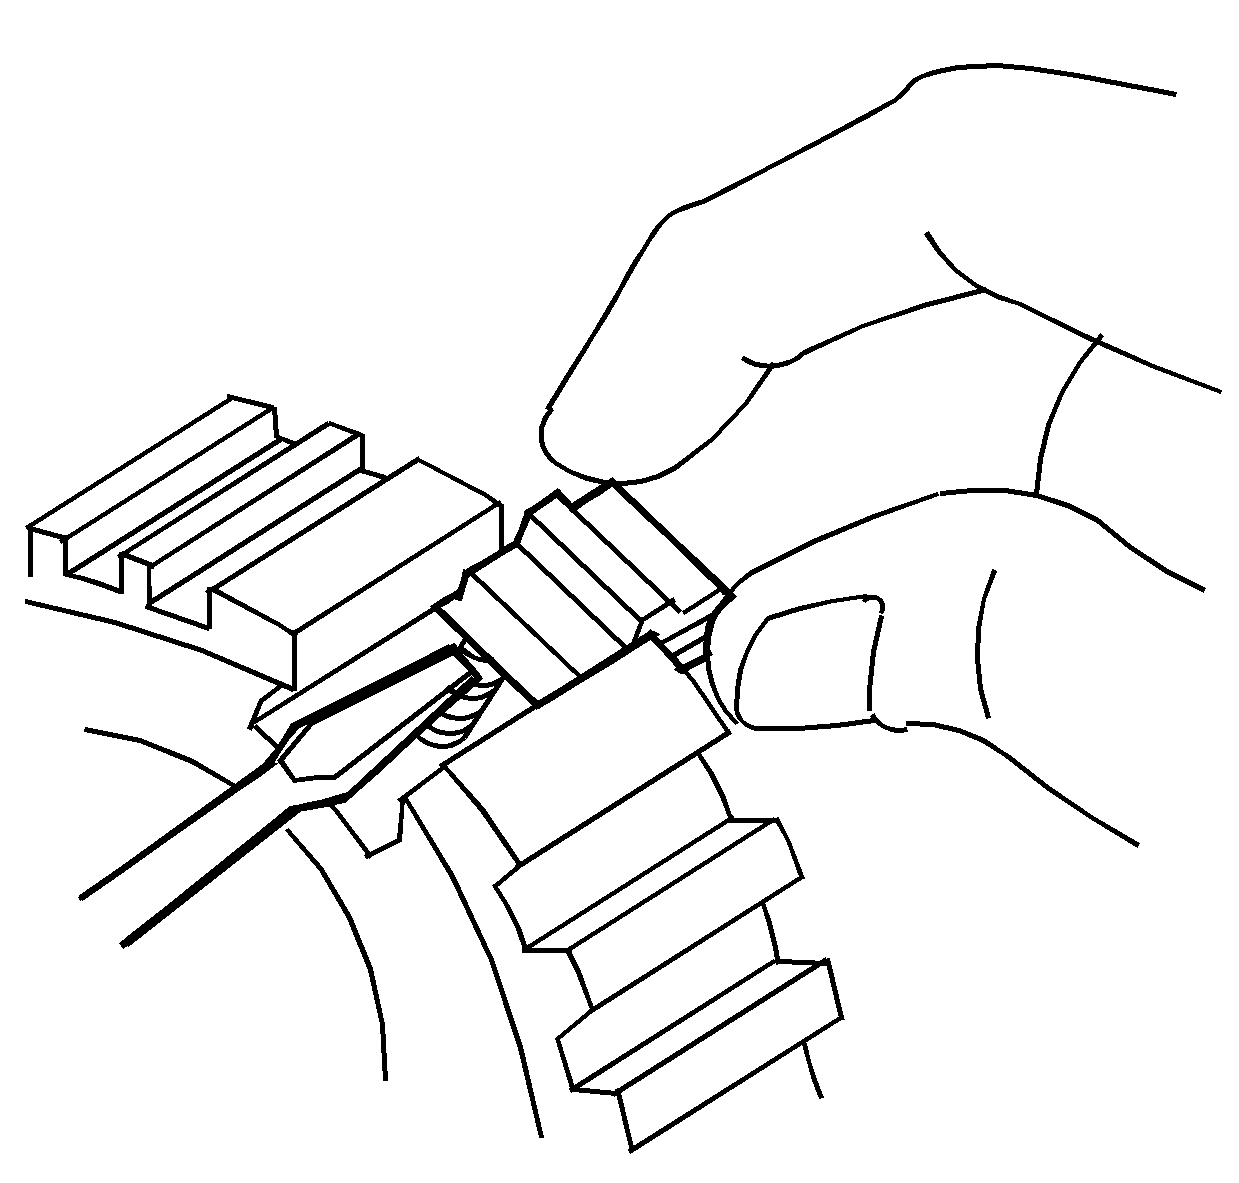
Important: The 3rd/4th gear synchronizer hub cannot be used again after removal. Always install a new hub.
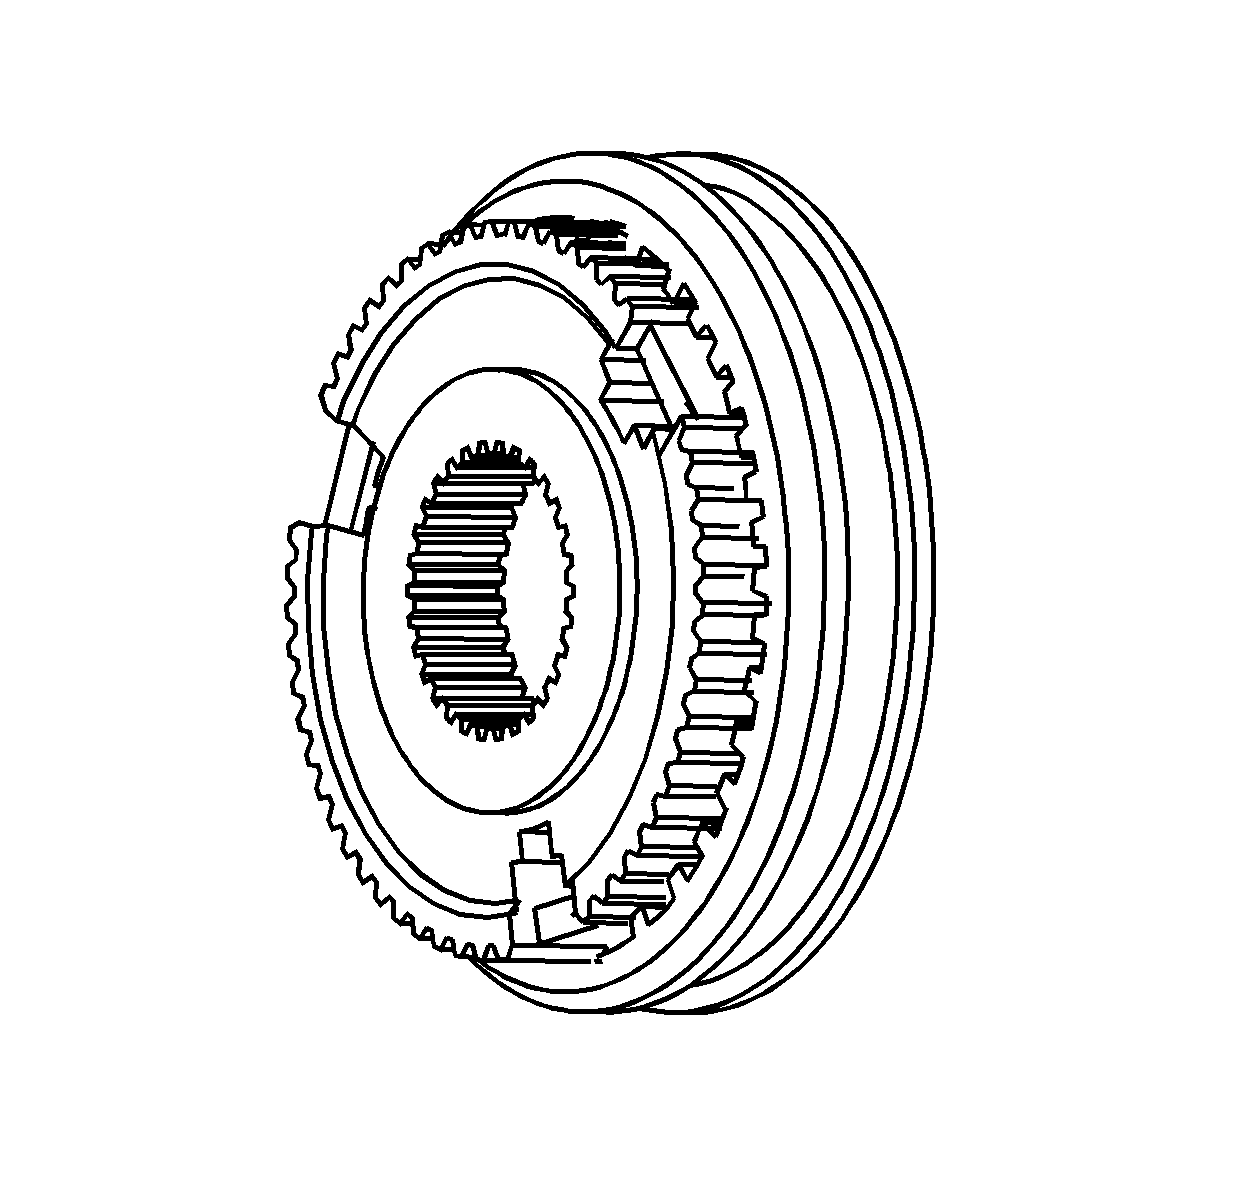
| • | The shoulder of the sleeve with the step goes forward, 4th gear side. |
| • | The smooth side of the hub, without the indents for synchronizer tabs, is the 4th gear side. |
| • | Align the inserts with the non-tooth areas of the sleeve. |
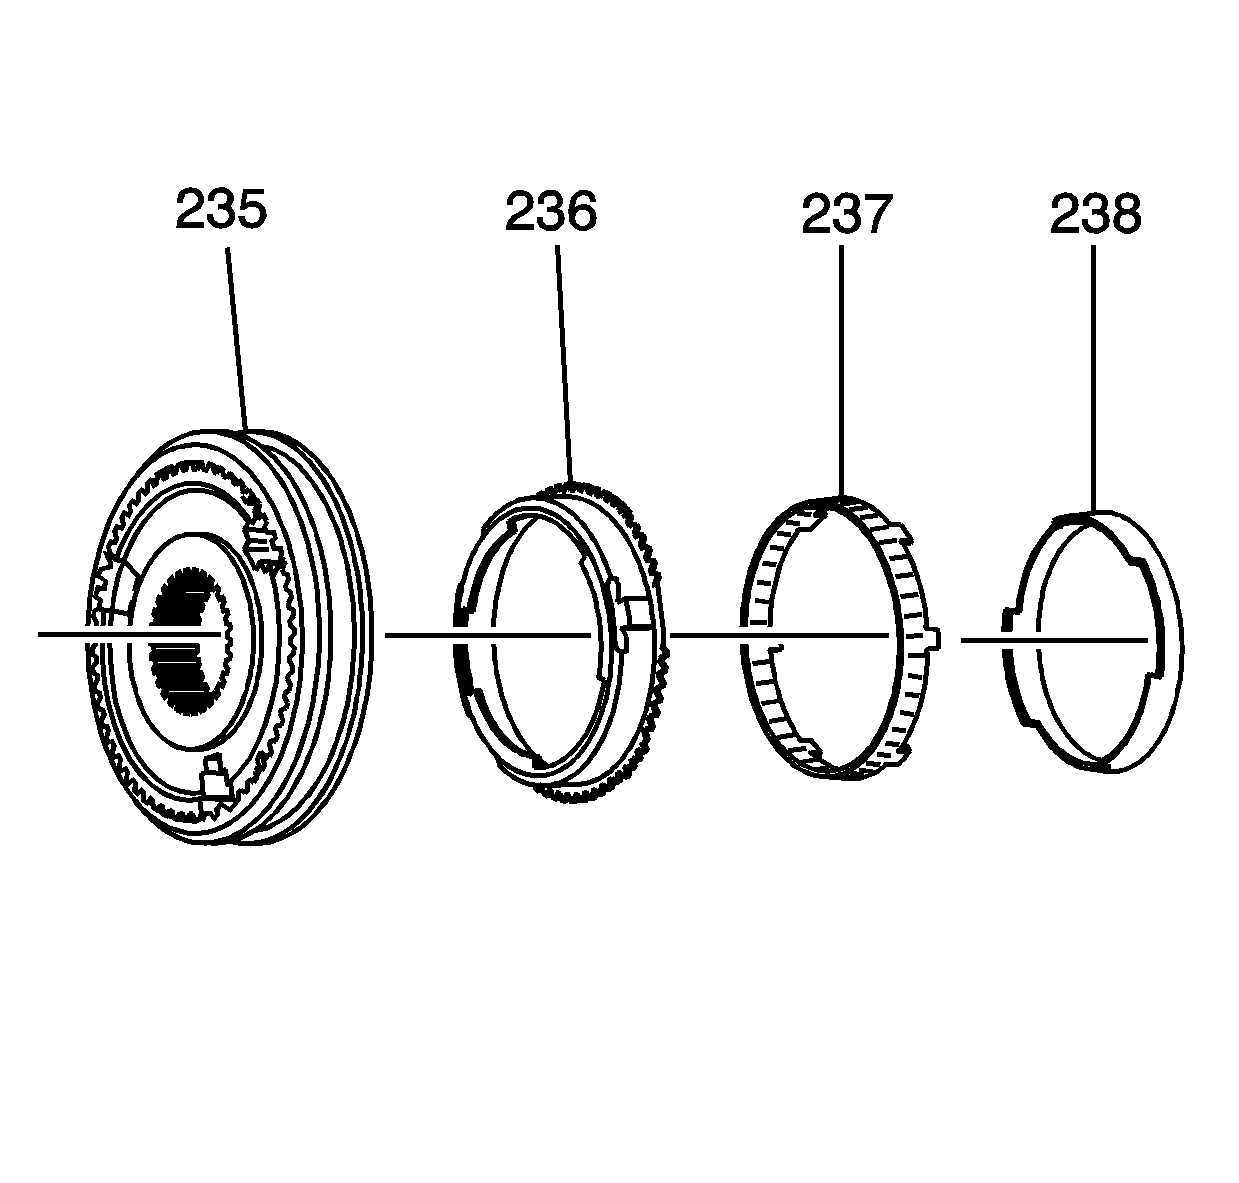
| 4.1. | The 3rd gear outer blocking ring (236) |
Ensure the tabs align in the hub.
| 4.2. | The 3rd gear internal blocking ring (237) |
| 4.3. | The 3rd gear inner blocking ring (238) |
Ensure the tabs align in the hub
The 4th gear blocking ring is installed with the input gear.
1st/2nd Gear Synchronizer
- Install the synchronizer spring in the hole of the 1st/2nd gear synchronizer hub.
- Slide the insert in while pushing down on the spring.
- Install the reverse gear on the hub while pushing in the inserts.
- Install the following components to the 1st/2nd gear synchronizer hub (215). Ensure the tabs on the rings are aligned with the notches in the hub.

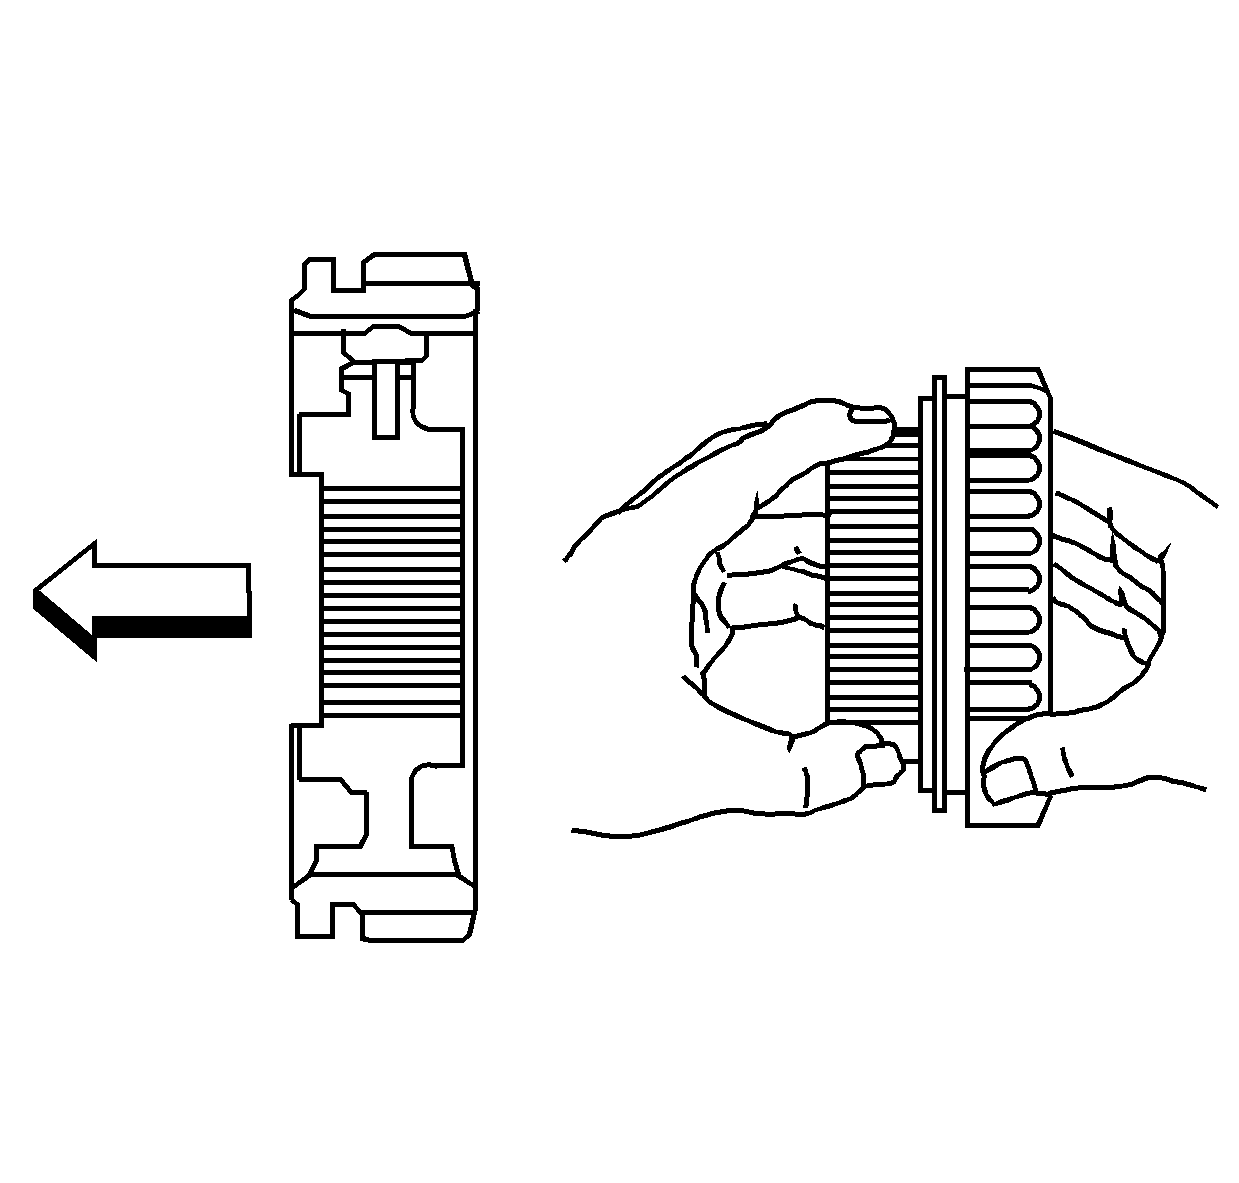
| • | The forward, 2nd gear, side of the reverse gear has the shift fork groove. |
| • | The 2nd gear side of the hub has the internal splines indented from the thrust surface. |
| • | Align the inserts with the non-tooth areas of the sleeve. |
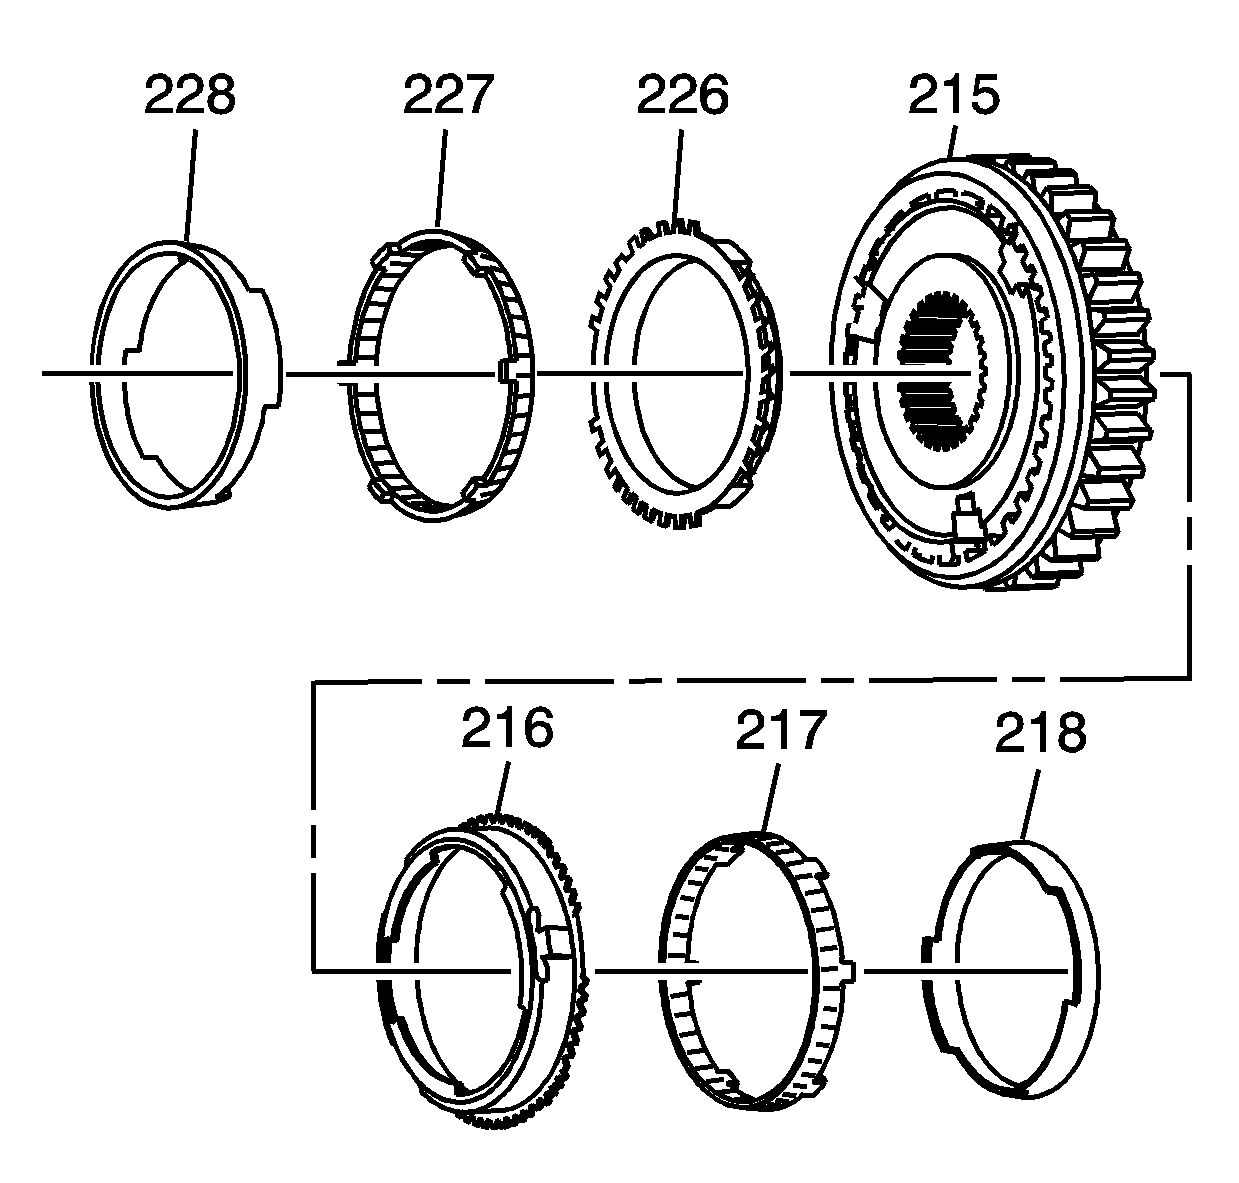
Important: When you service the synchronizers, retain them in the order that they are removed. Keep the synchronizer components together and mark to identify the correct location.
| • | The 2nd gear inner blocking ring (228) |
| • | The 2nd gear internal blocking ring (227) |
| • | The 2nd gear outer blocking ring (226) |
| • | The 1st gear outer blocking ring (216) |
| • | The 1st gear internal blocking ring (217) |
| • | The 1st gear inner blocking ring (218) |
