For 1990-2009 cars only
Crossmember Replacement Early Design
Removal Procedure
- Raise the vehicle. Refer to Lifting and Jacking the Vehicle in General Information.
- Remove the coupler clamp bolt from the intermediate shaft. Refer to Lower Intermediate Steering Shaft Replacement in Steering Wheel and Column.
- Separate the intermediate shaft from the steering gear.
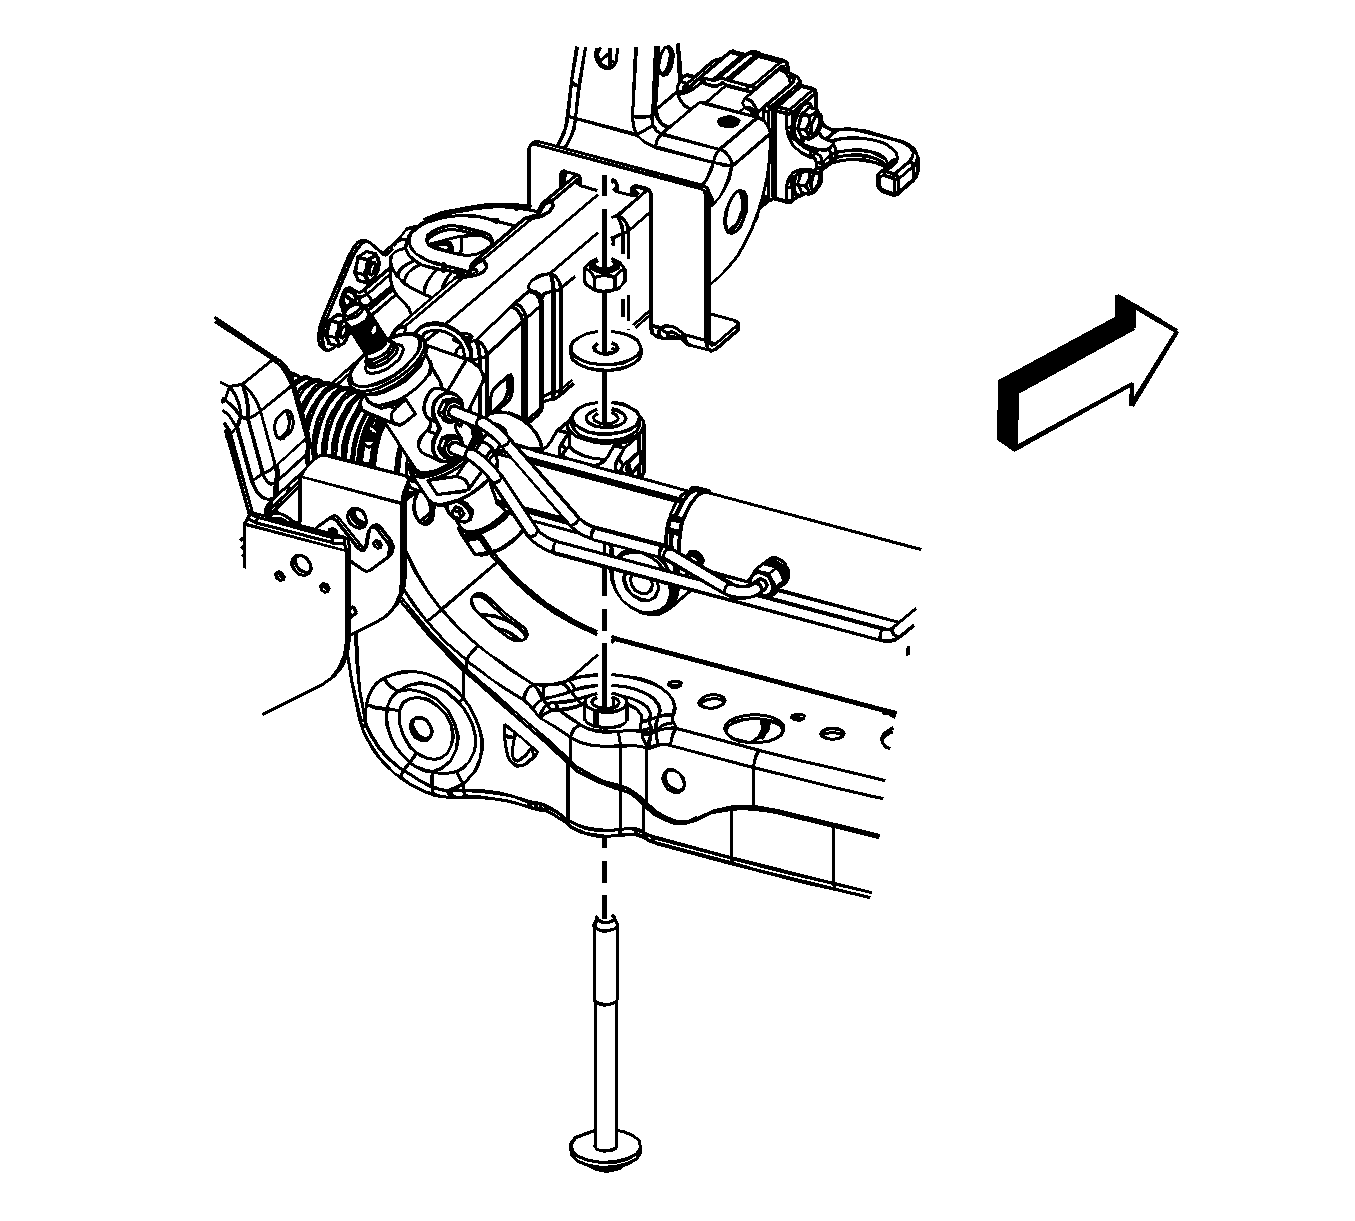
- Remove the long vertical steering gear mounting bolt.
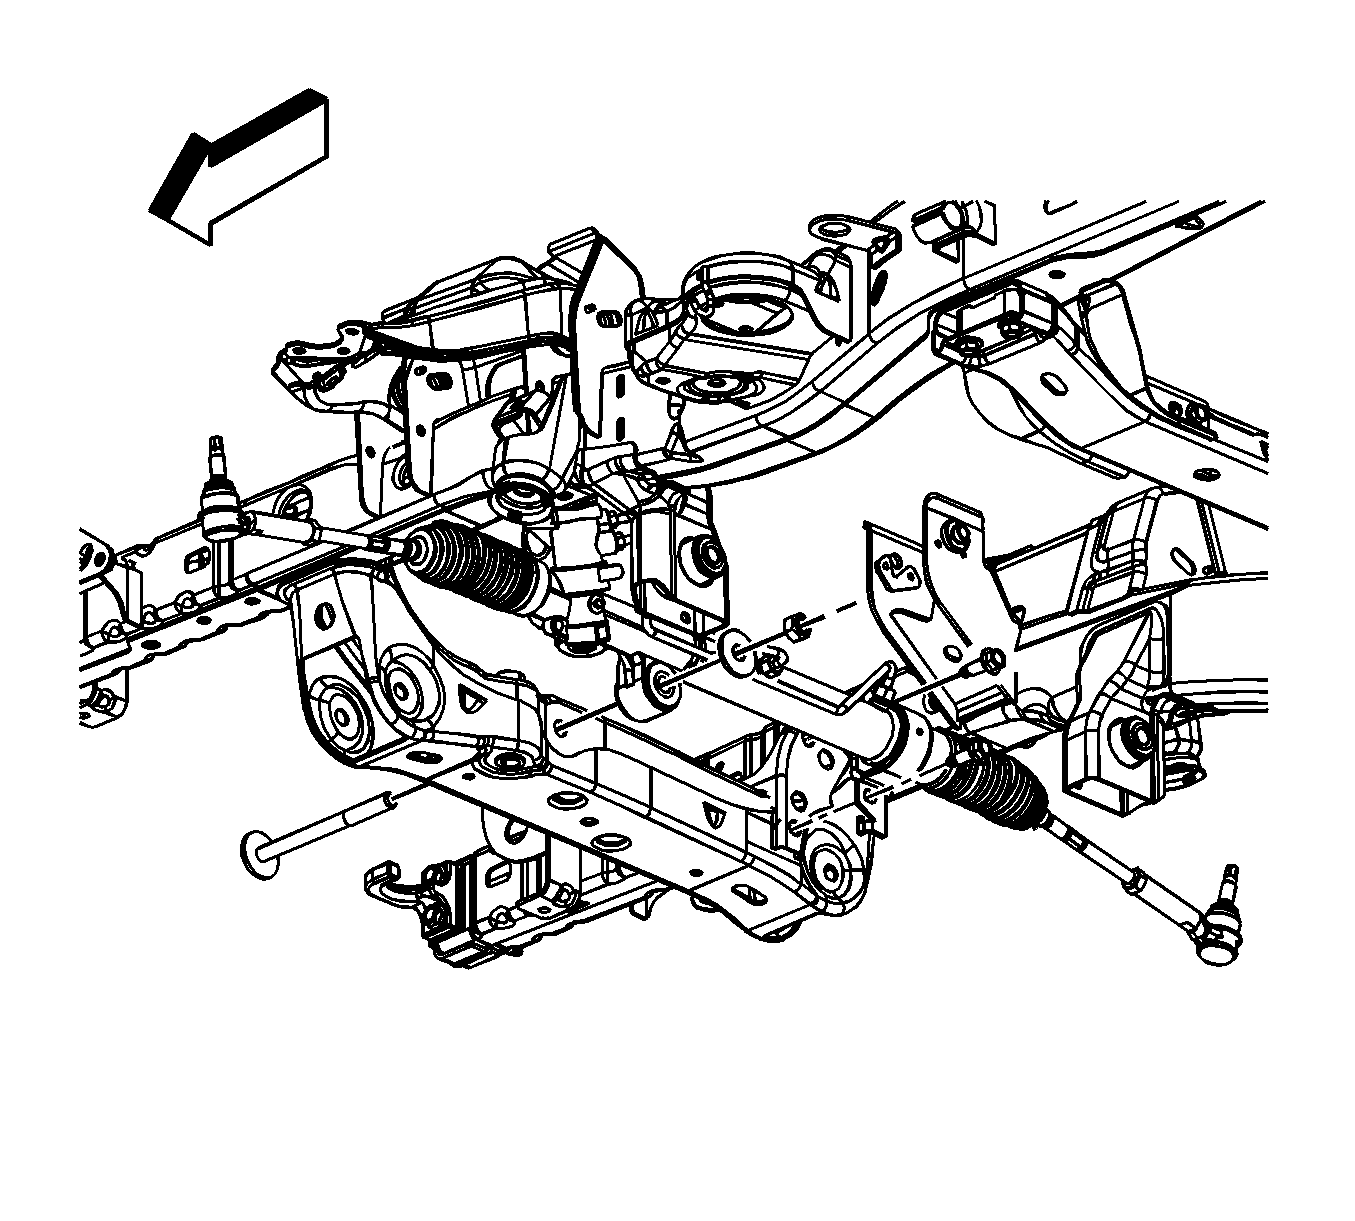
- Remove the 2 short horizontal isolator clamp bolts.
- Loosen the long horizontal steering gear mounting bolt.
- Tilt the steering gear to allow access to the frame crossmember bolts.
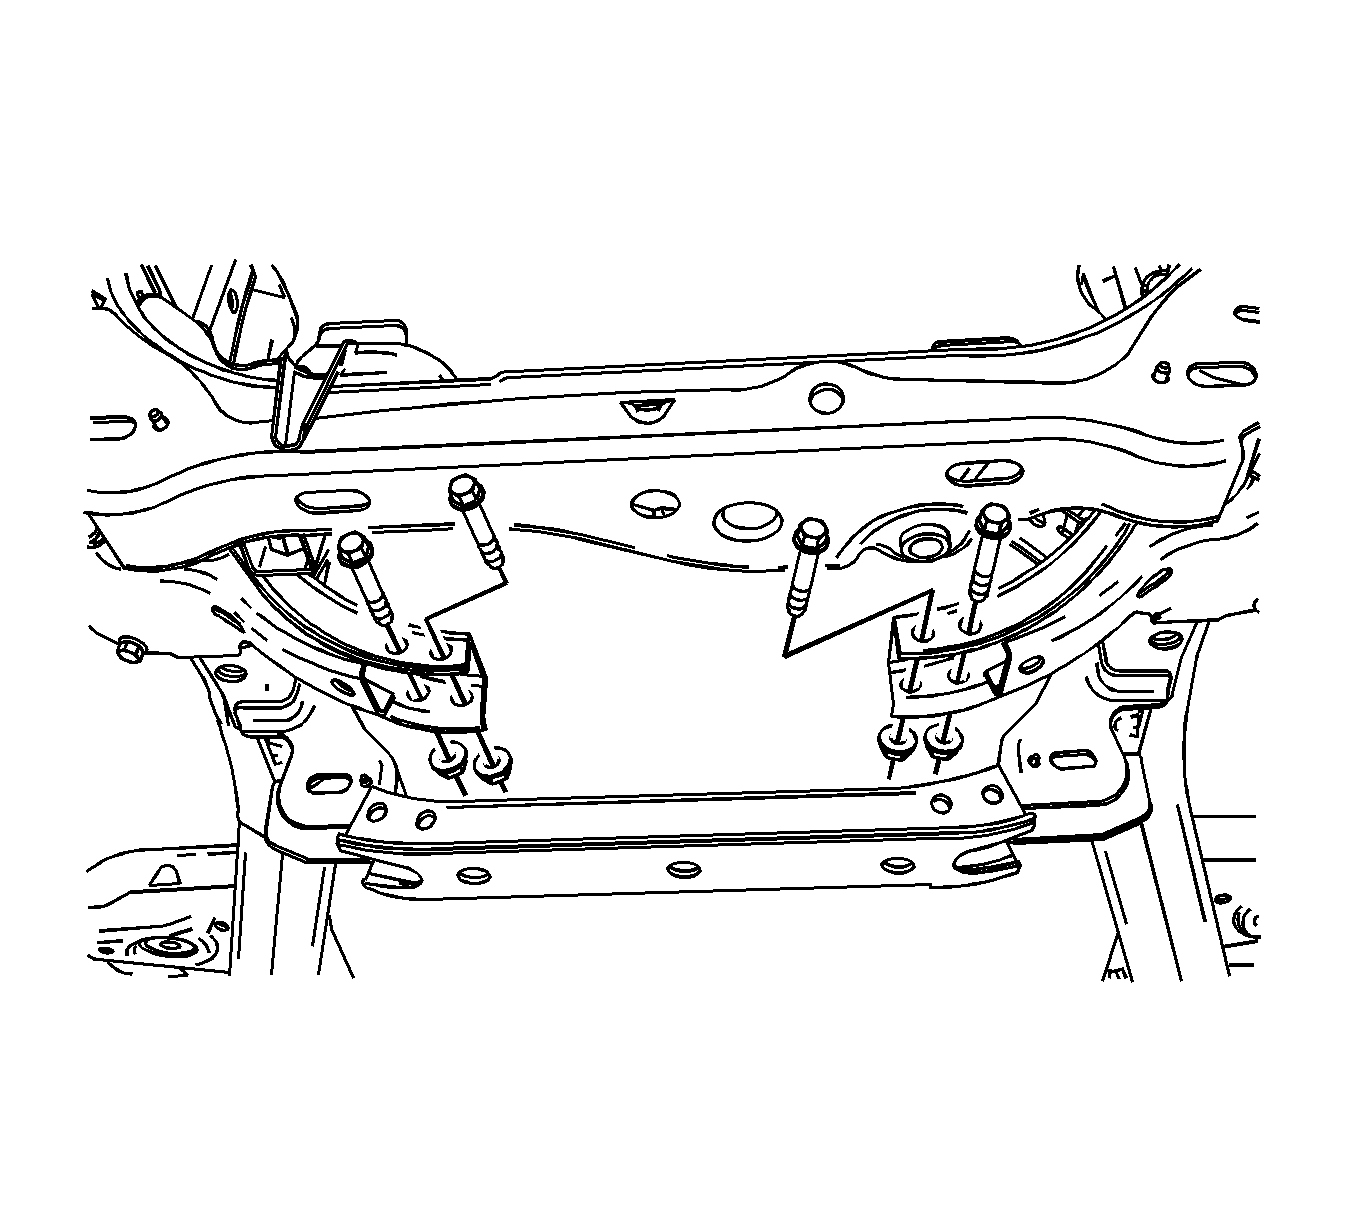
- Remove the crossmember mounting nuts and bolts .
- Remove the crossmember from the vehicle.


Installation Procedure
- Install the crossmember to the vehicle.
- Reverse the orientation of the crossmember bolts then reinstall them.
- Perform the following procedure before installing the bolts:
- Install the bolts and the nuts.
- Install the 2 short horizontal isolator clamp bolts. Do not tighten.
- Install the long vertical mounting bolt, washer, and nut to the power steering gear. Do not tighten.
- Install the long vertical mounting bolt, washer, and nut to the power steering gear.
- Connect the intermediate shaft to the steering gear.
- Install the coupler clamp bolt to the intermediate shaft. Refer to Lower Intermediate Steering Shaft Replacement in Steering Wheel and Column.
- Lower the vehicle.

| • | Remove all traces of the original adhesive patch. |
| • | Clean the threads of the bolt with denatured alcohol or equivalent and allow to dry. |
| • | Apply Threadlocker GM P/N 12345493 (Canadian P/N 10953488). |
Notice: Refer to Fastener Notice in the Preface section.
Tighten
Tighten the bolts to 60 N·m (44 lb ft).


Tighten
| • | Tighten the mounting bolt nuts to 130 N·m (96 lb ft). |
| • | Tighten the isolator clamp bolts to 100 N·m (74 lb ft). |
Crossmember Replacement Late Design
Removal Procedure
- Raise the vehicle. Refer to Lifting and Jacking the Vehicle in General Information.
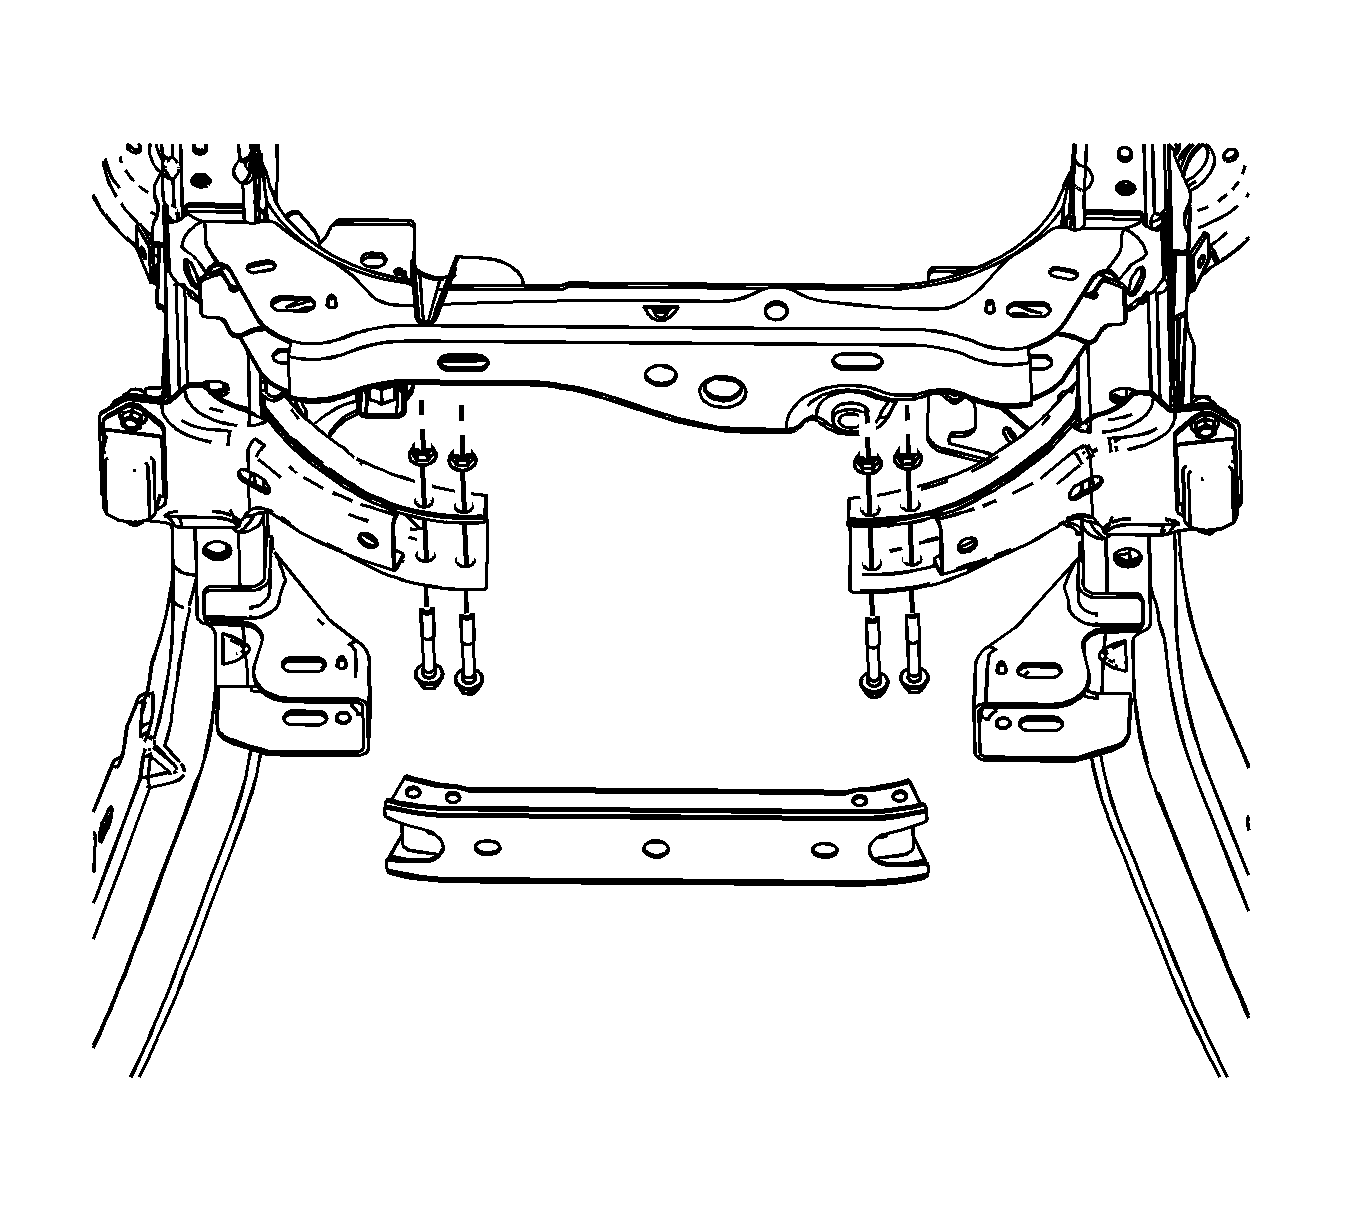
- Remove the crossmember mounting nuts and bolts .
- Remove the crossmember from the vehicle.

Installation Procedure
- Install the crossmember to the vehicle.
- Perform the following procedure before installing the bolts.
- Install the bolts and the nuts.
- Lower the vehicle.

| • | Remove all traces of the original adhesive patch. |
| • | Clean the threads of the bolt with denatured alcohol or equivalent and allow to dry. |
| • | Apply Threadlocker GM P/N 12345493 (Canadian P/N 10953488). |
Notice: Refer to Fastener Notice in the Preface section.
Tighten
Tighten the bolts to 60 N·m (44 lb ft).
