For 1990-2009 cars only
Tools Required
J 44225 Balance Shaft Bearing Remover/Installer
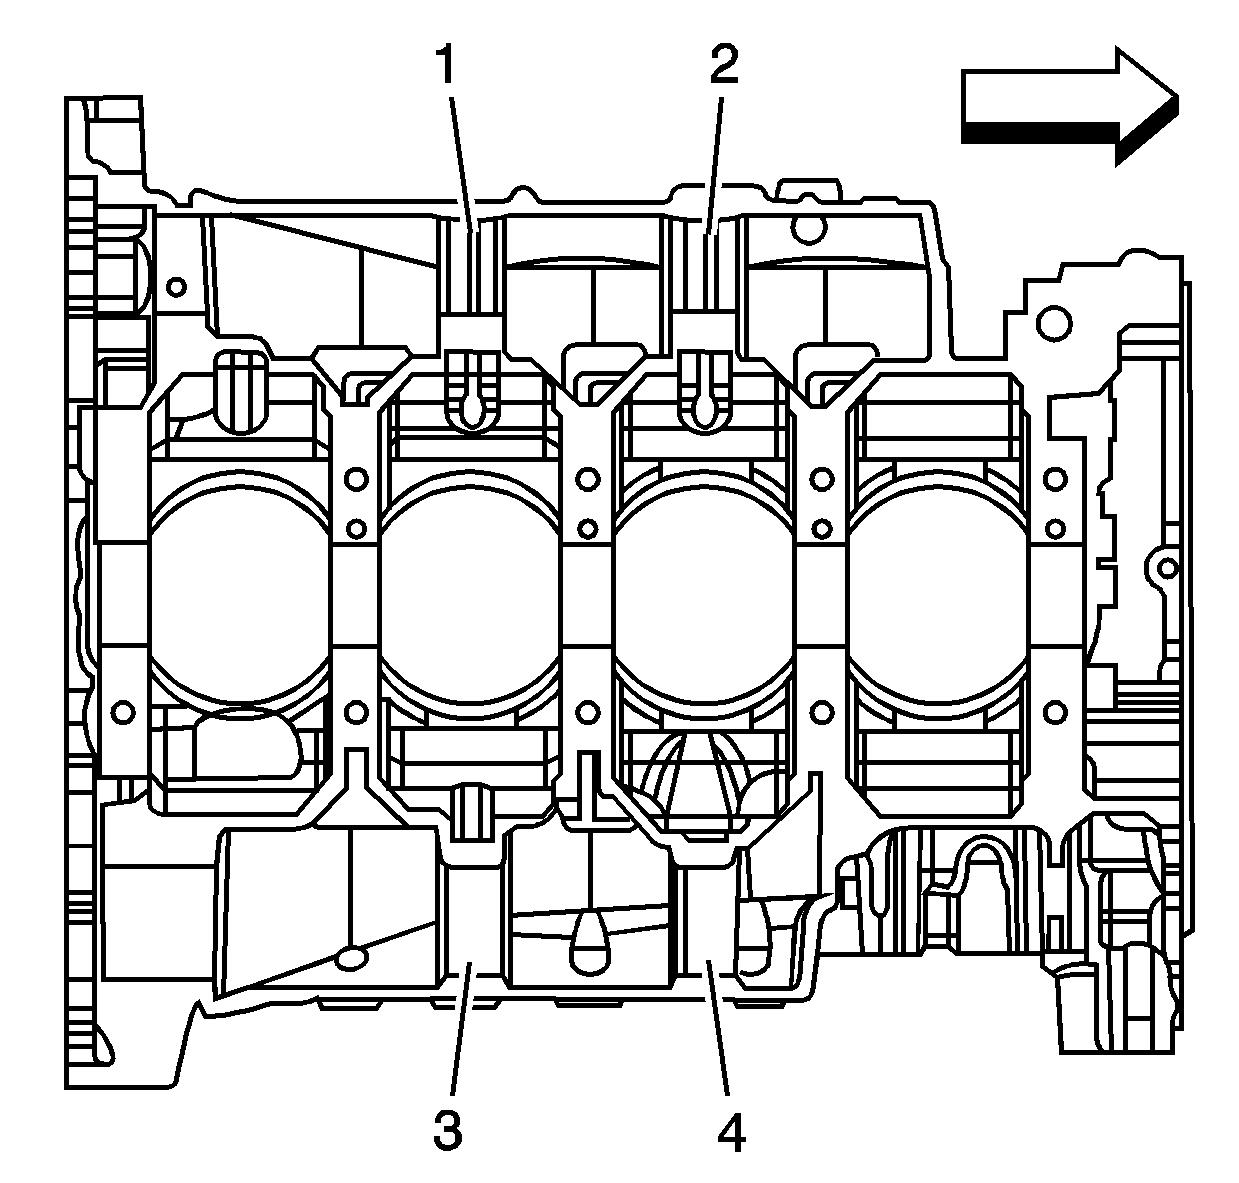
Position the cylinder block so the cylinder head deck face is down and identify the following:
| • | The left balance shaft bearings are in the shorter length balance shaft journal (3) and (4). |
| • | The right balance shaft - grooved bearings are in the longer length balance shaft journal (1) and (2). |
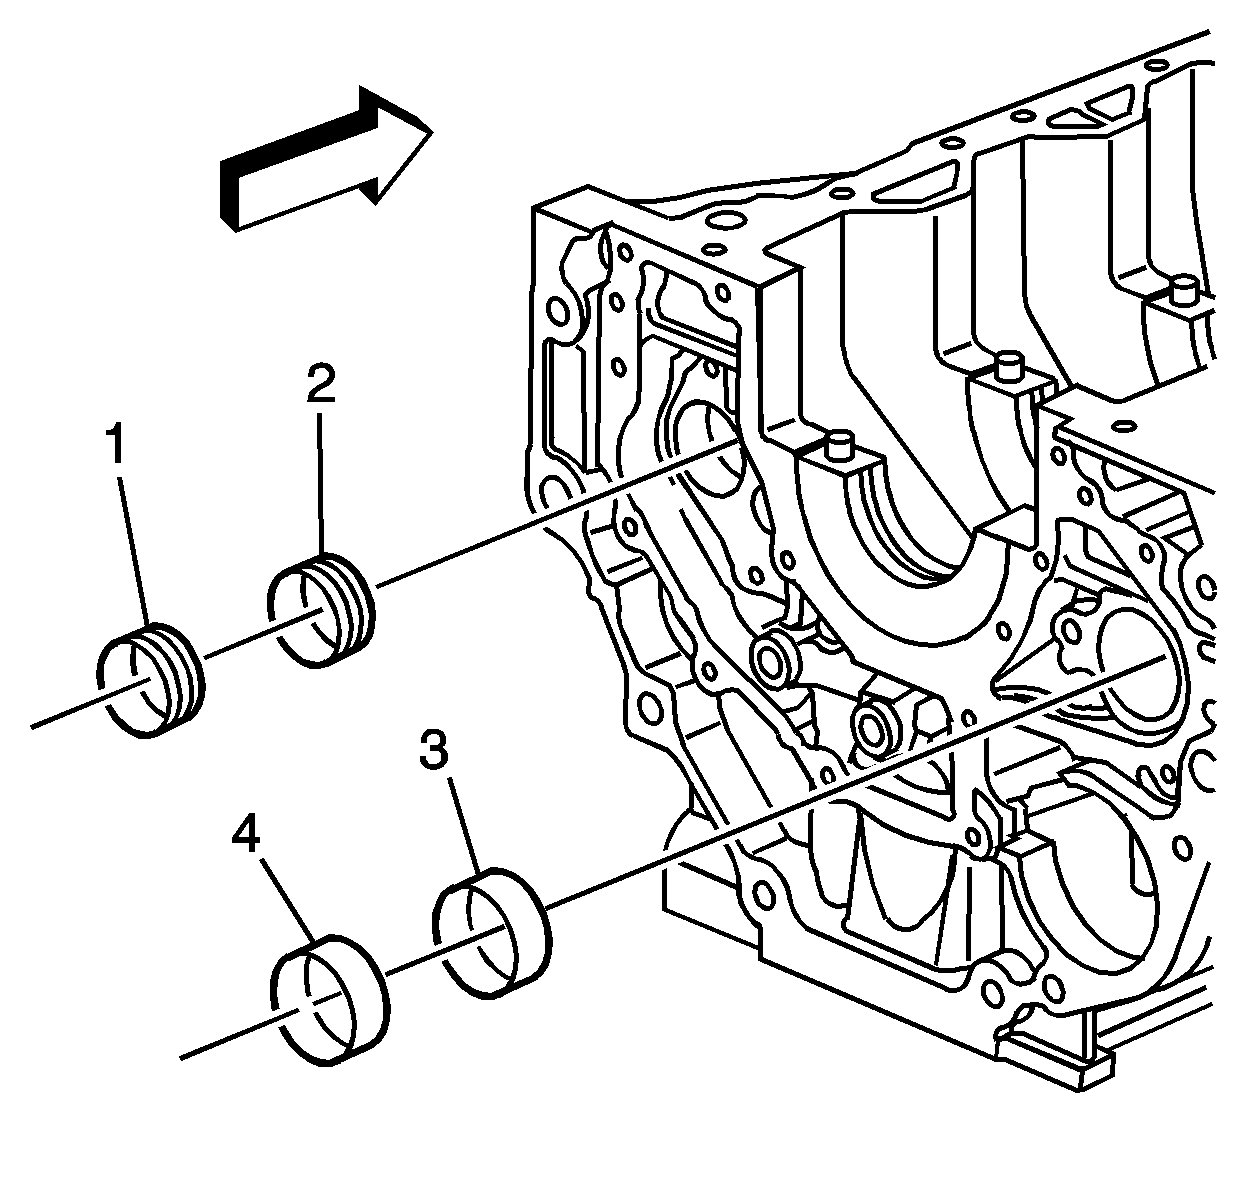
Identify the following:
| • | Bearings (2) and (3) are the front bearings and bearings (1) and (4) are the rear bearings. |
| • | The rear bearings (1) and (4) have a slightly larger diameter than the front bearings (2) and (3). This allows for easier removal and installation of the front bearings. The rear bushings also have notches on them for identification purposes. |
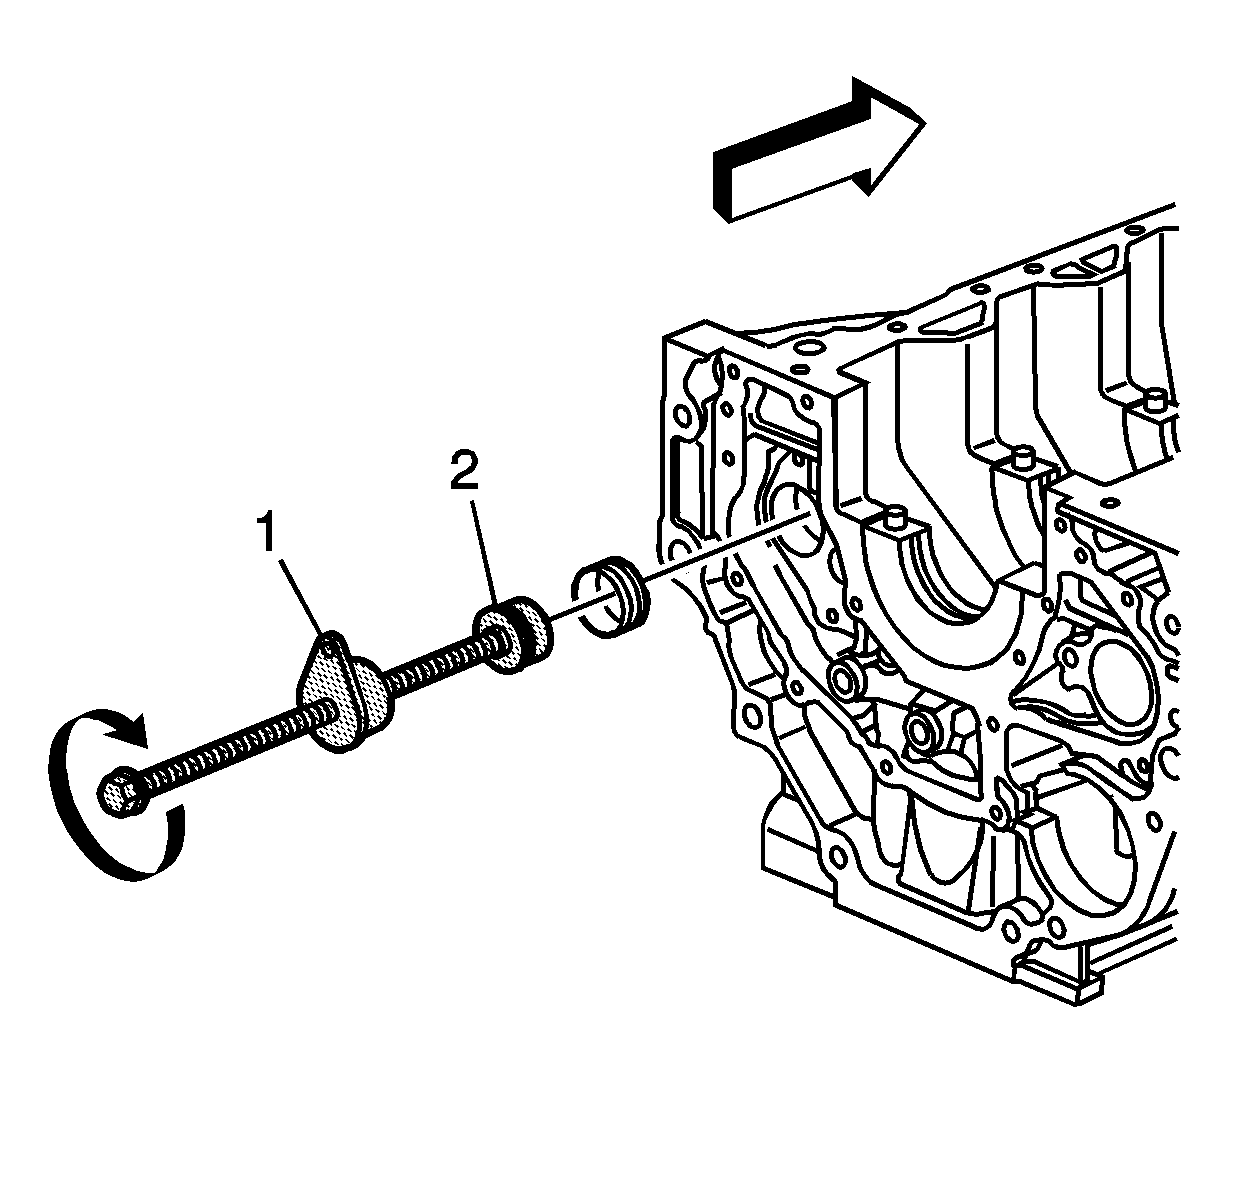
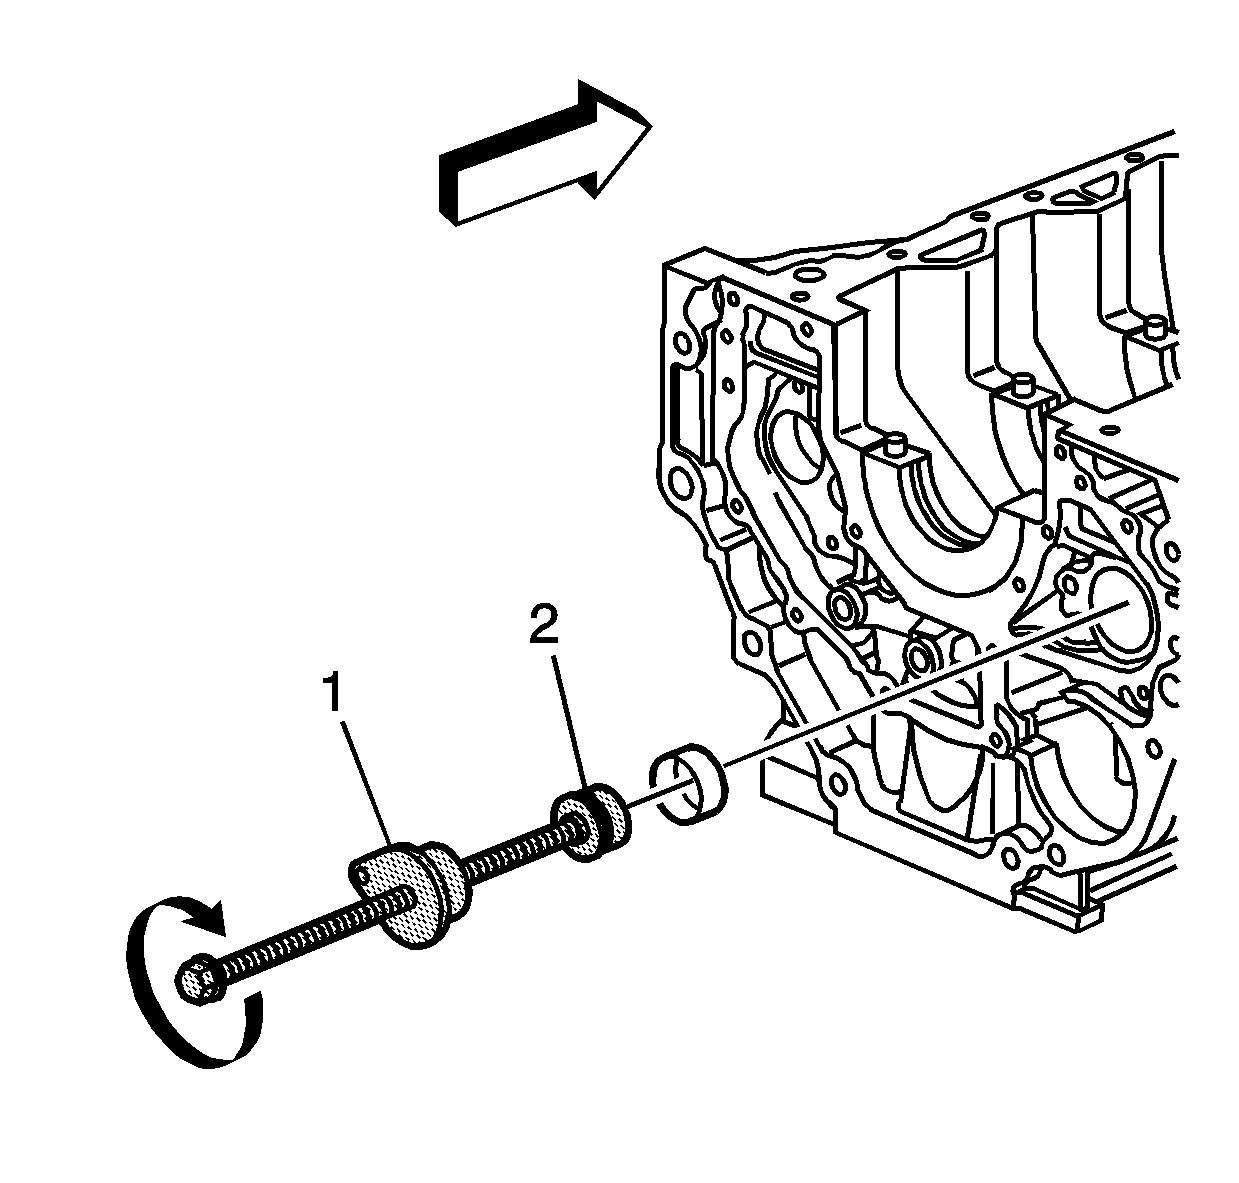
- Install the new right front balance shaft bearing onto J 44225 (2).
- Install J 44225 into the balance shaft bearing bore and align the front bearing.
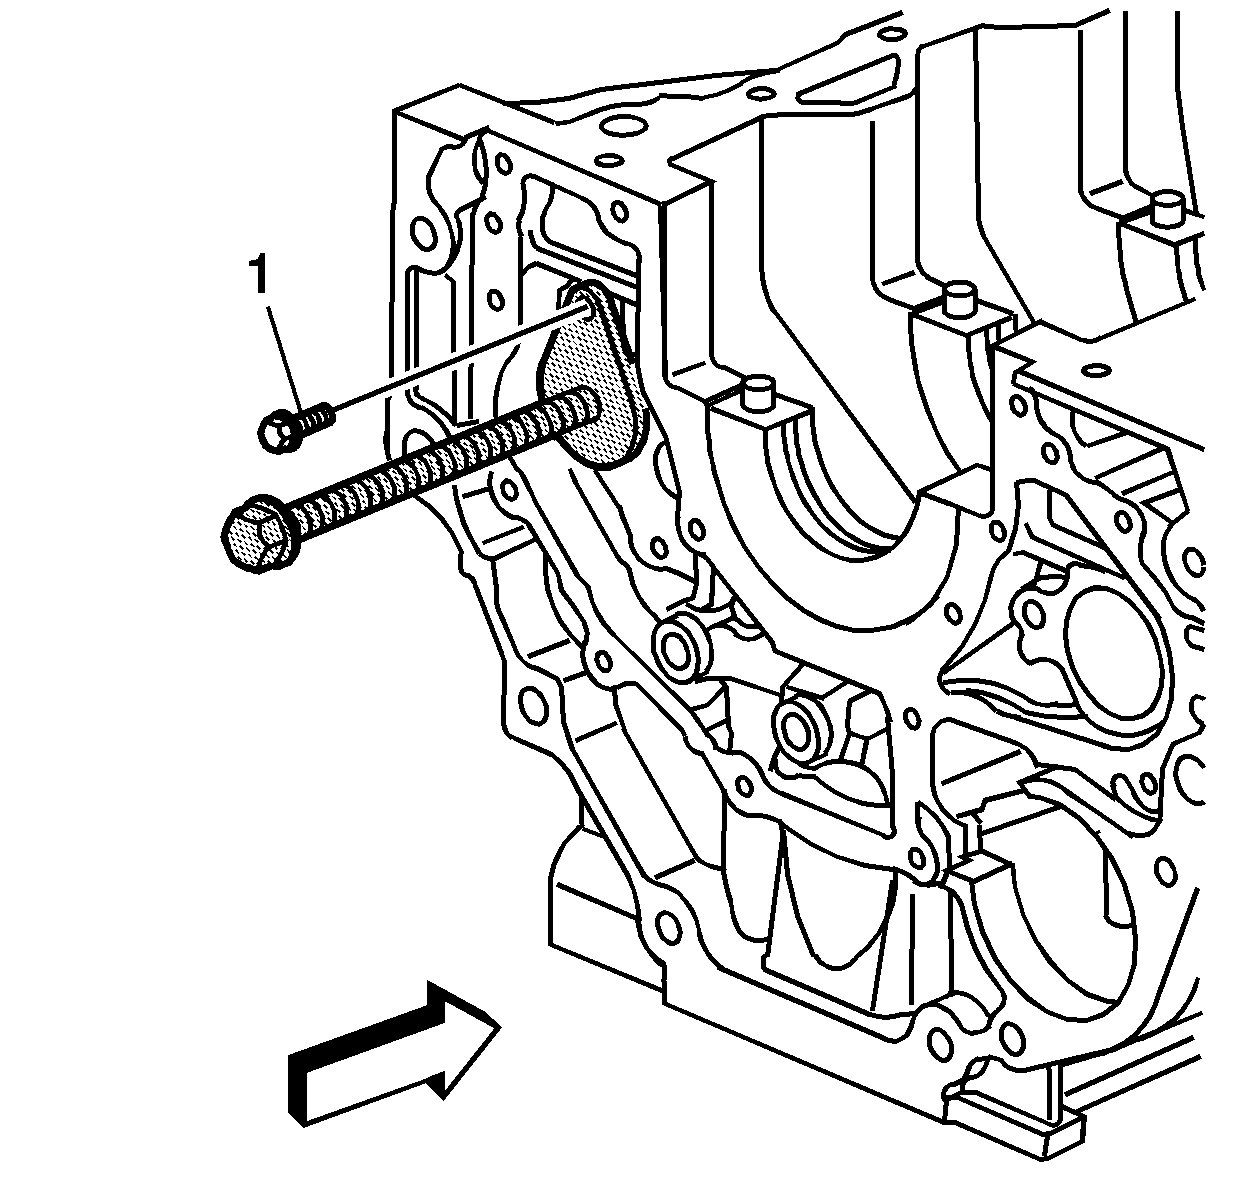
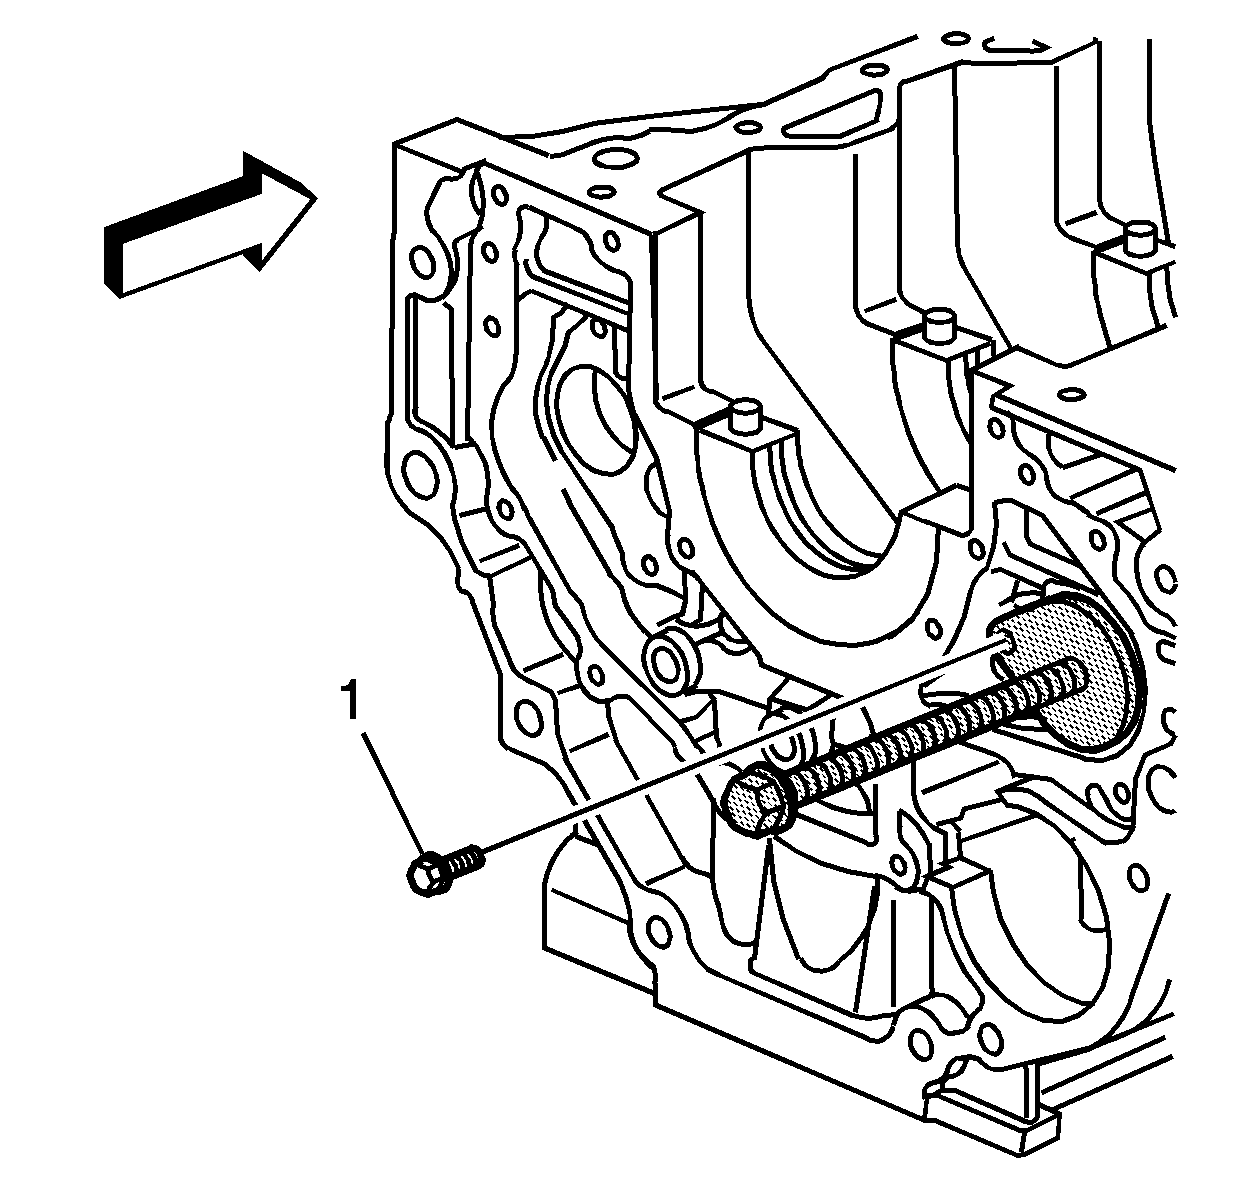
- Turn the threaded rod clockwise until the guide (1) is seated into the rear journal.
- Install and tighten the balance shaft mounting bolt (1) to hold J 44225 .
- Turn the threaded rod clockwise until it bottoms to install the right front balance shaft bearing to the proper depth.
- Remove the balance shaft mounting bolt and J 44225 .
- Install the new right rear balance shaft bearing onto J 44225 (2).
- Install J 44225 into the balance shaft bearing bore and align the rear bearing.
- Turn the threaded rod clockwise until the guide (1) is seated into the rear journal.
- Install and tighten the balance shaft mounting bolt (1) to hold J 44225 .
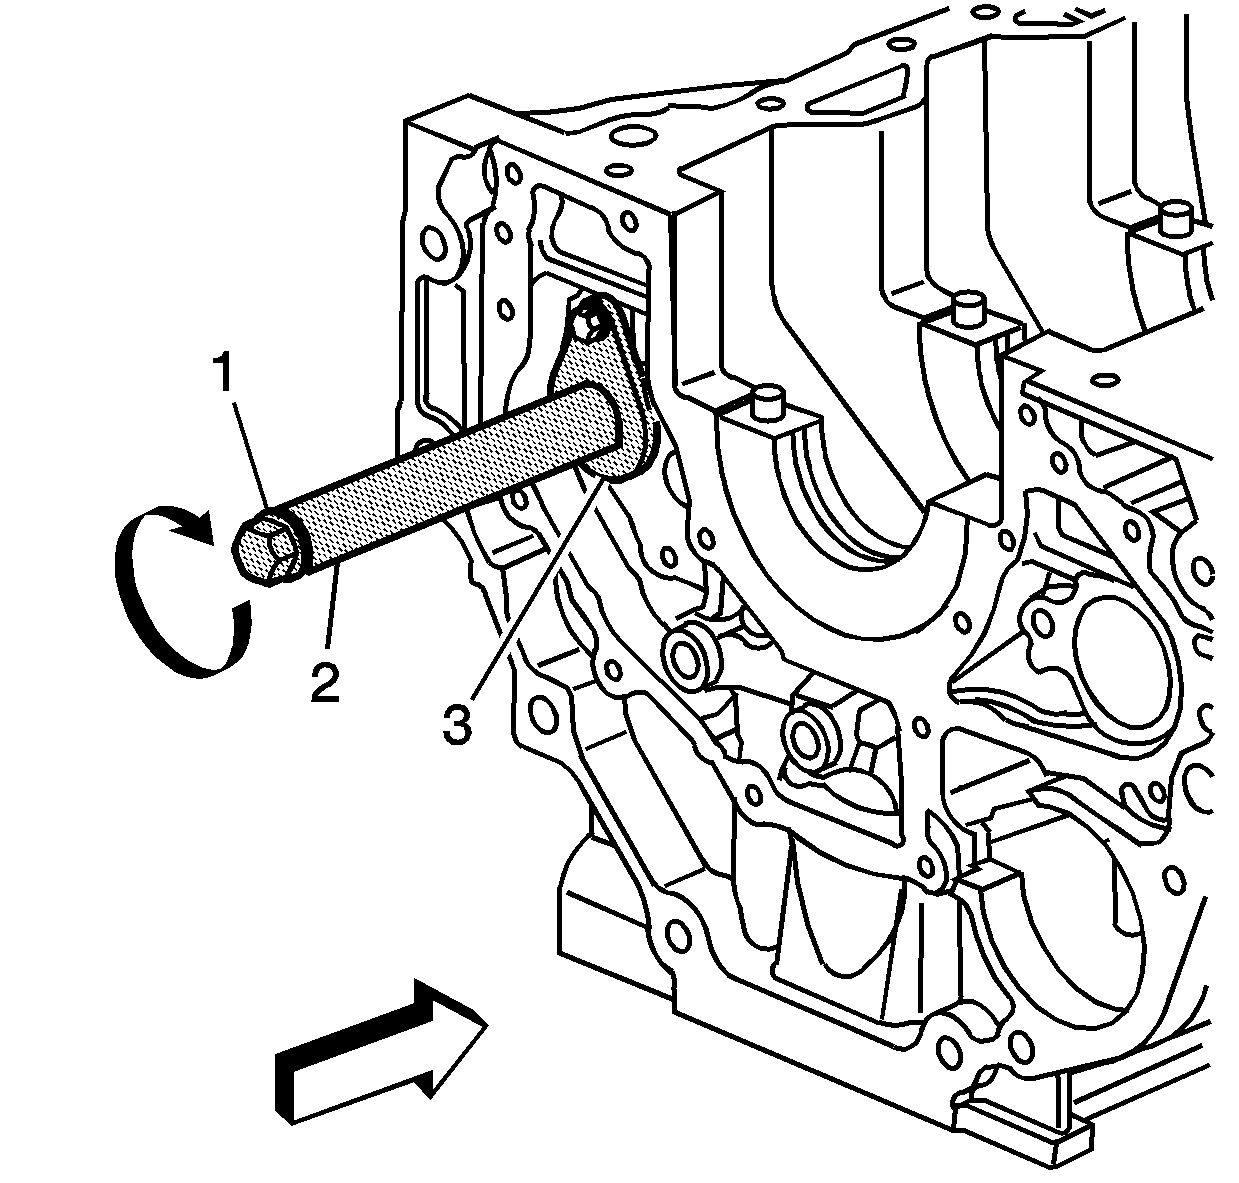
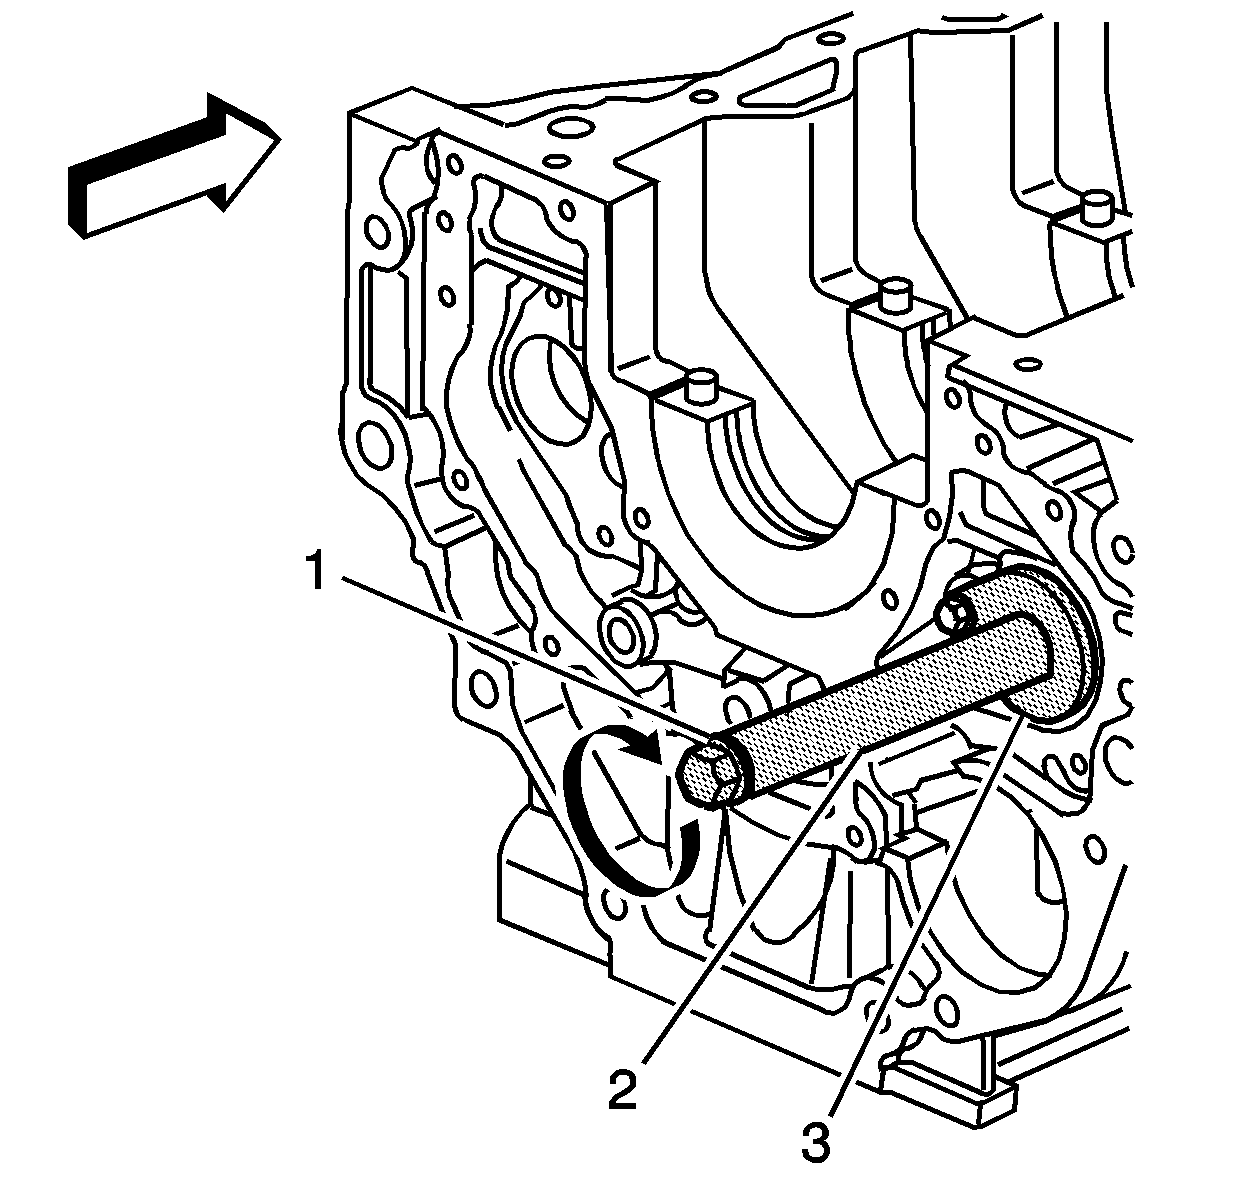
- Install J 44225 - spacer (2) between the guide (3) and the washer (1).
- Turn the threaded rod clockwise until it bottoms to install the right rear balance shaft bearing to the proper depth.
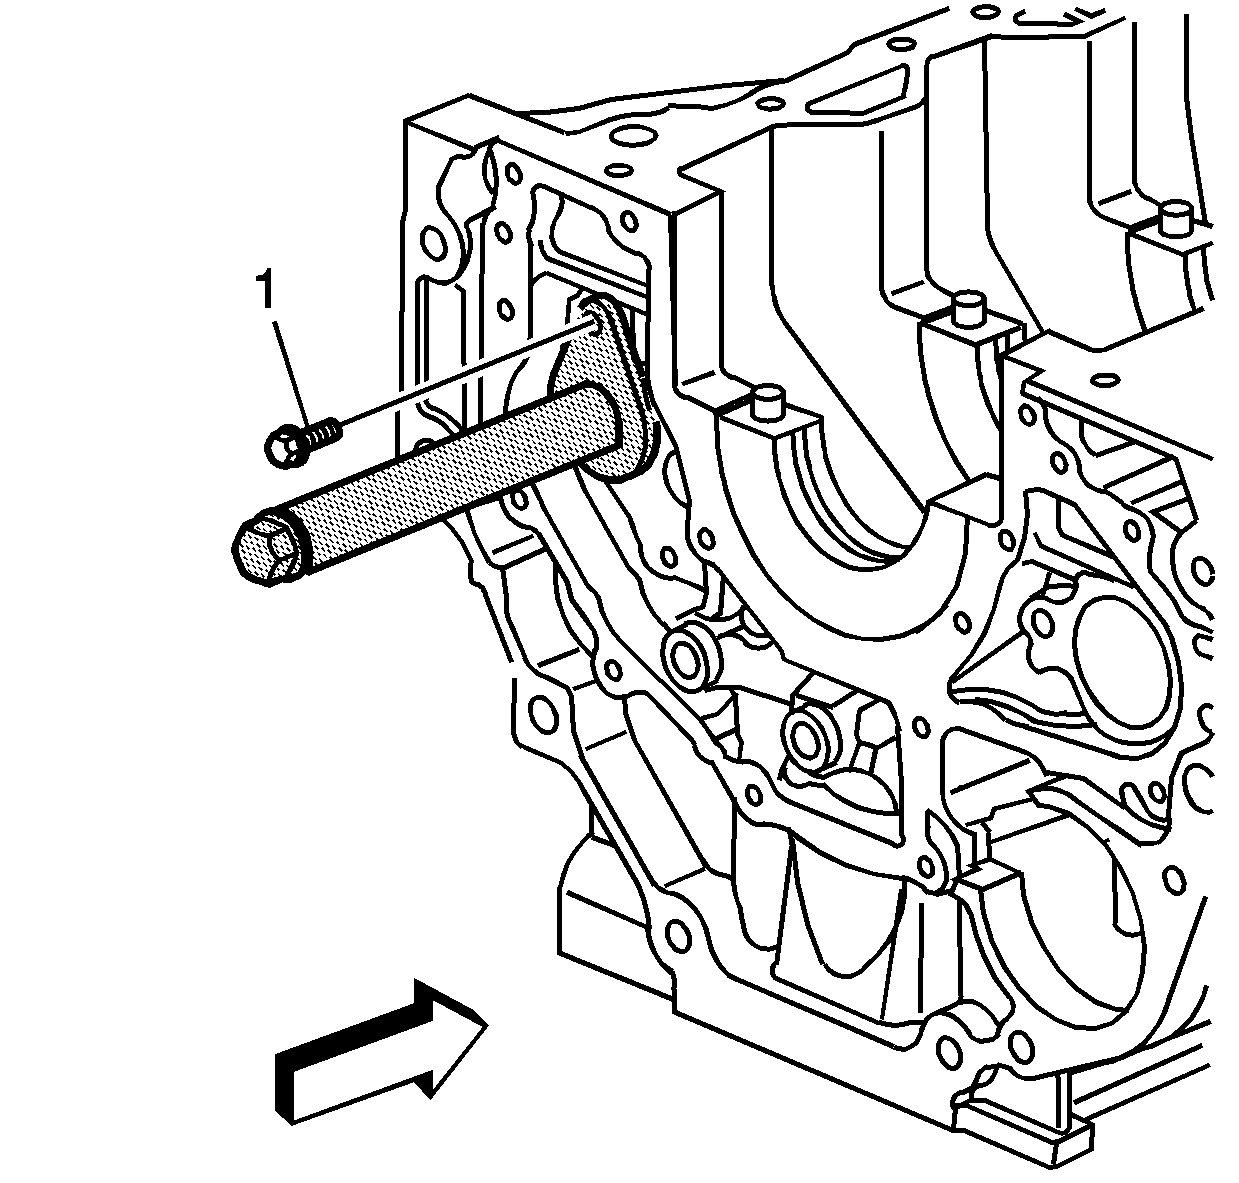
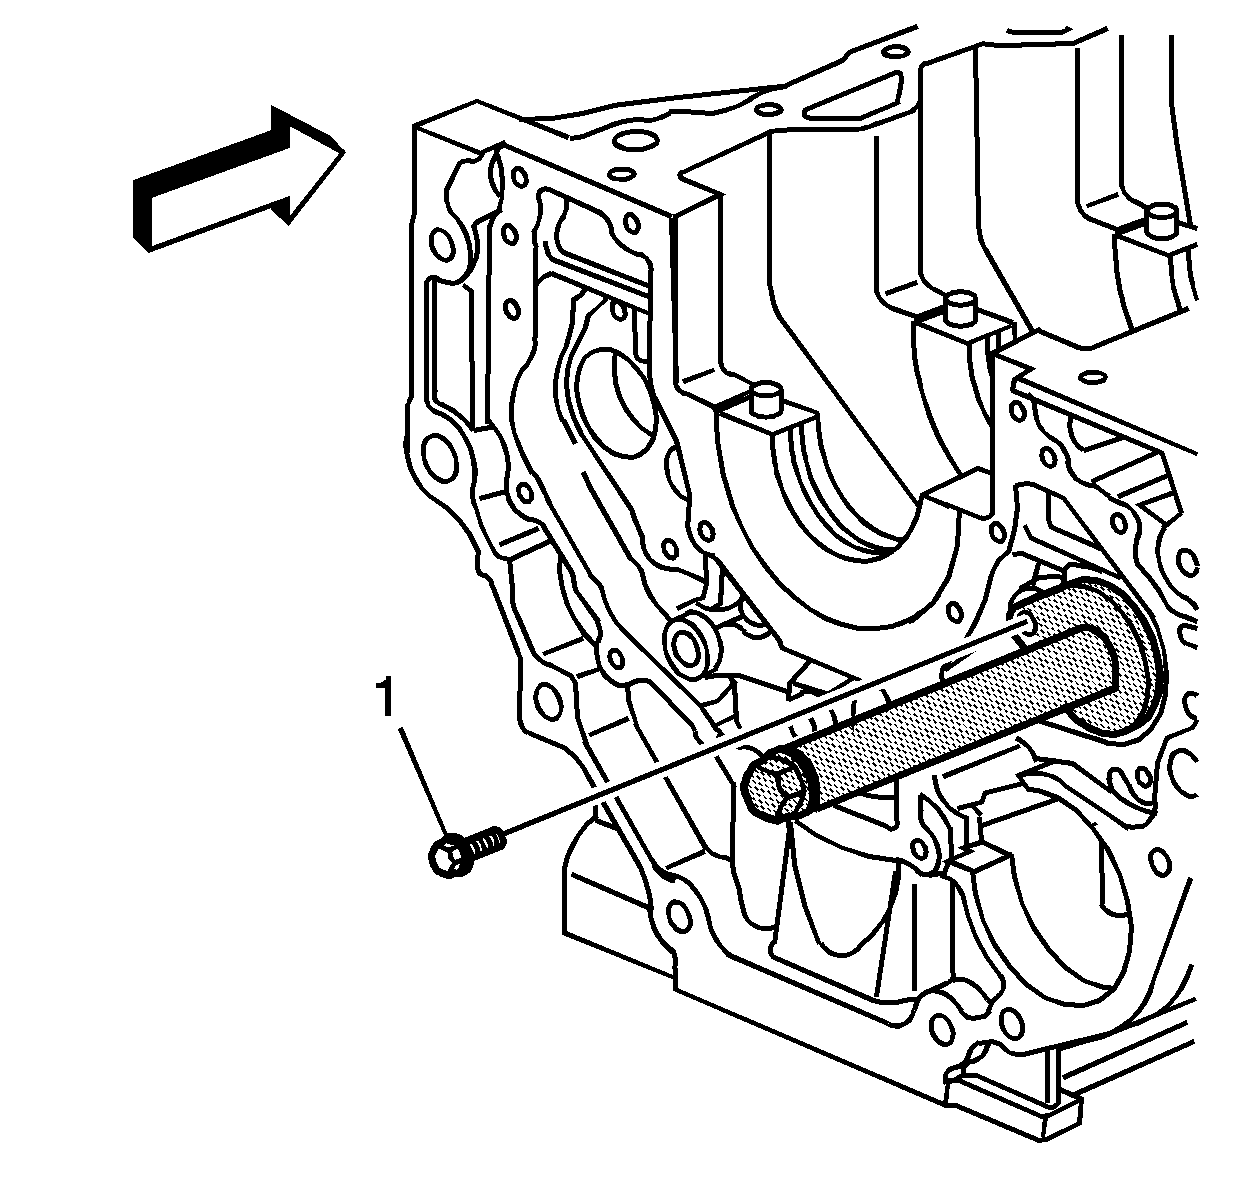
- Remove the balance shaft mounting bolt (1) and J 44225 .
- Install the new left front balance shaft bearing onto J 44225 (2).
- Install J 44225 into the balance shaft bearing bore and align the front bearing.
- Turn the threaded rod clockwise until the guide (1) is seated into the rear journal.
- Install and tighten the balance shaft mounting bolt (1) to hold J 44225 .
- Turn the threaded rod clockwise until it bottoms to install the left front balance shaft bearing to the proper depth.
- Remove the balance shaft mounting bolt (1) and J 44225 .
- Install the new left rear balance shaft bearing onto J 44225 (2).
- Install J 44225 into the balance shaft bearing bore and align the rear bearing.
- Turn the threaded rod clockwise until the guide (1) is seated into the rear journal.
- Install and tighten the balance shaft mounting bolt (1) to hold J 44225 .
- Install J 44225 - spacer (2) between the guide (3) and the washer (1).
- Turn the threaded rod clockwise until it bottoms to install the left rear balance shaft bearing to the proper depth.
- Remove the balance shaft mounting bolt (1) and J 44225 .
