For 1990-2009 cars only
Removal Procedure
Caution: Refer to Fuel and Evaporative Emission Pipe Caution in the Preface section.
Caution: Refer to Gasoline/Gasoline Vapors Caution in the Preface section.
Notice: Refer to Fuel and Evaporative Emission Hose/Pipe Connection Cleaning Notice in the Preface section.
- Relieve the fuel system pressure. Refer to Fuel Pressure Relief .
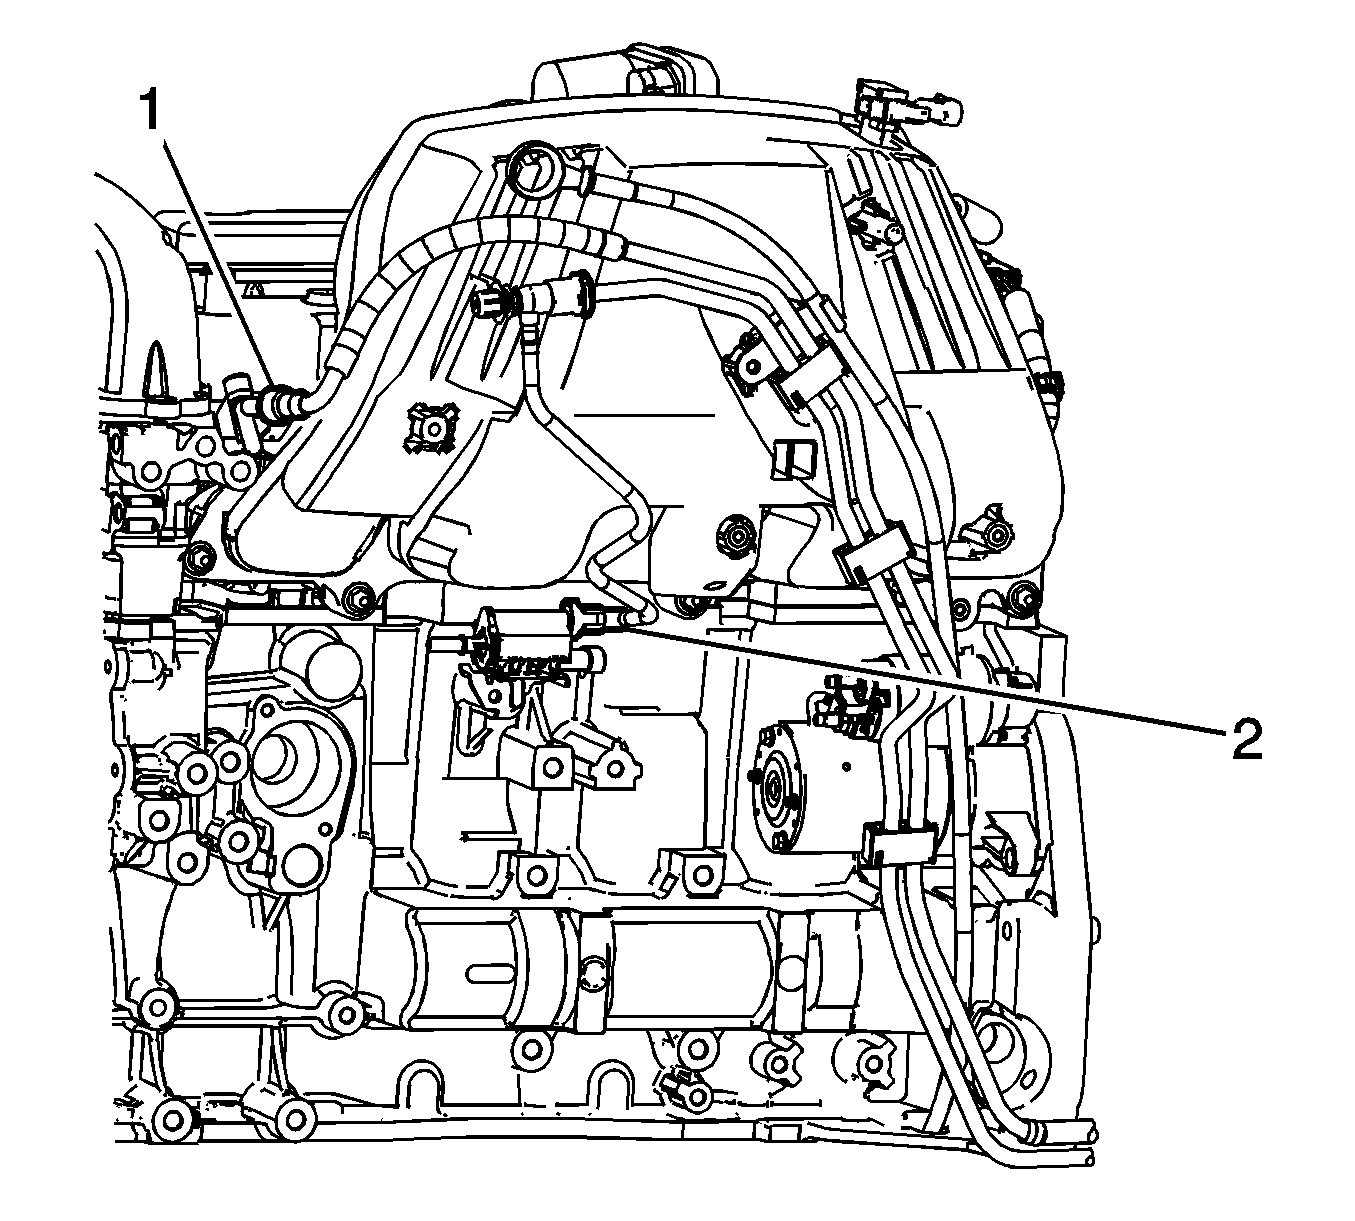
- Disconnect the fuel feed line quick connect fitting (1) from the fuel rail. Refer to Metal Collar Quick Connect Fitting Service .
- Disconnect the evaporative emission (EVAP) line quick connect fitting (2) from the EVAP canister purge solenoid valve. Refer to Plastic Collar Quick Connect Fitting Service .
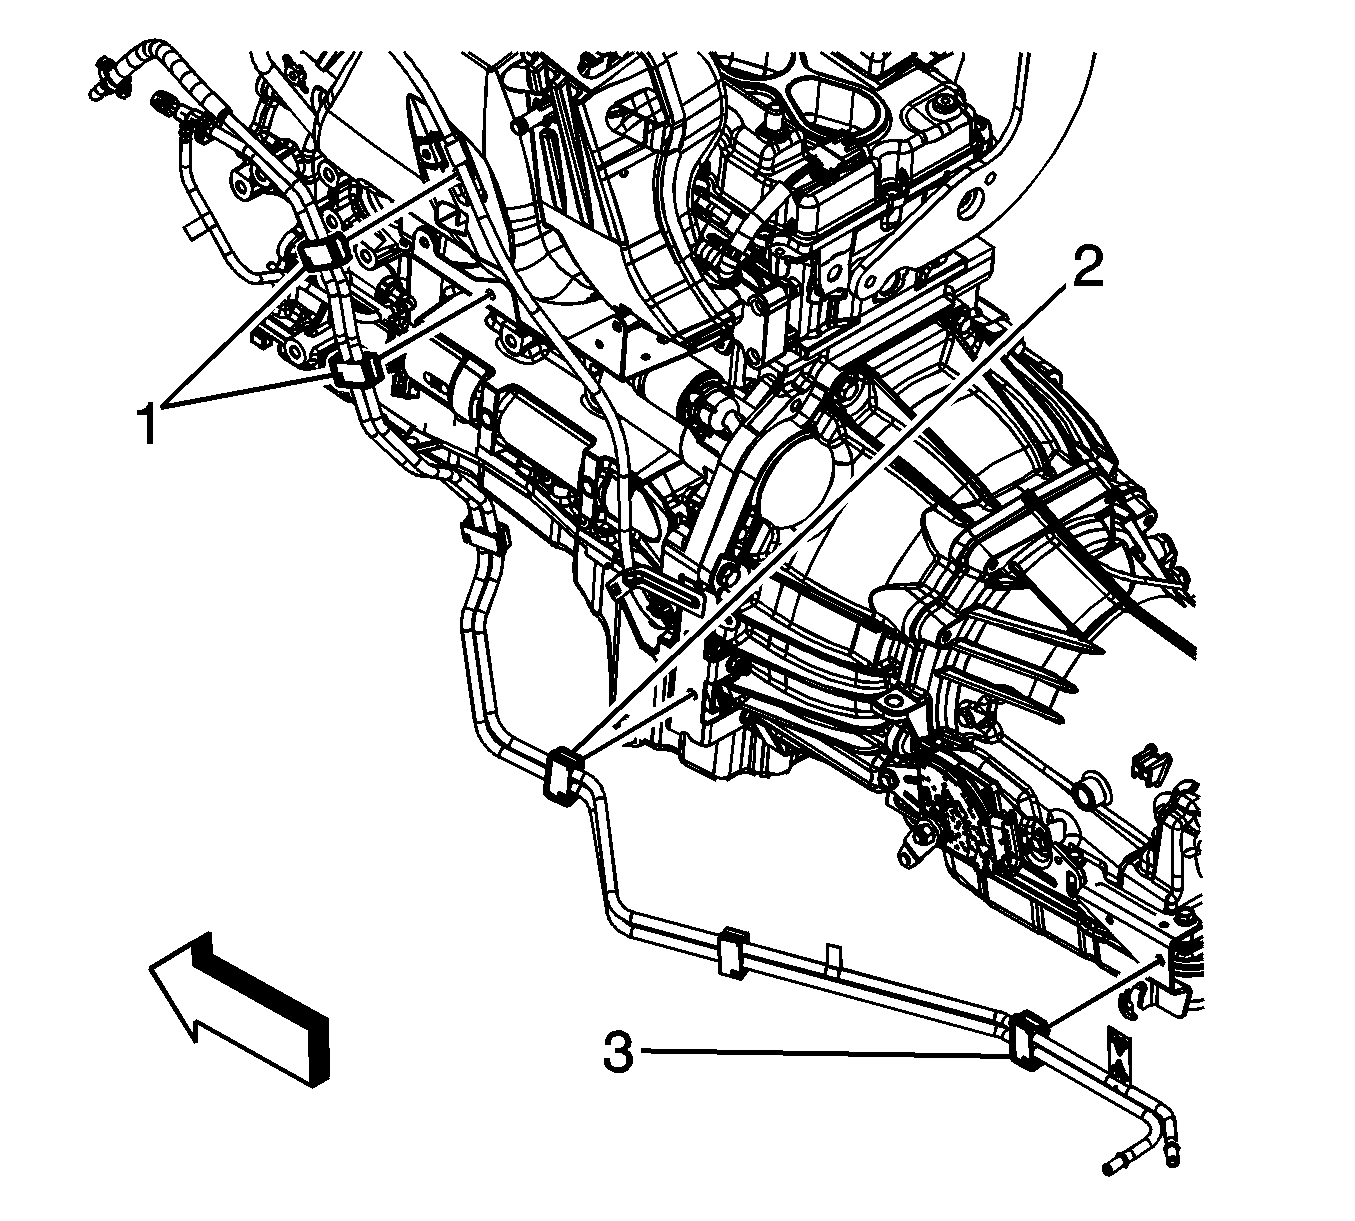
- If equipped with an automatic transmission perform the following steps, disengage the EVAP/fuel pipe clips (1) from the oil level indicator tube bracket and the engine wiring harness bracket.
- Raise and support the vehicle. Refer to Lifting and Jacking the Vehicle .
- Disengage the EVAP/fuel pipe clip (2) from the fuel pipe bracket.
- Disengage the EVAP/fuel pipe clip (3) from the transmission range selector lever bracket.
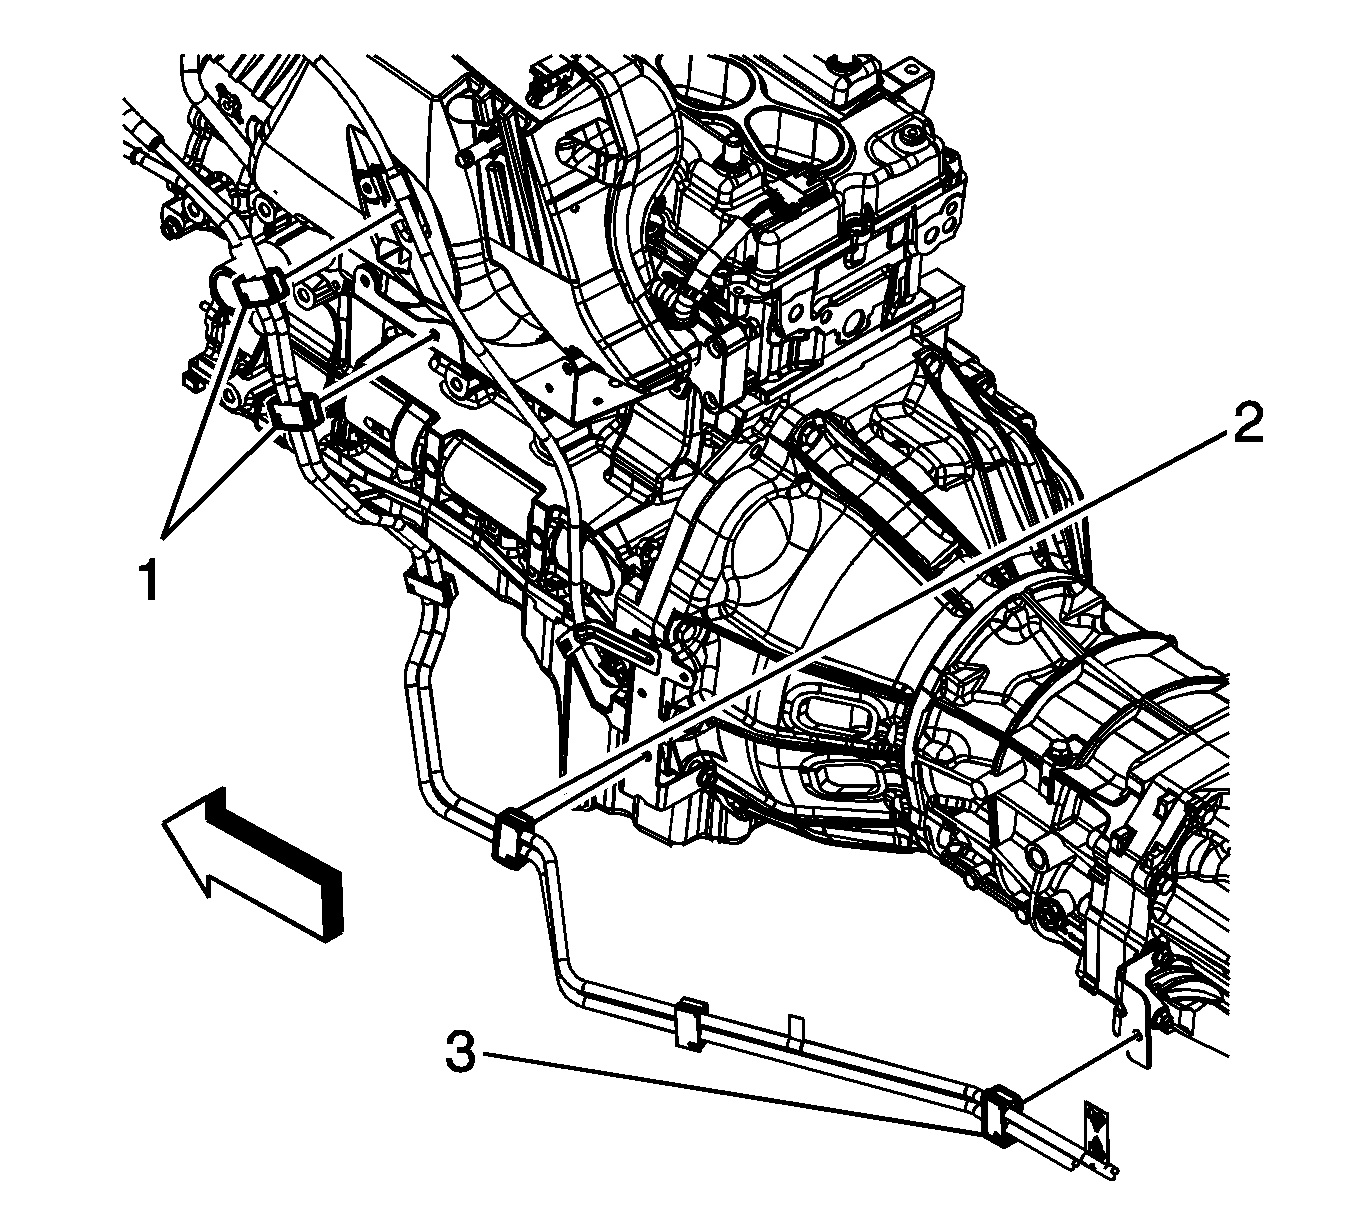
- If equipped with a manual transmission perform the following steps, disengage the EVAP/fuel pipe clips (1) from the oil level indicator tube bracket and the engine wiring harness bracket.
- Raise and support the vehicle. Refer to Lifting and Jacking the Vehicle .
- Disengage the EVAP/fuel pipe clips (1 and 2) from the fuel pipe brackets.
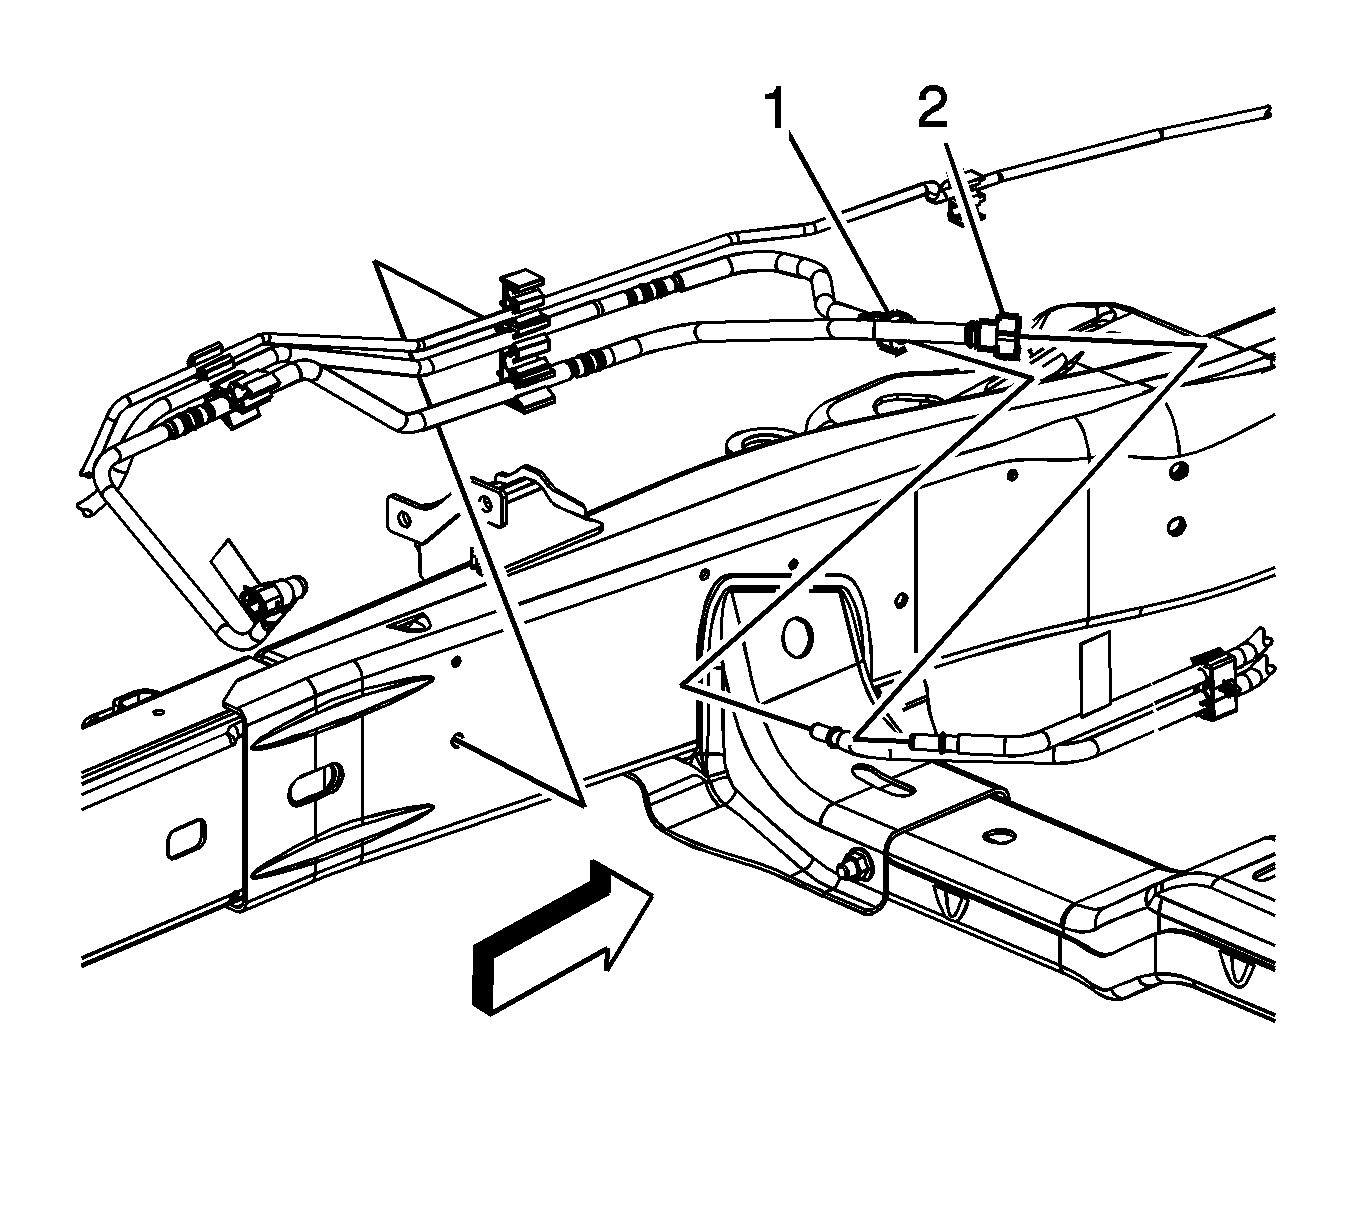
- Disconnect the chassis fuel feed (2) and EVAP (1) line quick connect fittings from the engine lines. Refer to Plastic Collar Quick Connect Fitting Service .
- Remove the EVAP/fuel engine line assembly from the vehicle.
- Open the fuel feed and EVAP line clips (1).
- Remove the fuel feed line (2) from the clips.
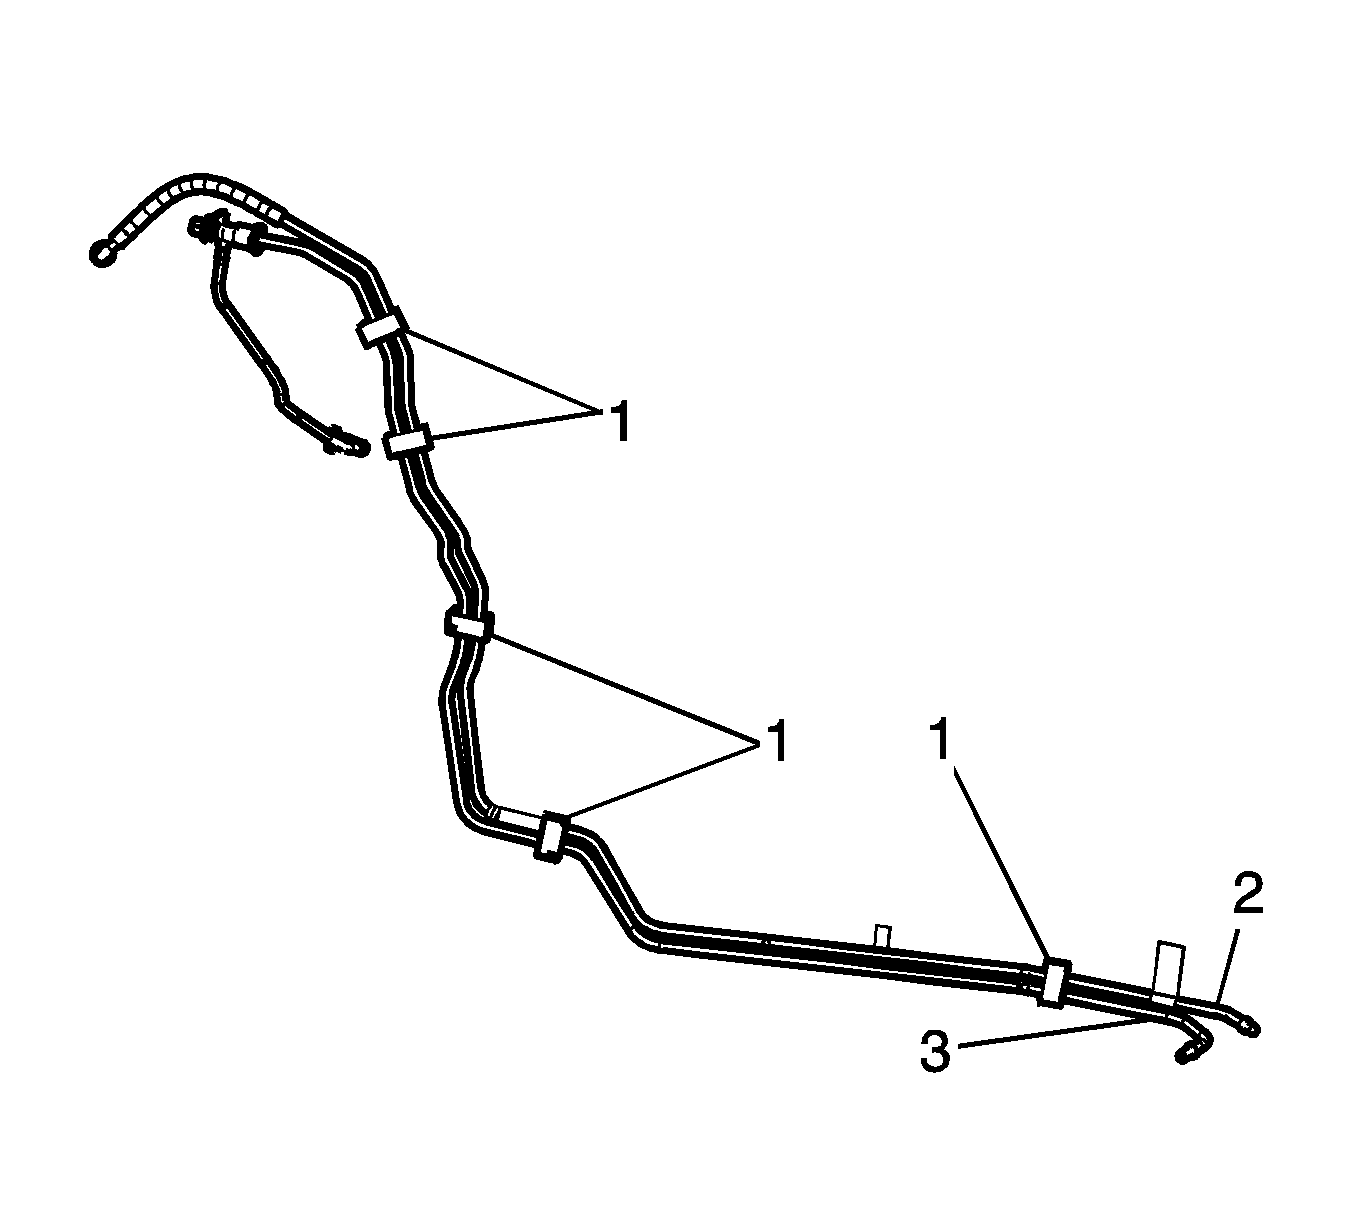
Installation Procedure
- Install the fuel feed line (2) to the clips.
- Close the fuel feed and EVAP line clips (1).
- Position the EVAP/fuel line assembly up into the engine compartment along the transmission.
- Connect the chassis fuel feed (2) and EVAP (1) line quick connect fittings to the engine lines. Refer to Plastic Collar Quick Connect Fitting Service .
- If equipped with a manual transmission perform the following steps, engage the EVAP/fuel pipe clips (1 and 2) to the fuel pipe brackets.
- Lower the vehicle.
- Engage the EVAP/fuel pipe clips (1) to the oil level indicator tube bracket and the engine wiring harness bracket.
- If equipped with an automatic transmission perform the following steps, engage the EVAP/fuel pipe clip (3) to the transmission range selector lever bracket.
- Engage the EVAP/fuel pipe clip (2) to the fuel pipe bracket.
- Lower the vehicle.
- Engage the EVAP/fuel pipe clips (1) to the oil level indicator tube bracket and the engine wiring harness bracket.
- Connect the EVAP line quick connect fitting (2) to the EVAP canister purge solenoid valve. Refer to Plastic Collar Quick Connect Fitting Service .
- Connect the fuel feed line quick connect fitting (1) to the fuel rail. Refer to Metal Collar Quick Connect Fitting Service .
- Inspect for leaks using the following procedure:


| 14.1. | Turn ON the ignition, with the engine OFF for 2 seconds. |
| 14.2. | Turn OFF the ignition, for 10 seconds. |
| 14.3. | Turn ON the ignition, with the engine OFF. |
| 14.4. | Inspect for fuel leaks. |
