For 1990-2009 cars only
Removal Procedure
Caution: Refer to Fuel and Evaporative Emission Pipe Caution in the Preface section.
Caution: Refer to Gasoline/Gasoline Vapors Caution in the Preface section.
Notice: Refer to Fuel and Evaporative Emission Hose/Pipe Connection Cleaning Notice in the Preface section.
- Raise and support the vehicle. Refer to Lifting and Jacking the Vehicle in General Information.
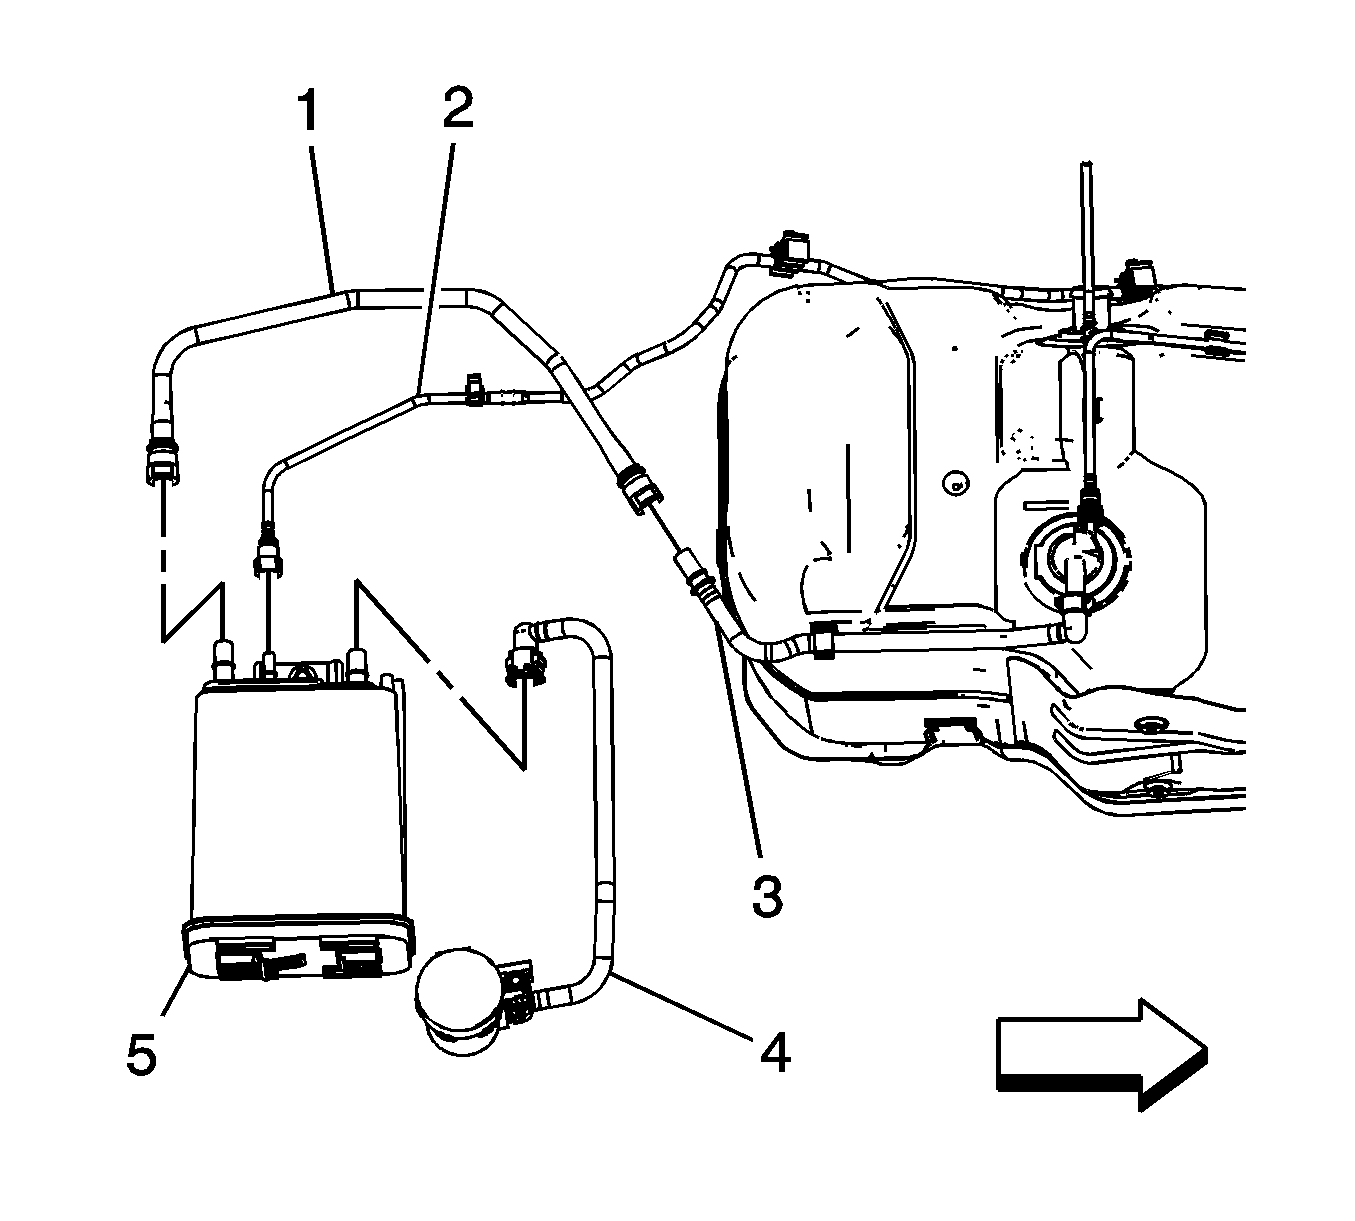
- Disconnect the electrical connector from the evaporative emission (EVAP) canister vent solenoid valve (4).
- Disengage the bracket retaining tab and remove the EVAP canister vent solenoid valve (4).
- Refer to Plastic Collar Quick Connect Fitting Service in order to disconnect the following from the EVAP canister (5):
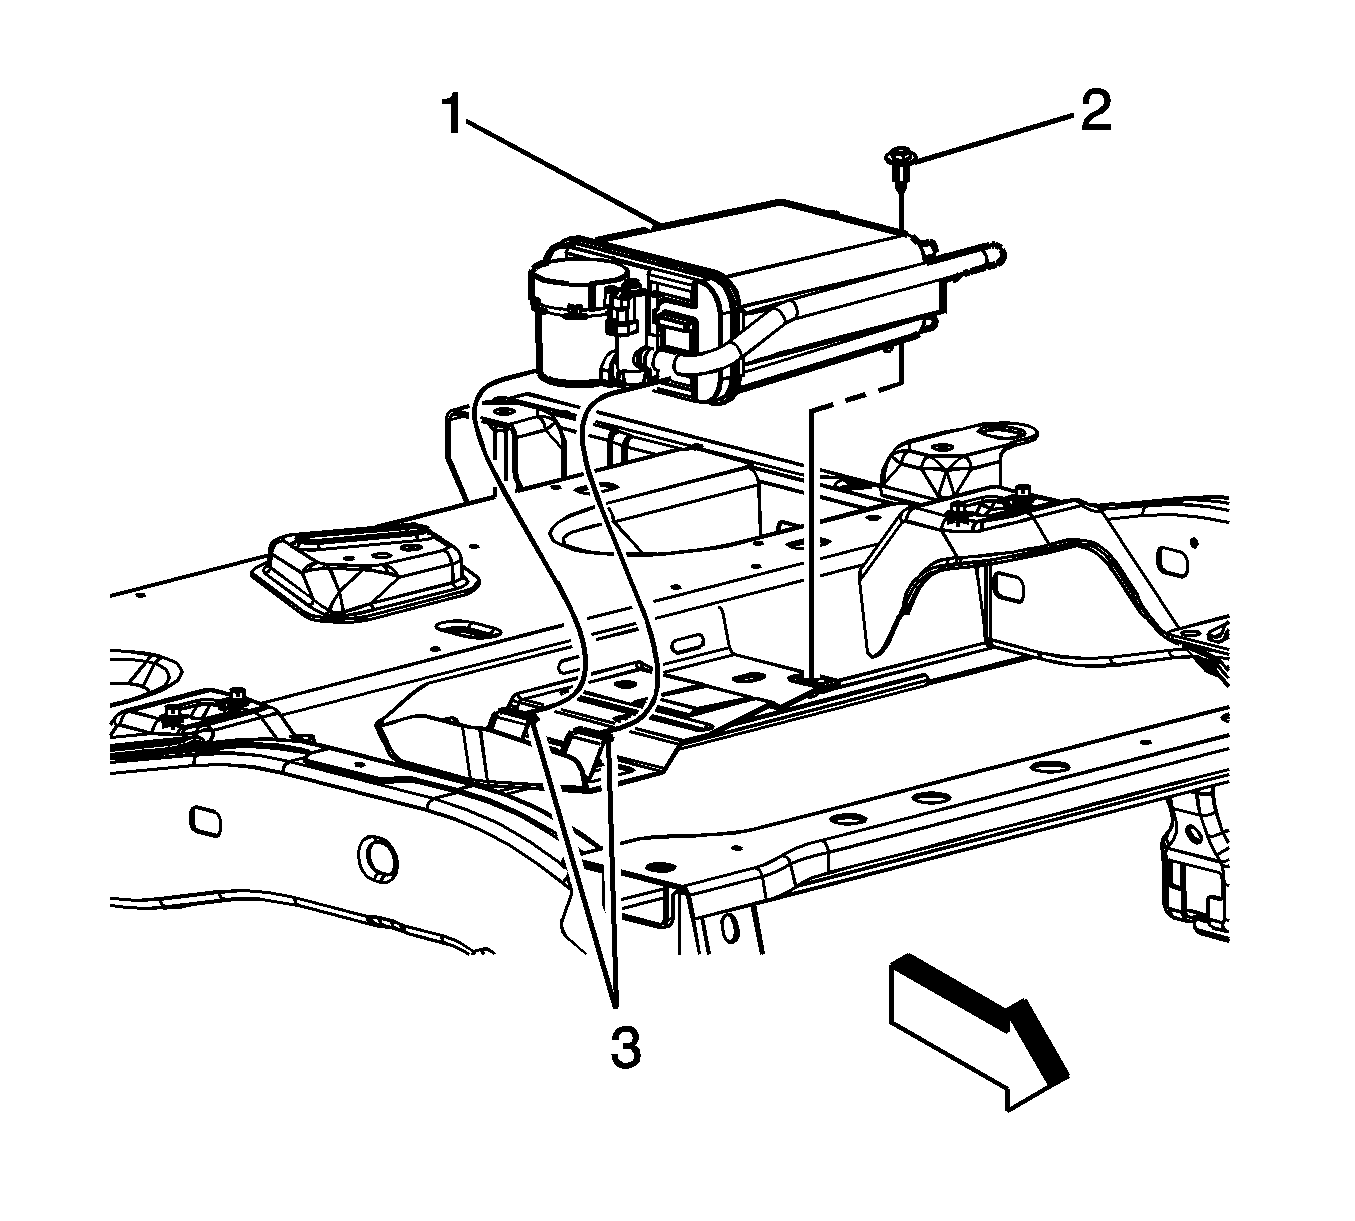
- Remove the bolt (2) securing the EVAP canister (1) to the crossmember.
- Disengage the EVAP canister (1) from the crossmember bracket tabs (3).
- Remove the EVAP canister (1) from the vehicle.

| • | The EVAP vent hose (1) |
| • | The EVAP chassis hose/pipe (2) |
| • | The EVAP canister vent solenoid valve (4) |

Installation Procedure
- Position the EVAP canister (1) to the crossmember bracket tabs (3).
- Install the bolt (2) securing the EVAP canister (1) to the crossmember.
- Slide the EVAP canister vent solenoid valve (4) over the bracket.
- Refer to Plastic Collar Quick Connect Fitting Service in order to connect the following to the EVAP canister (5):
- Connect the electrical connector to the EVAP canister vent solenoid valve (4).
- Lower the vehicle.

Notice: Refer to Fastener Notice in the Preface section.
Tighten
Tighten the EVAP canister bolt to 25 N·m
(18 lb ft).

Ensure the valve (4) is properly retained to the bracket.
| • | The EVAP vent hose (1) |
| • | The EVAP chassis hose/pipe (2) |
| • | The EVAP canister vent solenoid valve (4) |
