For 1990-2009 cars only
Front Door Opening Weatherstrip Replacement Regular, Crew
Removal Procedure
- Open the front door.
- Remove the lower center pillar panel. Refer to Center Pillar Lower Trim Panel Replacement .
- Remove the front door opening weatherstrip (2) from the door opening pinchweld flange (1).
- Remove the front door opening weatherstrip from the vehicle.
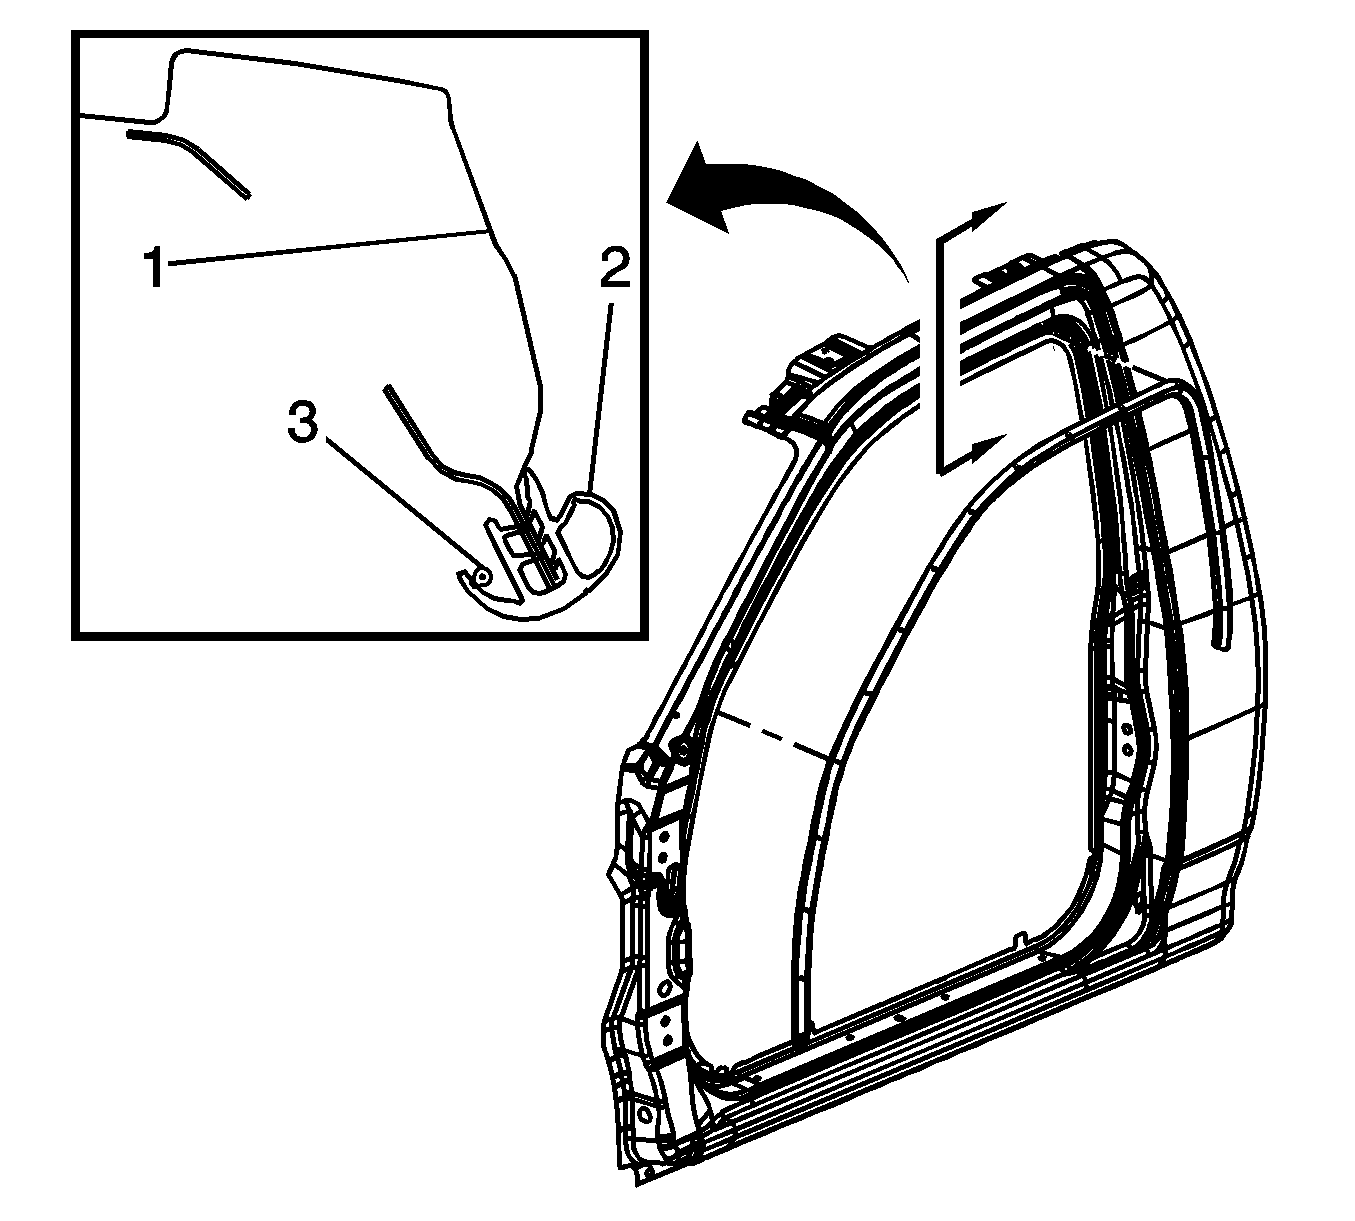
Installation Procedure
- Position the front door opening weatherstrip to the pinchweld flange.
- Starting at the upper rear corner, press the front door opening weatherstrip (2) onto the pinchweld flange (1) until it is fully seated.
- Install the lower center pillar panel. Refer to Center Pillar Lower Trim Panel Replacement .
- Pull the cord (3) on the front door opening weatherstrip ensuring the weatherstrip lip overlaps the interior trim panels and headliner.
- Close the front door.
Front Door Opening Weatherstrip Replacement Extended
Removal Procedure
- Open the front and rear door.
- Remove the front door opening weatherstrip (1) from the opening pinchweld flange.
- Remove the front door opening weatherstrip from the vehicle.

Installation Procedure
- Align the paint dot on the front door weatherstrip to the notch (2) in the upper rear corner of the pitchweld flange.
- Starting at the notch (2) in the upper rear corner, press the front door opening weatherstrip (1) onto the pinchweld flange until it is fully seated.
- Pull the cord (3) on the front door opening weatherstrip, ensuring the weatherstrip lip overlaps the interior trim panels and headliner.
- Close the front door.
