Tools Required
J 39400-A Halogen Leak Detector
Important: The A/C Refrigerant filter, ACDelco P/N 15-1696, must be installed to the A/C evaporator tube between the condenser and evaporator. The installation of this A/C refrigerant filter eliminates the need for flushing.
- Remove the evaporator tube (1) from the retaining clips (2) on the cowl.
- Measure 50 mm (2 in) from the bend on the evaporator tube (1) near the driver side fender and mark.
- Measure 50.8 mm (2 in) from the mark on the evaporator tube (1) from the previous step.
- Using a tubing cutter, cut the marked section of the evaporator tube (2).
- Remove the burrs from the evaporator tube (2).
- Remove the nuts (4), the ferrules (3), and the O-rings (2) from the A/C refrigerant filter (1).
- Push the nuts (4) and ferrules (3) over each of the evaporator tube halves.
- Install the ferrules (3) with the small end toward the nut (4).
- Install the A/C refrigerant filter (3) to the evaporator tube (2) with the flow arrow pointing towards the evaporator.
- While holding the evaporator tube in the A/C refrigerant filter (1), tighten the nuts (4) to the A/C refrigerant filter (1).
- Remove the nuts (4) from the A/C refrigerant filter (1).
- Install the O-rings (2) to the evaporator tube halves. Refer to O-Ring Replacement .
- Install the nuts (4) to the A/C refrigerant filter (1).
- Evacuate and recharge the system. Refer to Refrigerant Recovery and Recharging .
- Leak test the fittings of the component using the J 39400-A .
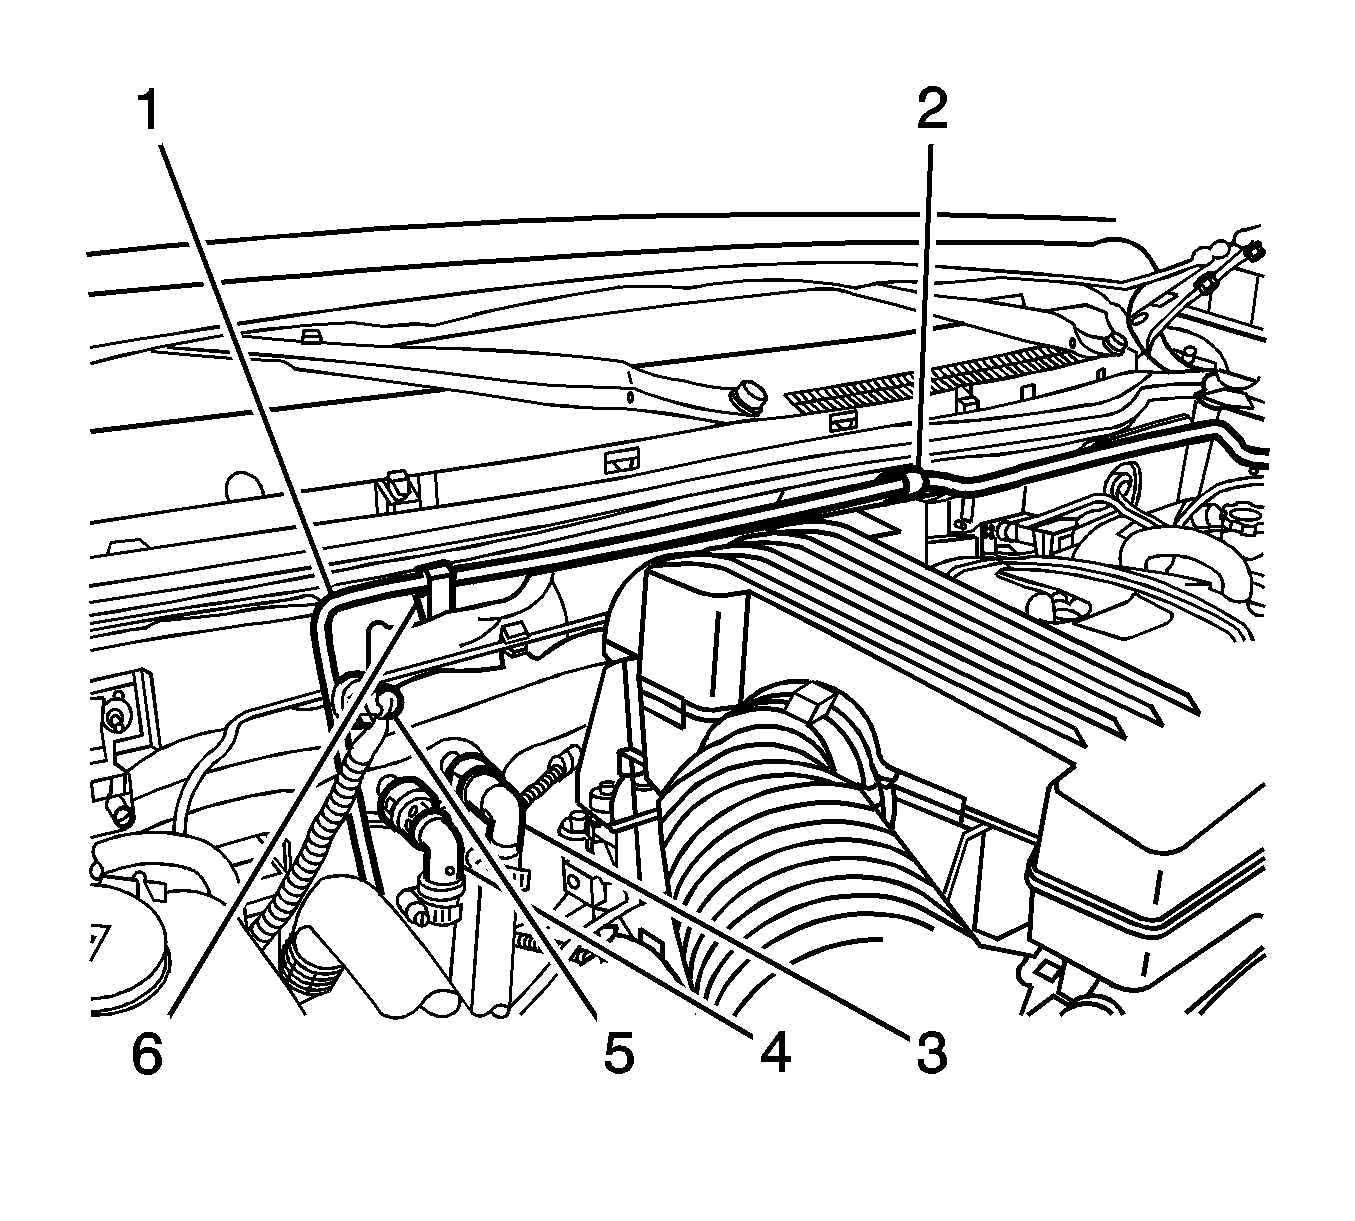
Important: Do not allow metal burrs to enter the evaporator tube (2) during cutting or when removing the burrs.
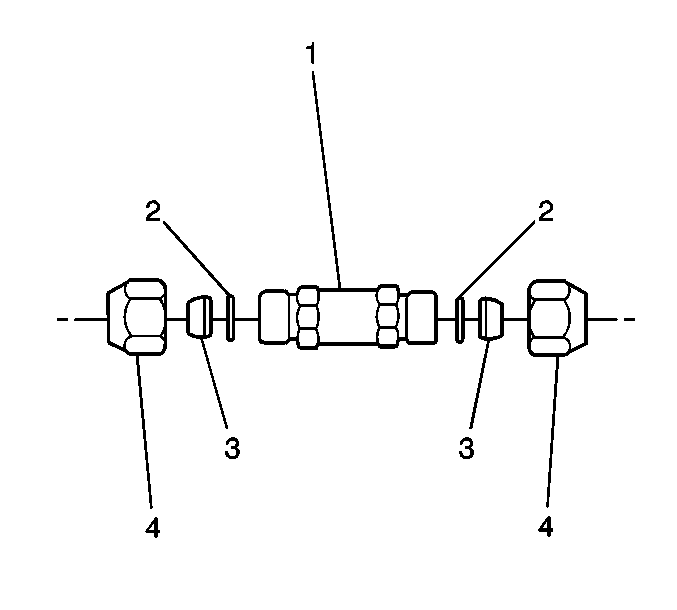
Important: DO NOT install the O-rings (2) in this step.
Notice: Use the correct fastener in the correct location. Replacement fasteners must be the correct part number for that application. Fasteners requiring replacement or fasteners requiring the use of thread locking compound or sealant are identified in the service procedure. Do not use paints, lubricants, or corrosion inhibitors on fasteners or fastener joint surfaces unless specified. These coatings affect fastener torque and joint clamping force and may damage the fastener. Use the correct tightening sequence and specifications when installing fasteners in order to avoid damage to parts and systems.
Tighten
Tighten the nuts to 15 N·m (11 lb ft).
Tighten
Tighten the nuts to 15 N·m (11 lb ft).
