For 1990-2009 cars only
Starter Replacement LLV/LLR
Removal Procedure
- Remove the intake manifold. Refer to Intake Manifold Replacement for the 2.9L engine or Intake Manifold Replacement for the 3.7L engine.
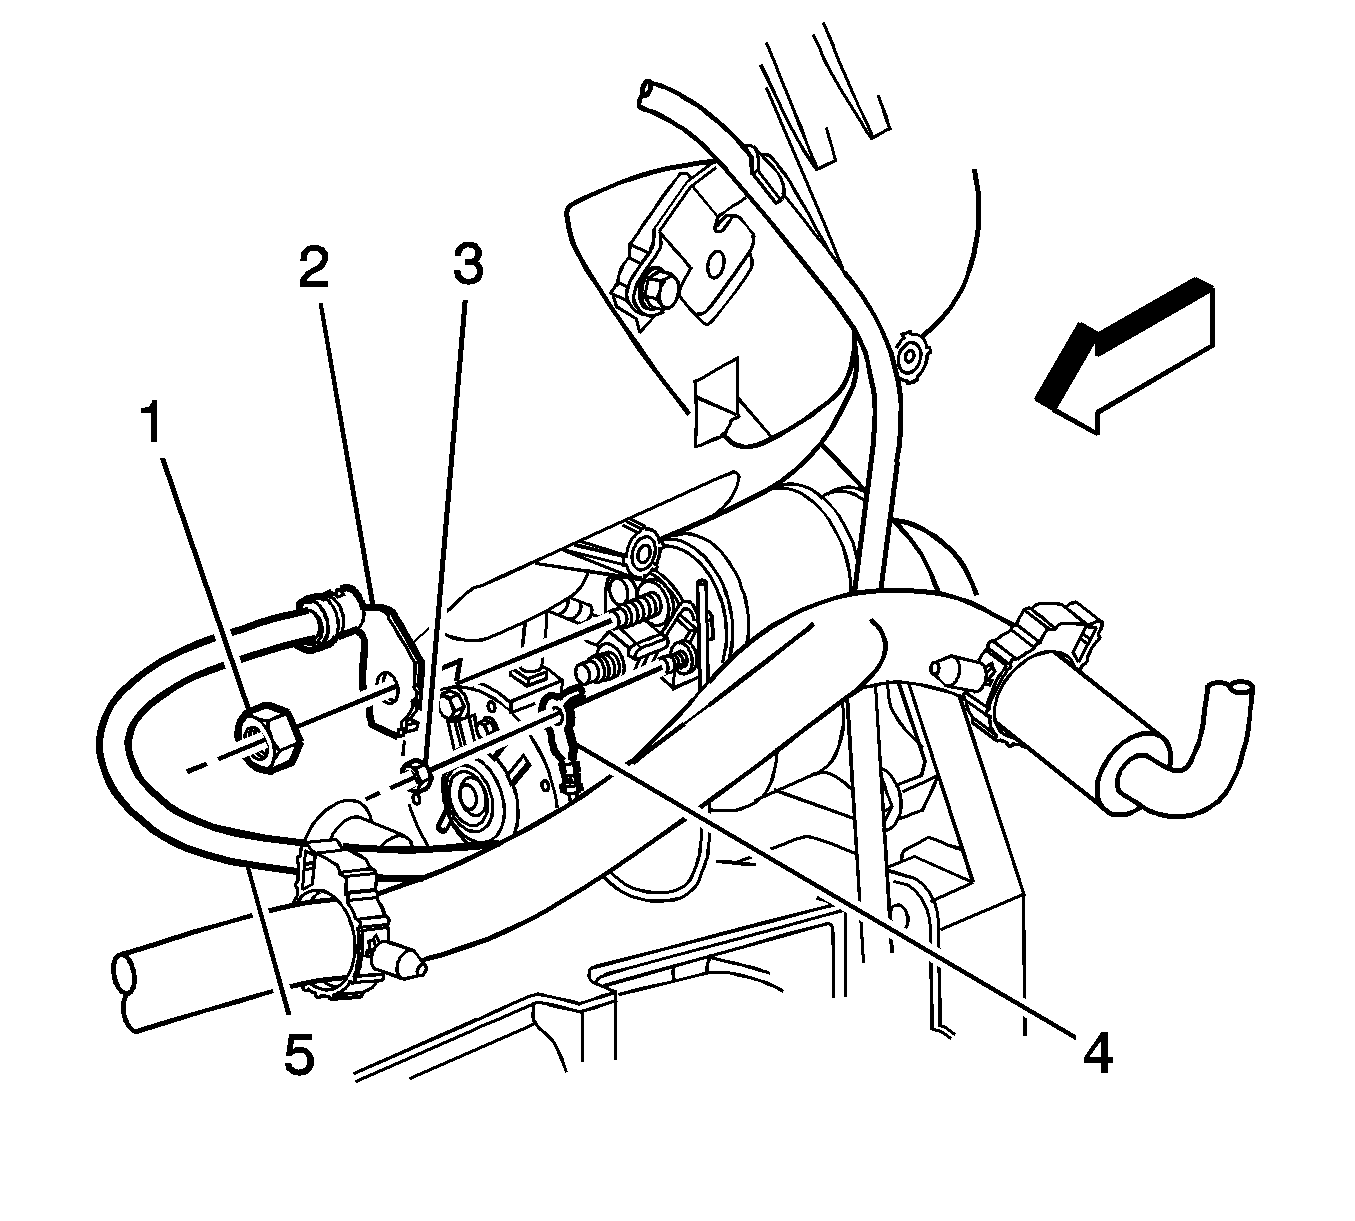
- Remove the starter solenoid S terminal nut (3) and disconnect the lead (4) from the starter.
- Remove the starter terminal nut (1) and disconnect the battery positive cable (2) from the starter.
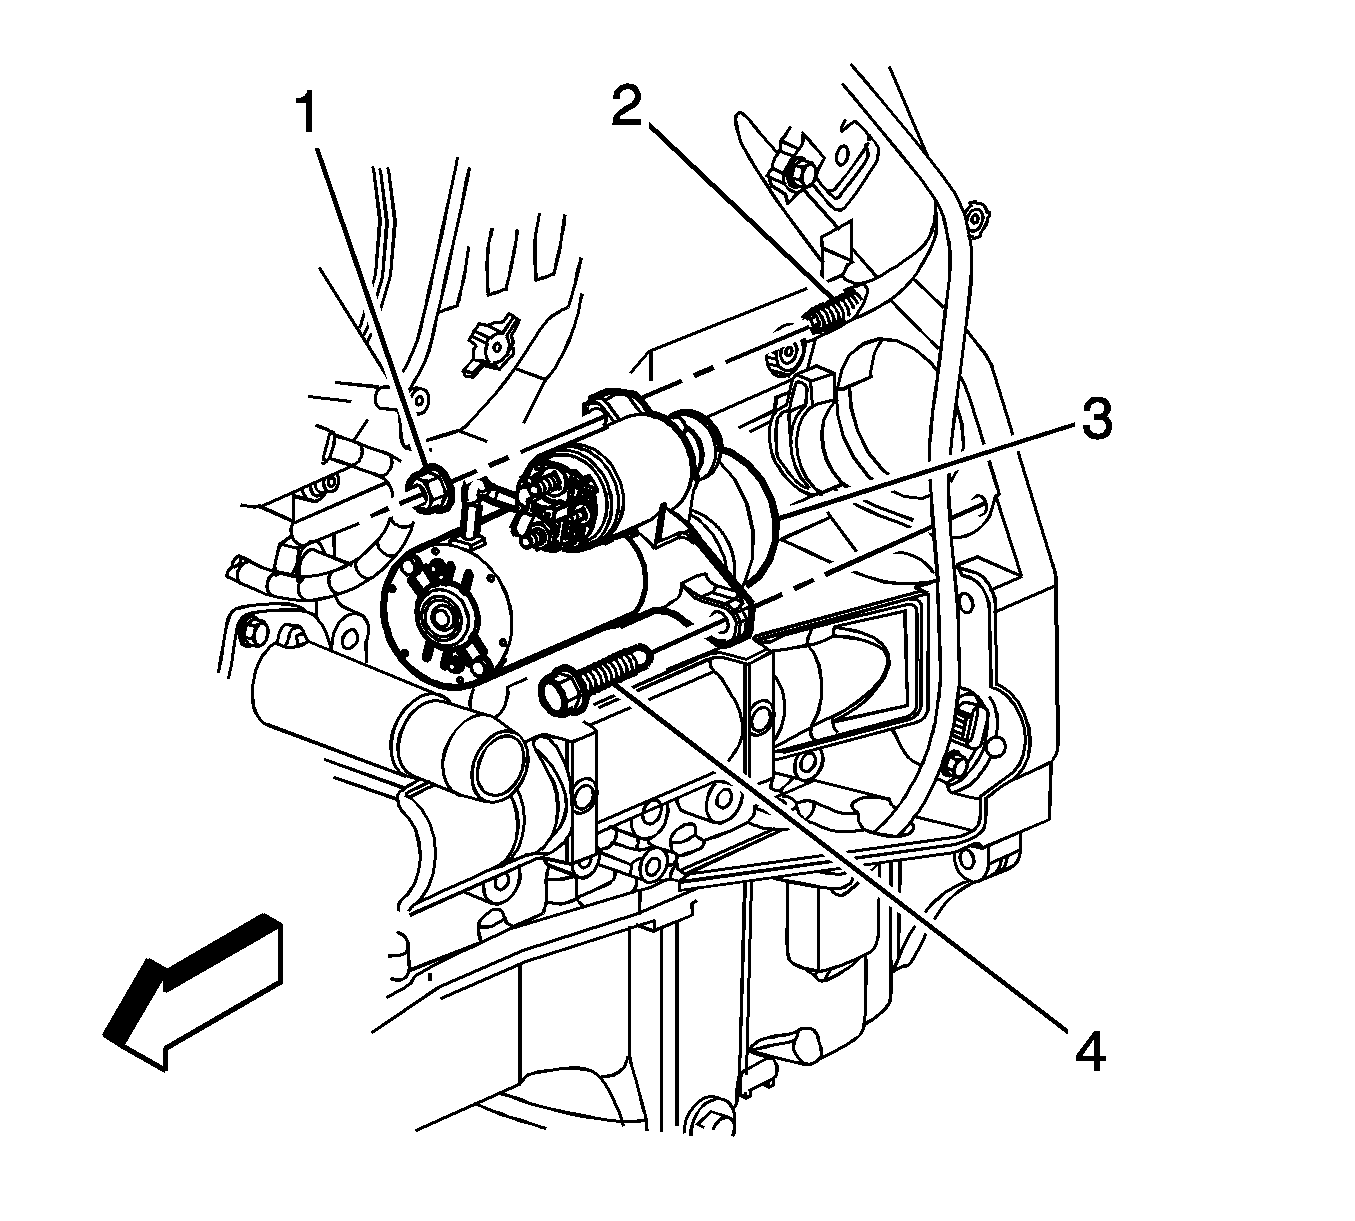
- Remove the starter motor mounting nut (1) and bolt (4).
- Remove the starter motor (3) from the engine.
Installation Procedure
- Position the starter motor (3) over the stud (2).
- Install the starter motor mounting nut (1) and bolt (4) and tighten to 50 N·m (37 lb ft).
- Connect the battery positive cable (2) to the starter and install the starter terminal nut (1).
- Connect the lead (4) to the starter solenoid and install the starter solenoid S terminal nut (3).
- Install the intake manifold. Refer to Intake Manifold Replacement for the 2.9L engine or Intake Manifold Replacement for the 3.7L engine.

Caution: Refer to Fastener Caution in the Preface section.

Tighten the nut to 9 N·m (80 lb in).
Tighten the nut to 3.5 N·m (31 lb in).
Starter Replacement LH8
Removal Procedure
- Disconnect the negative battery cable. Refer to Battery Negative Cable Disconnection and Connection.
- Remove the right front tire. Refer to Tire and Wheel Removal and Installation.
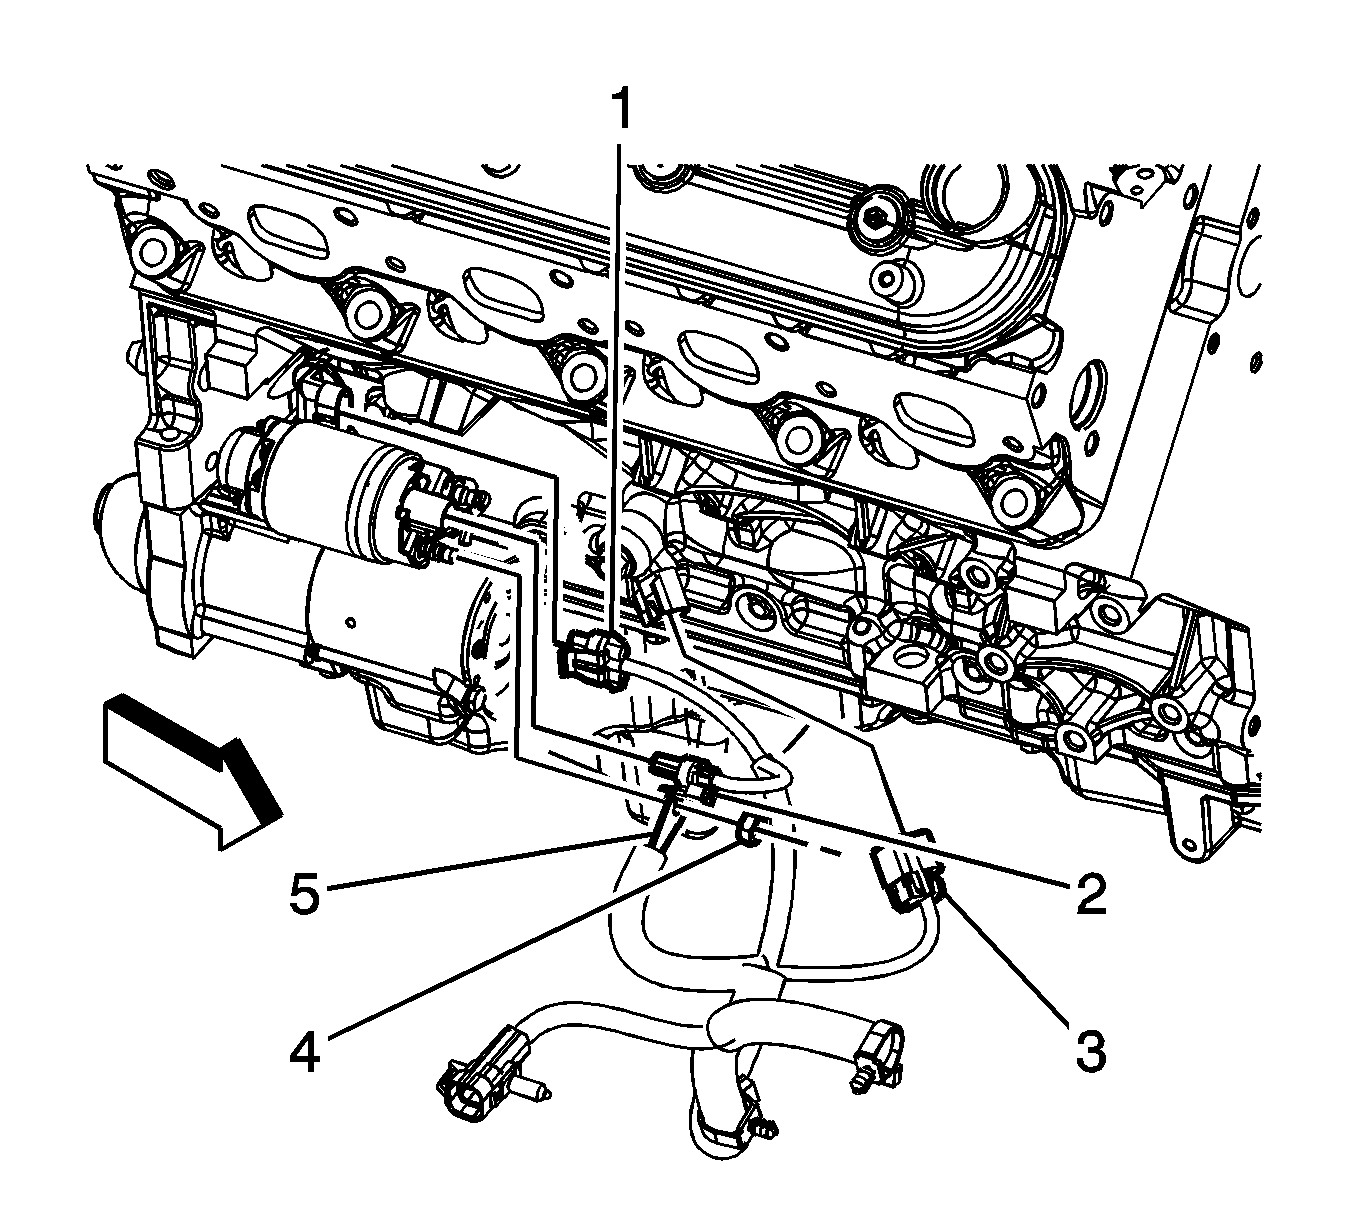
- Remove the engine wiring harness/positive battery cable terminal nut (4) and cable terminal (5) from the starter.
- Disconnect the engine wiring harness electrical connector (2) from the starter motor.
- Remove the front propeller shaft. Refer to Front Propeller Shaft Replacement.
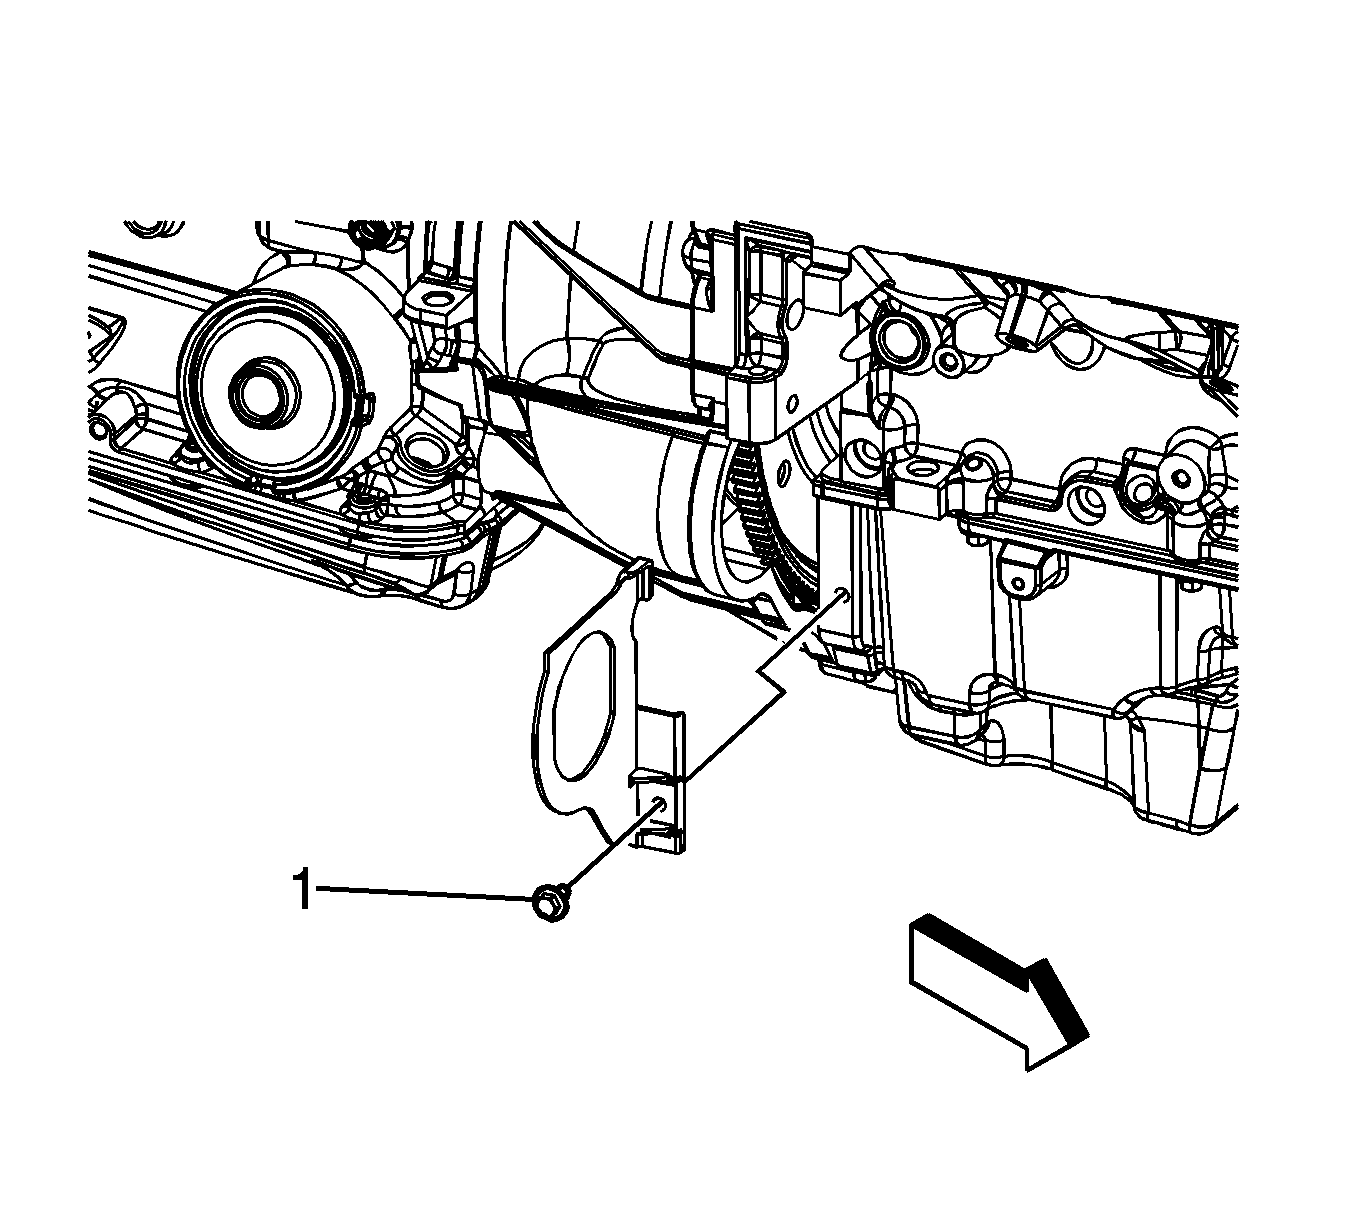
- Remove the transmission cover bolt (1).
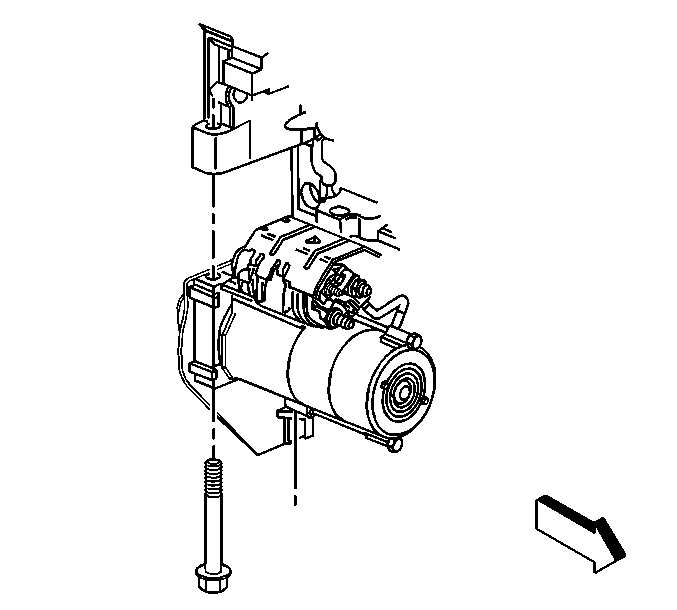
- Remove the starter motor bolts.
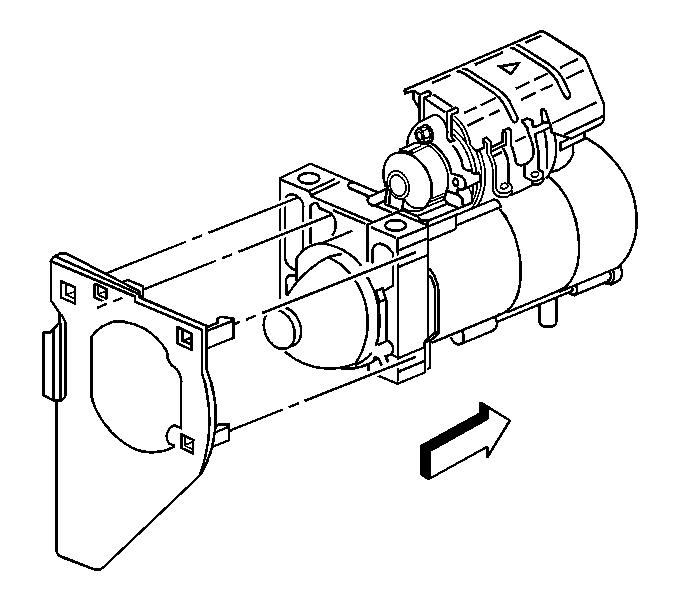
- Unsnap the transmission cover from the starter.
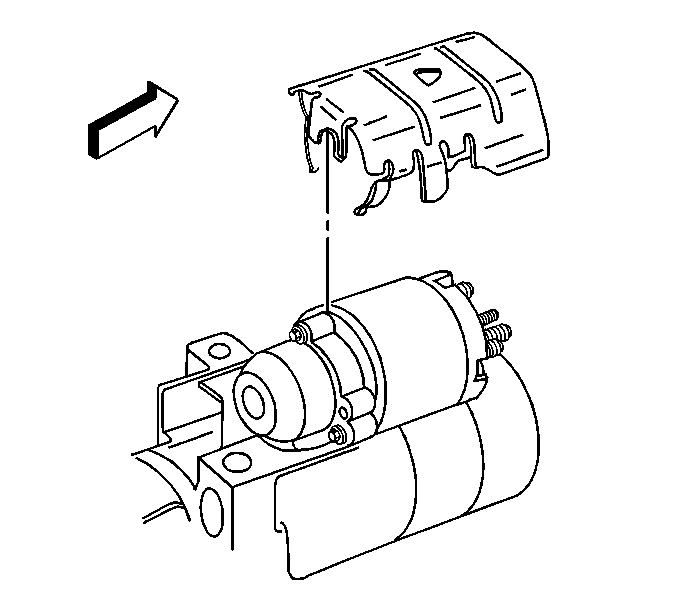
- Remove the starter heat shield, if required.
- Remove the starter.
Installation Procedure
- Install the starter heat shield, if required.
- Install the transmission cover to the starter.
- Position the starter and install the starter motor bolts.
- Install the transmission cover bolt (1).
- Connect the engine wiring harness electrical connector (2) to the starter motor.
- Install the engine wiring harness/positive battery cable terminal (5) to the starter and install the nut (4).
- Install the front propeller shaft. Refer to Front Propeller Shaft Replacement.
- Install the right front tire. Refer to Tire and Wheel Removal and Installation.
- Lower the vehicle.
- Connect the negative battery cable. Refer to Battery Negative Cable Disconnection and Connection.


Caution: Refer to Fastener Caution in the Preface section.

Tighten
Tighten the bolts to 50 N·m (37 lb ft).

Tighten
Tighten the bolt to 12 N·m (106 lb in).

Tighten
Tighten the nut to 9 N·m (80 lb in).
