For 1990-2009 cars only
Tools Required
J 44219 Cover Alignment Pins
Removal Procedure
- Drain the engine coolant. Refer to Cooling System Draining and Filling .
- Remove the cooling fan and the shroud. Refer to Cooling Fan and Shroud Replacement .
- Remove the drive belt. Refer to Drive Belt Replacement .
- Remove the water pump. Refer to Water Pump Replacement .
- Remove the crankshaft balancer. Refer to Crankshaft Balancer Replacement .
- Remove the power steering pump. Refer to Power Steering Pump Replacement .
- Raise the vehicle. Refer to Lifting and Jacking the Vehicle .
- Remove the oil pan. Refer to Oil Pan Replacement .
- Lower the vehicle.
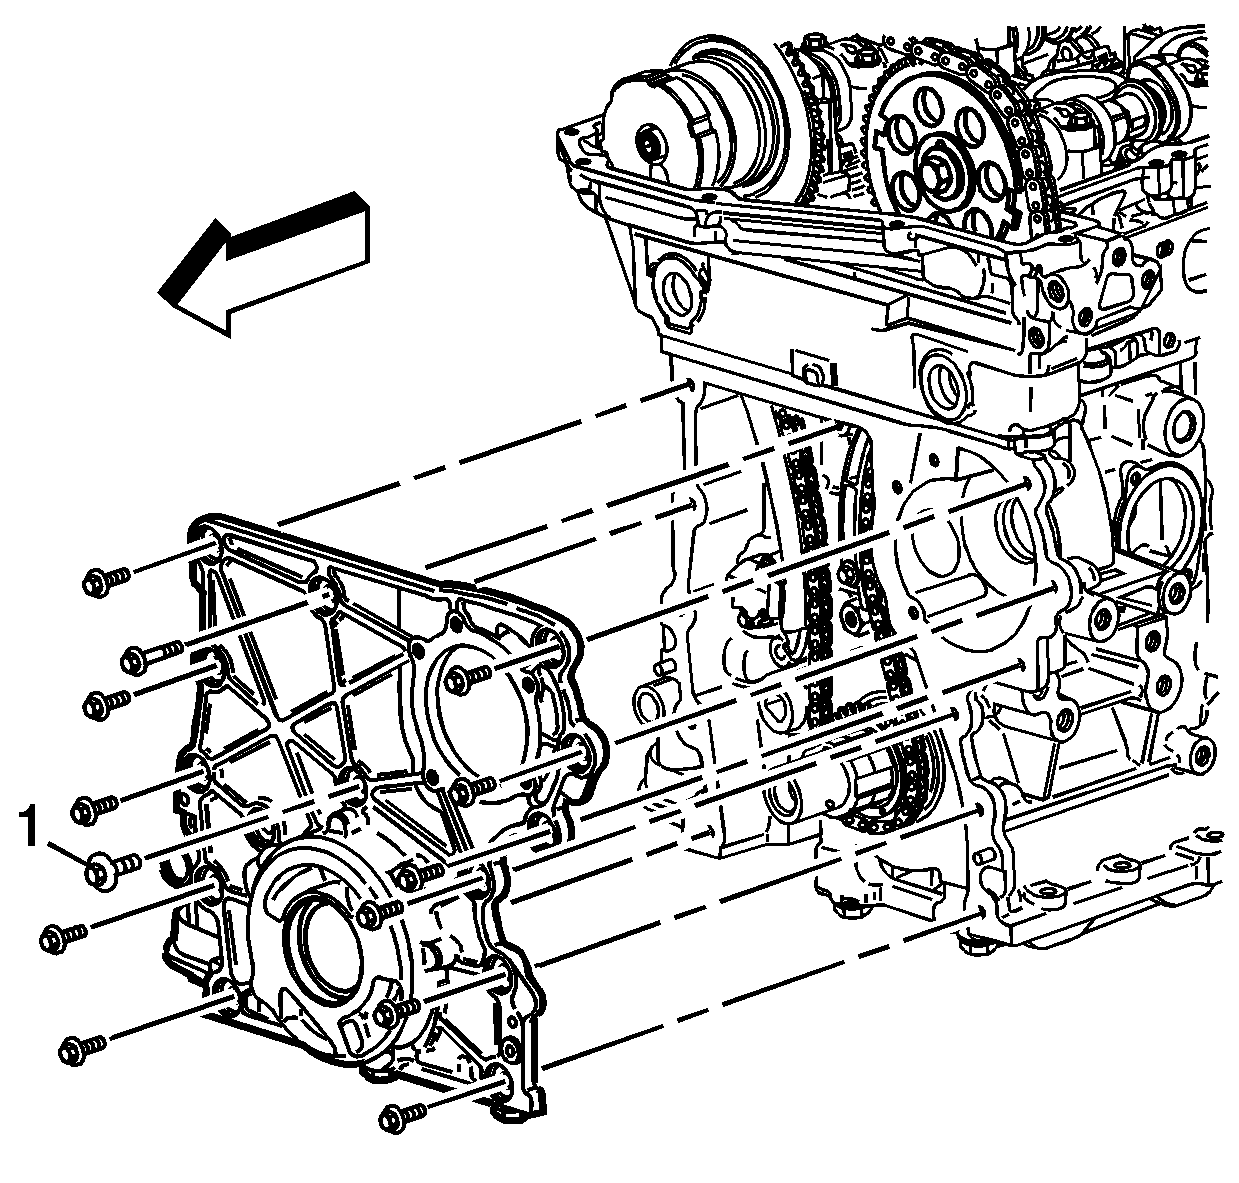
- Remove the 7 mm center bolt (1).
- Loosen and remove the remaining engine front cover bolts.
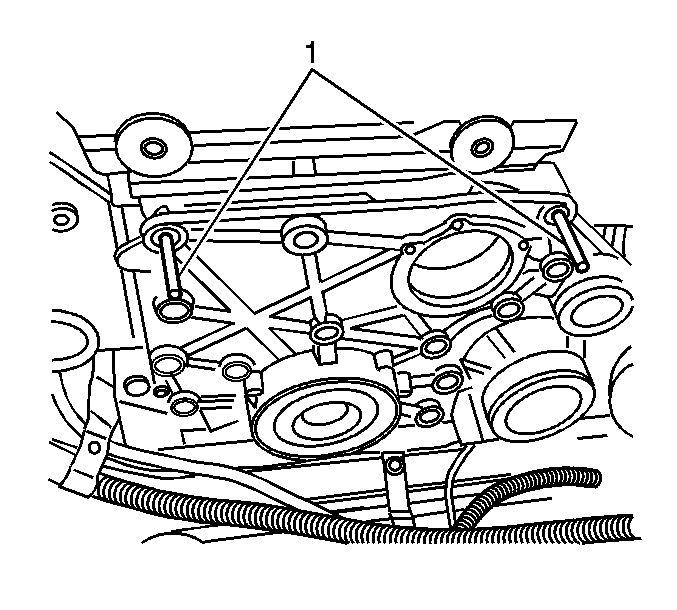
- Place 2 of the front cover bolts in the jack screw holes on the front cover and tighten the bolts evenly to release the front cover from the engine.
- Remove the 2 bolts from the front cover.
- Remove the oil pump. Refer to Oil Pump Replacement .
- Clean and inspect the front cover. Refer to Engine Front Cover Cleaning and Inspection .

Installation Procedure
- Install the J 44219 onto the engine.
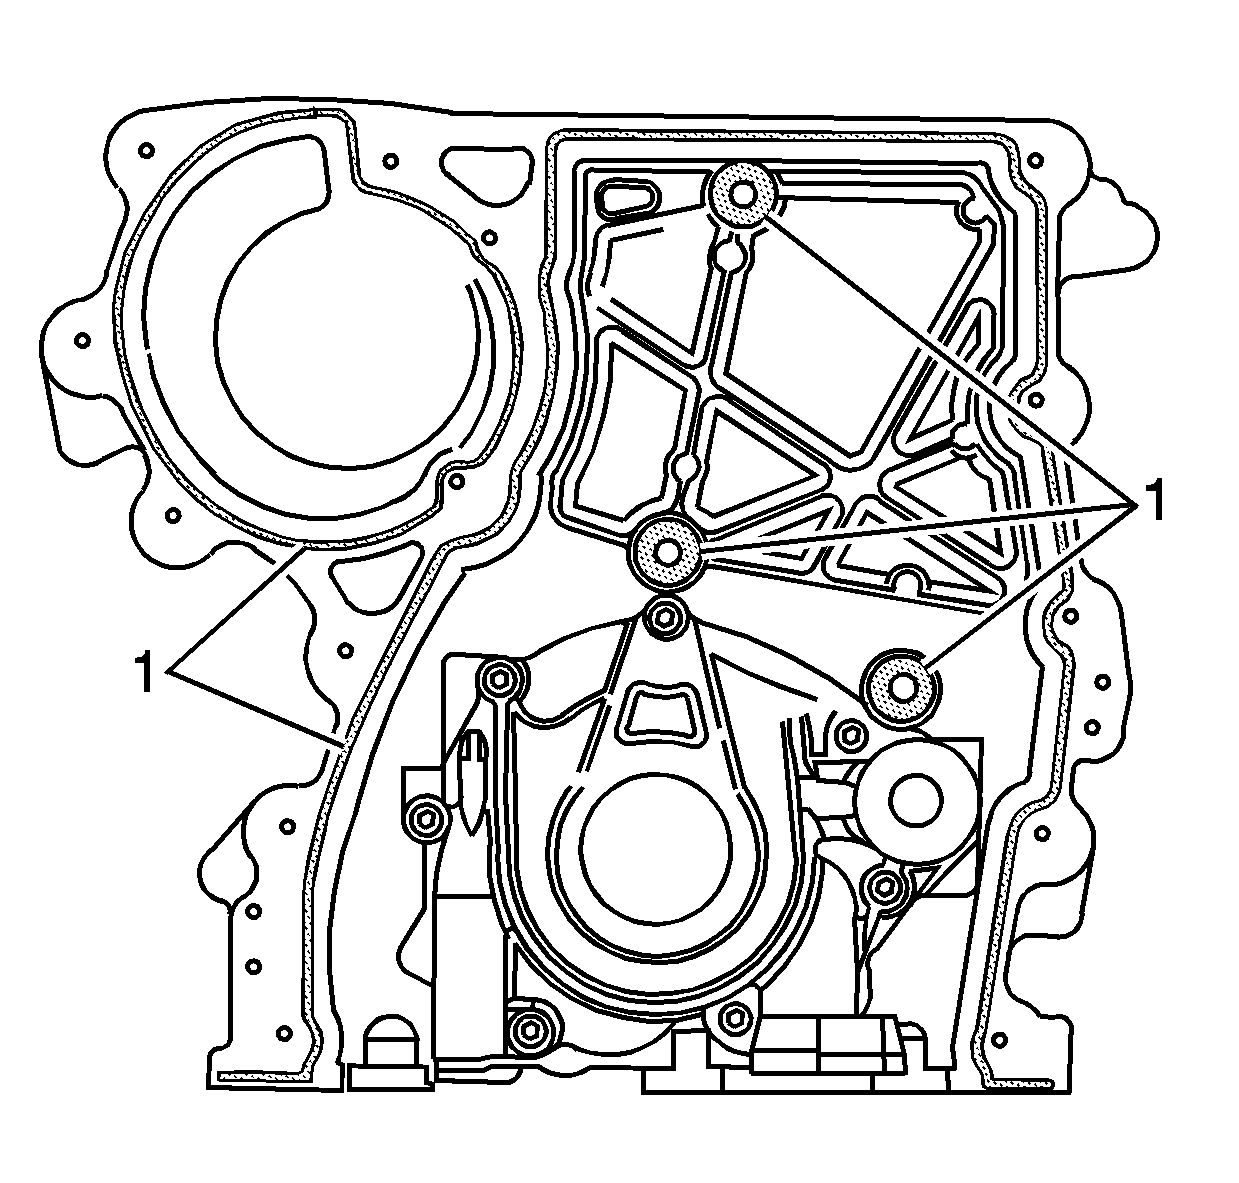
- Apply a 3 mm (0.12 in) bead of sealer to the trace grooves on back side of the engine front cover (1). Refer to Adhesives, Fluids, Lubricants, and Sealers for the correct part number.
- Also apply sealant on the inside 3 bolt hole bosses on the cover.
- Align the oil pump to the crankshaft sprocket splines.
- Install the front cover.
- Install the front cover bolts, tightening the center bolt (1) last.
- Remove the J 44219 .
- Raise the vehicle. Refer to Lifting and Jacking the Vehicle .
- Install the oil pan. Refer to Oil Pan Replacement .
- Lower the vehicle.
- Install the power steering pump. Refer to Power Steering Pump Replacement .
- Install the crankshaft balancer. Refer to Crankshaft Balancer Replacement .
- Install the water pump. Refer to Water Pump Replacement .
- Install the drive belt. Refer to Drive Belt Replacement .
- Install the cooling fan and shroud. Refer to Cooling Fan and Shroud Replacement .
- Fill the engine with coolant. Refer to Cooling System Draining and Filling .


Important: The engine front cover must be installed within 10 minutes from when the sealer was applied.

Notice: Refer to Fastener Notice in the Preface section.
Tighten
Tighten the front cover bolts to 10 N·m (89 lb in).
