For 1990-2009 cars only
Rear Bumper Step Pad Replacement TrailBlazer
Removal Procedure
- Apply protective tape to bumper surface at the edge of the step pad.
- Open the liftgate.
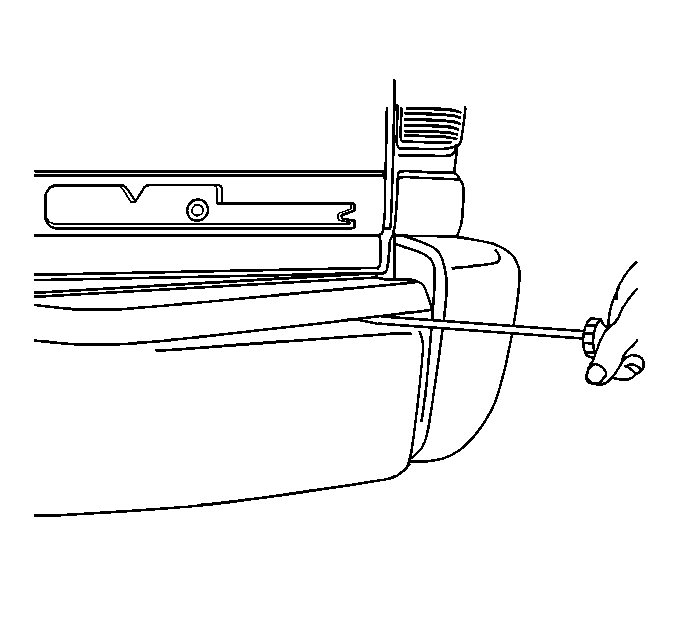
- Use a flat bladed tool to release the step pad from the adhesive strips located at each end of the step pad.
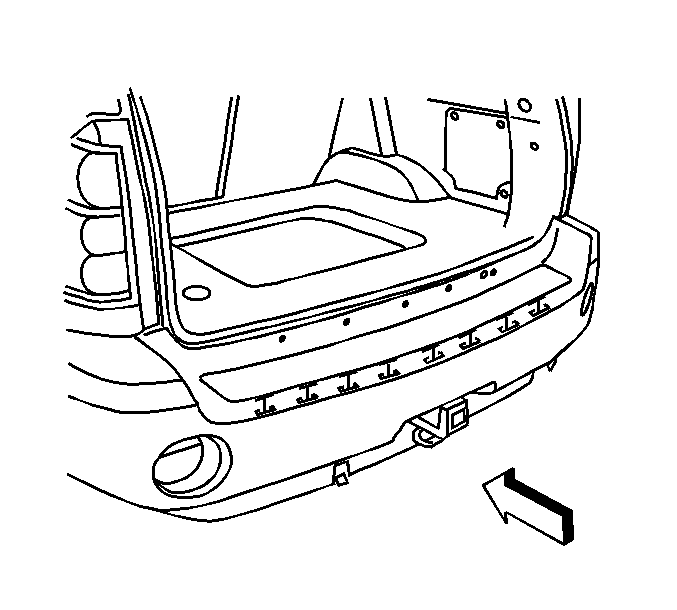
- Release the step pad retaining tabs.
- Remove the bolts retaining the outermost corners of the step pad to the fascia.
- Remove the step pad from the fascia.
- Remove all adhesive from the rear bumper fascia using 3M™ ScotchBrite molding adhesive remover disk 3M™ P/N 07501 or equivalent.
- Clean the rear door panel surface using varnish makers and painters (VMP) naphtha and allow to air dry.
Notice: When removing body panels, apply tape to corners of panel and adjacent surfaces to help prevent paint damage.

Installation Procedure
- Remove the backing from the adhesive strips.
- Position the step pad to the fascia.
- Install the step pad to the fascia, ensuring that the retaining tabs are thoroughly engaged, and the end of the step pad are secured.
- Install the bolts.
Notice: Refer to Fastener Notice in the Preface section.
Tighten
Tighten the step pad retaining bolts to 10 N·m (89 lb in).
Rear Bumper Step Pad Replacement Outer - TrailBlazer
Installation Procedure
- Place the fascia on a clean work surface. Cover the surface with a cloth-type material to prevent damage to the fascia painted surface.
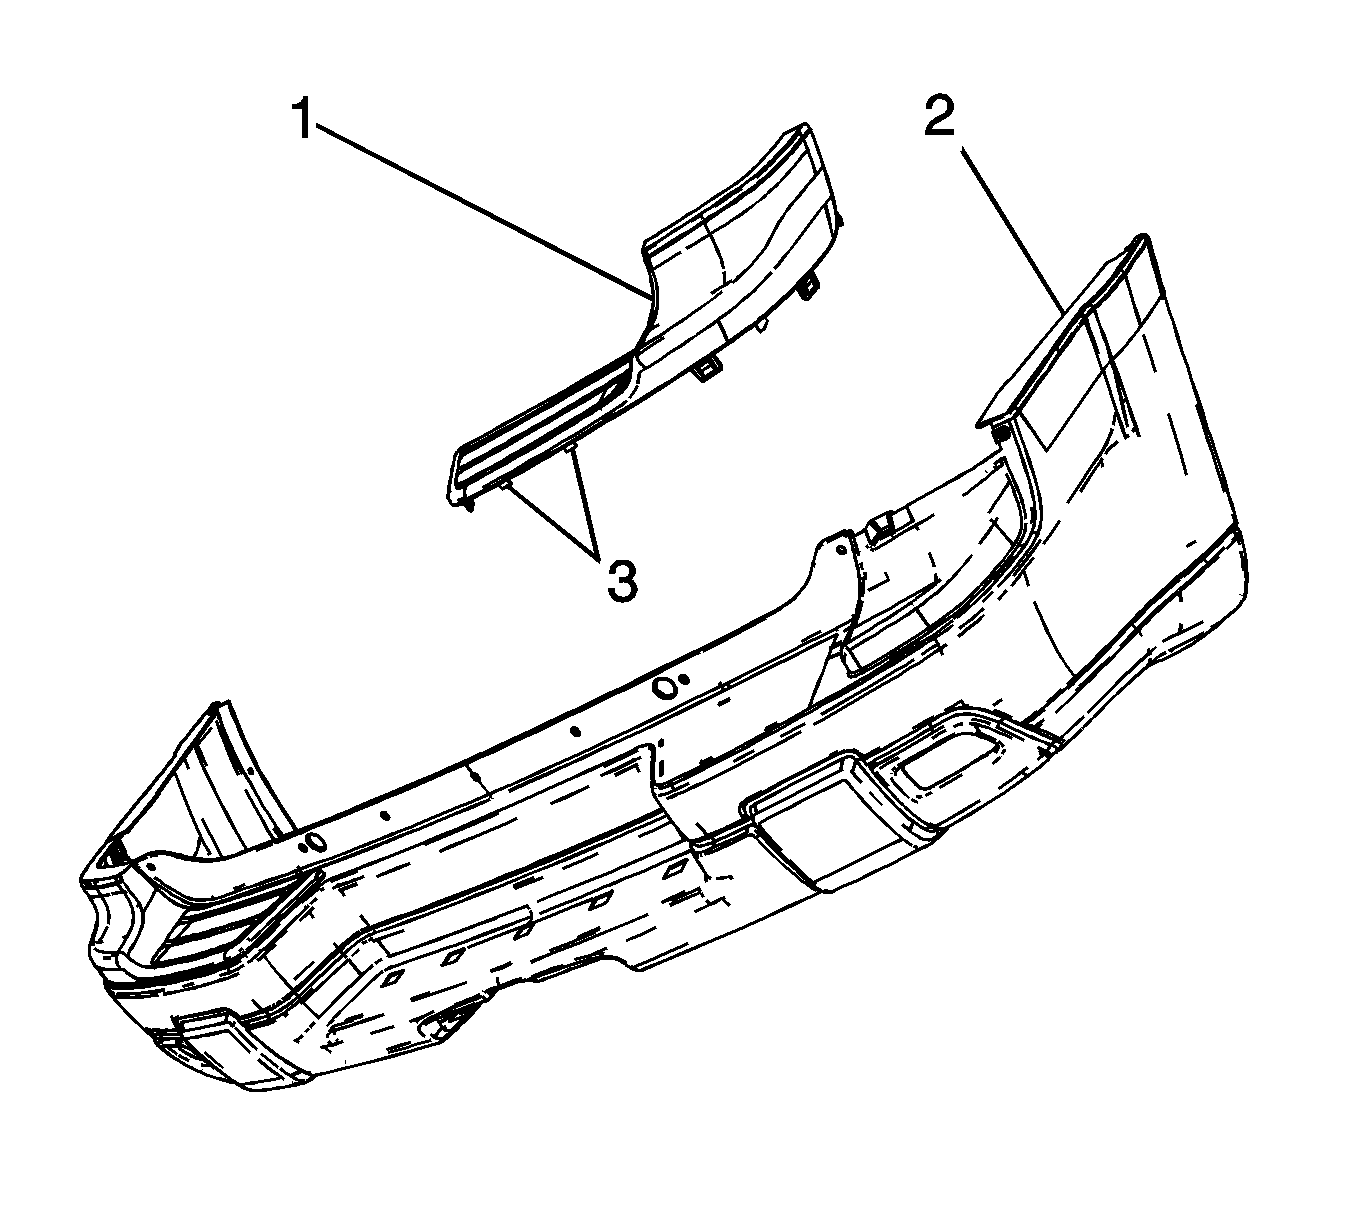
- Install the step pad (1) onto the fascia (2). Ensure the tabs are fully engaged and all heat stake tabs (3) are completely through the fascia material.
- Place the fascia on the work surface with the heat stake tabs facing upward.
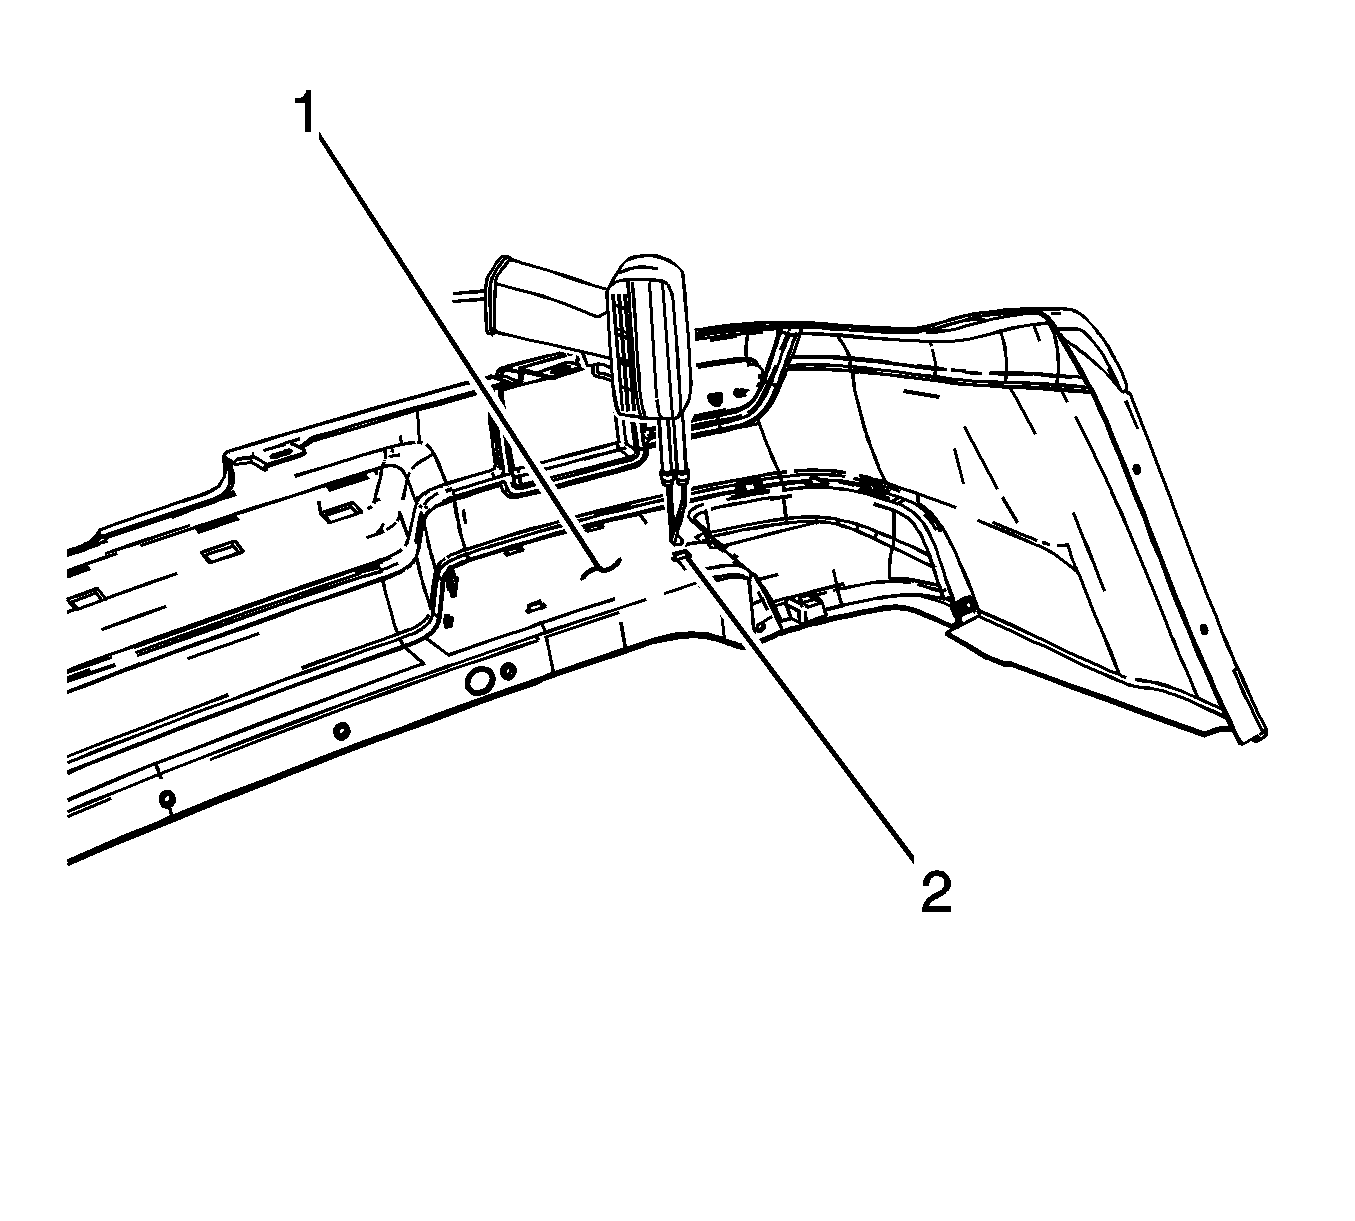
- Press and hold the fascia material (1) so the pad is flush with the outer fascia surface.
- Using a Weller™ Model 8200 soldering gun (or equivalent) equipped with a flat tip, use a circular motion on the heat stake material (2) to melt it flush to the fascia inner surface.
- After the heat stake has been melted, keep steady pressure on the fascia inner surface for 30 seconds to allow the heat stake to harden.
- Repeat steps 4-6 for the remaining heat stake tabs.


Rear Bumper Step Pad Replacement Envoy, Envoy XUV, Rainier
Removal Procedure
- Apply protective tape to the bumper surface at the edge of the step pad.
- Open the liftgate.
- Use a flat-bladed tool to release the step pad from the adhesive strips located at each end of the step pad.
- Release the step pad retaining tabs.
- Remove the step pad from the fascia.
- Remove all adhesive from the rear bumper fascia using 3M™ ScotchBrite molding adhesive remover disk 3M™ P/N 07501 or equivalent.
- Clean the rear bumper fascia surface using Varnish Makers and Painters (VMP) naphtha and allow to air dry.
Notice: When removing body panels, apply tape to corners of panel and adjacent surfaces to help prevent paint damage.


Installation Procedure
- Remove the backing from the adhesive strips.
- Position the step pad to the fascia.
- Install the step pad to the fascia, ensuring that the retaining tabs are thoroughly engaged, and the end of the step pads are secured.
- Close the liftgate.

