For 1990-2009 cars only
Removal Procedure
- Turn the ignition switch to the OFF position.
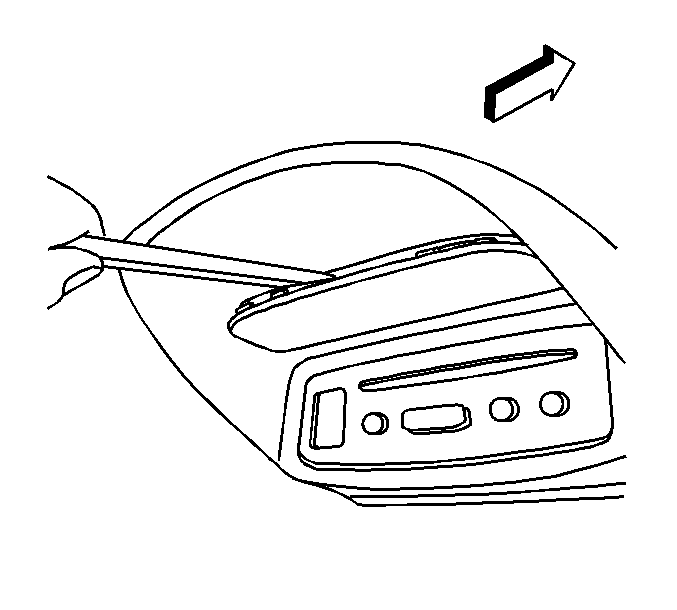
- Using a plastic flat-bladed tool, carefully remove the bolt cover bezel.
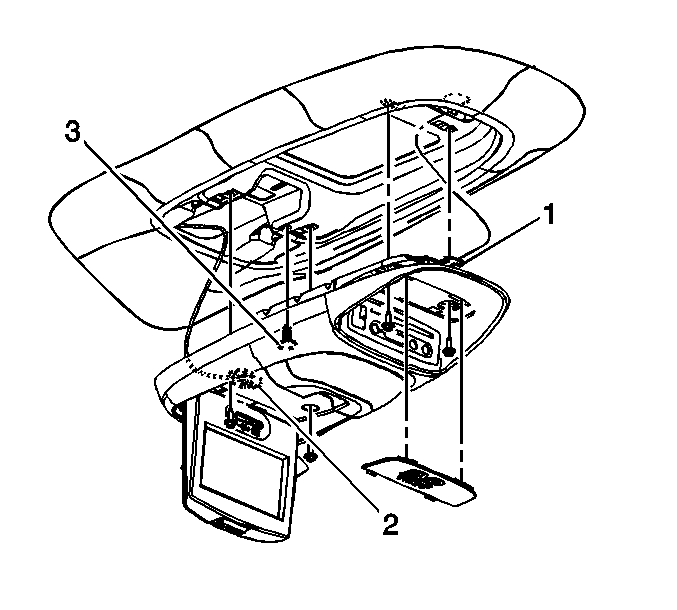
- Fully loosen the two rear retaining bolts. The bolts will remain attached to the video assembly.
- In order to expose the two front retaining bolts, adjust the video display screen to a full open position.
- Fully loosen the front retaining bolts. The bolts will remain attached to the video assembly.
- Close the video display screen.
- Slowly lower the front of the video assembly to release the retaining fastener (3).
- Support the video assembly and disconnect the electrical connector (2).
- Adjust the video assembly in order to release the T-hook (1) from the video player bracket.
- Remove the video assembly from the vehicle.
Important: Do not attempt to service the video display assembly components.
The video display is serviced only as an assembly.

Installation Procedure
- Install the video assembly to the vehicle.
- Lift the and adjust the video assembly in order to install the T-hook (1) to the video player bracket. Ensure the T-hook is fully seated to the bracket.
- Support the front of the video assembly and connect the video assembly electrical connector (2).
- Align the retaining fastener (3) to the corresponding hole in the video player bracket.
- Raise the front of the video assembly to install the retaining fastener (3).
- Partially install the rear retaining bolts.
- Adjust the video display screen to a full open position.
- Partially install the front retaining bolts.
- Fully seat the retaining bolts.
- Verify the video display for proper operation.
- Close the video display screen.
- Install the bolt cover bezel.
Important: Ensure the lock washers are fully seated, completely exposing the bolt threads.

Notice: Refer to Fastener Notice in the Preface section.
Tighten
Tighten the bolts to 9 N·m (80 lb in).
