Removal Procedure
- Disable the SIR system. Refer to SIR Disabling and Enabling .
- Remove the left closeout/insulator panel. Refer to Instrument Panel Insulator Panel Replacement - Left Side .
- Remove the knee bolster trim panel. Refer to Driver Knee Bolster Panel Replacement .
- Remove the knee bolster. Refer to Knee Bolster Replacement .
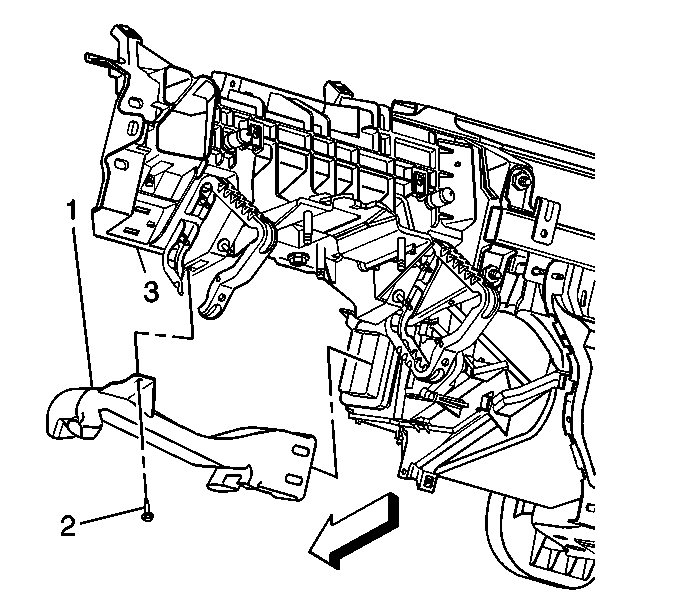
- Remove the left HVAC push pin (2).
- Remove the left HVAC floor duct (1).
- Fully lower the steering column. Refer to Steering Column Replacement .
- Remove the shift lever bezel, Oldsmobile only. Refer to Console Shift Lever Bezel Replacement .
- Remove the center console. Refer to Console Replacement .
- Remove the instrument panel (I/P) lower sound insulator panel, GMC or Chevrolet only. Refer to Instrument Panel Insulator Panel Replacement .
- Remove the I/P accessory trim plate, GMC or Oldsmobile only. Refer to Instrument Panel Accessory Trim Plate Replacement .
- Remove the I/P cluster bezel, Chevrolet only. Refer to Instrument Panel Cluster Trim Plate Bezel Replacement .
- Remove the I/P cluster. Refer to Instrument Cluster Replacement .
- Remove the right closeout/insulator panel. Refer to Instrument Panel Insulator Panel Replacement - Right Side .
- Remove the I/P storage compartment door. Refer to Instrument Panel Compartment Door Replacement .
- Remove the radio. Refer to Radio Replacement .
- Remove the HVAC control module. Refer to HVAC Control Module Replacement .
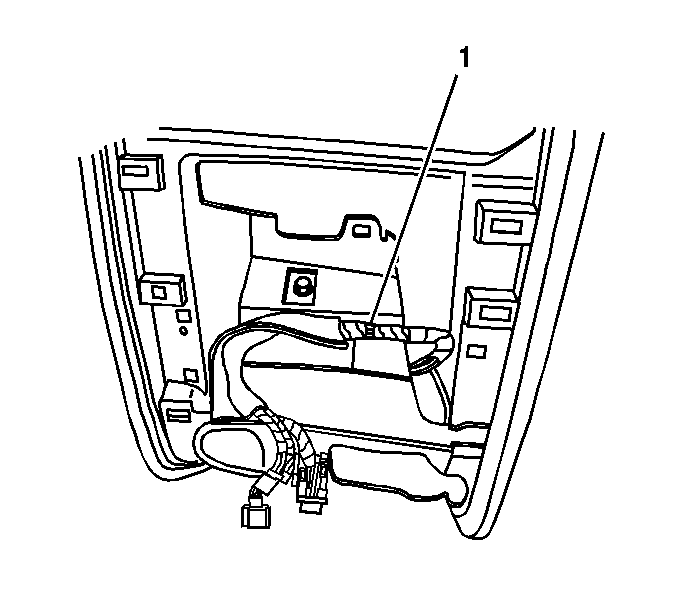
- Remove the HVAC control module wire harness attachment (1) from the I/P substrate.
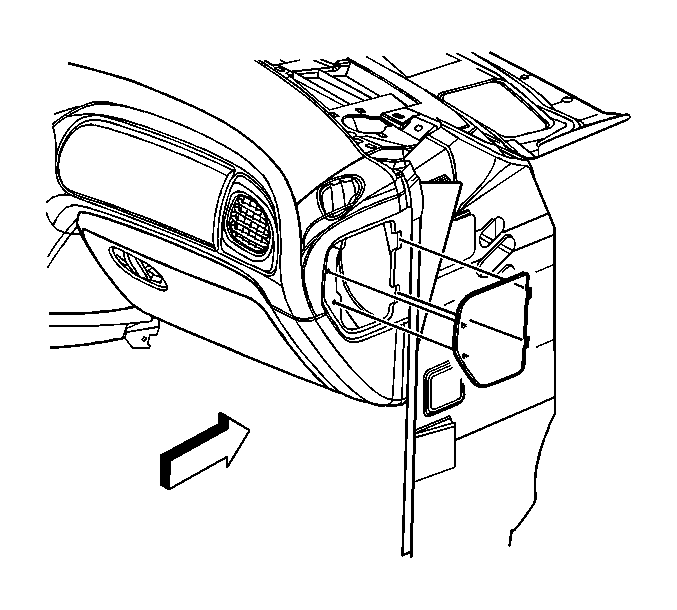
- Remove the left I/P access cover.
- Remove the headlamp switch. Refer to Headlamp Switch Replacement .
- If replacing the I/P, remove the headlamp switch bezel. Refer to Instrument Panel Accessory Trim Plate Replacement - Left Side .
- Remove the windshield garnish moldings. Refer to Windshield Pillar Garnish Molding Replacement .
- Remove the trim pad. Refer to Instrument Panel Upper Trim Pad Replacement .
- Remove the front upper speakers, if equipped. Refer to Front Upper Speaker Replacement .
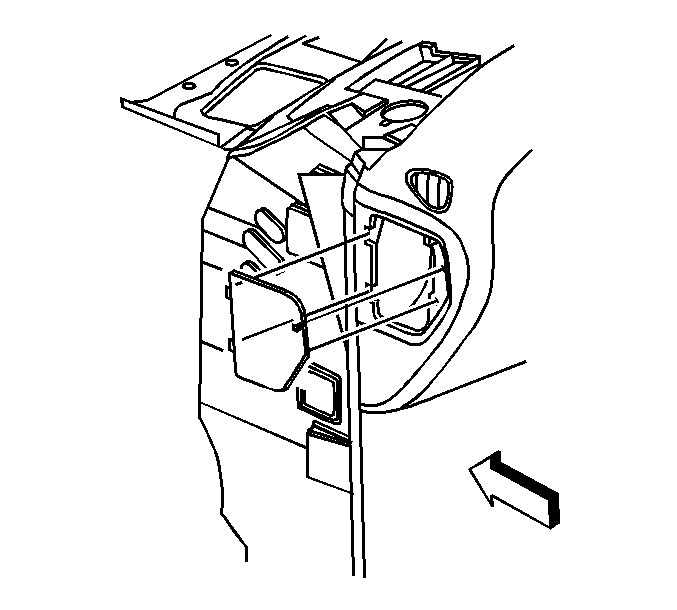
- Remove the right I/P access cover.
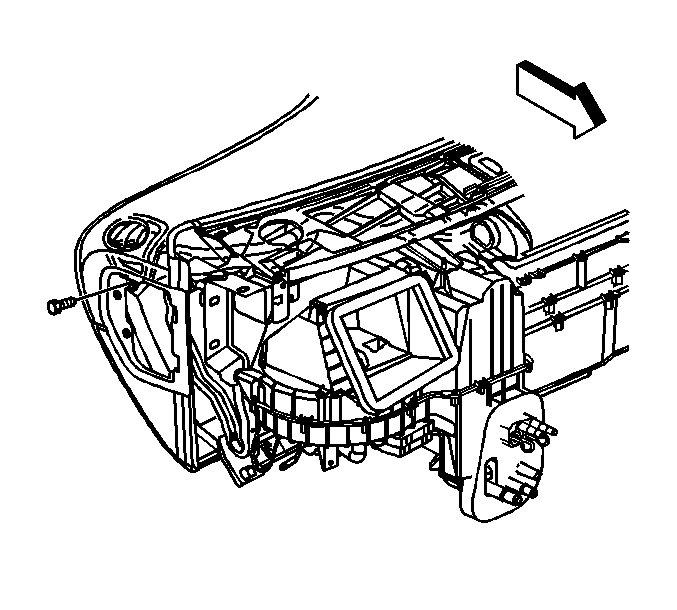
- Remove the side window defogger outlet screw.
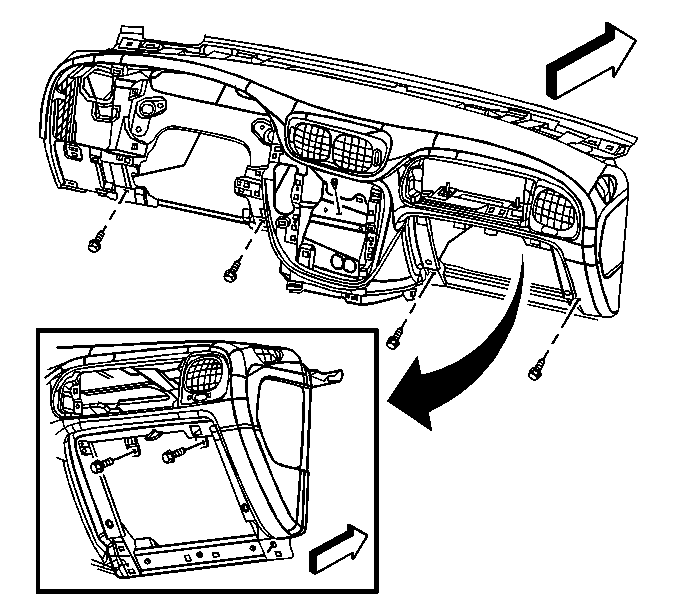
- Remove the bolts securing the lower portion of the instrument panel to the vehicle.
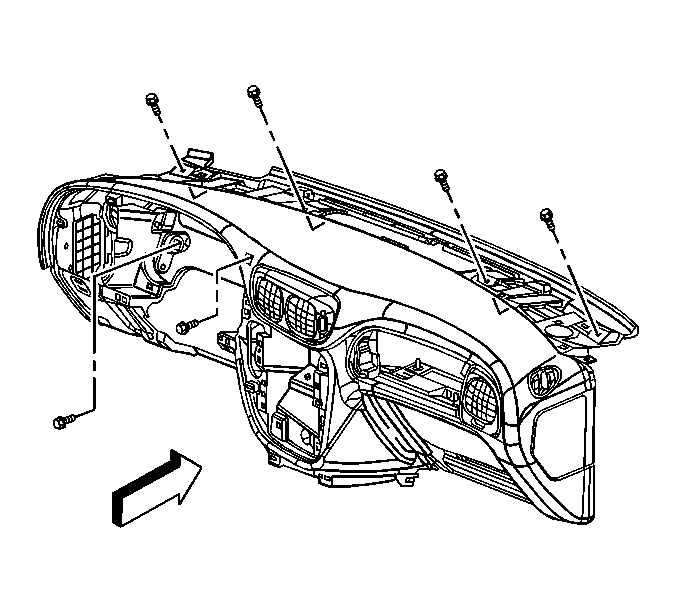
- Remove the bolts that secure the middle and upper portion of the instrument panel to the vehicle.
- With the aid of an assistant, lift up from the bottom of the instrument panel in order to release the I/P from the positioning locators.
- Remove the instrument panel from the vehicle.
- Place the I/P on a clean prepared surface.
- If replacing the I/P, remove the passenger inflatable restraint I/P module. Refer to Inflatable Restraint Instrument Panel Module Replacement .
- If replacing the I/P, remove the air distribution duct vents from the instrument panel. Refer to Air Distributor Duct Replacement .
Installation Procedure
- If replacing the I/P, install the air distribution duct vents to the instrument panel. Refer to Air Distributor Duct Replacement .
- If replacing the I/P, install the passenger inflatable restraint module to the instrument panel. Refer to Inflatable Restraint Instrument Panel Module Replacement .
- With the aid of an assistant, install the instrument panel to the vehicle.
- Fully seat the instrument panel to the positioning locators.
- Install the bolts securing the middle and upper portion of the instrument panel to the vehicle.
- Install the bolts that secure the lower portion of the instrument panel to the vehicle.
- Complete the installation of all of the bolts that retain the I/P to the vehicle.
- Install the side window defogger outlet screw.
- Install the right I/P access cover.
- Install the front upper speakers, if equipped. Refer to Front Upper Speaker Replacement .
- Install the trim pad. Refer to Instrument Panel Upper Trim Pad Replacement .
- Install the windshield garnish moldings. Refer to Windshield Pillar Garnish Molding Replacement .
- If replacing the I/P, Install the headlamp switch bezel. Refer to Instrument Panel Accessory Trim Plate Replacement - Left Side .
- Install the headlamp switch to the bezel. Refer to Headlamp Switch Replacement .
- Install the left I/P access cover.
- Install the HVAC control module wire harness attachment (1) to the I/P substrate.
- Install the HVAC control module. Refer to HVAC Control Module Replacement .
- Install the radio. Refer to Radio Replacement .
- Install the I/P cluster. Refer to Instrument Cluster Replacement .
- Install the I/P cluster bezel, Chevrolet only. Refer to Instrument Panel Cluster Trim Plate Bezel Replacement .
- Install the I/P accessory trim plate, GMC or Oldsmobile only. Refer to Instrument Panel Accessory Trim Plate Replacement .
- Install the I/P lower sound insulator, GMC or Chevrolet only. Refer to Instrument Panel Insulator Panel Replacement .
- Install the center console. Refer to Console Replacement .
- Install the shift lever bezel, Oldsmobile only. Refer to Console Shift Lever Bezel Replacement .
- Install the I/P compartment door. Refer to Instrument Panel Compartment Door Replacement .
- Install the right closeout/insulator panel. Refer to Instrument Panel Insulator Panel Replacement - Right Side .
- Install the steering column. Refer to Steering Column Replacement .
- Install the left HVAC floor duct (1).
- Install the left HVAC floor duct push pin (2).
- Install the knee bolster. Refer to Knee Bolster Replacement .
- Install the knee bolster trim panel. Refer to Driver Knee Bolster Panel Replacement .
- Install the left closeout/insulator panel. Refer to Instrument Panel Insulator Panel Replacement - Right Side .
- Enable the SIR system. Refer to SIR Disabling and Enabling .
Important: Ensure the wiring harnesses and electrical connectors are not pinched behind the instrument panel and are positioned for proper connection.

Important: Do not tighten the I/P retaining bolts until all of the bolts have been loosely installed.

Notice: Use the correct fastener in the correct location. Replacement fasteners must be the correct part number for that application. Fasteners requiring replacement or fasteners requiring the use of thread locking compound or sealant are identified in the service procedure. Do not use paints, lubricants, or corrosion inhibitors on fasteners or fastener joint surfaces unless specified. These coatings affect fastener torque and joint clamping force and may damage the fastener. Use the correct tightening sequence and specifications when installing fasteners in order to avoid damage to parts and systems.
Tighten
Tighten the bolts to 7 N·m (62 lb in).

Tighten
Tighten the screw to 2.5 N·m (22 lb in).


