For 1990-2009 cars only
Removal Procedure
- Remove the cargo shade/cover.
- Remove the inflator access panel.
- Remove the right rear quarter upper trim panel. Refer to Quarter Upper Trim Panel Replacement .
- Remove the lift gate sill plate. Refer to Liftgate Door Sill Plate Replacement .
- Remove the right rear door sill panel. Refer to Rear Side Door Sill Plate Replacement .
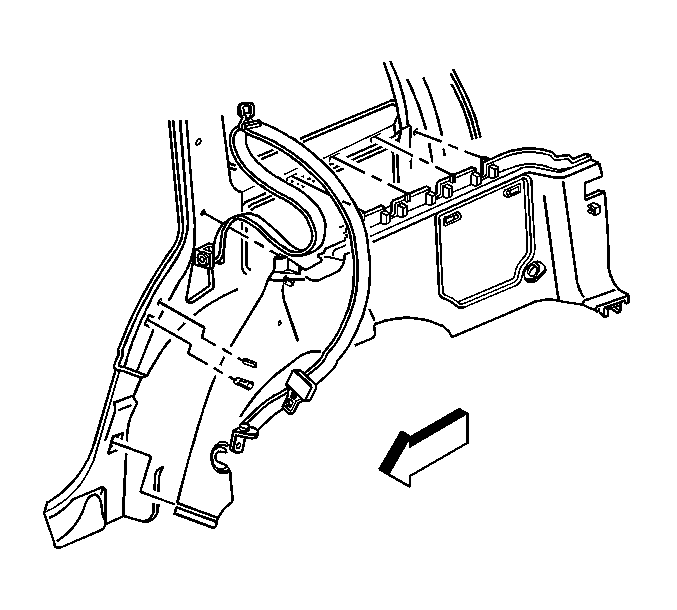
- Remove the lower seat belt anchor bolt.
- Release the retaining clips that retain the trim panel to the body.
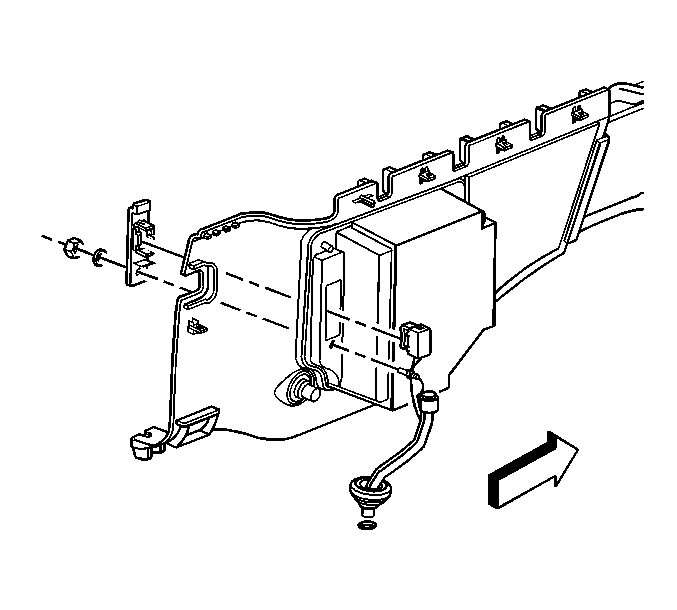
- Partially remove the trim panel in order to remove the inflator switch from the inflator bezel.
- Remove the auxiliary air outlet washer and retaining nut.
- Feed the auxiliary air outlet through the inflator bezel.
- Remove the inflator bezel from the trim panel.
- Disconnect the 12-volt power supply electrical connector.
- Remove the trim panel from the vehicle.


Installation Procedure
- Position the trim panel to the vehicle.
- Connect the 12-volt power supply electrical connector.
- Install the inflator bezel to the trim panel.
- Feed the auxiliary air outlet through the hole in the inflator bezel.
- Install the auxiliary air outlet washer and retaining nut.
- Install the inflator switch to the inflator bezel.
- Position the seat belt over the top of the trim panel, ensuring that the buckle is not behind the trim panel.
- Align the locating tabs on the trim panel to the holes in the body.
- Seat the clips that retain the trim panel to the body.
- Install the seat belt lower anchor.
- Install the right rear door sill panel. Refer to Rear Side Door Sill Plate Replacement .
- Install the lift gate sill plate. Refer to Liftgate Door Sill Plate Replacement .
- Install the trim panel-rear quarter upper. Refer to Quarter Upper Trim Panel Replacement .

Notice: Refer to Fastener Notice in the Preface section.
Tighten
Tighten the nut to 2 N·m (18 lb in).

Tighten
Tighten the anchor bolt to 70 N·m (52 lb ft).
