Procedure to Retrofit Power Outside Rearview Mirrors on Vehicle Not Originally Equipped with Such

| Subject: | Procedure to Retrofit Power Outside Rearview Mirrors On Vehicles Not Originally Equipped With Such |
| Models: | 2003 GMC Envoy, Envoy XL |
| with Manual Outside Rearview Mirrors (RPO DR1) |
This bulletin will provide instructions for adding power outside rearview mirrors (RPO DK2) to 2003 Envoys originally equipped with the 1SA package and manual outside rearview mirrors (RPO DR1). Power mirrors were not available with the 1SA package on early 2003 GMC Envoy and Envoy XL models.
To retrofit the vehicle with power outside rearview mirrors, use the parts and procedure listed below.
- Remove both outside rearview mirrors. Refer to the Mirror Replacement procedure (SI Document ID #734659).
- Cut a hole in the driver's door trim panel for the power mirror switch using the following steps:
- Install the new outside rearview mirrors.
- Install both door trim panels. Be sure to plug the power mirror switch and outside rearview mirror electrical connectors into the driver door module.
- Verify the operation of both power mirrors.

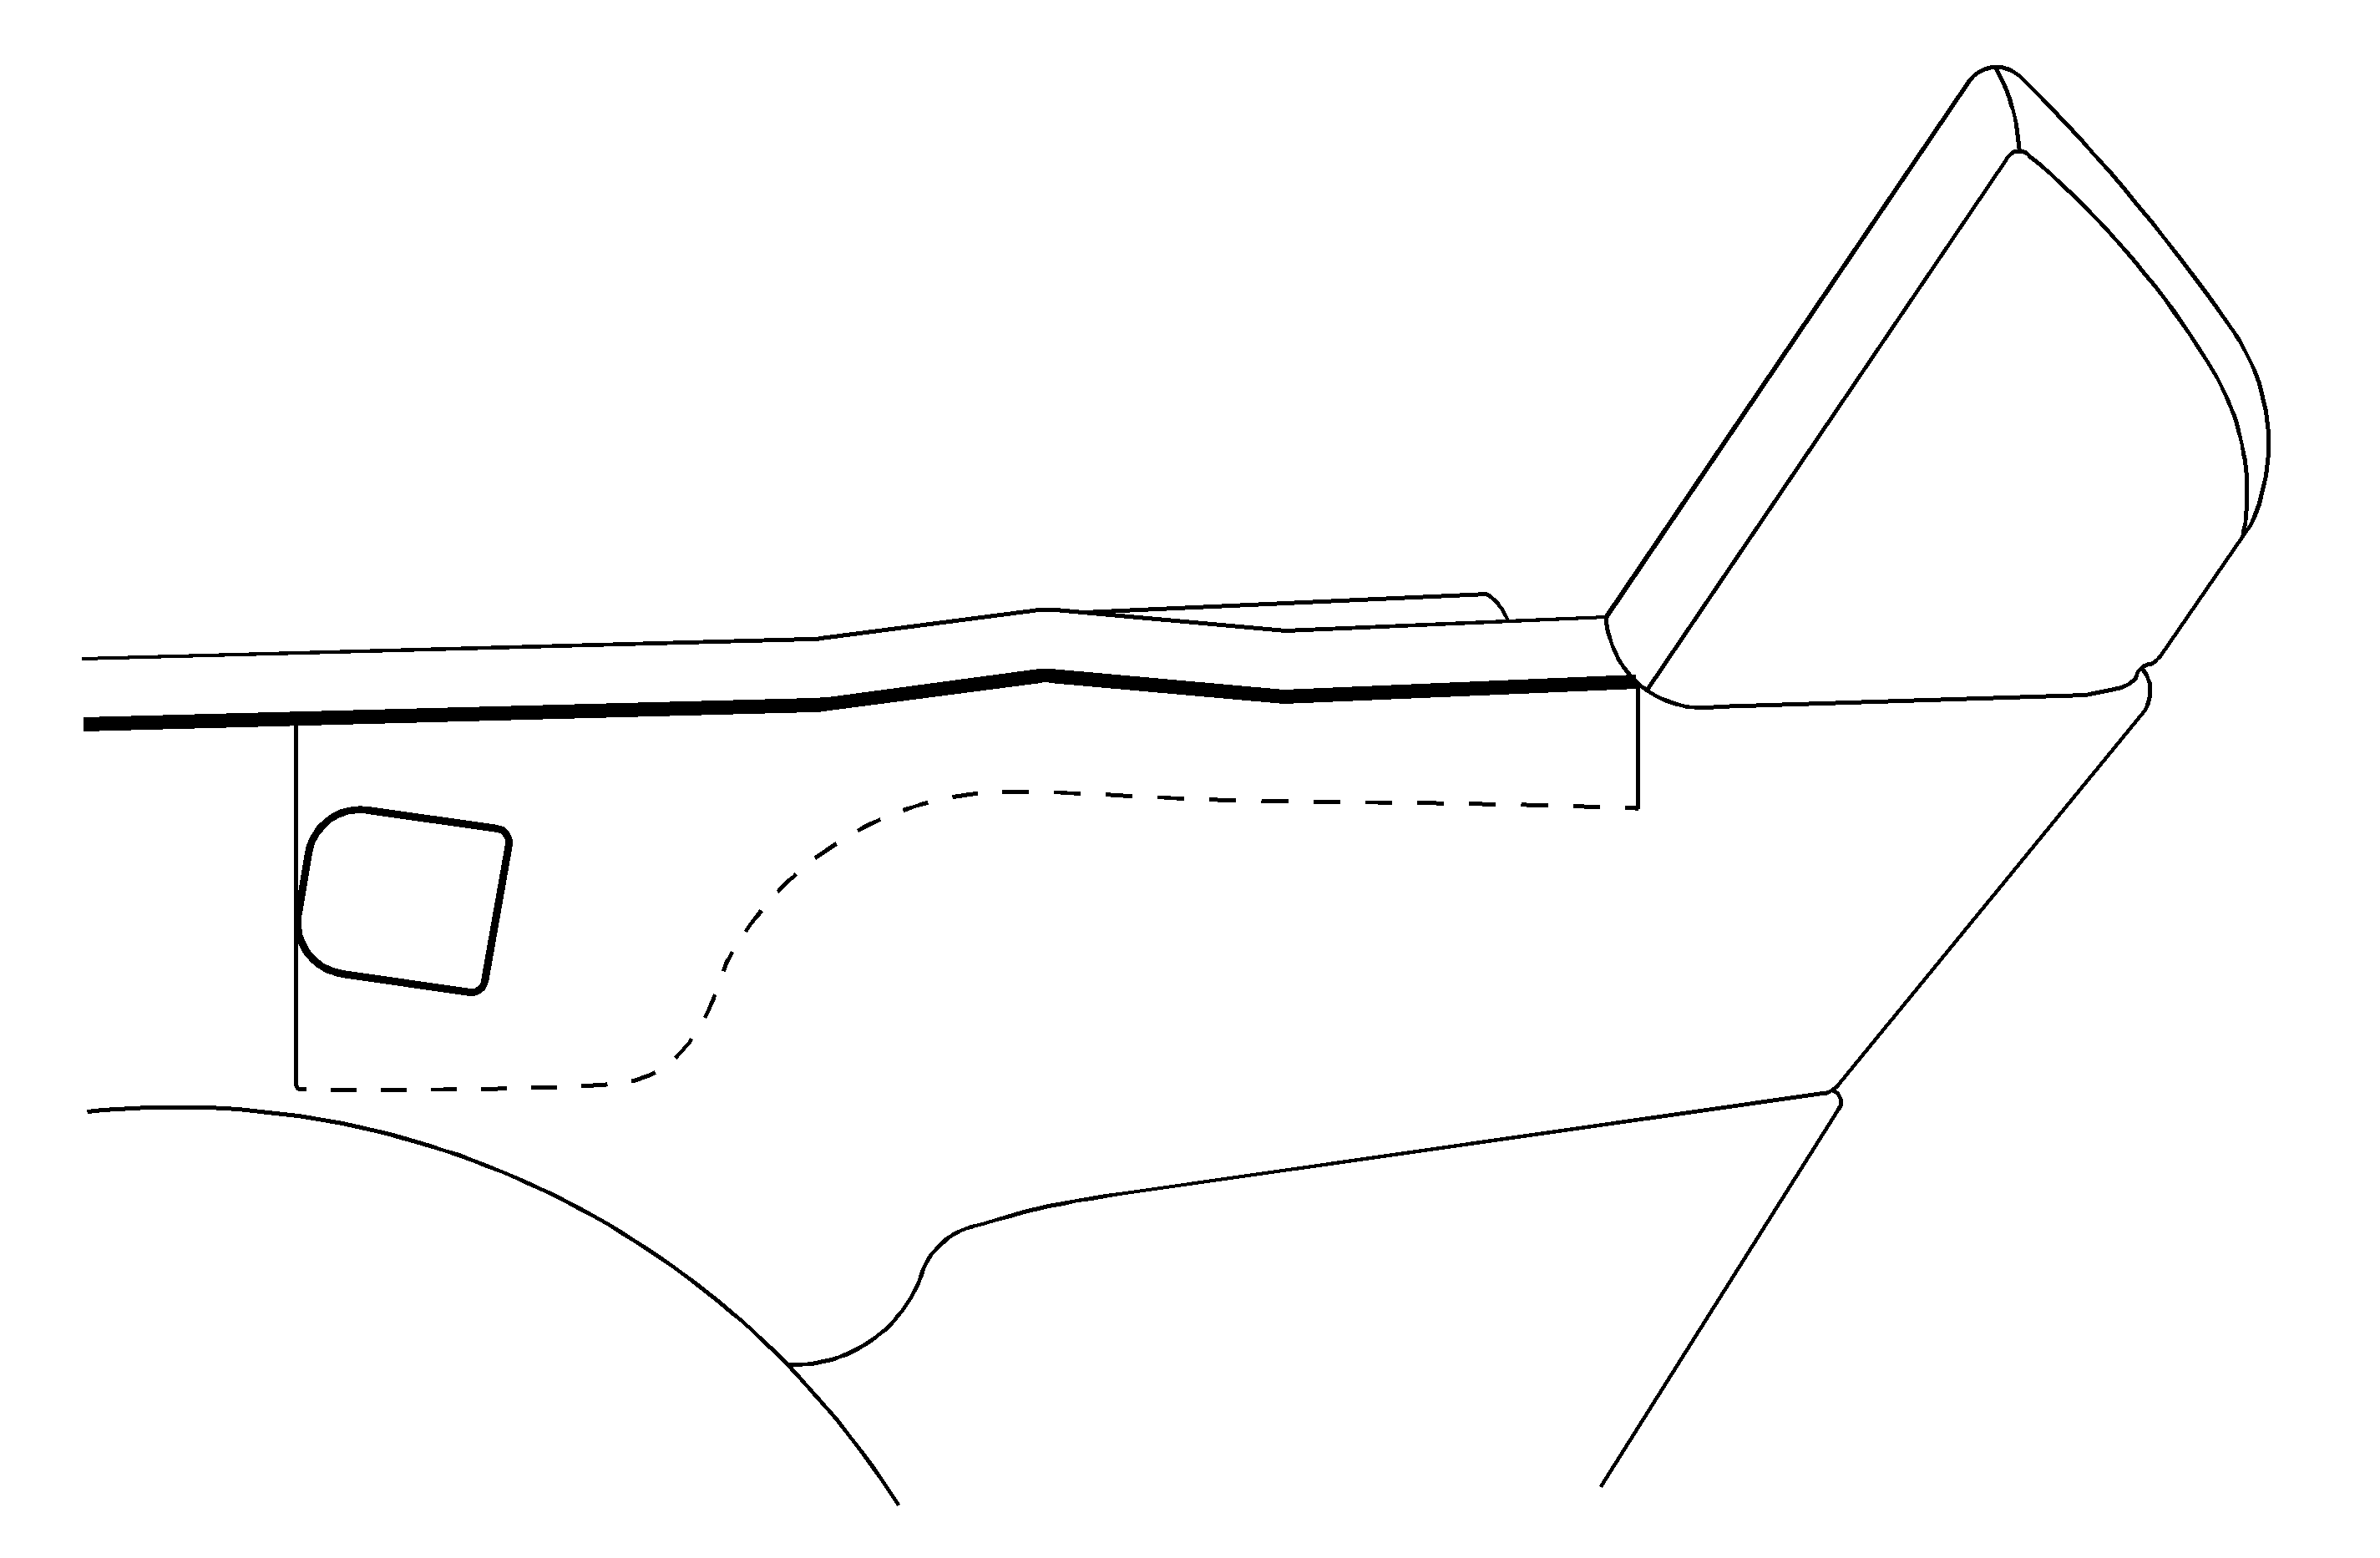
| 2.1. | Refer to the illustration above of the driver's door trim panel for the location of the cutout for the power mirror switch and for placement of the template. |
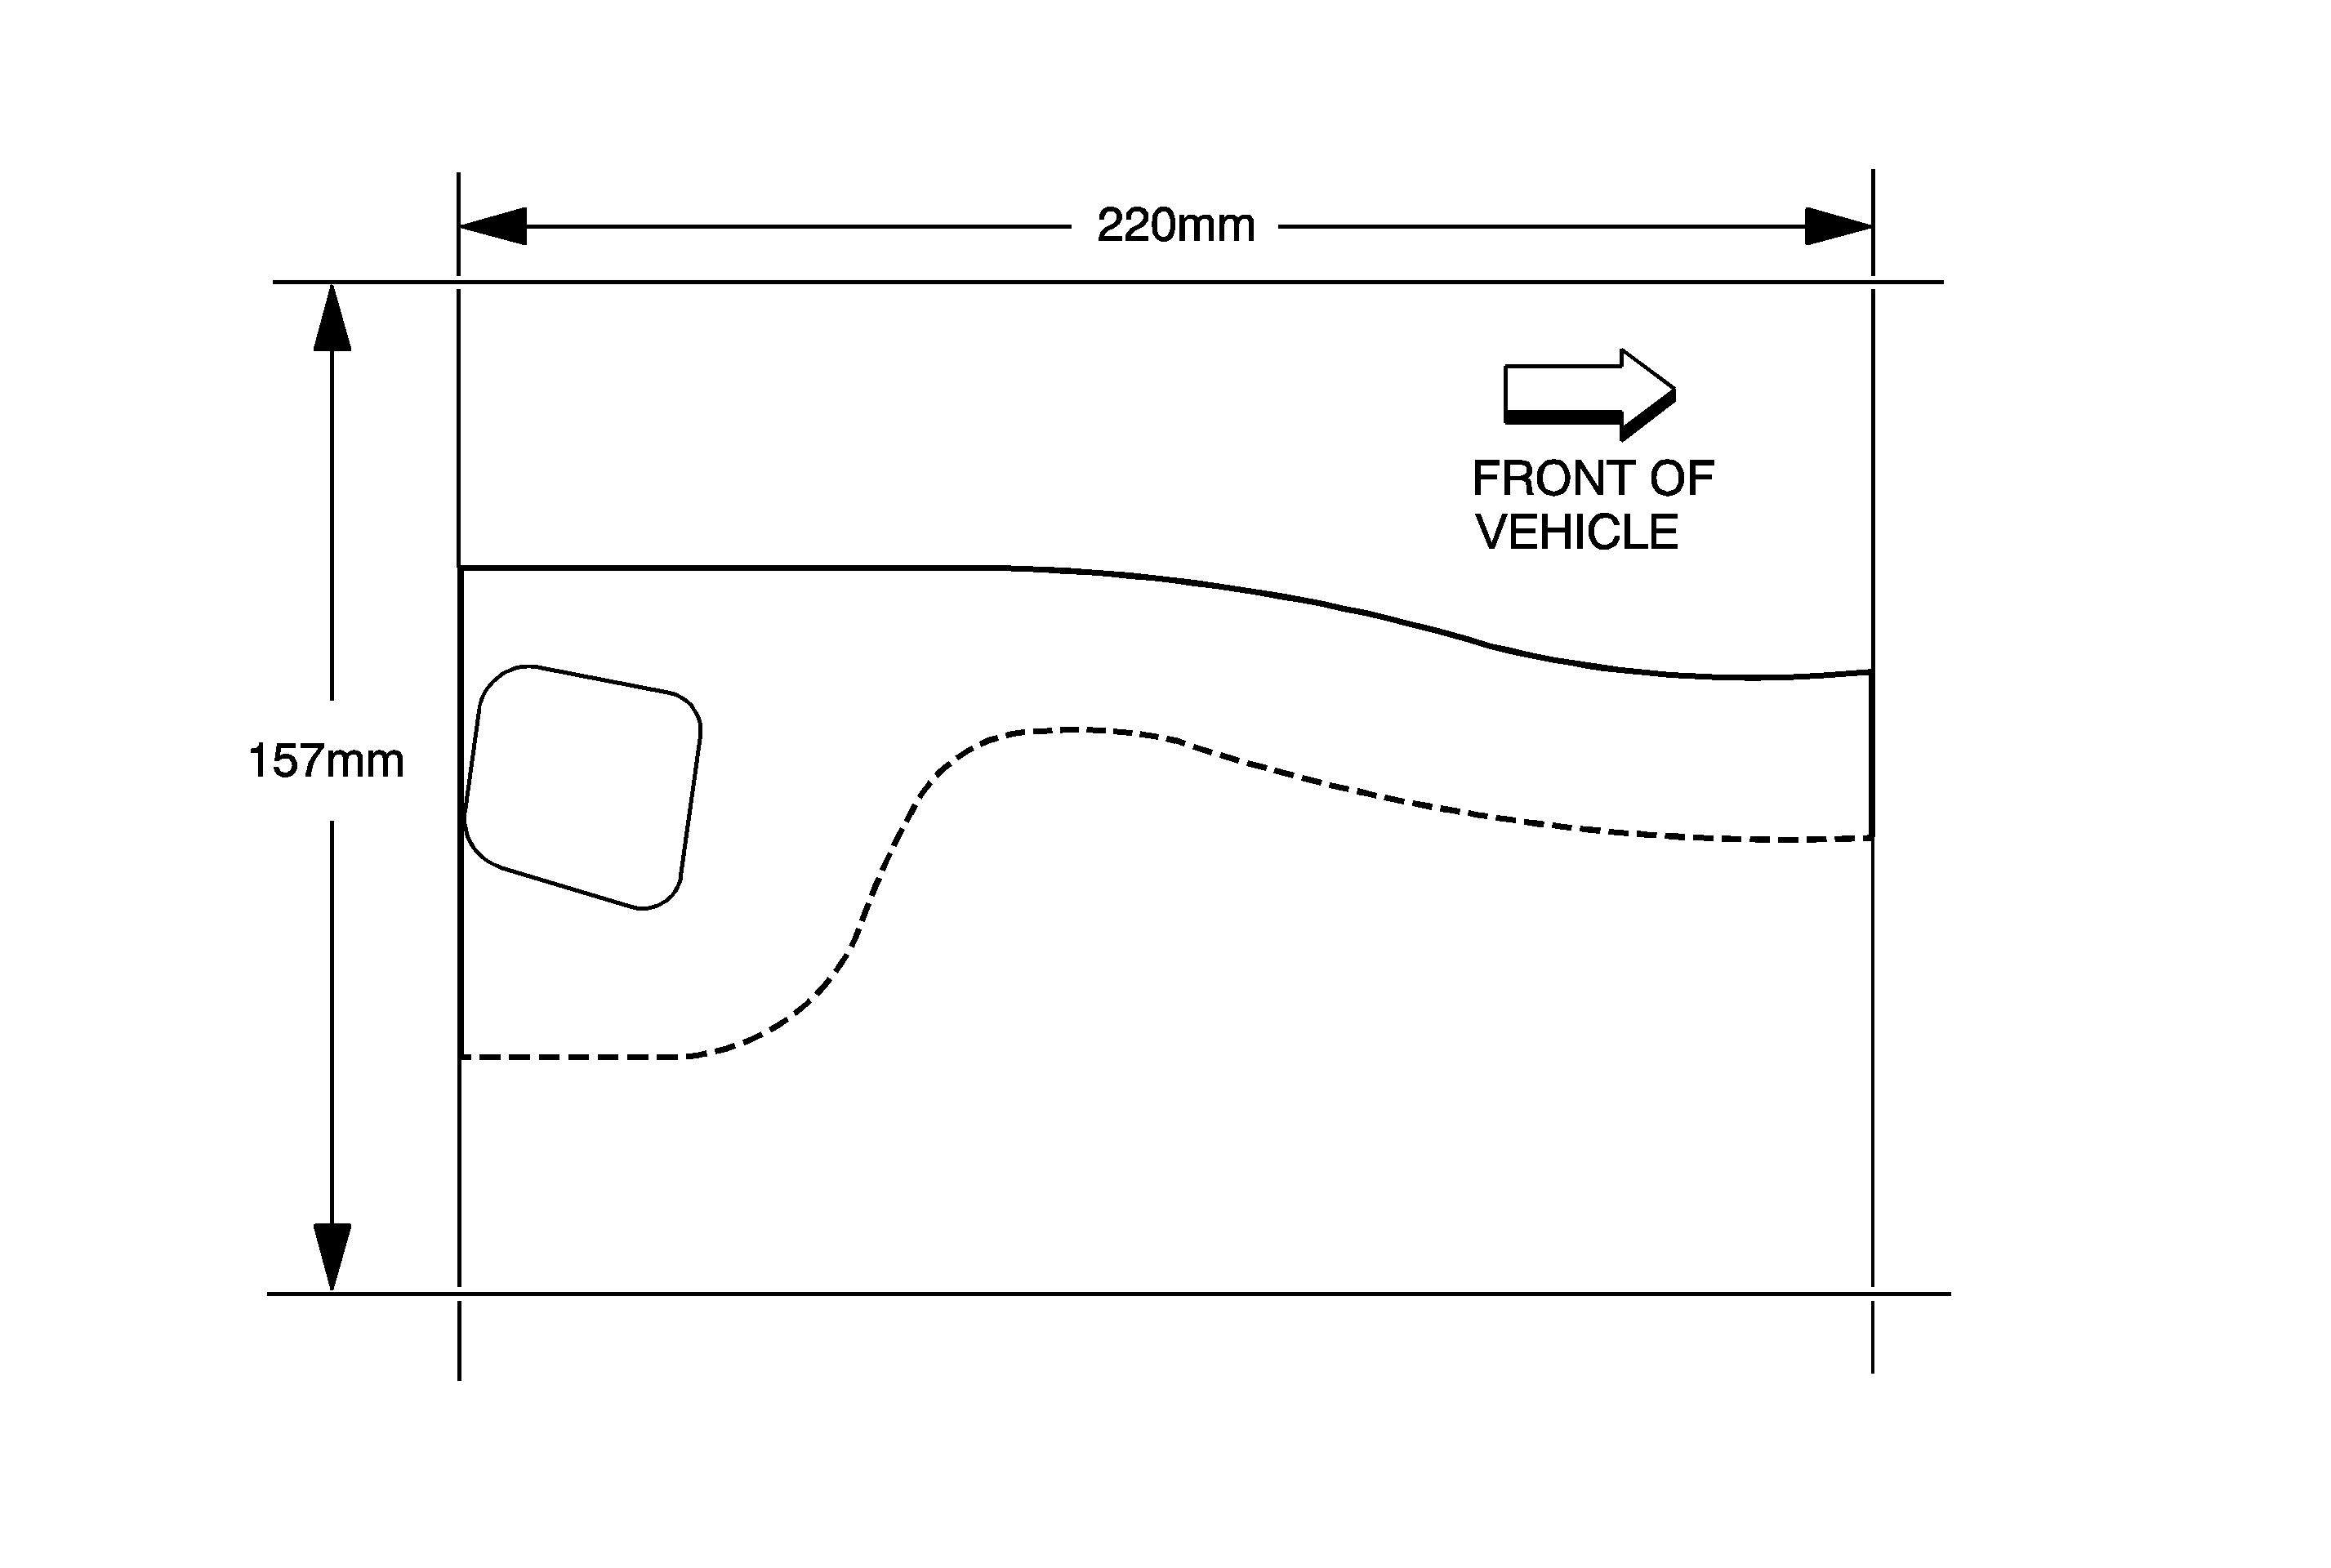
| Important: When photocopying the template at the end of this bulletin, be aware that some photocopiers may not make an exact copy of the original. Some may make the copy slightly smaller or larger than the original. This same condition may occur when printing the template from SI. Before proceeding, verify that the copy made is the same size as the dimensions given on the template. The template given in this bulletin should be enlarged 200% (two times) the size of the original. The width of the enlarged template should be 157 mm (6 1/8 in) and the length should be 220 mm (8 11/16 in). |
| 2.2. | Make a photocopy of the template, included at the end of this bulletin, that is two times the size of the original. |
| 2.3. | Cut the enlarged template from the sheet of paper following the border line so that it is the proper size, 157 mm (6 1/8 in) wide and 220 mm (8 11/16 in) long. |
| 2.4. | Cut the template along the heavy line and the dashed line that are drawn through the middle of the template. |
| 2.5. | Cut out the opening for the power mirror switch out of the template using a razor blade or a sharp knife. |
| 2.6. | Locate the groove in the top edge of the door trim panel. Refer to the heavy line along the top edge of the door trim panel in the illustration above for the location. |
| 2.7. | Align the edge of the template with the groove in the top of the door trim panel starting at the shark fin working backward. Refer to the above illustration for the location. Tape the template to the door trim panel. |
| 2.8. | Make sure the template lies flat on the contour of the door trim panel. Use a felt tip pen to mark an outline of the switch cutout on the door trim panel. The underside of the door trim panel already has a cutout in it. The opening in the template for the power mirror switch should be located over this cutout. |
| 2.9. | Remove the template from the door trim panel. |
| 2.10. | Carefully cut through the first layer of door trim panel material using a utility knife. Peel the first layer of material from the door trim panel. |
| 2.11. | Cut through the second layer of the door trim panel. Be careful not to make the cutout too large. Check the fit of the power mirror switch into the door trim panel. |
Parts Information
The customer may select a new outside rearview mirror with or without turn signal indicators. It is their choice. The part numbers for both are included below and both work on the vehicle with no modifications.
Part Number | Description | Qty |
|---|---|---|
15178913 | Mirror, Left Hand-Electric Remote Control, Heated (RPO DK2) | 1 |
15178914 | Mirror, Right Hand-Electric Remote Control, Heated (RPO DK2) | 1 |
15178919 | Mirror, Left Hand-Electric Remote Control, Heated, With Turn Signal Indicator (RPO DK9) | 1 |
15178920 | Mirror, Right Hand-Electric Remote Control, Heated, With Turn Signal Indicator (RPO DK9) | 1 |
15183745 | Switch, Power Mirror-Medium Dark Pewter (RPO 95I) | 1 |
15183747 | Switch, Power Mirror-Very Dark Pewter (RPO 92I) | 1 |
15183746 | Switch, Power Mirror-Medium Dark Pewter (RPO 65I) | 1 |
Parts are expected to be available from GMSPO on April 4, 2003.
Warranty Information
This retrofit procedure is a customer pay repair.

