HIGH DOOR LOCK EFFORT WITH KEY (INSTALL NEW LOCK-PAWL & ROD)

HIGH DOOR LOCK KEY EFFORT
VEHICLES AFFECTED: 1988 C/K
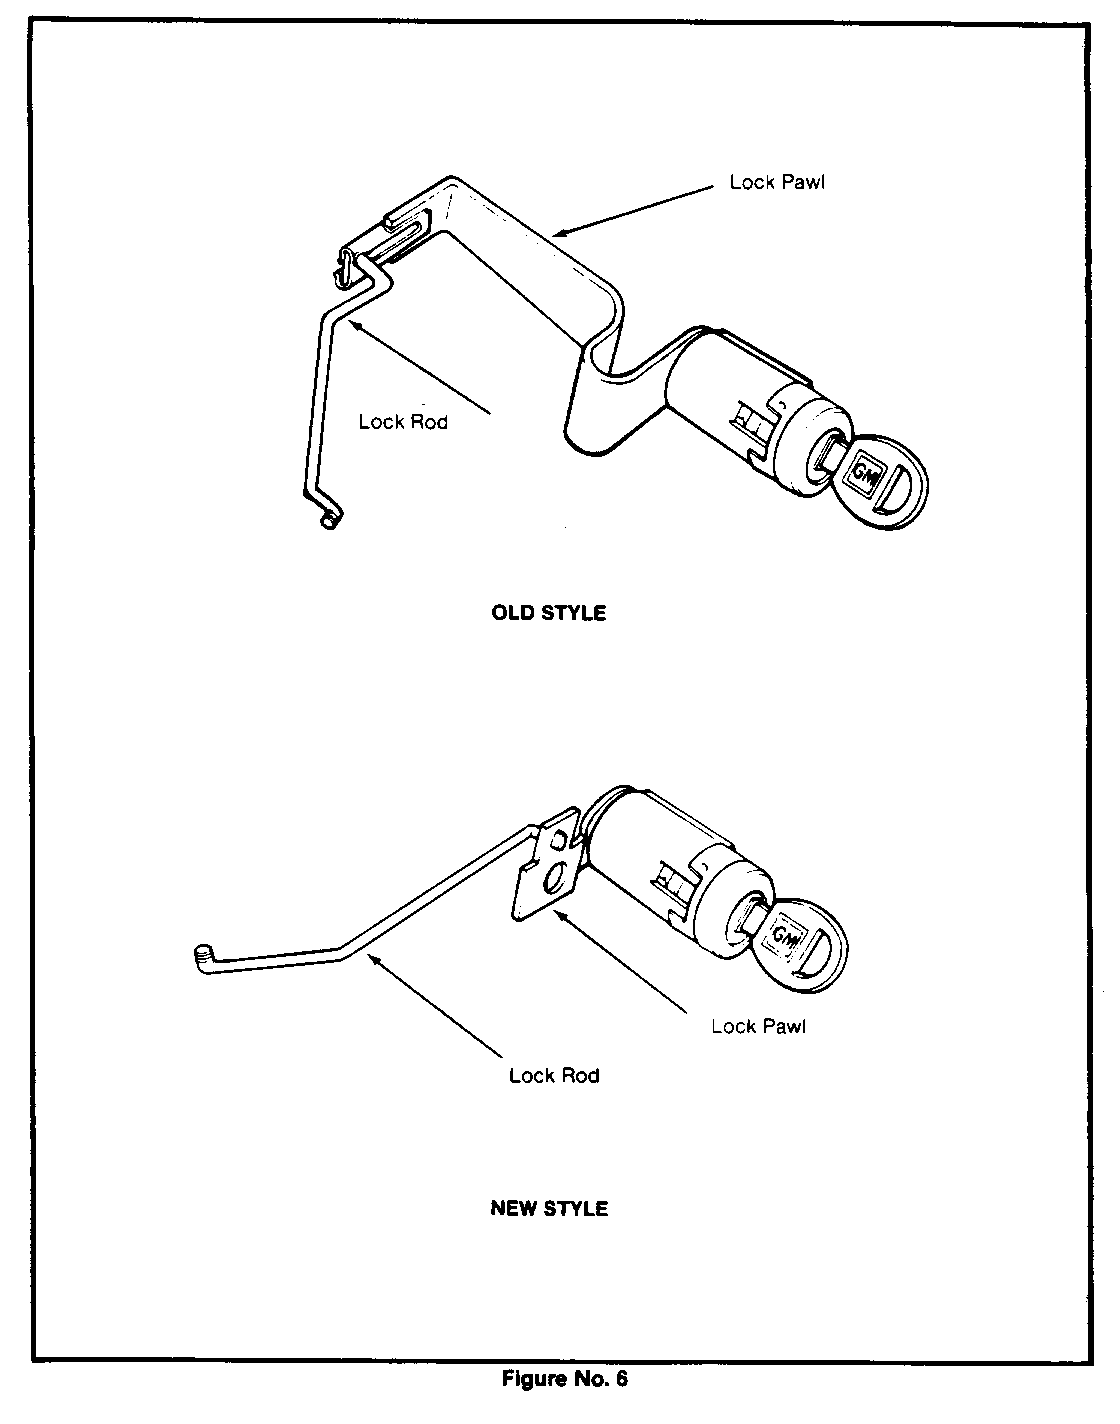
High door lock key effort may be experienced on some 1988 C/K models. A new door lock rod and lock pawl is available to address this condition (Figure 6). Service parts are now available from GMSPO.
Parts Information
Part Number(s) Description --------- ------------ 15616166 Lock Pawl-Left Side 15616167 Lock Pawl-Right Side
15612999 Lock Rod -Left Side 15613000 Lock Rod -Right Side
Service Procedure (with Power Door Locks/Windows) -------------------------------------------------
Removal:
-------
1. Place door windows in the full down position.
2. Remove power door lock/window switch assembly bezel (do not disconnect wiring from switch assembly).
3. Remove trim panel.
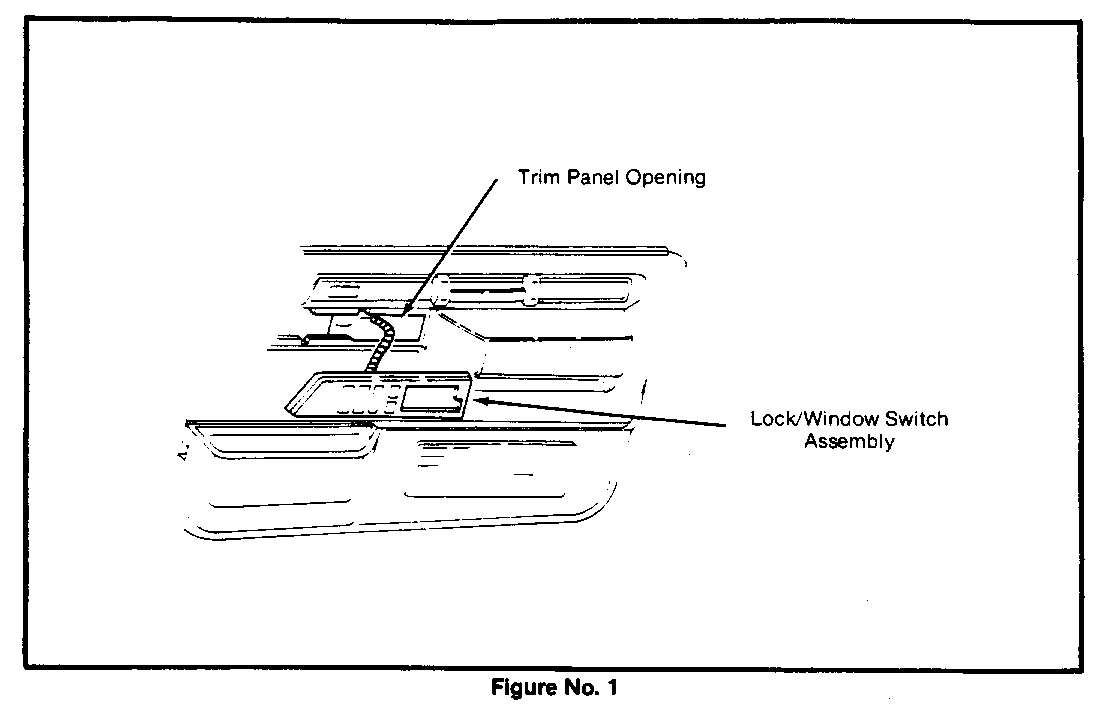
Notice: Power door lock/window switch assembly must be fed through opening in trim panel (Figure 1).
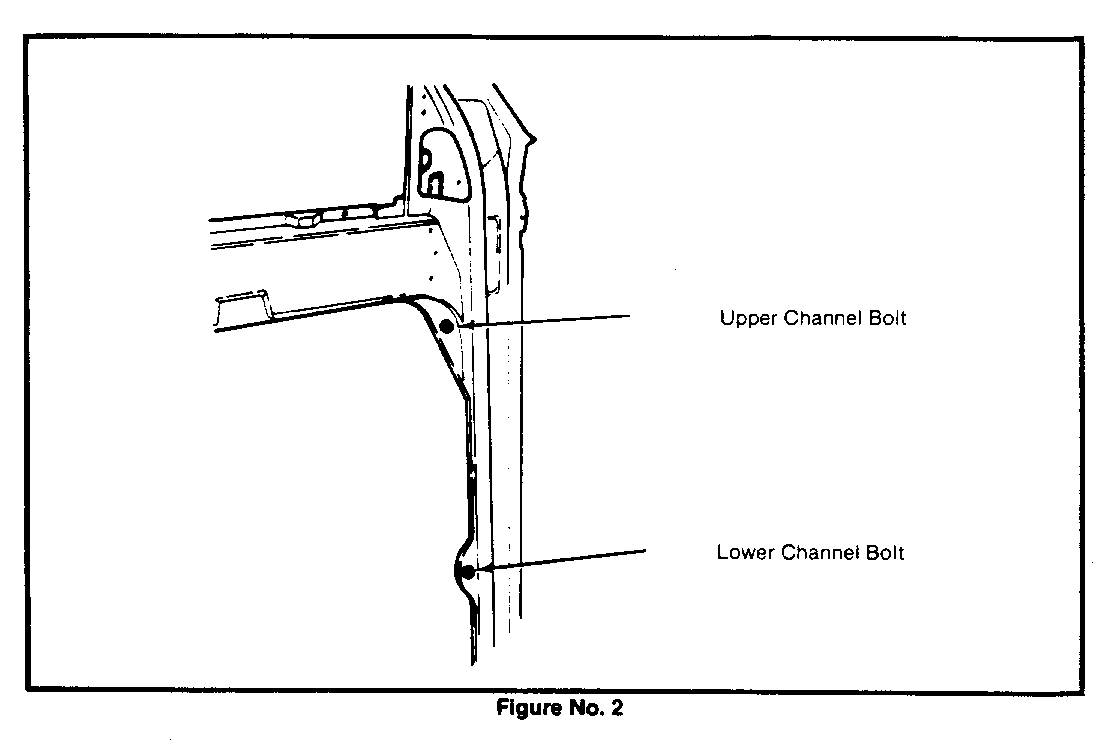
4. Loosen upper front window channel bolt (Figure 2).
5. Remove lower front window channel bolt (Figure 2).
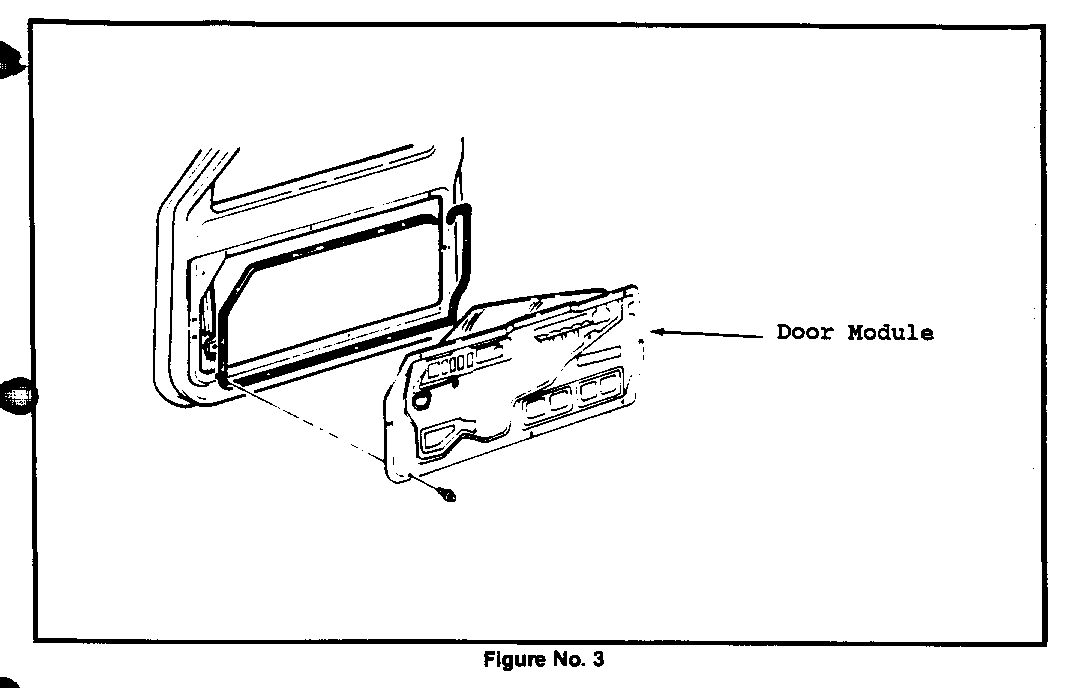
6. Remove screws holding door inner panel (Figure 3).
7. Remove lock rods from the: a) door handle b) lock switch c) pwr door lock actuator
Notice: Tape lock rods up and away from door inner panel.
8. Move front window channel away from glass.
9. Remove window glass as described in the Service Manual (Section 1OA1-14).
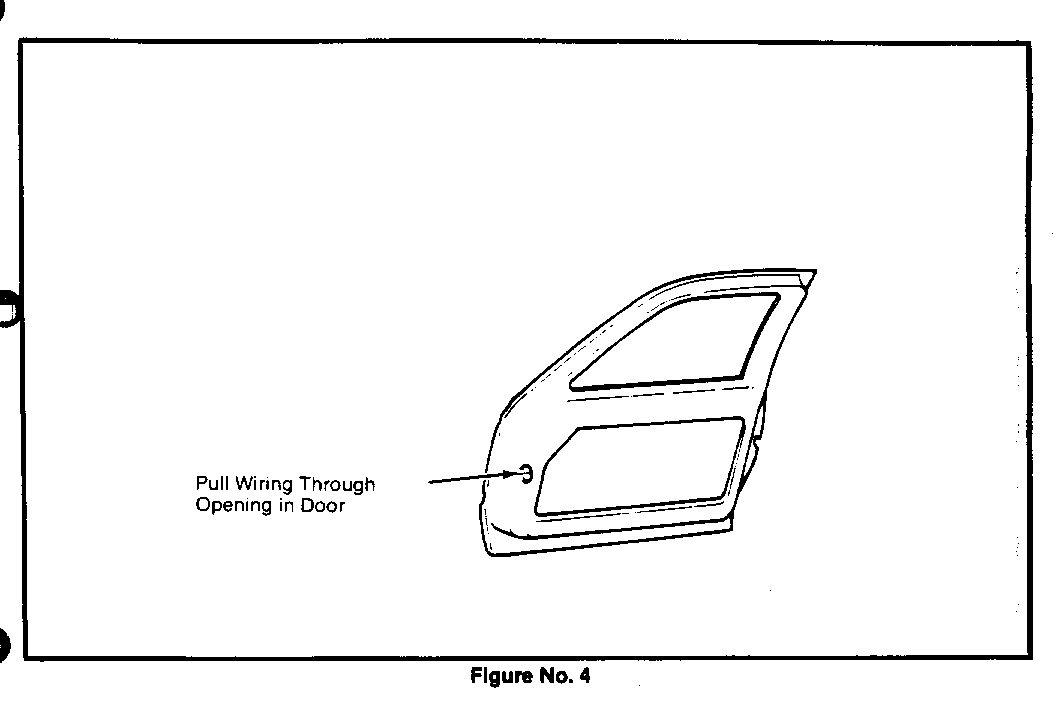
10. Pull excess power door lock/window wiring through door opening as shown in Figure 4.
11. Lower door module panel assembly including glass, out through the opening in the door inner panel.
Notice: Due to insufficient wire length the door module panel assembly will not reach the floor. The front edge must be supported.
12. With the door module panel assembly removed, remove the clip holding the lock rod to lock pawl.
13. Remove three torx screws holding lock assembly to the door.
14. Remove lock assembly and lock rods from the door.
Notice: This step provides access to the lock rod.
15. Remove the two bolts attaching the outside door handle to the door and remove the handle.
Notice: This step provides access to the lock pawl.
Installation:
------------
1. Install new lock rod and lock pawl and reverse removal procedure.
Service Procedure (without Power Door Lock/Windows) -------------------------------------------------- *) Procedure is the same as for vehicles with power door lock/windows except for the following:
1. Remove window handle.
2. Remove door lock/handle bezel.
* Do not have to move wires. * No lock rod to power door lock actuator.
Use the most applicable labour operation from the Canadian Labour Time Guide.

General Motors bulletins are intended for use by professional technicians, not a "do-it-yourselfer". They are written to inform those technicians of conditions that may occur on some vehicles, or to provide information that could assist in the proper service of a vehicle. Properly trained technicians have the equipment, tools, safety instructions and know-how to do a job properly and safely. If a condition is described, do not assume that the bulletin applies to your vehicle, or that your vehicle will have that condition. See a General Motors dealer servicing your brand of General Motors vehicle for information on whether your vehicle may benefit from the information.
