Removal Procedure
- Raise the vehicle. Refer to
Lifting and Jacking the Vehicle
in General Information.
- Remove the transmission oil pan and the filter. Refer to
Automatic Transmission Fluid and Filter Replacement
.

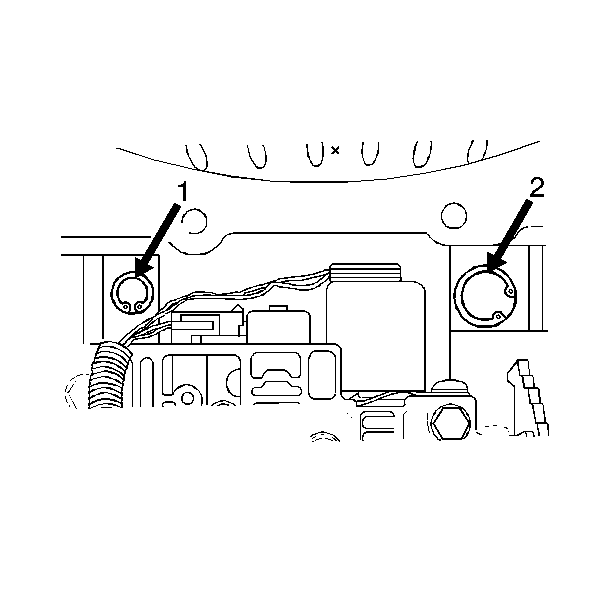
- Remove the reverse boost valve bushing retainer ring (2).

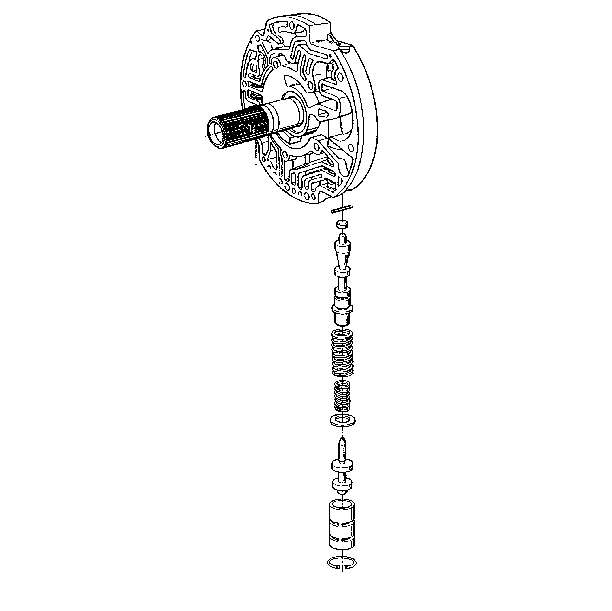
- Remove the following from the reverse boost valve cylinder:
| • | The reverse boost valve bushing |
| • | The reverse boost valve |
| • | The pressure regulator spring retainer |
| • | The pressure regulator spring |
| • | The pressure regulator valve |
| • | The reverse boost valve bushing |
Installation Procedure
Tools Required
J 36850
Transjel®
- Install the pressure regulator valve with
J 36850

- Pre-assemble the following parts:
| 2.1. | The reverse boost valve bushing |
| 2.2. | A new reverse boost valve |
| 2.3. | A new pressure regulator spring retainer |
| 2.4. | The added isolator pressure regulator spring |
| 2.5. | The pressure regulator spring |
- Install the pre-assembled parts into the pump bore.

- Install the reverse boost valve bushing retainer ring (2) while holding the reverse boost valve bushing
in place.
Ensure the retainer ring is in the groove.
- Install the transmission oil pan and the oil filter. Refer to
Automatic Transmission Fluid and Filter Replacement
.
- Lower the vehicle.
Important: It is recommended that transmission adaptive pressure (TAP) information be reset.
Resetting the TAP values using a scan tool will erase all learned values in all cells. As a result, The ECM, PCM or TCM will
need to relearn TAP values. Transmission performance may be affected as new TAP values are learned.
- Reset the TAP values. Refer to
Adapt Function
.


