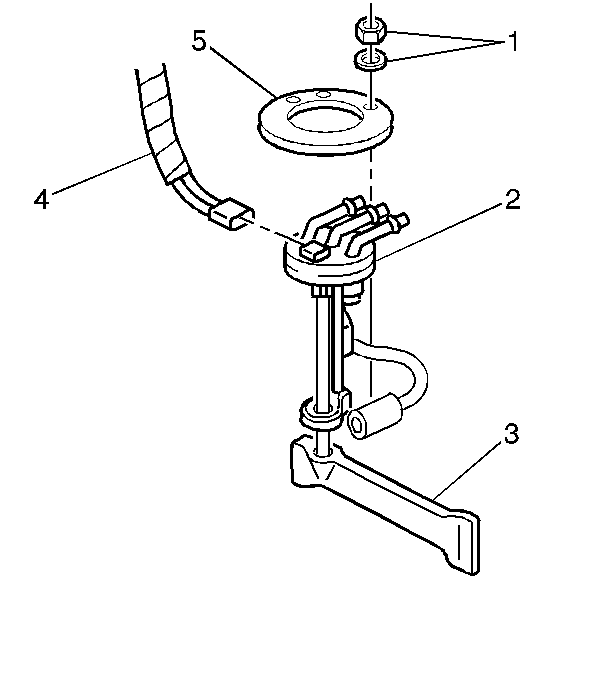
For 1990-2009 cars only
Removal Procedure
- Disconnect the negative battery cable.
- Remove the fuel tank filler cap.
- Remove the Fuel Tank. Refer to Fuel Tank Replacement - Left Side for the left side.
- Refer to Fuel Tank Replacement - Right Side for the right side.
- Remove the six nuts and washers (1) retaining the fuel sender assembly lock ring (8).
- Remove the lock ring, the sender assembly (5), and the seal.
Caution: Unless directed otherwise, the ignition and start switch must be in the OFF or LOCK position, and all electrical loads must be OFF before servicing any electrical component. Disconnect the negative battery cable to prevent an electrical spark should a tool or equipment come in contact with an exposed electrical terminal. Failure to follow these precautions may result in personal injury and/or damage to the vehicle or its components.

Installation Procedure
- Install the new seal on the fuel sender assembly.
- Install the fuel sender assembly (2), and lock ring (5).
- Install the six washers and nuts (1) retaining the fuel sender assembly lock ring.
- Install the fuel tank. Refer to Fuel Tank Replacement - Left Side for the left side.
- Refer to Fuel Tank Replacement - Right Side for the right side.
- Install the negative battery cable.
- Check for fuel leaks by using the scan tool to activate the fuel lift pump.
- Install the fuel tank filler cap.

Important: Care should be taken not to fold over or twist the strainer (3), when installing the sender assembly as this will restrict fuel flow.
Make sure the lock ring alignment holes fit over the tabs on the tank.
