Removal Procedure
Important: The pushrods have a different degree of hardness at each end. The end
with a paint stripe identifies the upper end of the pushrod. If the paint
stripe is not visible, mark the pushrods on the upper end as they are removed.
- Use the following steps
in order to position the engine so that no valves are close to a piston crown:
| 1.1. | Rotate the engine until the mark on the crankshaft balancer is
at 2 o'clock. |
| 1.2. | Rotate the crankshaft counterclockwise 88 mm (3 ½ in). |
| 1.3. | Align the mark on the crankshaft balancer with the first lower
water pump bolt (about 12:30). |
- Disconnect the battery negative cables from the batteries. Refer
to
Battery Cable Replacement
in Engine Electrical.
- Remove the air cleaner assembly with the mounting brackets from
the engine block. Refer to
Air Cleaner Assembly Replacement
in Engine Controls-6.5L-L65.
- Remove the left or right front wheel housing panel. Refer to
Wheelhouse Panel Replacement
in
Body Front End.
- Remove the valve rocker arm cover from the cylinder head. Refer
to
Valve Rocker Arm Cover Replacement
.
Notice: Store and mark all valve train components in an exact order so they
may be reassembled in the same position from which they were removed.
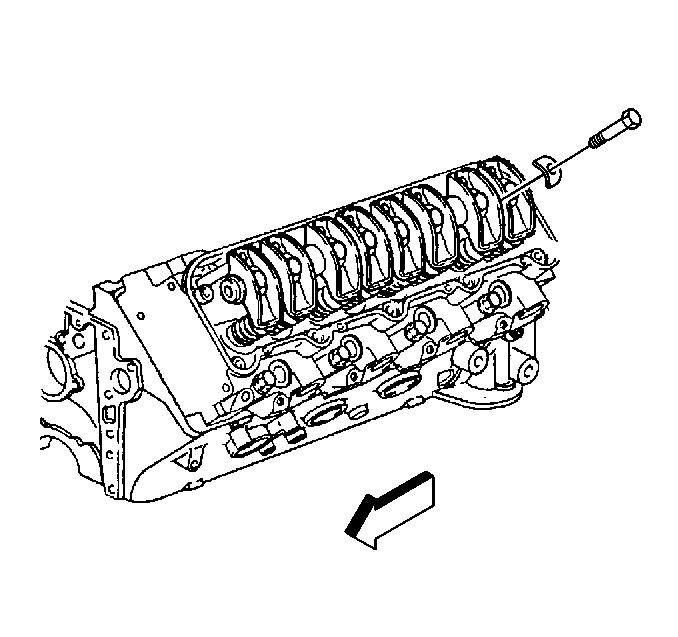
- Remove the valve rocker shafts retaining bolt from the cylinder head.
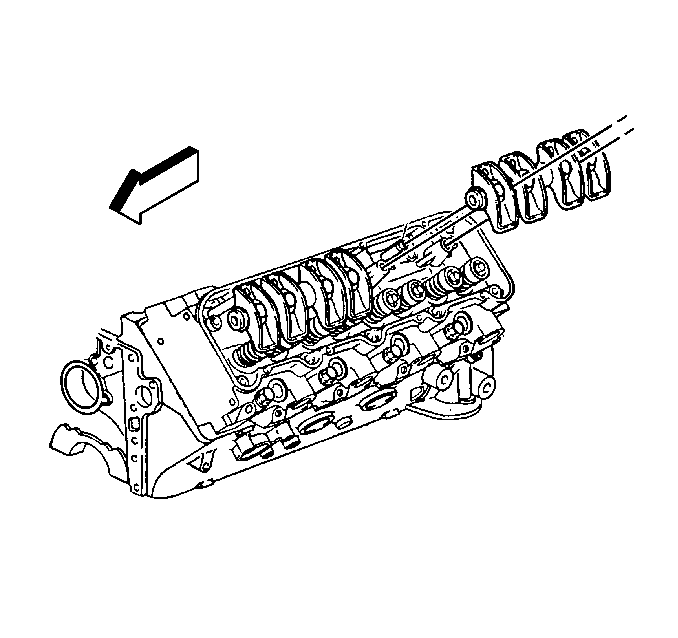
- Remove the valve rocker
arm shaft assembly from the cylinder head.
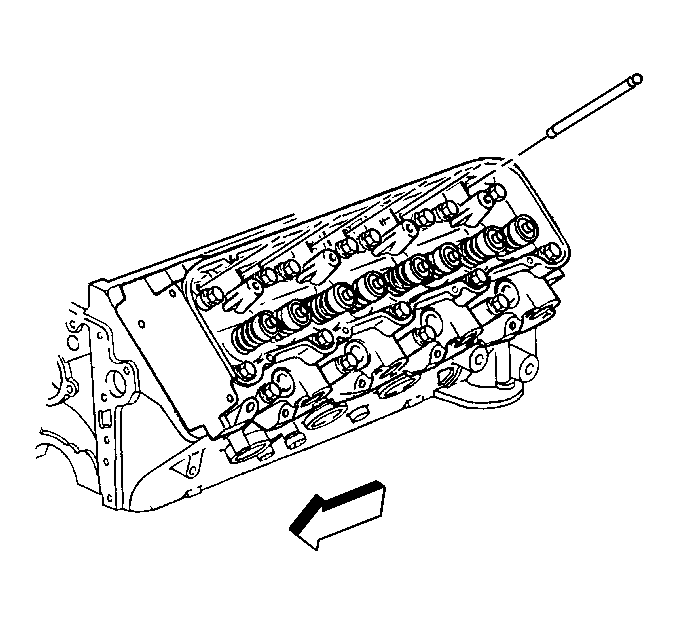
- Remove the pushrods from
the engine block.
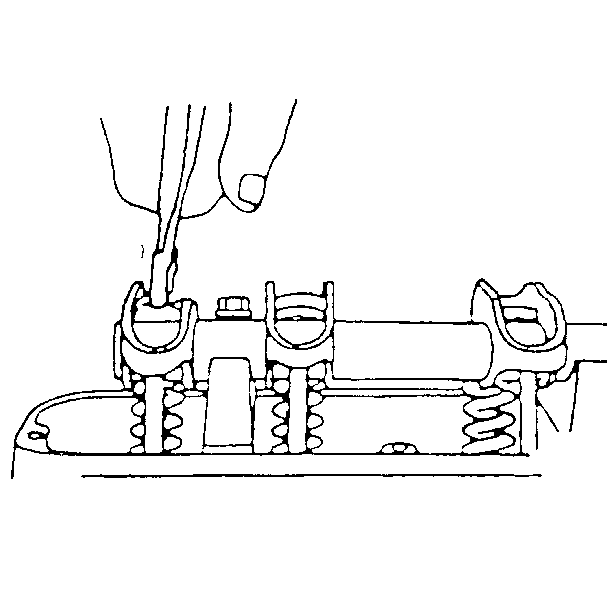
- Use the following steps
in order to remove the rocker arms, if necessary:
| 9.1. | Insert a screwdriver into the valve rocker arm shaft bore. |
| 9.2. | Break off the end of the nylon valve rocker arm retainers. |
| 9.3. | Remove the valve rocker arm retainers with a pair of pliers. |
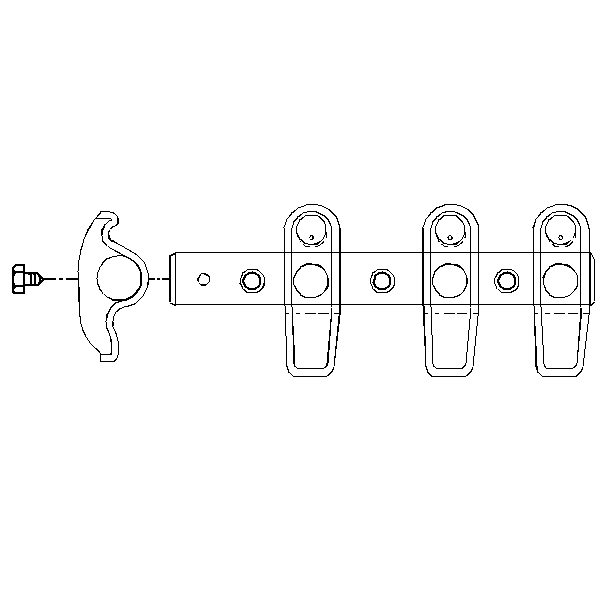
- Slide the valve rocker
arms from the shaft.
- Inspect for obstructions in the pushrod oil passages. Verify that
the pushrod oil passages are clean.
Installation Procedure
Important: One type of valve rocker arm is used for the intake and the exhaust
valves.

- Install the pushrods in
the valve lifters.
Notice: All valve train components must be reassembled in the exact
order and position from which they were removed.
- Install the valve rocker arms to the valve rocker arm shaft.
- Use the following steps in order to install the valve rocker arm
retainers:
| 3.1. | Center the valve rocker arms on the corresponding holes in the
valve rocker arm shaft. |
| 3.2. | Use a drift of at least 13 mm (½ in) diameter. |
| 3.3. | Install the new retainers. |

- Install the valve rocker
arm shaft assembly.
- Ensure that the ball ends of the pushrods seat in the valve rocker
arms.

Notice: Improper installation of the valve rocker arm shaft bolt may cause valve
rocker arm shaft breakage and /or piston to valve contact.
Notice: Use the correct fastener in the correct location. Replacement fasteners
must be the correct part number for that application. Fasteners requiring
replacement or fasteners requiring the use of thread locking compound or sealant
are identified in the service procedure. Do not use paints, lubricants, or
corrosion inhibitors on fasteners or fastener joint surfaces unless specified.
These coatings affect fastener torque and joint clamping force and may damage
the fastener. Use the correct tightening sequence and specifications when
installing fasteners in order to avoid damage to parts and systems.
- Install the bolts for the valve rocker
arm shaft assembly.
Tighten
Tighten the bolts alternately to 55 N·m (40 lb ft).
- Rotate the engine by hand. Make sure that the valve train moves
freely.
- Install the valve rocker arm cover to the cylinder head. Refer
to
Valve Rocker Arm Cover Replacement
.
- Install the left or the right front wheel housing panel. Refer
to
Wheelhouse Panel Replacement
in Body Front End.
- Install the air cleaner assembly with the mounting brackets on
the engine block. Refer to
Air Cleaner Assembly Replacement
in Engine Controls-6.5L-L65.
- Connect the battery negative cables to the batteries. Refer to
Battery Cable Replacement
in Engine
Electrical.


