GM Service Manual Online
For 1990-2009 cars only

Information Sensors/Switches Description w/TAC

All of the sensors and the input switches can be diagnosed through the use of a scan tool. The following is a short description of how the sensors and switches can be diagnosed by using a scan tool. The scan tool can also be used in order to compare the values for a normal running engine with the engine being diagnosed.

Engine Coolant Temperature (ECT) Sensor


Object Number: 228866  Size: SH

The engine coolant temperature sensor is a thermistor (a resistor which changes value based on temperature) mounted in the right cylinder head. Low coolant temperature produces a high resistance (100,000 ohms at -38°C/-39°F) while high temperature causes low resistance (70 ohms at 130°C/266°F).

The PCM supplies a 5.0 volt signal to the engine coolant temperature sensor through a resistor in the PCM and measures the voltage. The voltage will be high when the engine is cold. The voltage will be low when the engine is hot. By measuring the voltage, the PCM calculates the engine coolant temperature. Engine coolant temperature affects most systems the PCM controls.

The scan tool displays engine coolant temperature in degrees. After engine startup, the temperature should rise steadily to about 90°C (194°F) then stabilize when thermostat opens. If the engine has not been run for several hours (overnight), the engine coolant temperature and intake air temperature displays should be close to each other. When the PCM detects a malfunction in the ECT sensor circuit, the following DTCs will set:

    • DTC P0117 ECT Sensor Circuit Low Voltage
    • DTC P0118 ECT Sensor Circuit High Voltage
    • DTC P1114 ECT Sensor Circuit Intermittent Low Voltage
    • DTC P1115 ECT Sensor Circuit Intermittent High Voltage

Service Category Specifications contains a table to check for sensor resistance values relative to temperature.

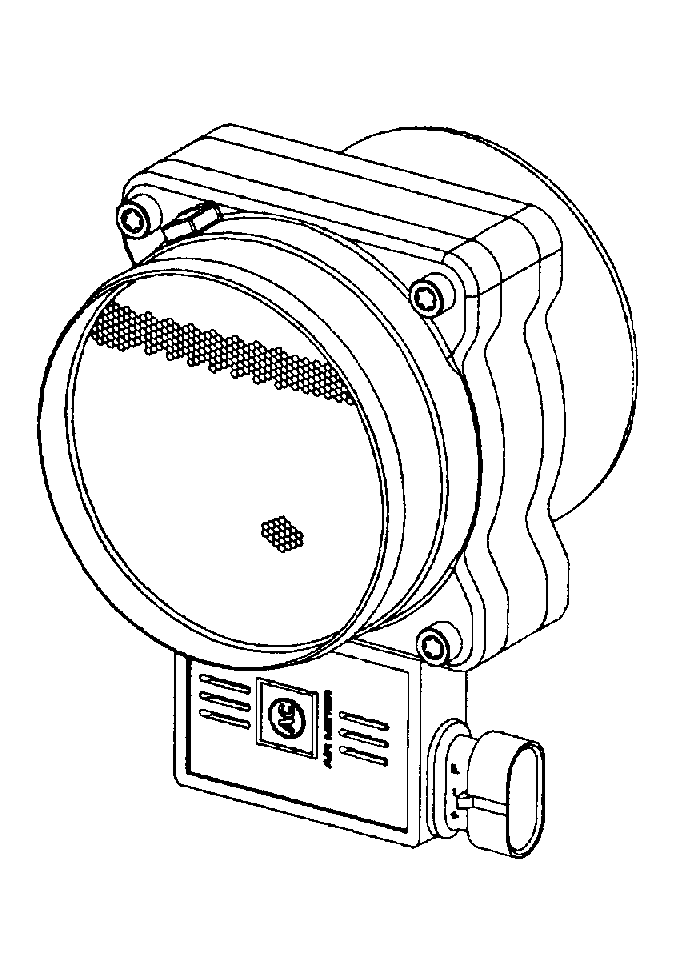
Mass Air Flow (MAF) Sensor


Object Number: 13487  Size: MH

The Mass Air Flow (MAF) sensor measures the amount of air which passes through it. The PCM uses this information to determine the operating condition of the engine, to control fuel delivery. A large quantity of air indicates acceleration. A small quantity of air indicates deceleration or idle.

The scan tool reads the MAF value and displays it in grams per second (g/s). At idle, it should read between 6 - 9 g/s on a fully warmed up engine. Values should change rather quickly on acceleration, but values should remain fairly stable at any given RPM. When the PCM detects a malfunction in the MAF sensor circuit, the following DTCs will set:

    • DTC P0102 MAF Sensor Circuit Low Frequency
    • DTC P0103 MAF Sensor Circuit High Frequency

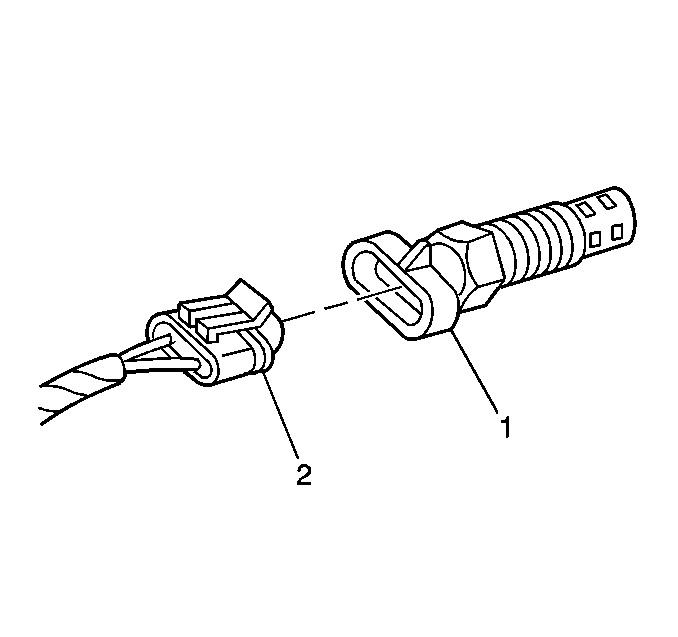
Intake Air Temperature (IAT) Sensor


Object Number: 13643  Size: SH
(1)Intake Air Temperature (IAT) Sensor
(2)Electrical Harness Connector

The Intake Air Temperature (IAT) sensor is a thermistor which changes value based on the temperature of air entering the engine. Low temperature produces a high resistance (100,000 ohms at -38°C/-39°F). A high temperature causes low resistance (70 ohms at 130°C/266°F). The PCM supplies a 5.0 volt signal to the sensor through a resistor in the PCM and measures the voltage. The voltage will be high when the incoming air is cold, and low when the air is hot. By measuring the voltage, the PCM calculates the incoming air temperature. The IAT sensor signal is used to adjust spark timing according to incoming air density.

The scan tool displays temperature of the air entering the engine, which should read close to ambient air temperature when engine is cold. The temperature should rise as underhood temperature increases. If the engine has not been run for several hours (overnight) the IAT sensor temperature and engine coolant temperature should read close to each other. If the PCM detects a malfunction in the IAT sensor circuit, the following DTCs will set:

    • DTC P0112 IAT Sensor Circuit Low Voltage
    • DTC P0113 IAT Sensor Circuit High Voltage
    • DTC P1111 IAT Sensor Circuit Intermittent High Voltage
    • DTC P1112 IAT Sensor Circuit Intermittent Low Voltage

Manifold Absolute Pressure (MAP) Sensor


Object Number: 13094  Size: SH
(1)Manifold Absolute Pressure (MAP) Sensor
(2)Manifold Absolute Pressure (MAP) Sensor seal

The Manifold Absolute Pressure (MAP) sensor responds to changes in the intake manifold pressure. The pressure changes as a result of engine load and speed. The map sensor converts this to a voltage output.

A closed throttle on engine coast down would produce a relatively low map output voltage. A wide open throttle would produce a high map output voltage. This high output voltage is produced because the pressure inside the manifold is the same as outside the manifold. The MAP is inversely proportional to what is measured on a vacuum gauge. The MAP sensor is used for the following:

    • Altitude determination
    • Ignition timing control
    • Speed density fuel management default

When the PCM detects a malfunction in the MAP sensor circuit DTC P0107 MAP Sensor Circuit Low Voltage or DTC P0108 MAP Sensor Circuit High Voltage will set.
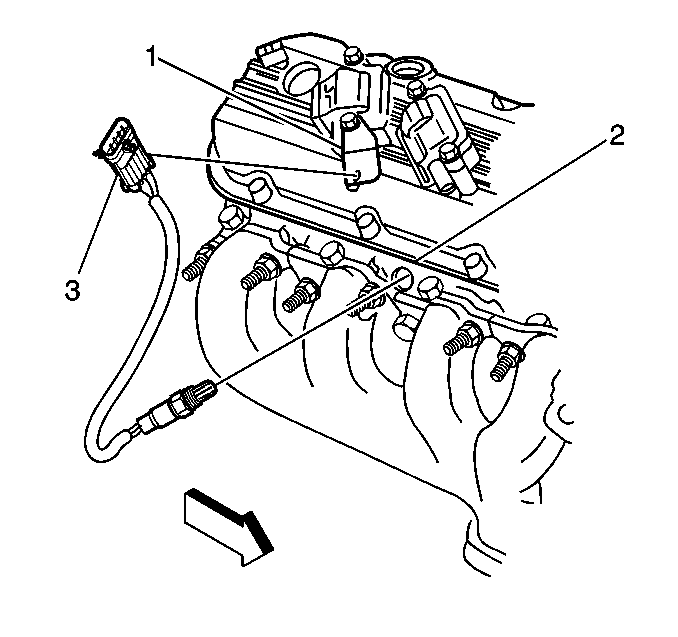
Heated Oxygen Sensors (HO2S) Cutaway


Object Number: 13576  Size: LH
(1)Four Wire In-Line Connector
(2)Heater Termination
(3)Water Shield Assembly
(4)Sensor Lead
(5)Flat Seat Shell
(6)Seat Gasket
(7)Outer Electrode and Protective Coating
(8)Rod Heater
(9)Inner Electrode
(10)Zirconia Element
(11)Insulator
(12)Clip Ring
(13)Gripper

Front Heated Oxygen Sensors (HO2S)

The heated oxygen sensors (HO2S) are mounted in the exhaust system where they can monitor the oxygen content of the exhaust gas stream. The oxygen present in the exhaust gas reacts with the sensor to produce a voltage output. This voltage should constantly fluctuate from approximately 100 mV (high oxygen content-lean mixture) to 900 mV (low oxygen content-rich mixture). The heated oxygen sensor voltage can be monitored with a scan tool. By monitoring the voltage output of the oxygen sensor, the PCM calculates what fuel mixture command to give to the injectors (lean mixture- low HO2S voltage = rich command, rich mixture-high HO2S voltage = lean command).

When the PCM detects an HO2S signal circuit that is low, the PCM will set the following DTCs:

    • DTC P0131 HO2S Circuit Low Voltage Bank 1 Sensor 1
    • DTC P0151 HO2S Circuit Low voltage Bank 2 Sensor 1
    • DTC P0137 HO2S Circuit Low Voltage Bank 1 Sensor 1

When the PCM detects an HO2S signal circuit that is high, the PCM will set the following DTCs:

    • DTC P0132 HO2S Circuit High Voltage Bank 1 Sensor 1
    • DTC P0152 HO2S Circuit High Voltage Bank 2 Sensor 1
    • DTC P0138 HO2S Circuit High Voltage Bank 1 Sensor 2

When the PCM detects no HO2S activity, the PCM will set the following DTCs:

    • DTC P0134 HO2S Insufficient Activity Bank 1 Sensor 1
    • DTC P0154 HO2S Insufficient Activity Bank 2 Sensor 1
    • DTC P0140 HO2S Insufficient Activity Bank 1 Sensor 2

Accelerator Pedal Position (APP) Sensor


Object Number: 215321  Size: SH

The accelerator pedal assembly, is mounted on the Accelerator Pedal Position (APP) sensor . The sensor is actually three individual Accelerator Pedal Position sensors within one housing. Three separate signal, ground and 5.0 volt reference circuits are used to connect the Accelerator Pedal Position Sensor assembly and the Throttle Actuator Control (TAC) Module. Each sensor has a unique functionality. The APP sensor 1 signal increases as the accelerator pedal is depressed, from below 1 volt at 0 percent pedal travel (pedal at rest) to above 3.3 volts at 100 percent pedal travel (pedal fully depressed). The APP sensor 2 signal decreases from above 4 volts at 0 percent pedal travel to below 1.8 volts at 100 percent pedal travel. The APP sensor 3 signal also decreases from above 3.5 volts at 0 percent pedal travel to below 2.6 volts at 100 percent pedal travel. Note also that the signal circuits for APP Sensor 2 and APP Sensor 3 are pulled up to 5.0 volts and the APP Sensor 1 signal circuit is pulled to ground within the TAC Module.

When the PCM detects a malfunction with the APP sensor circuits, the following DTCs will set:

    • DTC P1125 APP System
    • DTC P1275 APP Sensor 1 Circuit
    • DTC P1276 APP Sensor 1 Circuit Performance
    • DTC P1280 APP Sensor 2 Circuit
    • DTC P1281 APP Sensor 2 Circuit Performance
    • DTC P1285 APP Sensor 3 Circuit
    • DTC P1286 APP Sensor 3 Circuit Performance

Throttle Position (TP) Sensor


Object Number: 215025  Size: SH

Important: The Throttle Position (TP) sensor cannot be serviced.

The Throttle Position (TP) sensor is mounted on the throttle body assembly. The sensor is actually two individual Throttle Position sensors within one housing. Two separate signal, ground and 5.0 volt reference circuits are used to connect the TP sensor assembly and the Throttle Actuator Control (TAC) Module. The two sensors have opposite functionality. The TP sensor 1 signal voltage increases as the throttle opens, from below 1.1 volts at 0 percent throttle to above 3.7 volts at 100 percent throttle. The TP sensor 2 signal voltage decreases from above 3.9 volts at 0 Percent throttle to below 1.2 volts at 100 percent throttle. Note also that the signal circuit for TP Sensor 1 is pulled up to 5.0 volts and that the signal circuit for TP Sensor 2 is pulled to ground within the TAC Module. The TAC module converts these different signals to a common scale and continuously compares them to each other to verify proper system operation.

When the PCM detects a malfunction with the TP sensor circuits, the following DTCs will set:

    • DTC P1120 Throttle Position TP Sensor 1 Circuit
    • DTC P1220 Throttle Position TP Sensor 2 Circuit
    • DTC P1221 Throttle Position TP Sensors 1, 2 Performance

Park/Neutral Position Switch

The neutral switch contacts are closed to ground in neutral and open in drive ranges.

The PCM supplies ignition voltage, through a current limiting resistor, to the neutral signal circuit and senses a closed switch, when the voltage on the neutral signal circuit drops to less than 1 volt.

The PCM uses this signal as one of the inputs to control Idle, fuel delivery, and the starter relay operation.

Knock Sensors (KS) Bank 1 and Bank 2


Object Number: 13635  Size: SH

The knock sensor (KS) system is used to detect engine detonation. The PCM will retard the spark timing based on the signals from the KS system. The knock sensors produce an AC voltage that is sent to the PCM. The amount of AC voltage produced is proportional to the amount of knock.

An operating engine produces a normal amount of engine mechanical vibration (Noise). The knock sensors will produce an AC voltage signal from this Noise. When an engine is operating, the PCM will learn the minimum and maximum frequency of the noise the engine produces. When the PCM determines that this frequency is less than or greater than the expected amount, a knock sensor DTC will set.

Vehicle Speed Sensor and Speedo Adapter Module


Object Number: 215308  Size: SH
(1)Speedo Adapter Module Push Pins
(2)Steering Column Bracket
(3)Speedo Adapter Module Harness Connector
(4)Speedo Adapter Module

The vehicle speed sensor (VSS) is a pulse counter type input that informs the PCM how fast the vehicle is being driven. The speedometer adapter module system uses an inductive sensor mounted to the Allison automatic transmission housing and a toothed reluctor attached to the ring gear. As the reluctor rotates, the teeth alternately interfere with the magnetic field of the sensor creating an induced voltage pulse.

The VSS produces an AC voltage signal that increases with vehicle speed. The speedometer adapter module processes this signal and sends it to the PCM.

Crankshaft Position Sensor (CKP)


Object Number: 213843  Size: SH
(1)Crankshaft
(2)Bolt
(3)CKP Sensor

The crankshaft position sensor provides the PCM with crankshaft speed and crankshaft position.

The PCM also monitors the CKP sensor signal circuit for malfunctions. When the PCM detects a CKP sensor that is out of normal operating range, the PCM will set a DTC P0335 or a DTC P0336.

Camshaft Position Sensor (CMP)


Object Number: 213421  Size: SH
(1)Bolt
(2)Camshaft Position Sensor
(3)Lower Intake Manifold

The Camshaft Position sensor is mounted through the top of the engine block at the rear of the valley cover. The PCM provides a 12 volt power supply to the CMP sensor as well as a ground and a signal circuit.

The camshaft position sensor is used to determine whether a cylinder is on a firing or exhaust stroke. As the camshaft rotates, the reluctor wheel interrupts a magnetic field produced by a magnet within the sensor. The sensors internal circuitry detects this and produces a signal which is read by the PCM. The PCM uses this 1X signal in combination with the crankshaft position sensor 24X signal to determine crankshaft position and stroke. This diagnostic for the camshaft position sensor checks for a loss of camshaft position sensor signal. The PCM also monitors the CMP sensor signal circuit for malfunctions. The following DTCs set when the PCM detects a CMP sensor that is out of the normal operating range.

    • DTC P0341 Camshaft Position Sensor (CMP) Circuit Performance
    • DTC P0342 Camshaft Position Sensor (CMP) Circuit Low Voltage
    • DTC P0343 Camshaft Position Sensor (CMP) Circuit High Voltage

Electronic Ignition System

The electronic ignition system controls fuel combustion by providing a spark to ignite the compressed air/fuel mixture at the correct time. To provide optimum engine performance, fuel economy, and control of exhaust emissions, the PCM controls the spark advance of the ignition system. The Electronic ignition system has the following advantages over a mechanical distributor system:

    • No moving parts
    • Less maintenance
    • Remote mounting capability
    • No mechanical load on the engine
    • More coil cool down time between firing events
    • Elimination of mechanical timing adjustments
    • Increased available ignition coil saturation time

The electronic ignition system does not use the conventional distributor and coil. The ignition system consists of the following components/circuits:

    • Eight ignition coils/modules
    • Eight Ignition Control (IC) circuits
    • Camshaft Position (CMP) sensor
    • 1X Camshaft reluctor wheel
    • Crankshaft Position (CKP) sensor
    • 24X Crankshaft reluctor wheel
    • Related connecting wires
    • Powertrain Control Module (PCM)

The CKP sensor works in-conjunction with a 24X reluctor wheel. The reluctor wheel is mounted on the front of the crankshaft. The 24X reluctor wheel uses two different width notches that are 15 degrees apart. This Pulse Width Encoded pattern allows cylinder position identification within 90 degrees of crankshaft rotation. In some cases, cylinder identification can be located in 45 degrees of crankshaft rotation. This reluctor wheel also has dual track notches that are 180 degrees out of phase. The dual track design allows for quicker starts and accuracy.

The PCM also receives a 4X signal from the Crankshaft Position sensor. The PCM utilizes the 4X signal for the following:

    • Tachometer output
    • Spark control
    • Fuel control
    • Certain diagnostics

The CKP signal must be available for the engine to start. The CMP signal is not needed to start and operate the engine. The PCM can determine when a particular cylinder is on either a firing or exhaust stroke by the 24X signal. The CMP sensor is to determine what stroke the engine is on. The system will attempt synchronized and look for an increase in the MAF signal. An increase in the MAF signal indicates the engine has started. If the PCM does not detect an increase in the MAF signal, a re-sync will occur to the opposite cam position. A slightly longer cranking time may be a symptom of this condition.

Ignition Coils/Module


Object Number: 213850  Size: SH
(1)Bank 2 Coil/Module for #8 Cylinder
(2)Bank 2 Coil/Module for #6 Cylinder
(3)Bank 2 Coil/Module for #4 Cylinder
(4)Bank 2 Coil/Module for #2 Cylinder
(5)Bank 2 Coil near Plug Wire Cylinder #2
(6)Bank 2 Coil near plug Wire Cylinder #4
(7)Bank 2 Coil near Plug Wire Cylinder #6
(8)Bank 2 Coil near Plug Wire Cylinder #8

Object Number: 213856  Size: SH
(1)Bank 1 Coil/Module for #1 Cylinder
(2)Bank 1 Coil/Module for #3 Cylinder
(3)Bank 1 Coil/Module for #5 Cylinder
(4)Bank 1 Coil/Module for #7 Cylinder
(5)Bank 1 Coil near Plug Wire Cylinder #7
(6)Bank 1 Coil near Plug Wire Cylinder #5
(7)Bank 1 Coil near Plug Wire Cylinder #3
(8)Bank 1 Coil near Plug Wire Cylinder #1

The ignition system on this vehicle features a multiple coil ignition and is known as coil near plug. The secondary ignition wires are short compared with a distributor ignition system wire. Eight ignition coils/modules are individually mounted above each cylinder on the rocker covers. The coils/modules are fired sequentially. There is an Ignition Control (IC) circuit for each ignition coil/module. The eight ignition control circuits are connected to the PCM. All timing decisions are made by the PCM, which triggers each coil/module individually. The ignition coil/modules are supplied with the following circuits:

    • Ignition feed circuit
    • Ignition control circuit
    • Ground circuit
    • Reference low circuit

The ignition feed circuits are fused separately for each bank of the engine. Each coil/module is serviced separately.

This system puts out very high ignition energy for plug firing. Because the ignition wires are shorter, less energy is lost to ignition wire resistance. Also, since the firing is sequential, each coil has seven events to saturate as opposed to the three in a waste spark arrangement. Futhermore, no energy is lost to the resistance of a waste spark system.

Circuits Affecting Ignition Control

To properly control ignition timing, the PCM relies on the following information:

    • Engine load (manifold pressure or vacuum)
    • Atmospheric (barometric) pressure
    • Engine temperature
    • Intake air temperature
    • Crankshaft position
    • Engine speed (RPM)

The Ignition Control (IC) system consists of the following components:

    • Ignition coil/modules
    • 24X crankshaft position sensor
    • Powertrain Control Module (PCM)
    • All connecting wires

The ignition control utilizes the following to control spark timing functions:

    • 24X signal - The 24X crankshaft position sensor sends a signal to the PCM. The PCM uses this signal to determine crankshaft position. The PCM also utilizes this signal to trigger the fuel injectors.
    • Ignition Control (IC) circuits - The PCM uses these circuits to trigger the ignition coil/modules. The PCM uses the crankshaft reference signal to calculate the amount of spark advance needed.

Ignition Information

There are important considerations to point out when servicing the ignition system. The following Noteworthy Information will list some of these, to help the technician in servicing the ignition system.

       Caution: Remove the high voltage (secondary) ignition wire from the ignition coil and ground it to a good known engine ground in order to reduce the risk of fire and personal injury.

    • The ignition coils secondary voltage output capabilities are very high - more than 40,000 volts.
    • The 24X crankshaft position sensor is the most critical part of the ignition system. If the sensor is damaged so that pulses are not generated, the engine will not start.

       Notice: Clearance is very important for the crankshaft position sensor. The sensor must not contact the rotating interrupter ring at any time. Sensor damage will result. The interrupter ring blades will destroy the sensor if the interrupter ring is bent.

    • The sensor must not contact the rotating interrupter ring at any time.
    • Ignition timing is not adjustable. There are no timing marks on the crankshaft balancer or timing chain cover.

       Notice: Spark plug boots often adhere to the spark plugs. Use tool J 36011 in order to remove by first twisting and then pulling upward on retainers. Reinstall the boots and the retainers on the ignition coil housing secondary terminals. The boots and the retainers must be in place on the ignition coil housing secondary terminals prior to the ignition coil and the electronic ignition control module assembly installation or ignition control system damage may result.

    • Rotate each boot to dislodge it from the plug or coil tower before pulling it from either a spark plug or the ignition coil.

Powertrain Control Module (PCM)

The PCM is responsible for maintaining proper spark and fuel injection timing for all driving conditions. To provide optimum driveability and emissions, the PCM monitors input signals from the following components in calculating ignition control (IC) spark timing:

    • Engine Coolant Temperature (ECT) sensor
    • Intake Air Temperature (IAT) sensor
    • Mass Air Flow (MAF) sensor
    • PNP inputs from Park/Neutral Position switch
    • Throttle Position (TP) sensor
    • Speedo Adapter Module

Results of Incorrect Operation

An ignition control circuit that is open, grounded, or short to voltage will set an ignition control circuit DTC. If a fault occurs in the IC output circuit when the engine is running, the engine will experience a misfire.

The PCM uses information from the engine coolant temperature sensor in addition to RPM to calculate spark advance values as follows:

    • High RPM = more advance
    • Cold engine = more advance
    • Low RPM = less advance
    • Hot engine = less advance

Therefore, detonation could be caused by high resistance in the engine coolant temperature sensor circuit. Poor performance could be caused by low resistance in the engine coolant temperature sensor circuit.

If the engine cranks but will not run or immediately stalls, Engine Cranks But Will Not Run diagnostic table must be used to determine if the failure is in the ignition system or the fuel system. If DTC P0341, P0342, P0343, P0335, P0336 is set, the appropriate diagnostic trouble code table must be used for diagnosis.