Pitman Arm Replacement Saginaw Steering Gear
Removal Procedure
A nut-retained pitman arm is used on models with the Saginaw steering gear.
Pitman arms are non-repairable. Replace the pitman arm when it is damaged or worn.
Notice: Do not hammer on the pitman arm, pitman arm shaft or puller. Damage to the pitman arm or steering gear may result.
Tools Required
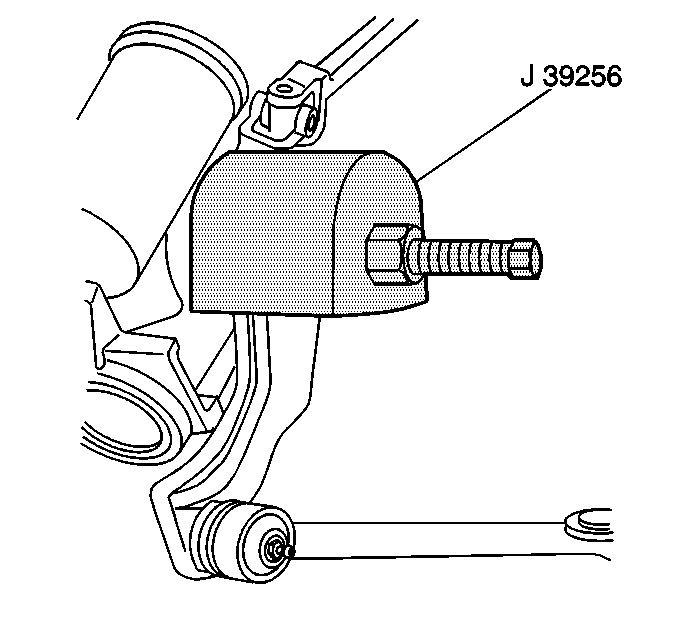
| • | J 39256 Pitman Arm Puller |
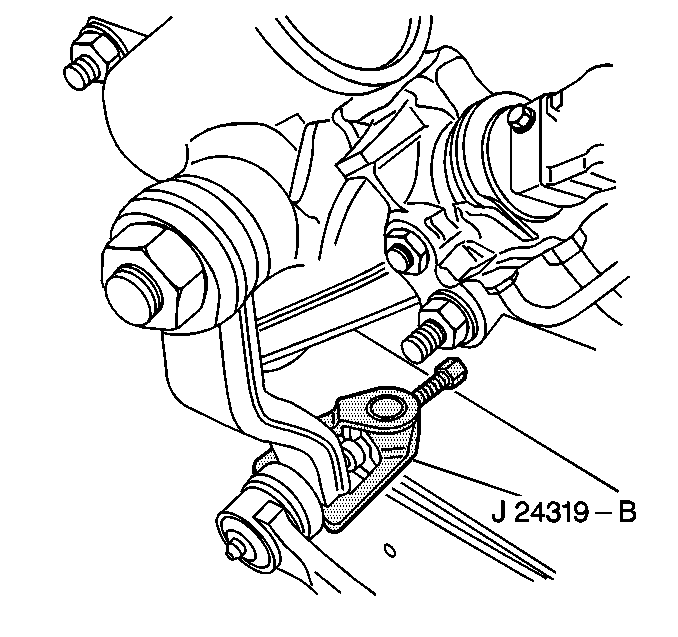
| • | J 24319-B Steering Linkage Puller |
- Remove the cotter pin ( 3).
- Discard the cotter pin.
- Remove the relay rod nut (4).
- Use the J 24319-B in order to remove the relay rod assembly from the pitman arm end.
- Mark the position of the pitman arm (13) on the pitman shaft (12).
- Remove the pitman arm nut (1).
- Remove the flat washer (14).
- Use the J 39256 in order to remove the pitman arm.
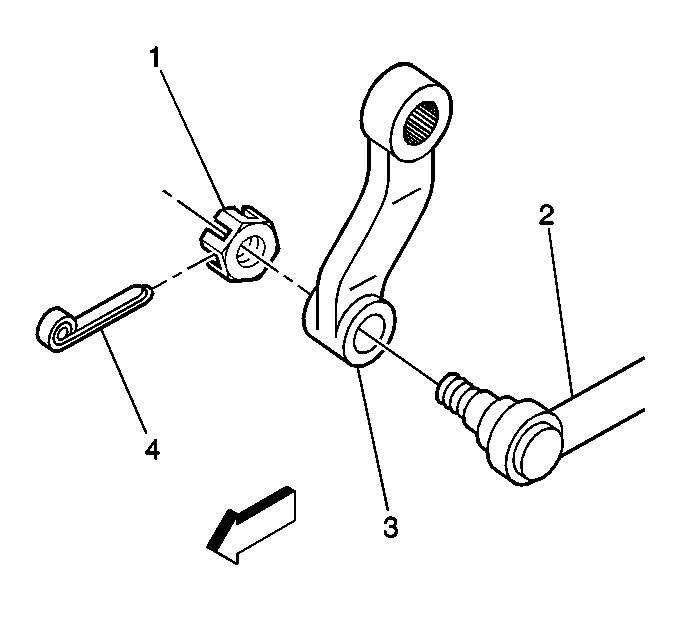
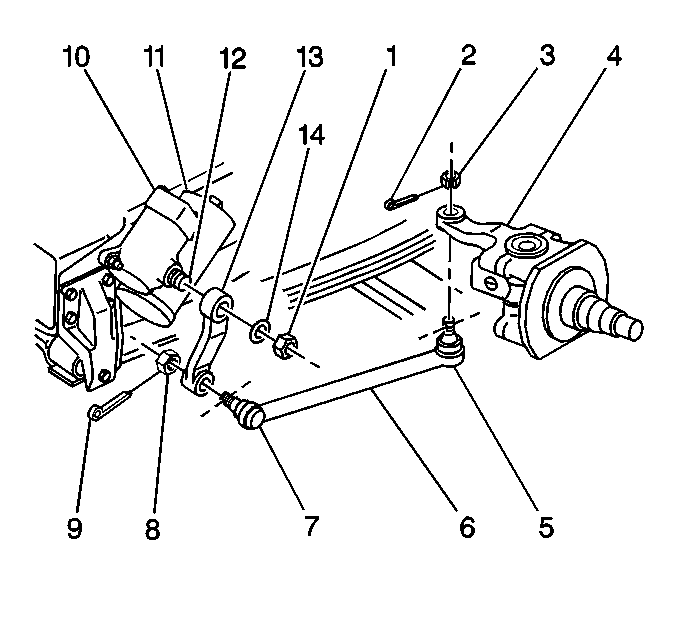
Installation Procedure
- Align the position marks made during the removal.
- Install the pitman arm (13).
- Install the flat washer (14).
- Install the pitman arm nut (1).
- Advance the relay rod nut to the nearest cotter pin slot.
- Install the relay rod assembly (2) to the pitman arm (1).
- Install the relay rod nut (4).
- Install the new cotter pin ( 3).

Notice: Use the correct fastener in the correct location. Replacement fasteners must be the correct part number for that application. Fasteners requiring replacement or fasteners requiring the use of thread locking compound or sealant are identified in the service procedure. Do not use paints, lubricants, or corrosion inhibitors on fasteners or fastener joint surfaces unless specified. These coatings affect fastener torque and joint clamping force and may damage the fastener. Use the correct tightening sequence and specifications when installing fasteners in order to avoid damage to parts and systems.
Tighten
Tighten the pitman arm nut to 370 N·m (275 lb ft).

Important: Do not back off a relay rod nut in order to insert a cotter pin.
Notice: Use the correct fastener in the correct location. Replacement fasteners must be the correct part number for that application. Fasteners requiring replacement or fasteners requiring the use of thread locking compound or sealant are identified in the service procedure. Do not use paints, lubricants, or corrosion inhibitors on fasteners or fastener joint surfaces unless specified. These coatings affect fastener torque and joint clamping force and may damage the fastener. Use the correct tightening sequence and specifications when installing fasteners in order to avoid damage to parts and systems.
Tighten
Tighten the relay rod ball joint nut to 130 N·m (95 lb ft).
Pitman Arm Replacement TRW Ross Steering Gear
Removal Procedure
This pitman arm is a clamp-bolt retained type. Pitman arms are non-repairable. Replace the pitman arm when it is damaged or worn.
Notice: Do not hammer on the pitman arm, pitman arm shaft or puller. Damage to the pitman arm or steering gear may result.
Tools Required
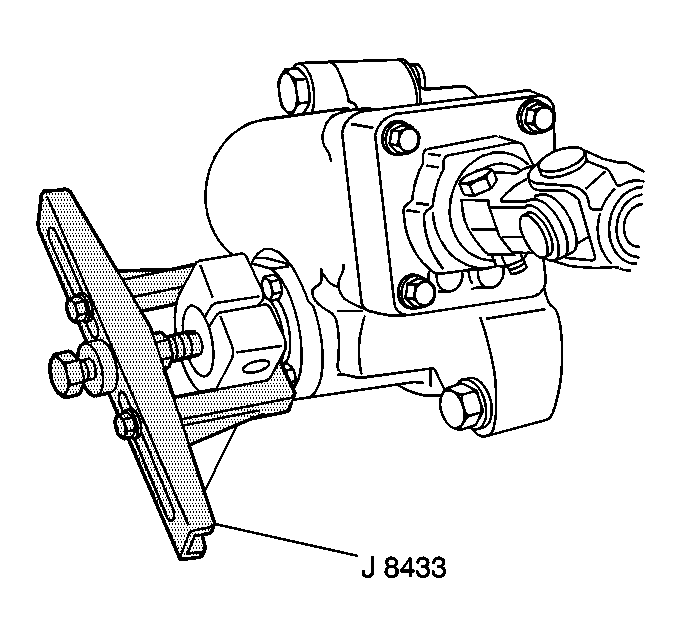
| • | J 8433 Pitman Arm Puller |
| • | J 33882 Pitman Arm Puller |
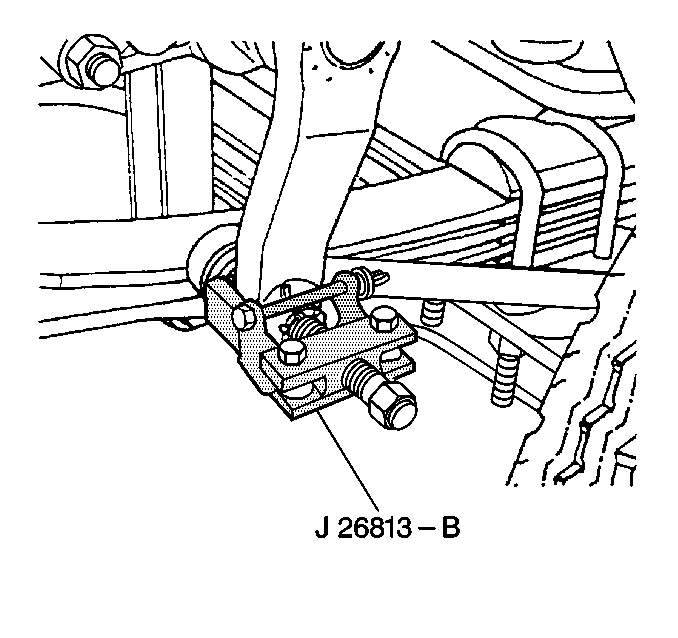
| • | J 26813-B Steering Linkage Puller |
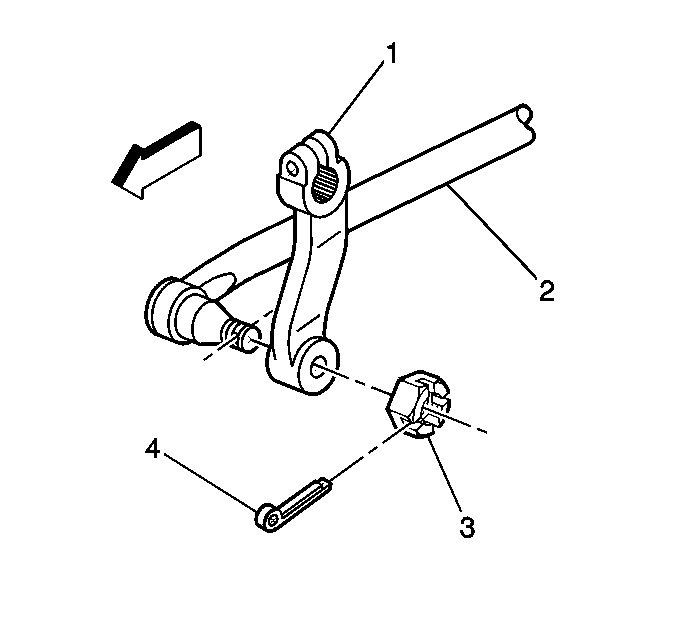
- Remove the cotter pin (4).
- Discard the cotter pin.
- Remove the relay rod nut (3).
- Use the J 26813-B in order to remove the relay rod ball joint from the pitman arm end.
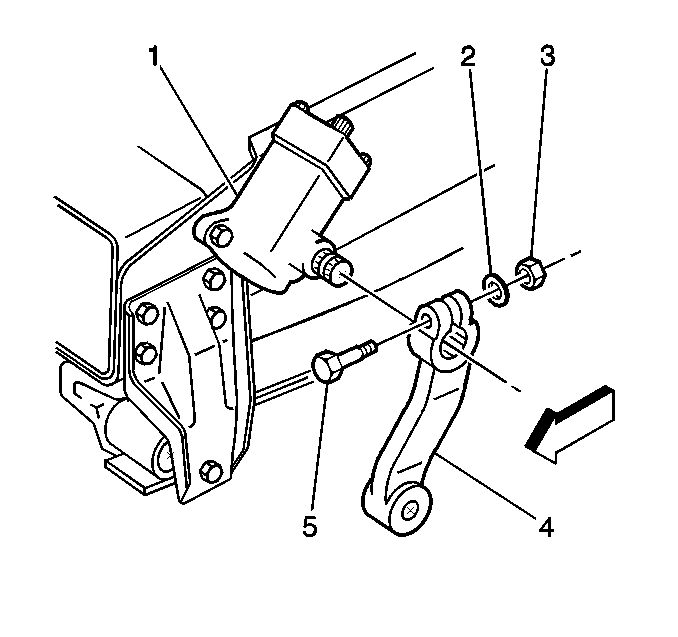
- Remove the pitman arm clamp nut (3).
- Remove the flat washer (2).
- Remove the pitman arm clamp bolt (5).
- Mark the position (4) of the pitman arm (3) on the pitman shaft (2).
- Install a dial indicator (3).
- Use a wedge-shaped tool (1) in order to spread the pitman arm clamp bosses.
- Remove the dial indicator (3).
- Use the J 8433 to remove the pitman arm.
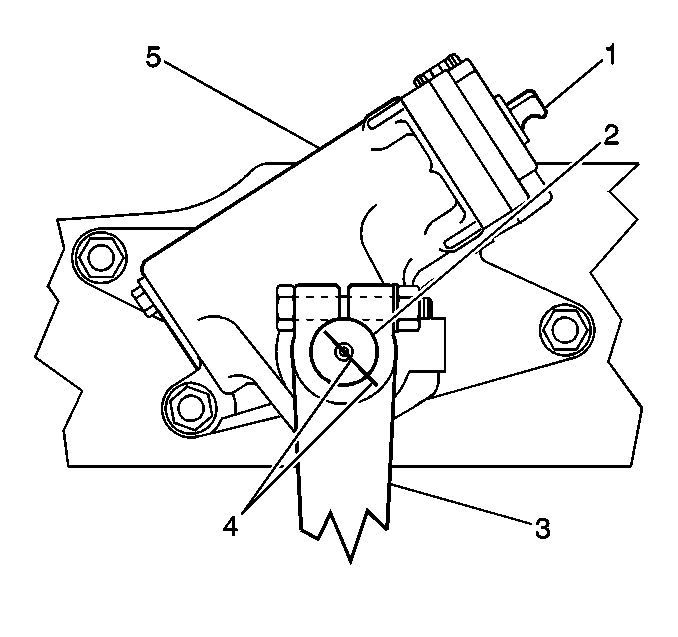
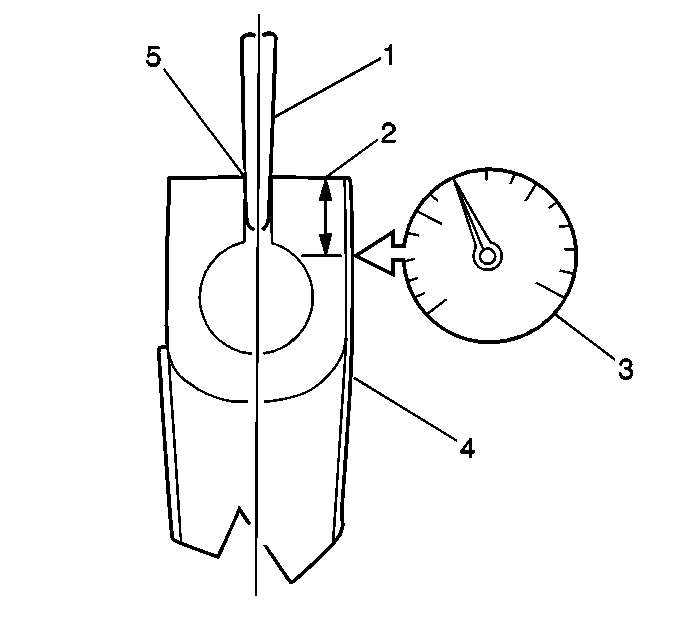
Ensure that the pitman arm clamp bosses are spread no more than 0.1 mm (0.004 in).
Installation Procedure
- Install the pitman arm (3).
- Install the pitman arm clamp bolt (5).
- Install the flat washer (2).
- Install the pitman arm clamp nut (3).
- Install the relay rod (2) into the pitman arm (1).
- Do not back off a relay rod nut in order to insert a cotter pin.
- Install the relay rod nut (3).
- Install the new cotter pin (4).

Important: Align the position marks made during the pitman arm removal.
Spread the bosses a maximum of 0.1 mm (0.004 in). Spread the bosses only if necessary.
Notice: Use the correct fastener in the correct location. Replacement fasteners must be the correct part number for that application. Fasteners requiring replacement or fasteners requiring the use of thread locking compound or sealant are identified in the service procedure. Do not use paints, lubricants, or corrosion inhibitors on fasteners or fastener joint surfaces unless specified. These coatings affect fastener torque and joint clamping force and may damage the fastener. Use the correct tightening sequence and specifications when installing fasteners in order to avoid damage to parts and systems.
Tighten
Tighten the pitman arm clamp nut to 325 N·m (240 lb ft).

Important: Advance the relay rod nut to the nearest cotter pin slot.
Tighten
Tighten the relay rod nut to 160 N·m (120 lb ft).
