Owner Checks and Services General
Perform the owner checks and services that are listed below
at the intervals specified in order to ensure the safety, dependability and
emission control performance of your vehicle.
For your safety and the safety of others, inspect any of the safety
related components that may have been damaged in an accident. Perform any
necessary repairs before operating the vehicle.
At the minimum, perform these routine inspections every 6 months
or 10 000 km (6,000 mi), whichever occurs first. Complete
any necessary repairs before operating the vehicle.
At Each Fuel Fill
Important:
| • | Perform these underhood inspections at each fuel fill. |
| • | Do not add too much oil. If your engine has so much oil that the
oil level gets above the upper mark that shows the proper operating range,
your engine could be damaged. |
Engine Oil Level Inspection
Inspect the engine oil level. Add the proper oil if necessary.
Gasoline Engines
| • | If the oil is at or below the ADD mark, you will need to add at
least one quart of oil. But you must use the right kind. This part explains
what kind of oil to use. For crankcase capacity, see Capacities and Specifications
in the Index. |
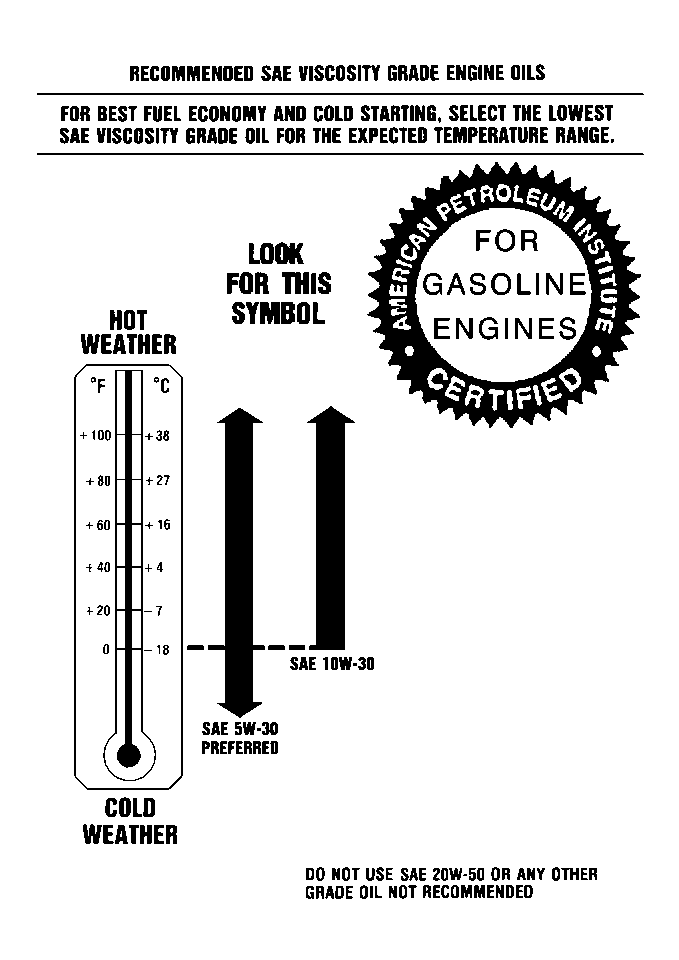
| • | Engine oil with the American Petroleum Institute Certified for
Gasoline Engines "Starburst" symbol of the proper viscosity. In
order to determine the preferred viscosity for your engine. Refer to Engine
Oil in the GM Owner's Manual. |
| • | Engine oil with the letters CG-4 is best for your vehicle.
If GC-4 is not available, you many use CF-4/SH oil. The letters CG-4
and CF-4/SH indicate American petroleum Institute (API) levels of quality.
In order to determine the preferred viscosity for your vehicle's diesel
engine. Refer to Engine Oil in the GM Owner's Manual. |
Engine Coolant Level Inspection
Inspect the engine coolant level. Add the proper coolant mix if necessary.
Windshield Washer Fluid Level Inspection
Inspect the windshield washer fluid level in the windshield washer tank.
Add the proper fluid if necessary.
Tire Inflation Inspection
Inspect the tire inflation. Ensure that the tires are inflated to the
pressures specified on the Certification/Tire label.
At Least Twice a Year
Parking Brake Inspection
Park the vehicle on a fairly steep hill. Hold the vehicle with the parking
brake only. This procedure determines the holding ability of the parking brake.
Starter Switch Inspection
Caution: When you are doing this check, the vehicle could move suddenly. If it
does, you or others could be injured. Follow the steps below.
Ensure that there is enough room around the vehicle.
On manual transmission vehicles, place the shift lever in NEUTRAL (N).
Push the clutch down halfway and attempt to start the engine. The starter
should function only when the clutch is pushed down all the way to the
floor. If the starter functions when the clutch is NOT pushed all the
way down, service the vehicle.
Automatic Transmission Shift Indicator Inspection
Verify that the indicator points to the gear chosen.
Steering Inspection
Be alert for any of the following conditions:
| • | Changes in steering action |
| • | Abnormal front tire wear |
| • | Changes in steering wheel position |
Inspect or service the vehicle when the following conditions occur:
| • | The steering wheel is harder to turn. |
| • | The steering wheel has too much free play. |
| • | Strange sounds can be heard during turning or parking. |
Brake System Inspection
Be alert for any of the following conditions:
| • | Illumination of the low air warning lamp |
| • | Changes in braking action |
| - | Repeated pulling to one side |
| - | Unusual sounds during braking |
| - | Increased brake pedal travel |
Ensure that the air brake system reservoirs are drained daily with full
system air pressure. Inspect the system for leaks.
Any of these conditions may indicate the need for brake system inspection
or service.
Exhaust System Inspection
Be alert for any changes in the sound of the exhaust system or any smell
of fumes. These conditions indicate that the system may be leaking. Inspect
or repair the exhaust system immediately, if needed. Refer to Engine
Exhaust and Running Your Engine While You're Parked cautions in the Owner's
manual.
Engine Cooling System Inspection
Important: The radiator and A/C condenser should be kept clean for proper system
performance. Cleaning is recommended at least once a year.
Inspect the front surface of the and A/C condenser. Insects, leaves,
debris, etc. can affect the performance of the radiator and A/C condenser.
If the front surface of either or both of these components is found
to be in need of cleaning, the unwanted material can be removed by performing
the following:
| • | Ensure that the engine is OFF and cool. |
| • | Blow compressed air through the radiator from the rear surface
of the radiator toward the front of the vehicle. |
| • | If compressed air is not available, use a water hose to force
water through the radiator from the rear surface of the radiator toward the
front of the vehicle. |
To help ensure proper cooling system pressure performance, a pressure
test of the cooling system and pressure cap is recommended at least once a
year.
Windshield Wipers and Washers Inspection
Inspect the operation and the conditions of the wiper blades.
Inspect the flow of the washer spray.
Lamps Inspection
Inspect the following lamps on the inside:
Inspect the following lamps on the outside:
| • | The license plate lamps |
| • | The reflectors or lights on the outside mirrors |
| • | The identification and clearance lamps |
| • | The hazard warning flashers |
Inspect the headlamp aim if the beams seem to be inappropriately aimed.
Glass, Mirrors, Lamps and/or Reflectors Condition Inspection
Inspect all glass, mirrors, lamps or reflectors for the following conditions:
Any of the above conditions may reduce the view or visibility or cause
injury. Replace, clean, or repair promptly if necessary.
Hood Latches Inspection
Verify that the hood closes firmly.
Inspect for broken, damaged or missing parts that might prevent tight
latching.
Ensure that the secondary latch, if equipped, prevents the hood from
opening all the way when the primary latch is released.
Fluid Leaks Inspection
Inspect for fluid leaks of the following substances by looking at the
surface beneath the vehicle after it has been parked for a while:
Underbody Inspection
Corrosive materials used for ice and snow removal and dust control may
collect on the underbody. If these materials are not removed, accelerated
corrosion (rust) may occur on the following underbody parts:
At least every spring, flush these materials from the underbody using
plain water. Thoroughly clean any areas where mud and other debris may collect.
Loosen the sediment packed in the closed areas of the frame before flushing.
Engine Cover Inspection
Verify that the cab's engine cover and seal (if equipped) are not torn
or damaged.
Verify that the cover is bolted down firmly to the floor.
At Least Once a Year
Key Lock Cylinders Service
Lubricate the key lock cylinders using the correct lubricant.
Tractor Protection (Breakaway) Valve Inspection
On air brake models, perform the following procedures on the tractor
protection (breakaway) valve:
- Remove the tractor protection (breakaway) valve.
- Disassemble the tractor protection (breakaway) valve.
- Clean the tractor protection (breakaway) valve.
- Inspect the tractor protection (breakaway) valve.
Engine Oil and Filter Change

USE SG OR SH quality energy
conserving II oils in order to ensure proper engine oil viscosity.
You may show the SG or SH designations alone or in combination
with the following designations:
Oil Filter
Notice: To prevent leakage of all oil filters such as PF-932, etc., it is very
important that the installation instructions listed below are closely followed.
- Turn the filter to the left in order to remove the used filter.
- Clean the gasket sealing area on the engine oil filter mounting
surface.
- Ensure that the threaded nipple or the bolt is properly torqued
if the engine has an adapter base.
- Lightly oil the gasket using clean oil in order to install the
filter.
- Tighten the oil filter gasket 3/4 to 1 full turn after the oil
filter gasket contacts the oil filter mounting surface.
- Use a cap-type wrench or a strap-type wrench with a handle or
the equivalent in order to ensure proper installation of the oil filter
gasket.
- Run the engine for three minutes with the proper engine oil level.
Then thoroughly inspect the oil gasket filter area for leaks.
Engine Oil Viscosity
Engine oil viscosity affects fuel economy and cold-weather operation.
Lower viscosity engine oils provide efficient fuel economy and cold weather
performance. Warmer weather conditions require the use of higher viscosity
engine oils for satisfactory lubrication.
Notice: Using oils of any viscosity other than those recommended
could result in engine damage. When choosing an oil, consider the range of
temperatures the vehicle will be operated in before the next oil change.
Then, select the recommended oil viscosity.
Consider the range of temperatures the vehicle operates
in before the next oil change when selecting an oil. Then select the recommended
oil viscosity.
Chassis Lubrication
Notice: Do not lubricate the parking brake cables. Lubrication destroys the
plastic coating on the cable.
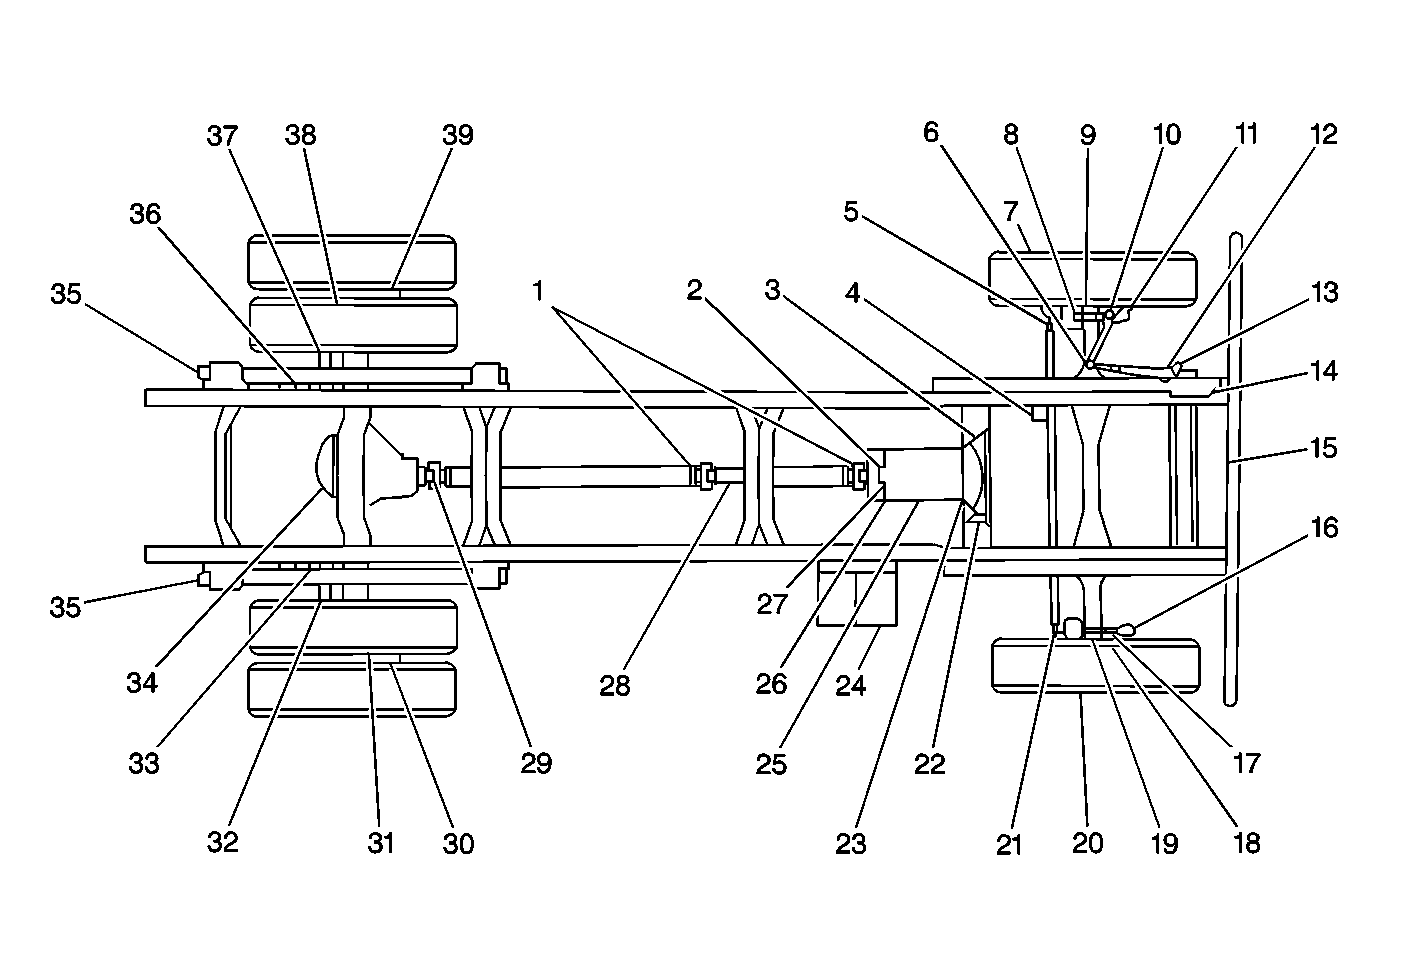
Lubricate the following chassis components:
| • | The parking brake cable guides |
| • | The underbody contact points and the linkage |
In order to lubricate the ball joints, wipe off all dirt from the grease
fitting. Lubricate the ball joints only if the ball joints temperature is
-12°C (10°F) or higher. Allow the ball joints to warn up before
lubricating ball joints in cold weather. Use a low-pressure grease gun on
all joints in order to prevent seal damage.
EGR System Service
Perform the EGR System Inspection.
Owner Checks and Services Single Axle
Single Axle Models


