Brake Caliper and Anchor Plate Wear Adjustment Rear, Bendix
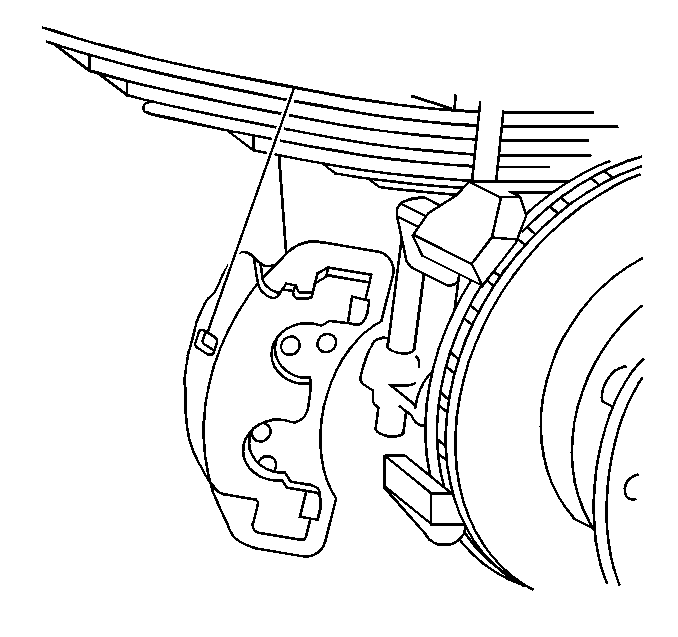
The rail slider type brake caliper support rainls and brake caliper mouting plate support rails wear, eventually causing the brake caliper to fit loosely. Bendix® and Dayton-Walther brakes use shims to adjust for this wear. Whenever you replace the brake pads, check the caliper and caliper mouting plate for wear. Add shims if necessary.
- Remove the brake caliper. Refer to Brake Caliper Replacement .
- Clean the support rail surfaces of the brake caliper with a wire brush.
- Clean the support rail surfaces of the brake caliper mounting plate with a wire brush.
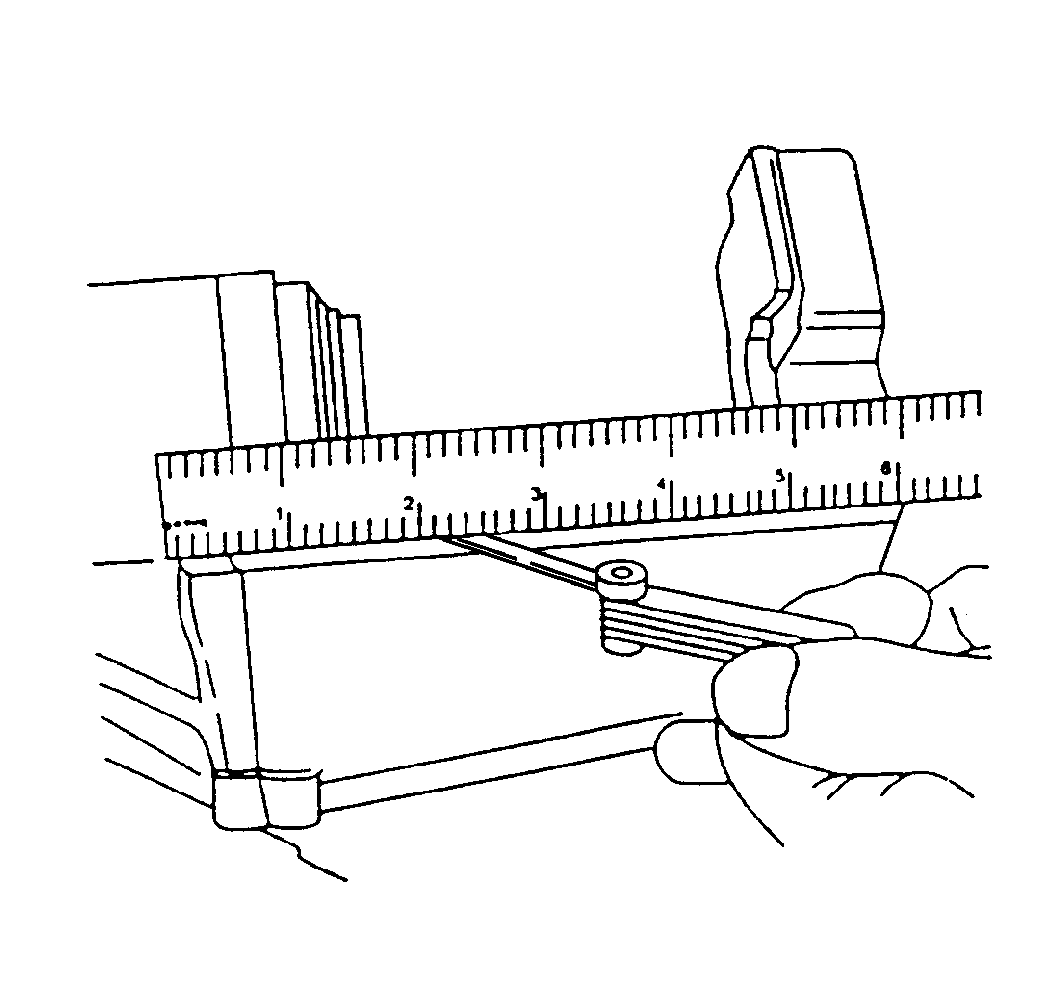
- Lay a straight edge across the brake caliper support rail surfaces.
- Measure the maximum depth of the brake caliper support rail surfaces.
- If the brake caliper support rail surfaces are worn to a depth of 1.27 mm (0.050 in) or more, replace the brake caliper. Refer to Brake Caliper Replacement .
- Temporarily install the brake caliper on the brake caliper mounting plate.
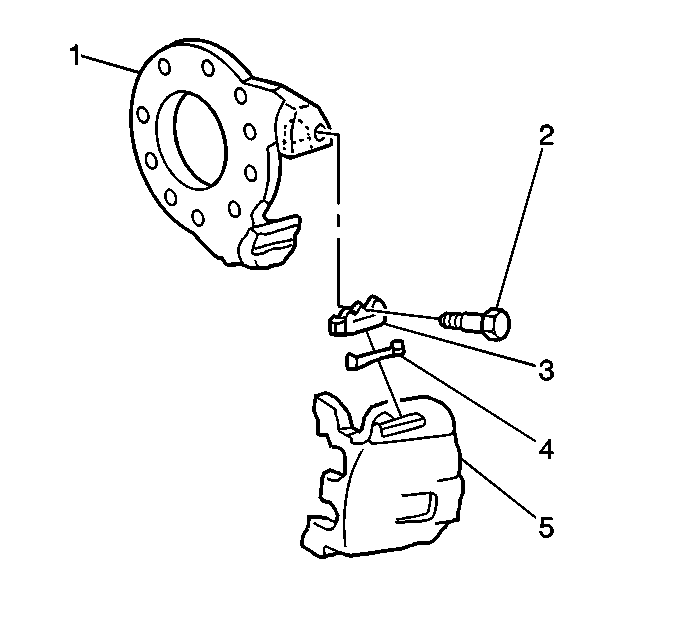
- Install a new brake caliper retainer (3).
- Install the brake caliper retainer bolt (2).
- Insert a screwdriver between the brake caliper and the brake caliper retainer. Ensure that the tool is equally distant from each edge of the brake caliper.
- Pry firmly with the screwdriver in order to seat the brake caliper against all three remaining slide surfaces.
- Measure the bumper gap between the brake caliper retainer and the brake caliper. Use the largest feeler gauge, or stack of gauges, that fits into the gap on both sides of the screwdriver.
- Using the bumper gap measurement, select a shim according to the following steps:
- If the bumper gap exceeds 3.68 mm (.0145 in), replace the brake caliper and measure the bumper gap with the new caliper.
- Remove the brake caliper.
- Install the selected shim on the brake caliper mounting plate support rail, opposite the brake caliper retainer and the brake caliper spring support rail.
- Install the brake caliper. Refer to Brake Caliper Replacement .

Important: Do not let the brake caliper hang from the brake hose. Suspend the brake caliper with a wire or a cord.
File smooth any nicks and gouges.
File smooth any nicks and gouges.

Important: Do not install the brake caliper spring (4).

| • | If the bumper gap measurement is 0.0--1.47 mm (0.0-0.058 in), no shim is required. |
| • | If the bumper gap measurement is 1.50--2.57 mm (0.59--0.101 in), use a shim thickness of 0.64 mm (0.025 in). |
| • | If the bumper gap measurement is 2.59--3.68 mm (0.102--0.145 in), use a shim thickness of 1.14 mm (0.045 in). |
| 14.1. | If the bumper gap with the new caliper is 1.49-3.68 mm (0.059-0.145 in), refer to step 13. |
| 14.2. | If the bumper gap with the new caliper exceeds 3.68 mm (0.145 in), replace the brake caliper mounting plate. Refer to Brake Caliper Mounting Plate Replacement . |
Important: Always use a new brake caliper retainer and brake caliper spring when assembling the new components.
Brake Caliper and Anchor Plate Wear Adjustment Dayton-Walther
The rail slider type brake caliper support rainls and brake caliper mouting plate support rails wear, eventually causing the brake caliper to fit loosely. Bendix® and Dayton-Walther brakes use shims to adjust for this wear. Whenever you replace the brake pads, check the caliper and caliper mouting plate for wear. Add shims if necessary.
- Remove the brake caliper. Refer to Brake Caliper Replacement .
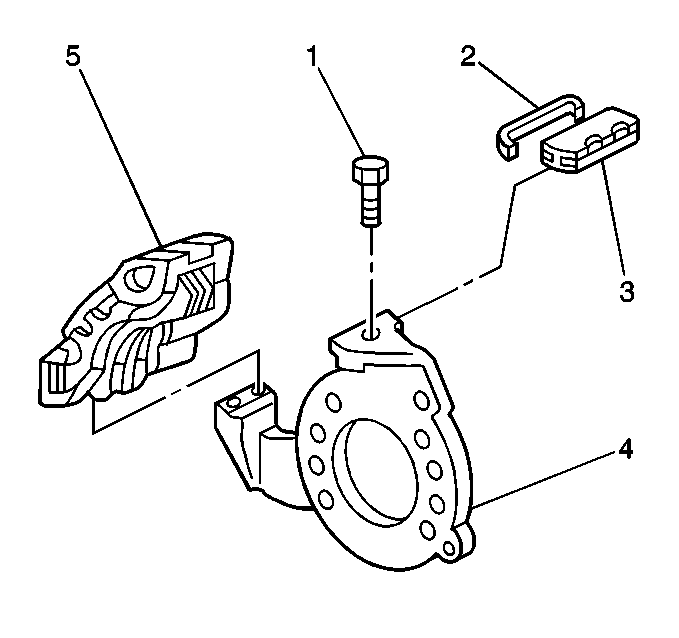
- Clean the support rail surfaces of the brake caliper (5) with a wire brush.
- Clean the support rail surfaces of the brake caliper mounting plate (4) with a wire brush.
- Temporarily install the brake caliper on the brake caliper mounting plate.
- Install the brake caliper spring (2).
- Install a new brake caliper retainer (3).
- Install the brake caliper retainer bolt (1).
- Use a screwdriver in order to turn the vanes of the brake rotor in the forward direction. This places the forward brake caliper mounting plate support rail in full contact with the brake caliper support rail surfaces.
- Measure the brake caliper retainer gap with a feeler gauge laid full length in the gap.
- Use the measurement in order to select a shim. Refer to Caliper Wear Shim Specifications (Dayton-Walther) table.
- Remove the brake caliper retainer bolt.
- Remove the brake caliper retainer.
- Remove the brake caliper spring.
- Lift the forward end of the brake caliper enough in order to provide clearance between the brake caliper and the brake caliper mounting plate support rail.
- Lower the brake caliper to the caliper's original position with the shim in place.
- Install the brake caliper. Refer to Brake Caliper Replacement .

Important: Do not let the brake caliper hang from the brake hose. Suspend the brake caliper with a wire or a cord.

File smooth any nicks and gouges.
File smooth any nicks and gouges.

| • | If the gap is 0.89 mm (0.035 in), or less then no shim is needed. |
| • | If the gap is more than 0.89 mm (0.035 in), continue with step 10 . |
| • | If the gap is greater than 2.92 mm (0.115 in), replace the brake caliper mounting plate. Refer to Brake Caliper Mounting Plate Replacement . |
This permits installation of the shim.
Important: Place the shim with the widest side of the shim fitting against the widest surface of the brake caliper mounting plate.
