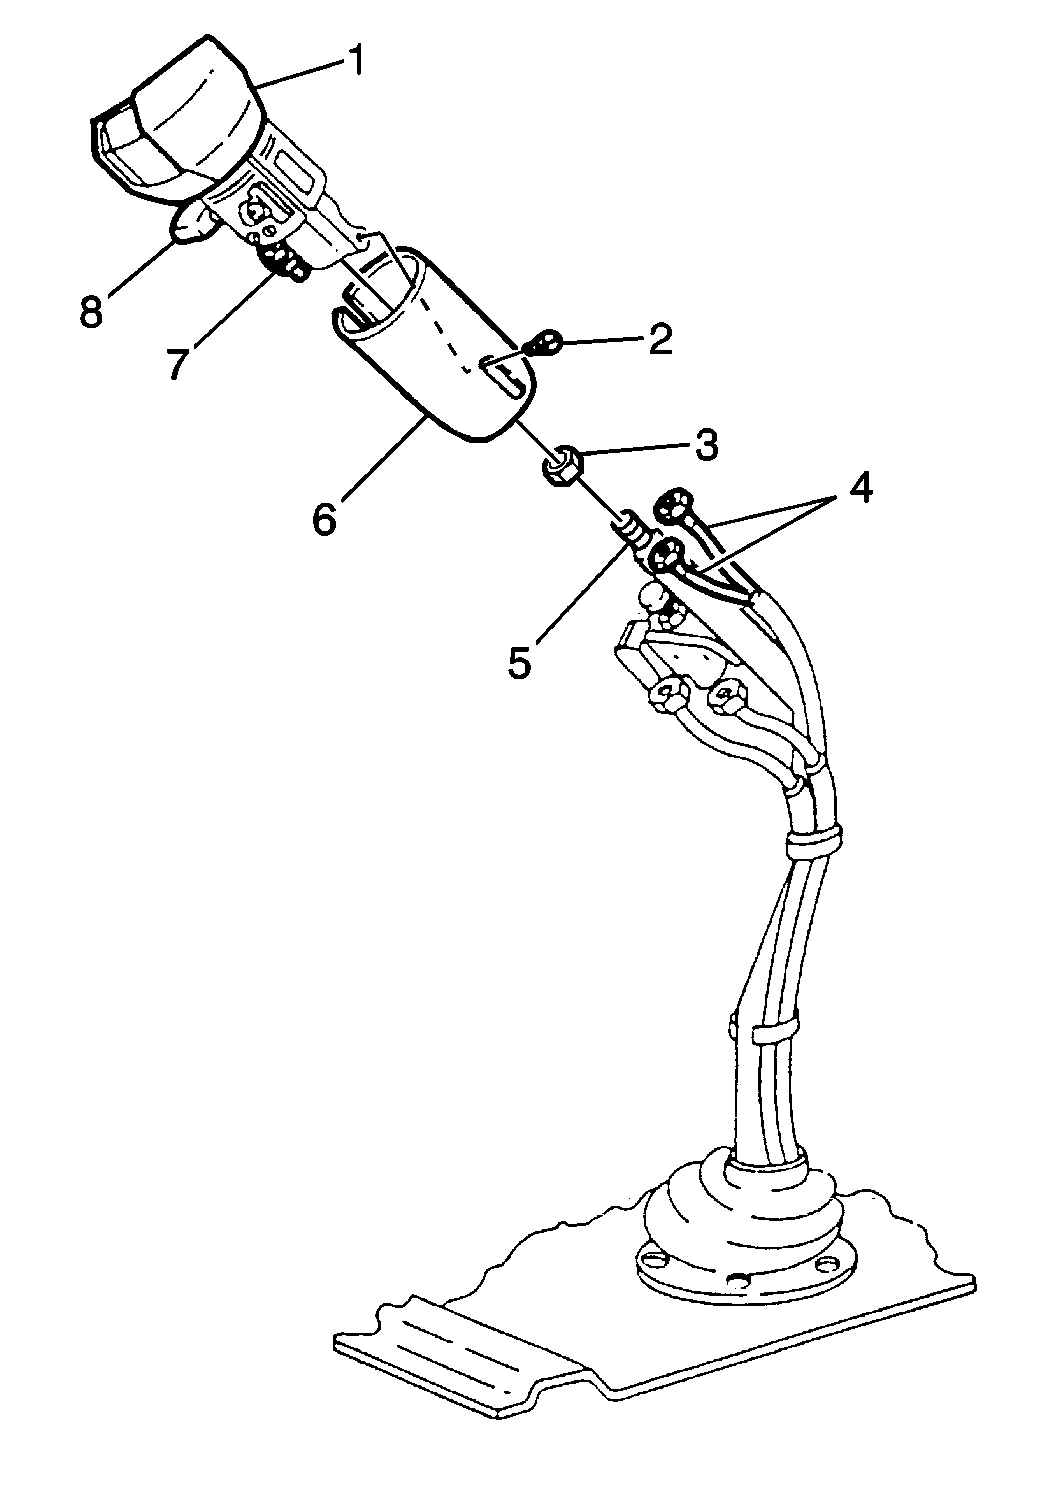
Removal Procedure
- Exhaust all air pressure from the system.
- Remove the screw (2) from the transmission shift valve skirt.
- Slide the skirt (6) down the shift lever.
- Remove the air lines from the shift control valve.
- Cap the line openings.

- Perform the following
steps in order to remove the shift control valve:
| 6.2. | Unscrew the shift control valve (1). |
| 6.3. | Slide off the skirt (6). |
Installation Procedure

- Perform the following
steps in order to install the shift control valve:
| 1.1. | For Fuller RT6610 transmissions, slide the skirt onto the shift
lever. |
| 1.2. | Screw the shift control valve on all the way, then back until
the valve lever or selector button points to the driver side of the cab. |
| 1.3. | Tighten the nut against the shift control valve. |
- Perform the following steps in order to install the air lines
to the shift control valve:
| 2.2. | Screw the air lines onto the connectors from which they were removed. |
- Slide the skirt onto the air shift control valve.
Notice: Use the correct fastener in the correct location. Replacement fasteners
must be the correct part number for that application. Fasteners requiring
replacement or fasteners requiring the use of thread locking compound or sealant
are identified in the service procedure. Do not use paints, lubricants, or
corrosion inhibitors on fasteners or fastener joint surfaces unless specified.
These coatings affect fastener torque and joint clamping force and may damage
the fastener. Use the correct tightening sequence and specifications when
installing fasteners in order to avoid damage to parts and systems.
- Install the screw
to the shift valve skirt.
Tighten
Tighten the skirt screw to 15 N·m (11 lb ft).
- Pressurize the air system.
- Operate the shift control valve to check for leaks.


