Removal Procedure
- Set the parking brake.
- Block the vehicles rear wheels.
- Raise the frame until the front tires clear the floor.
Important: Raise the frame high enough in order to allow the spring to clear the
rear spring bracket when you lower the axle.
- Remove the front wheel if necessary.
Notice: Do not use the front crossmember to support the vehicle or the crossmember
may buckle.
- Support
the frame using suitable safety stands.
- Support the axle with a jack.

- Remove the following components
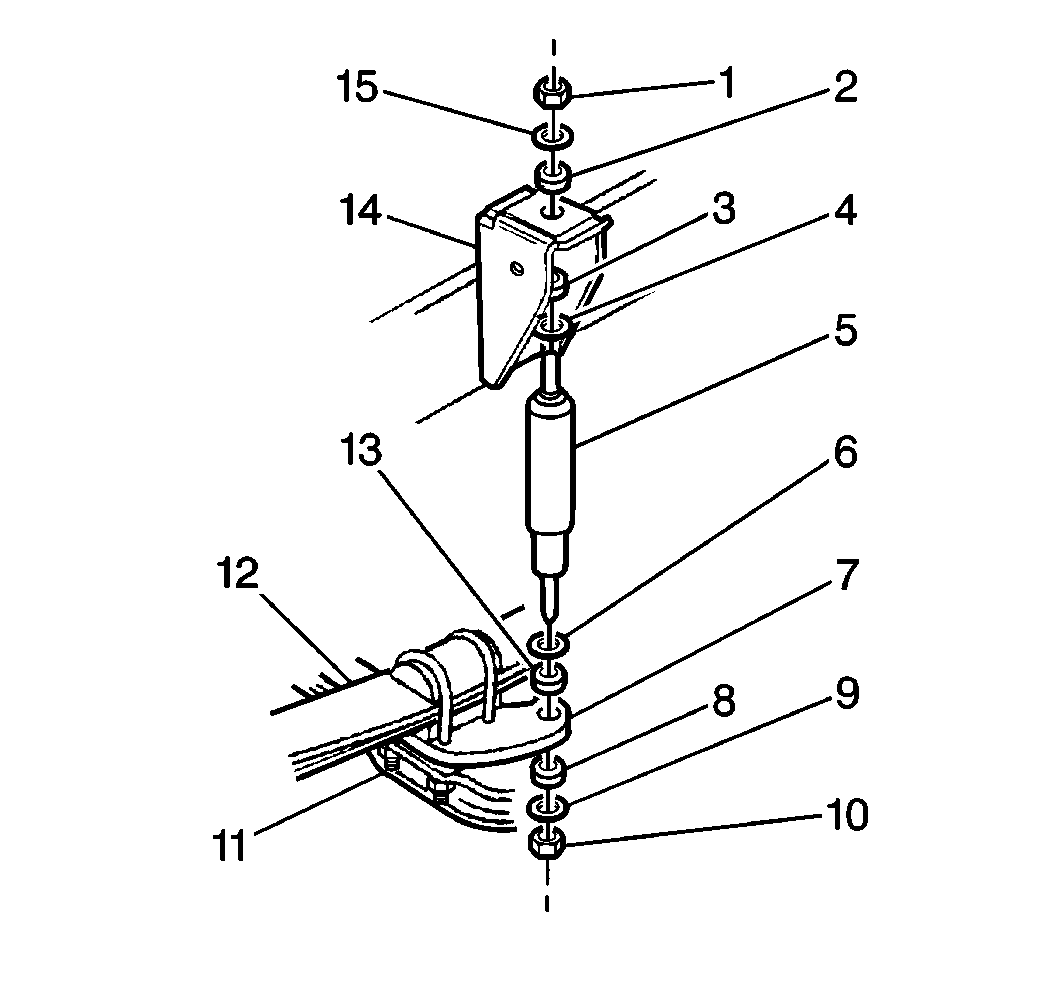
from the lower mounting brackets (7):
- Remove the shock absorbers (5) from the lower mounting brackets
(7). Push the shock absorbers into the fully retracted position.

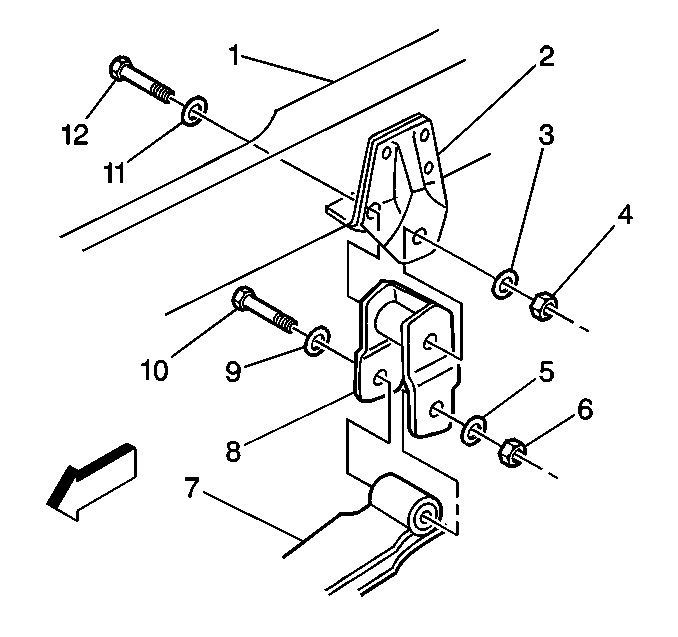
- Remove the following components
from the hanger (2):
| • | The hanger eye bolt nut (4) |
- Lower the axle far enough to allow the spring shackle (8) to
clear the hanger and allow removal of the bracket (2).

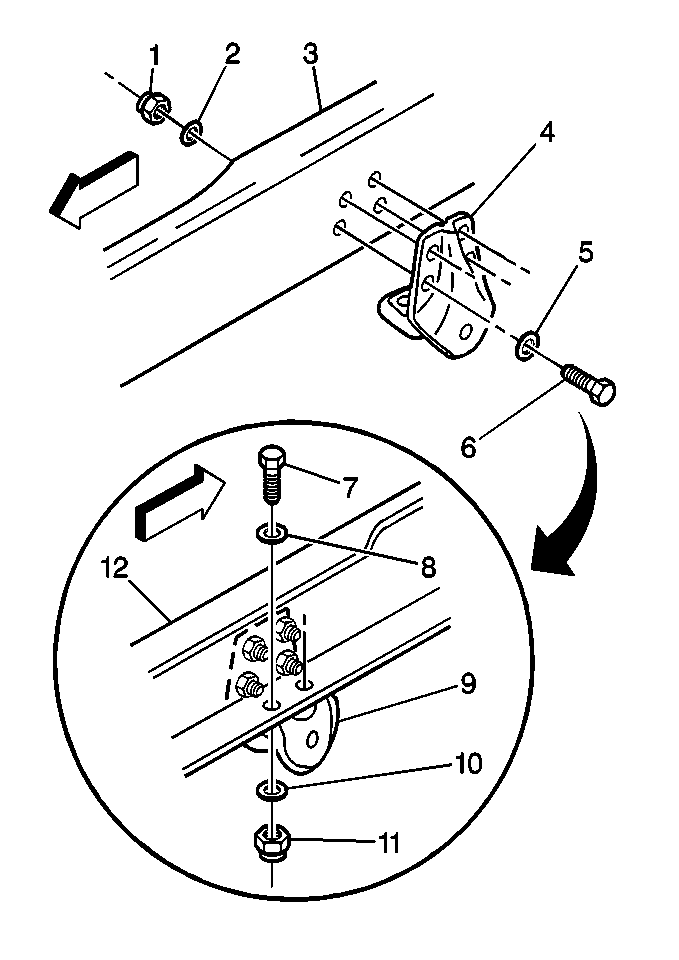
- Remove the following components
from the side member (3):
| • | The spring hanger nuts (1, 11) |

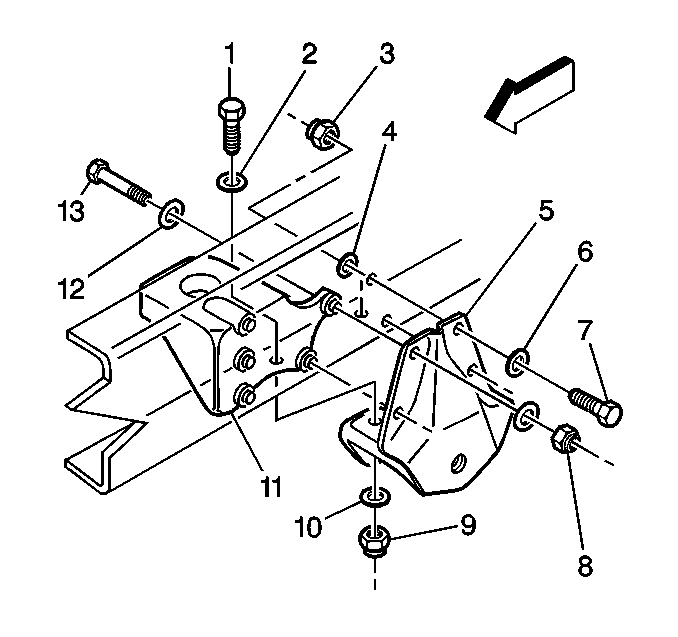
Important: Remove only the nuts (8) and washers from the engine mount bolts which
retain the hanger.
- On vehicles equipped with the LG5 engine remove the following components:
| 12.4. | Slide the hangar (5) off the engine mount bolts (13). |
Installation Procedure

Notice: Use the correct fastener in the correct location. Replacement fasteners
must be the correct part number for that application. Fasteners requiring
replacement or fasteners requiring the use of thread locking compound or sealant
are identified in the service procedure. Do not use paints, lubricants, or
corrosion inhibitors on fasteners or fastener joint surfaces unless specified.
These coatings affect fastener torque and joint clamping force and may damage
the fastener. Use the correct tightening sequence and specifications when
installing fasteners in order to avoid damage to parts and systems.
- Install the hanger
(4) to the side member with the following parts:
Tighten
Tighten the spring hanger nuts to 85 N·m (63 lb ft).

- On vehicles equipped with
the LG5 engine install the hanger (5) to the side member, sliding the hanger
over the protruding engine mount bolts (13).
- Install the following components:
| 3.4. | The engine mount nuts (8) and washers |
Tighten
| • | Tighten the spring hanger nuts (3, 9) to 85 N·m
(63 lb ft). |
| • | Tighten the engine mount nuts (8) to 70 N·m (52 lb ft). |

- Raise the spring.
- Guide the shackle assembly (8) into the hanger aligning
the holes.
- Install the following components:
Tighten
Tighten the rear spring hanger shackle assembly nut to 330 N·m
(243 lb ft).

- Install the washer (6)
and the insulator (13) if removed.
- Install the shock absorber (5) into the lower mounting bracket
(7)
- Install the following components:
Tighten
Tighten the lower shock absorber nut to 84 N·m (62 lb ft).
- Install the front wheel if removed.
- Lower the vehicle.
- Remove the blocks from the wheels.


