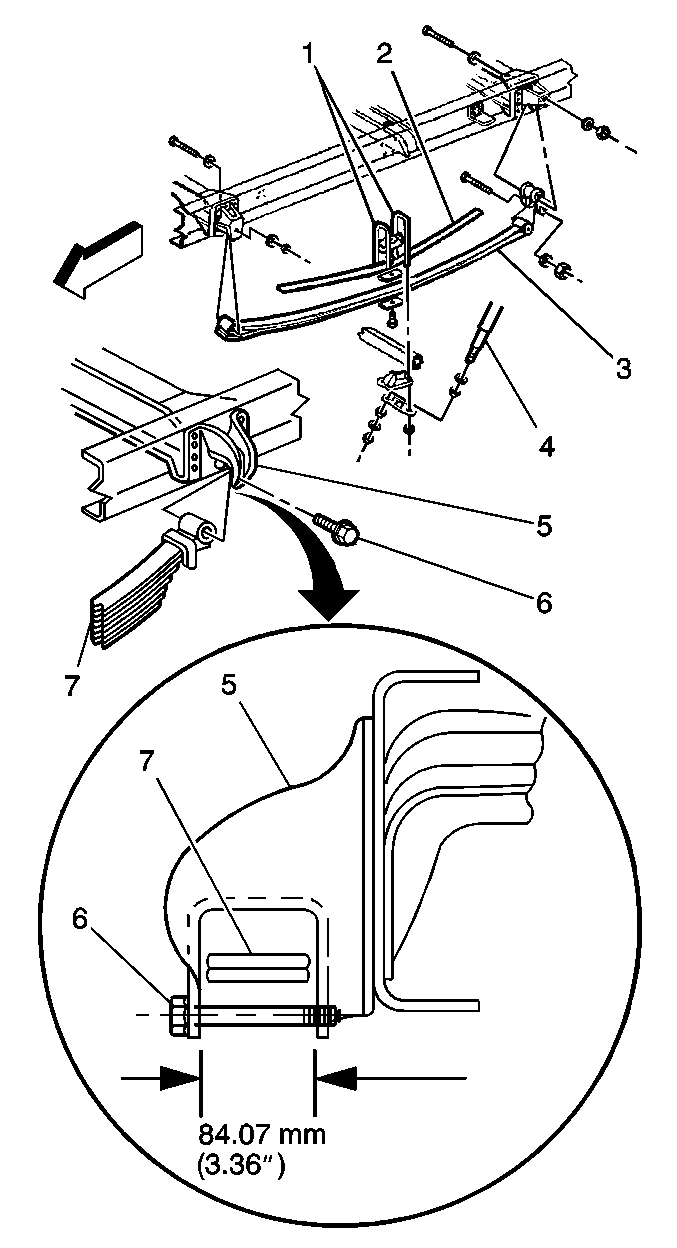
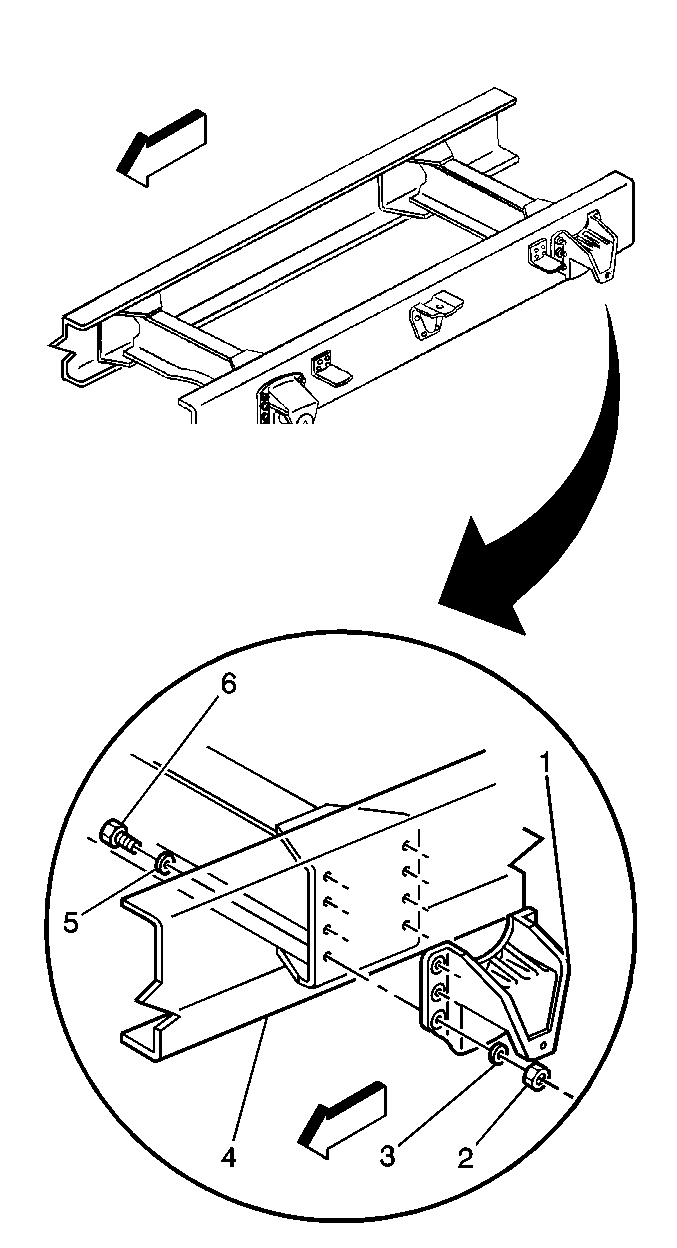
Removal Procedure

Important: Both the rear and the front rear spring hangers are installed the same
way. The front spring hanger requires the removal of the frame rivets.
- Set the parking brake.
- Block the front wheels.
- Raise the frame until the tension is released from the spring
and the hanger bolt.
- Remove the following components from the spring and the hanger:
| • | The spring eye bolt nut (6) |
- Remove the spring hanger rivets, if equipped.

- Remove the following components
from the side member (4):
| • | The spring hanger nuts (2) |
Installation Procedure

Notice: Use the correct fastener in the correct location. Replacement fasteners
must be the correct part number for that application. Fasteners requiring
replacement or fasteners requiring the use of thread locking compound or sealant
are identified in the service procedure. Do not use paints, lubricants, or
corrosion inhibitors on fasteners or fastener joint surfaces unless specified.
These coatings affect fastener torque and joint clamping force and may damage
the fastener. Use the correct tightening sequence and specifications when
installing fasteners in order to avoid damage to parts and systems.
- Install the hanger
to the side member with the following parts:
Tighten
Tighten the spring hanger nut to 70 N·m (52 lb ft).
- Raise the spring in order to align the spring eye and spring hanger
holes.

- Install the following
components in the spring and the hanger:
| • | The spring eye bolt (6) |
- For tapered leaf springs, install the following components:
| • | The rear spring hanger rebound bolt |
Tighten
Tighten the rear spring hanger bolt to 415 N·m (305 lb ft).
- For multileaf springs, install the rear spring hanger bolt.
Tighten
Tighten the rear spring hanger bolt. Ensure that a minimum of 84.07 mm
(3.36 in) is between the ears of the rear spring hanger.
- Lower the vehicle.
- Remove the blocks from the wheels.


