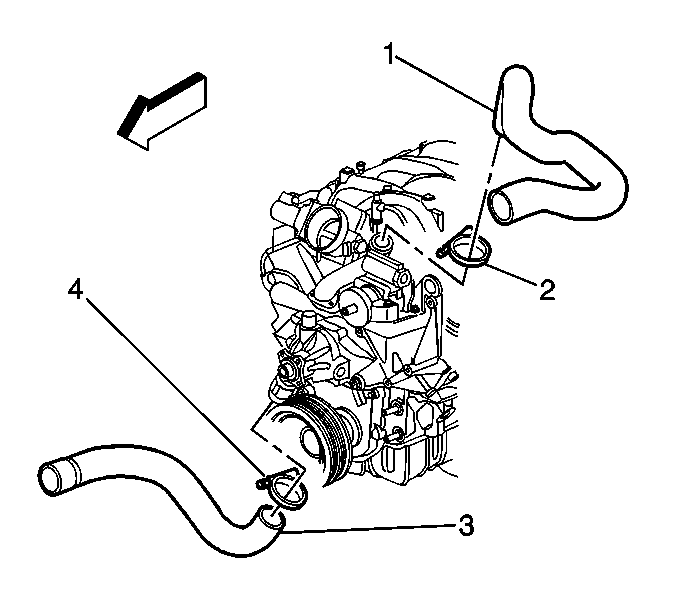
Radiator Outlet Hose Replacement L18
Removal Procedure
Important: Most truck models use spring-type clamps at the hose connections. When using this type of clamp, install the hoses on a dry, non-painted surface in order to ensure proper sealing. Reusing the spring-type clamps on aftermarket hoses is not recommended.
- Drain the cooling system. Refer to Cooling System Draining and Filling .
- Loosen the outlet hose clamp (4) at the water pump.
- Remove the outlet hose (3) from the water pump.
- Raise and suitably support the vehicle with safety stands. Refer to Lifting and Jacking the Vehicle in General Information.
- Loosen the outlet hose clamp (2) at the radiator.
- Remove the outlet hose (3) from the radiator.
Installation Procedure
- Install the outlet hose (3) to the radiator.
- Tighten the outlet hose clamp (2) at the radiator.
- Lower the vehicle.
- Install the outlet hose (3) to the water pump.
- Tighten the outlet hose clamp (4) at the water pump.
- Fill the cooling system. Refer to Cooling System Draining and Filling .
Notice: Use the correct fastener in the correct location. Replacement fasteners must be the correct part number for that application. Fasteners requiring replacement or fasteners requiring the use of thread locking compound or sealant are identified in the service procedure. Do not use paints, lubricants, or corrosion inhibitors on fasteners or fastener joint surfaces unless specified. These coatings affect fastener torque and joint clamping force and may damage the fastener. Use the correct tightening sequence and specifications when installing fasteners in order to avoid damage to parts and systems.
Tighten
Tighten the outlet hose clamp to 5 N·m (44 lb in).
Tighten
Tighten the outlet hose clamp to 5 N·m (44 lb in).
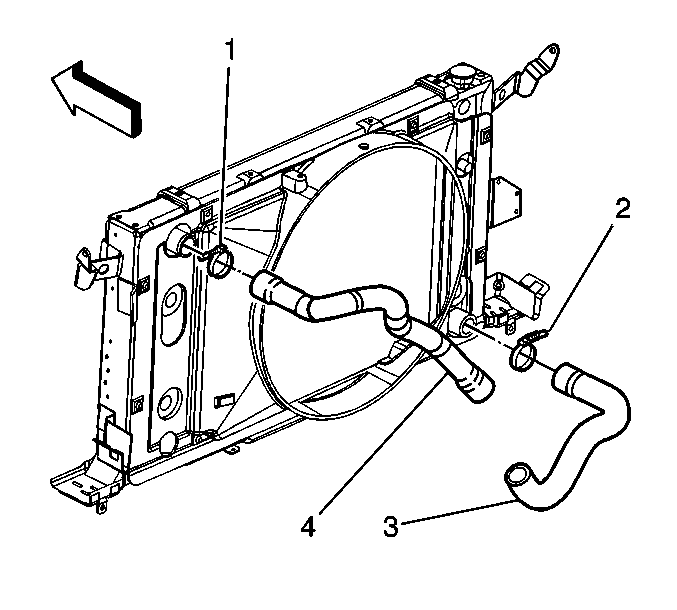
Radiator Outlet Hose Replacement LG5
Removal Procedure
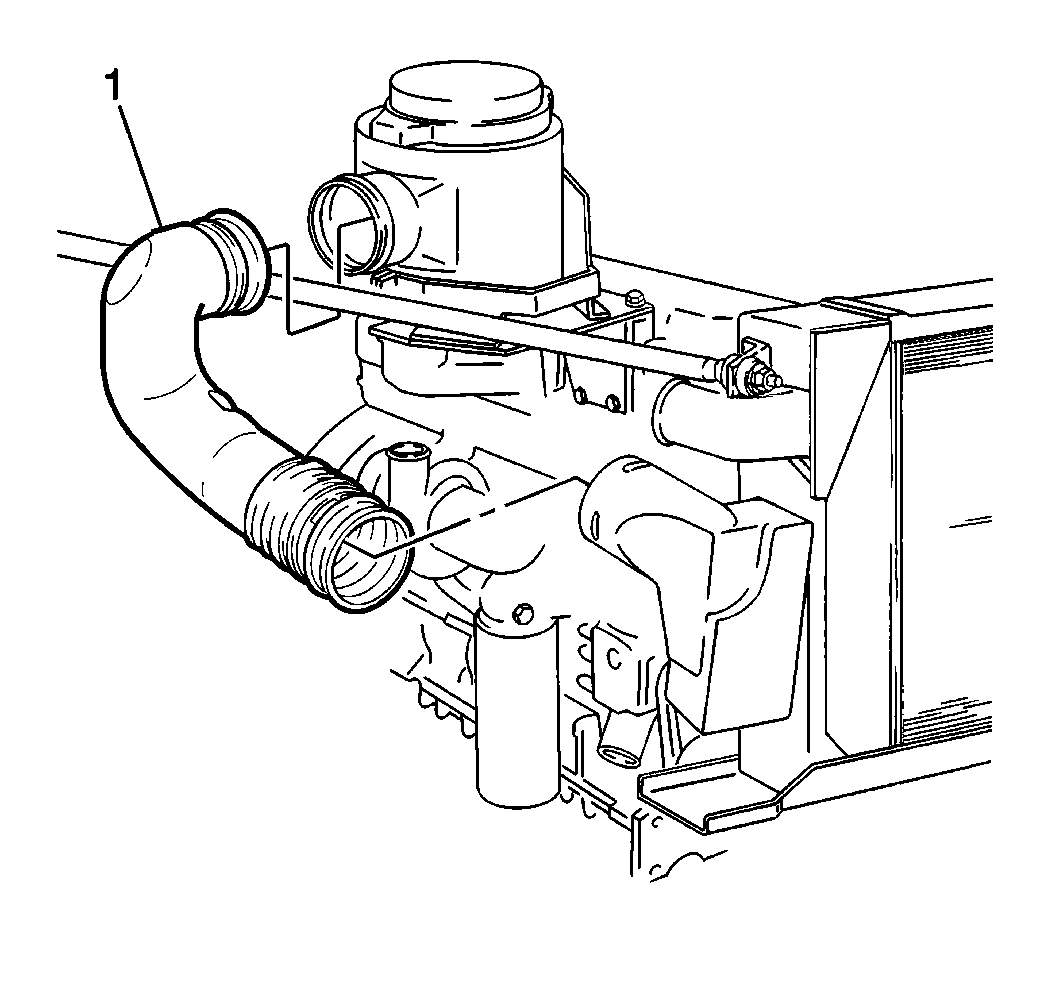
- Remove the front intake air duct (1) from the air filter housing.
- Remove the front wheelhouse panel. Refer to Wheelhouse Panel Replacement in Body Front End.
- Drain the coolant. Refer to Cooling System Draining and Filling .
- Remove the surge tank hose clamp (3).
- Remove the radiator outlet hose (4) and the clamp (5) from the radiator (1).
- Remove the radiator outlet hose (4) and the clamp from the water pump.

Installation Procedure
- Install the radiator outlet hose (4) and the clamp to the water pump.
- Install the surge tank hose clamp (3).
- Install the radiator outlet hose (4) and the clamp (5) to the radiator (1).
- Install the front air intake duct (1) to the air filter housing.
- Install the front wheelhouse panel. Refer to Wheelhouse Panel Replacement in Body Front End.
- Fill the cooling system. Refer to Cooling System Draining and Filling .
- Inspect the system for leaks.
Notice: Use the correct fastener in the correct location. Replacement fasteners must be the correct part number for that application. Fasteners requiring replacement or fasteners requiring the use of thread locking compound or sealant are identified in the service procedure. Do not use paints, lubricants, or corrosion inhibitors on fasteners or fastener joint surfaces unless specified. These coatings affect fastener torque and joint clamping force and may damage the fastener. Use the correct tightening sequence and specifications when installing fasteners in order to avoid damage to parts and systems.
Tighten
Tighten the clamps to 5 N·m (44 lb in).
Tighten
Tighten the clamps to 5 N·m (44 lb in).
