Refer to Engine Control Schematics
Indicators
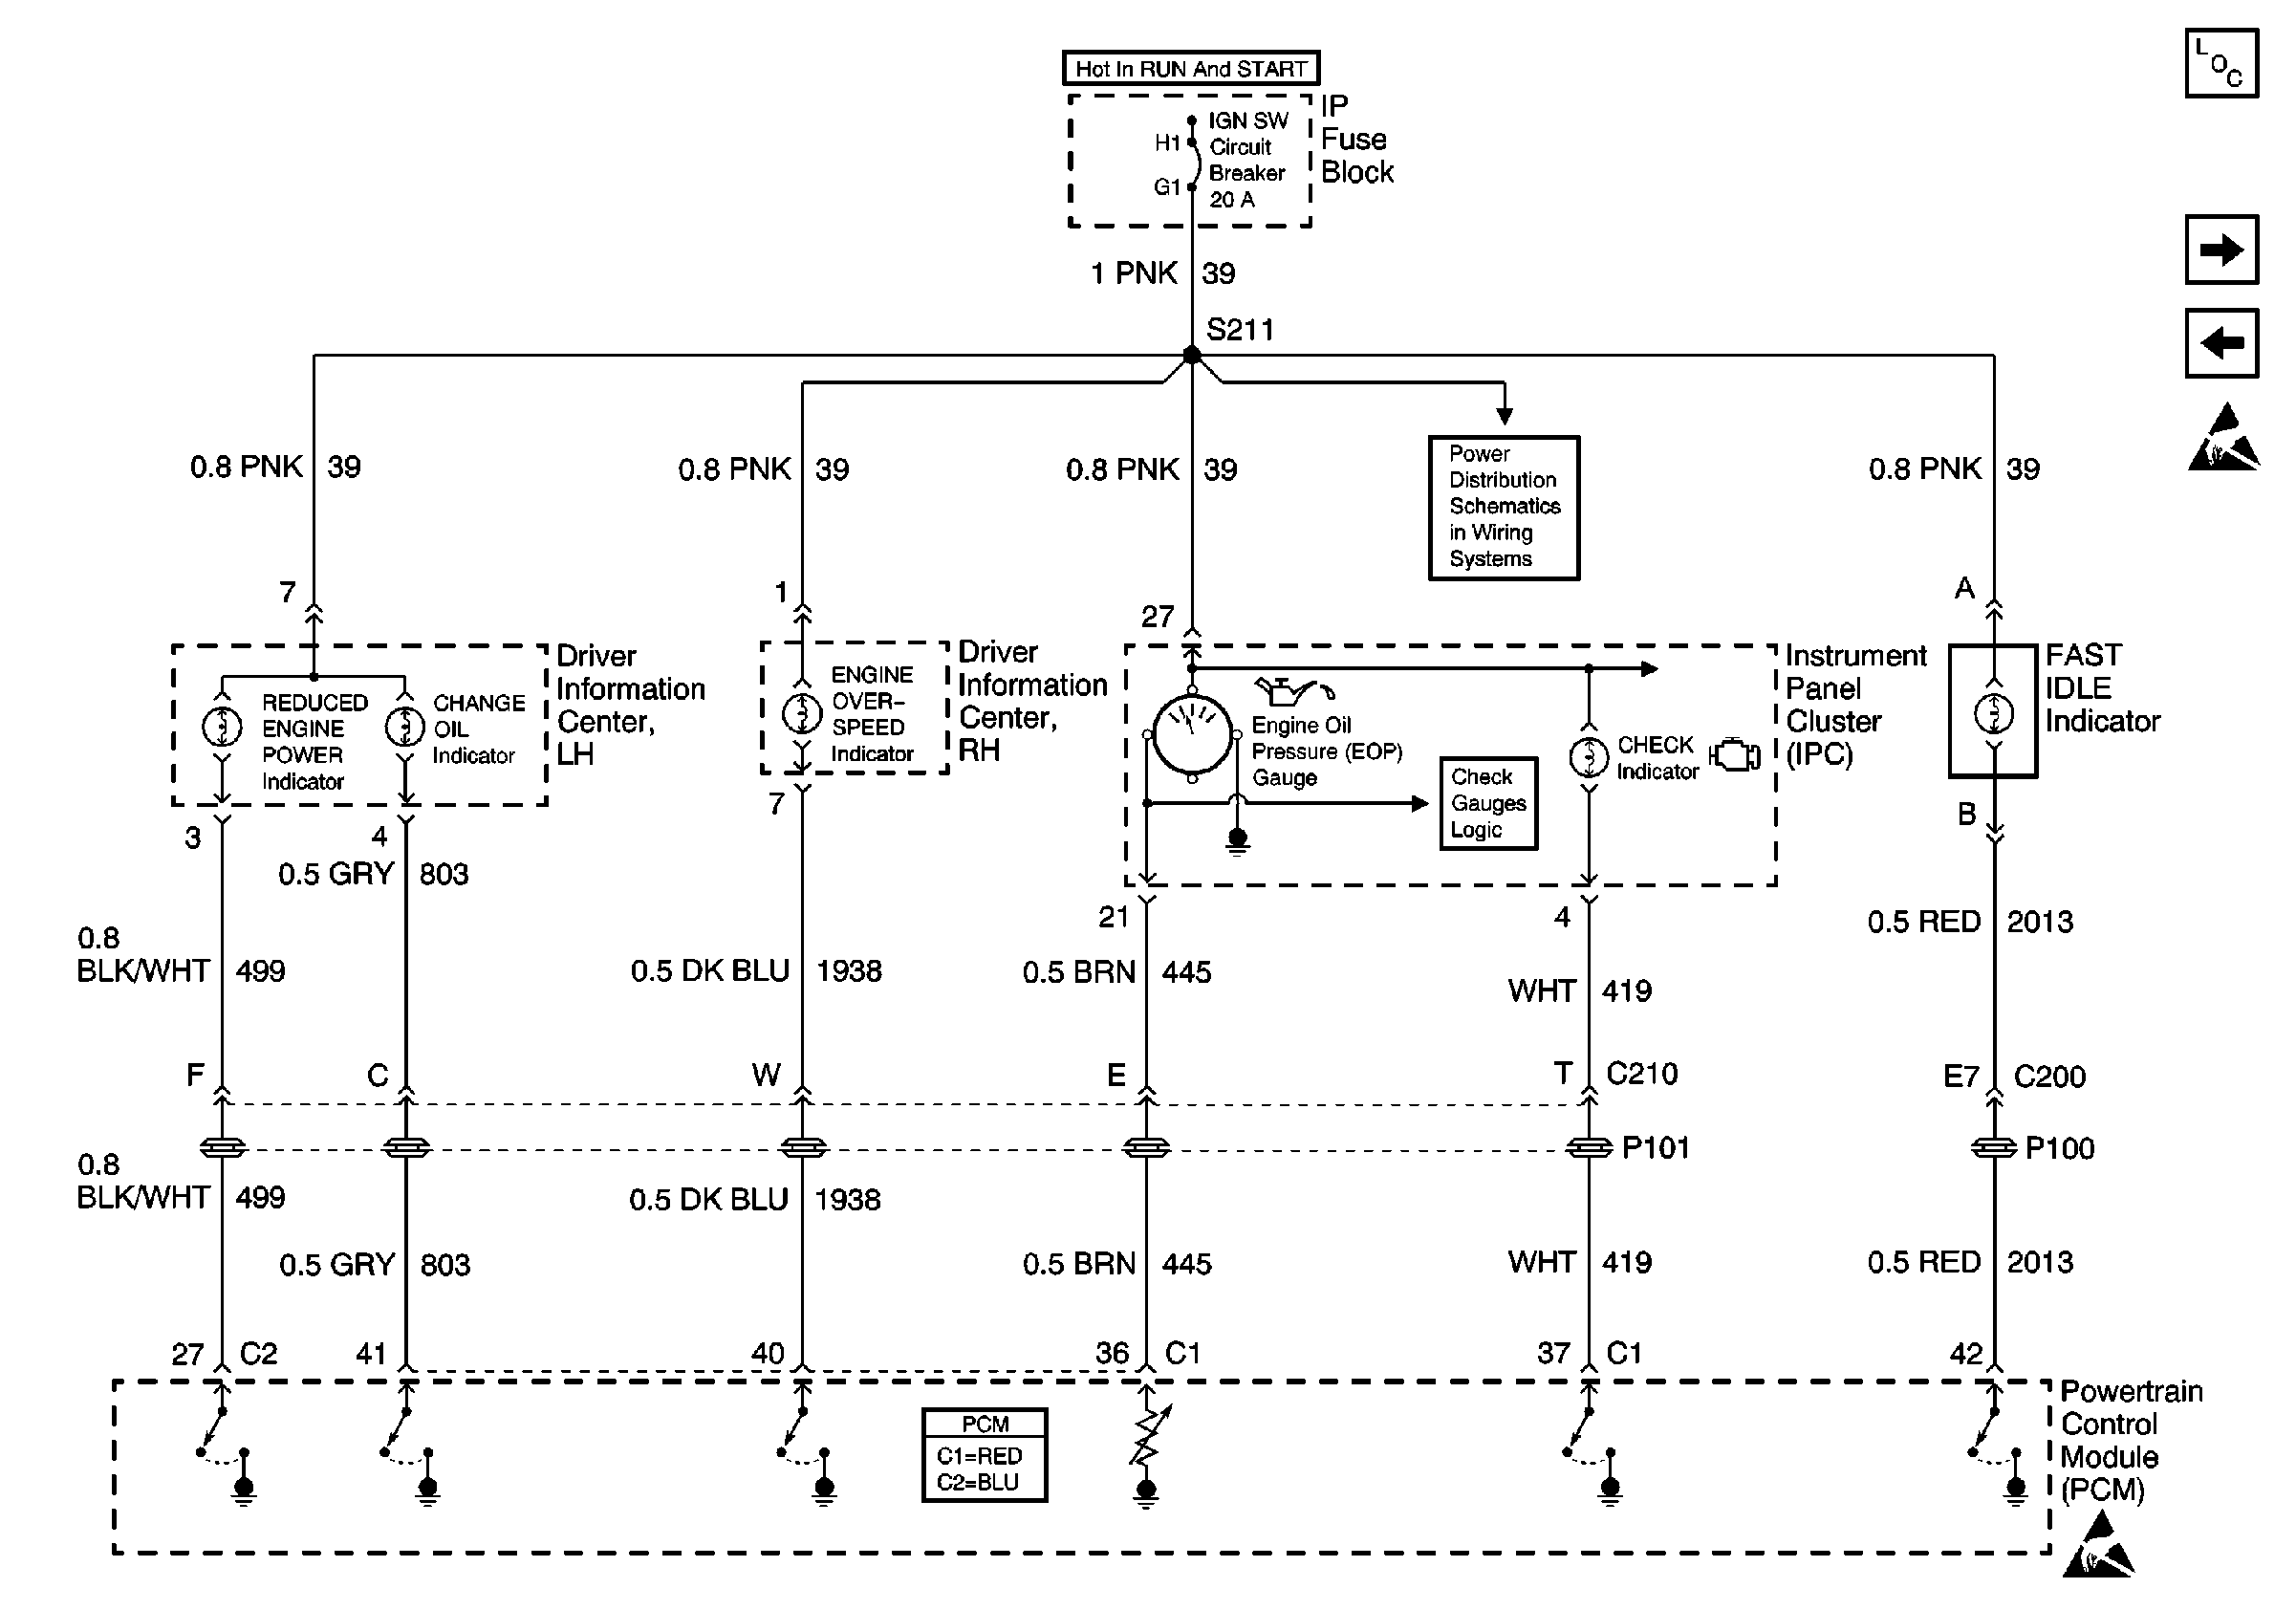
.
Circuit Description
The engine oil pressure (EOP) gauge supplies ignition positive voltage to the powertrain control module (PCM) by way of the EOP gauge control circuit. The EOP signal is sent to the PCM from the engine oil pressure sensor. The PCM controls the EOP gauge by momentarily grounding the EOP gauge control circuit and causing the voltage to pulse. The solid state circuits of the EOP gauge convert the voltage pulses in order to drive the gauge pointer and display EOP in pounds per square inch (PSI).
The PCM monitors the voltage on the EOP gauge control circuit in order to determine if the circuit is open or shorted to ground.
Conditions for Running the DTC
The engine speed is at least 600 RPM
Conditions for Setting the DTC
The EOP gauge control circuit voltage is less than 0.48 volts
Action Taken When the DTC Sets
| • | The PCM stores the DTC information into memory when the diagnostic runs and fails |
| • | The malfunction indicator lamp (MIL) will not illuminate |
| • | The PCM records the operating conditions at the time the diagnostic fails |
| The PCM stores this information in the Failure Records. |
Conditions for Clearing the MIL/DTC
| • | 40 consecutive warm-up cycles have occurred |
| A History DTC will clear after 40 consecutive warm-up cycles, if no failures are reported by this or any other non-emission related diagnostic. |
| • | A last test failed (Current DTC) will clear when the diagnostic runs and does not fail |
| • | Using a scan tool |
Diagnostic Aids
| • | Inspect for the following conditions that may cause an intermittent: |
| - | Poor connections |
| - | Inadequate terminal contact |
| - | Corrosion |
| - | Misrouted or damaged harness |
| - | Rubbed through wire insulation |
| - | Broken wire inside the insulation |
| - | Water intrusion |
| • | Inspect the wiring harness for damage. If the harness appears to be OK, disconnect the PCM, turn the ignition ON and observe a voltmeter connected to the engine oil pressure gauge control circuit at the PCM harness connector while moving connectors and wiring harnesses related to the engine oil pressure gauge control circuit. A change in voltage will indicate the location of the fault. |
Test Description
The number below refers to the step number in the diagnostic table.
Step | Action | Values | Yes | No |
|---|---|---|---|---|
1 | Did you perform the Powertrain On-Board Diagnostic (OBD) System Check? | -- | ||
Does the scan tool indicate that the EOP sensor parameter is more than the specified value? | 0.48 V | Go to Diagnostic Aids | ||
3 |
Does the test lamp illuminate? | -- | ||
4 | Test the engine oil pressure gauge control circuit for an open. Refer to Testing for Continuity in/Wiring Systems. Did you find and correct the condition? | -- | ||
5 | Test the engine oil pressure gauge control circuit for a short to ground. Refer to Testing for Short to Ground in Wiring Systems. Did you find and correct the condition? | -- | ||
6 | Inspect for poor connections at the I/P cluster connector. Refer to Testing for Intermittent Conditions and Poor Connections in Wiring Systems. Did you find and correct the condition? | -- | ||
7 | Inspect for poor connections at the PCM connector. Refer to Testing for Intermittent Conditions and Poor Connections in Wiring Systems. Did you find and correct the condition? | -- | ||
8 | Replace the I/P cluster. Refer to Instrument Cluster Replacement in Wiring Systems. Did you complete the replacement? | -- | -- | |
9 |
Important: Program the replacement PCM. Replace the PCM. Refer to Powertrain Control Module Replacement . Is the action complete? | -- | -- | |
10 |
Does the scan tool indicate that this test ran and passed? | -- | ||
11 | Select the Capture Info option and the Review Info option using the scan tool. Does the scan tool display any DTCs that you have not diagnosed? | -- | Go to the applicable DTC table | System OK |
