Removal Procedure
- Remove the driver's side knee bolster and deflector. Refer to Knee Bolster Replacement in Instrument Panel, Gages, and Console.
- Disconnect and reposition the junction block.
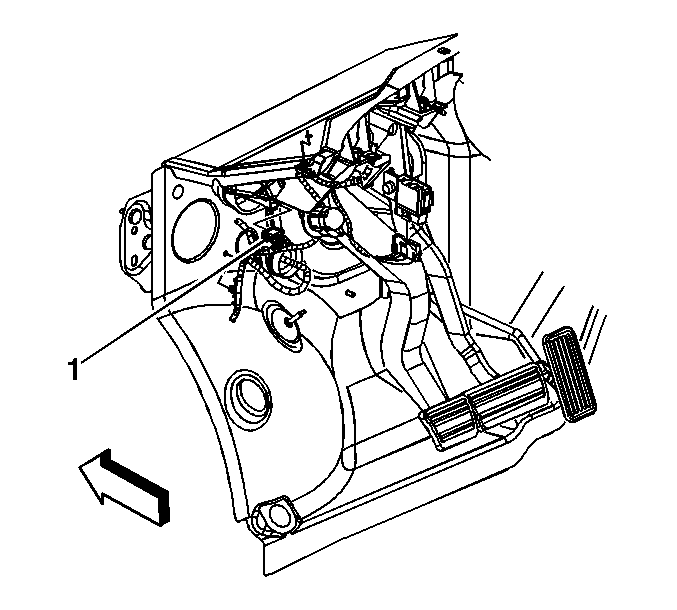
- Disconnect the clutch pedal position switch electrical connector (1).
- Push the clutch pedal in and squeeze the pushrod bushing tabs in, in order to release the pushrod bushing from the clutch pedal.
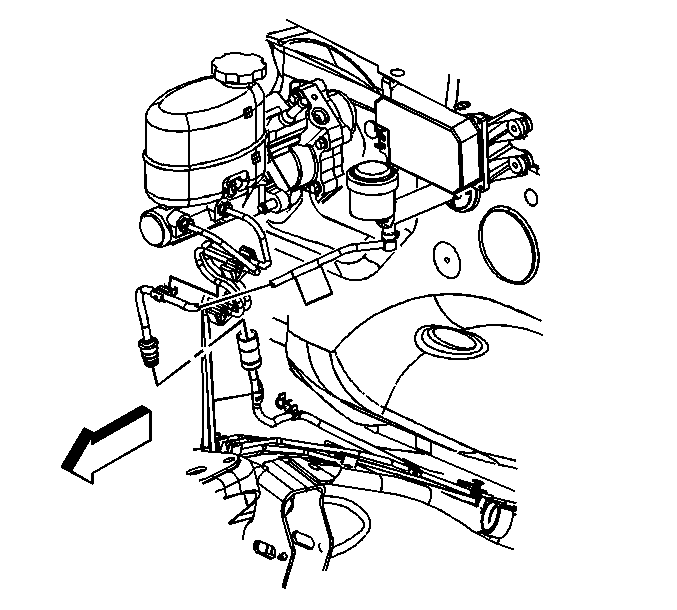
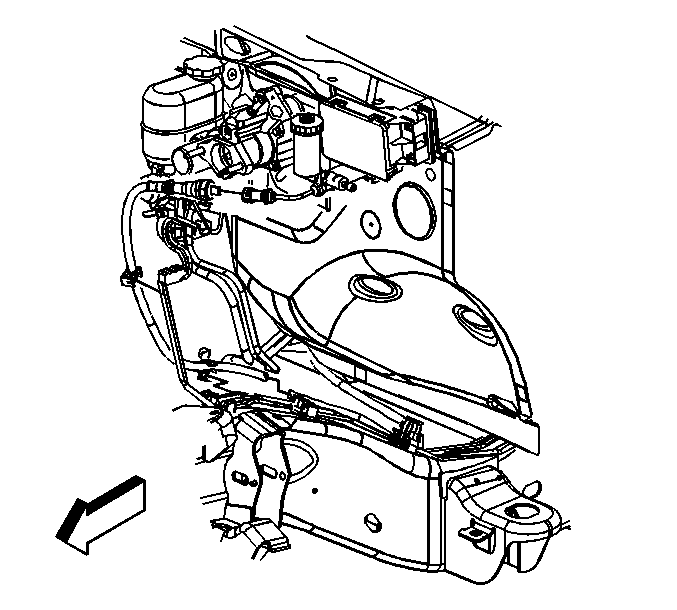
- If equipped with a NV 3500 or NV 4500 transmission, disconnect the clutch master cylinder to clutch actuator cylinder quick connect fitting.
- Remove the clutch master cylinder clip from the brake pressure module valve pipe.
- If equipped with a ZF S6-650 transmission, disconnect the clutch master cylinder to clutch actuator cylinder quick connect fitting.
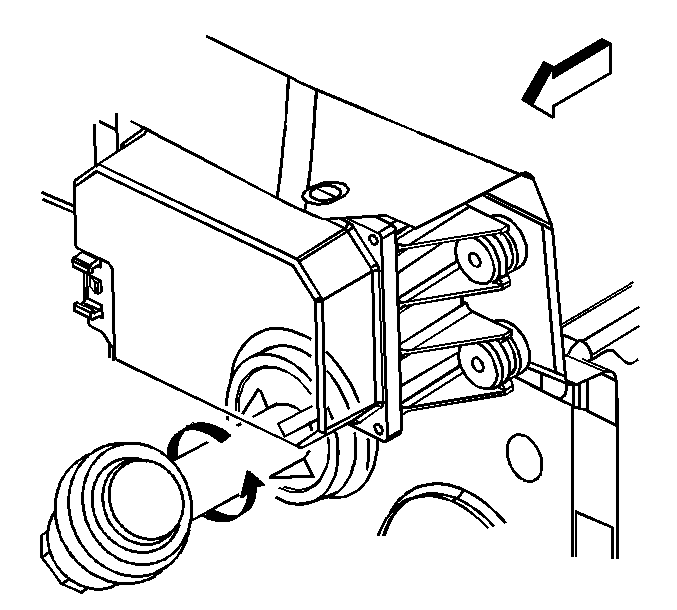
- Rotate the clutch master cylinder 45 degrees clockwise to the unlocked position.
- Pull the clutch master cylinder out until the pushrod socket is not touching the clutch pedal.
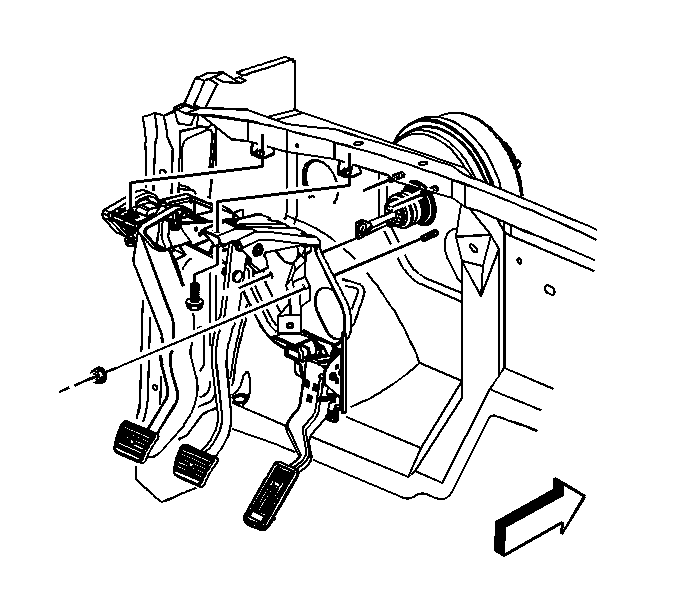
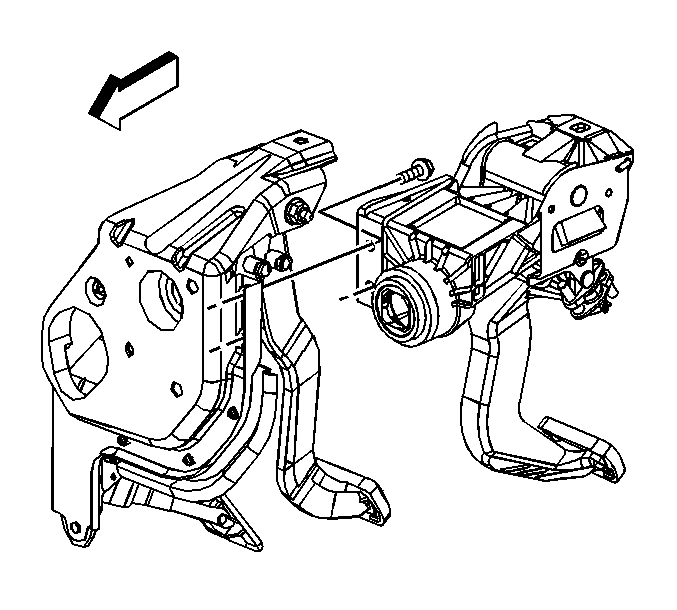
- Remove the clutch pedal to clutch pedal bracket bolt .
- Remove the clutch pedal to brake module bolts.
- Remove the clutch pedal sub-assembly.
Important: Complete removal of the clutch master cylinder is not required.
Installation Procedure
- Install the clutch pedal sub-assembly.
- Install the clutch pedal to brake module bolts.
- Install the clutch pedal to clutch pedal bracket bolt.
- Push the clutch master cylinder in until the pushrod socket is touching the clutch pedal.
- Push in and rotate the clutch master cylinder 45 degrees counterclockwise to the locked position.
- If equipped with a ZF S6-650 transmission, connect the clutch master cylinder to clutch actuator cylinder quick connect fitting.
- If equipped with a NV 3500 or NV 4500 transmission, connect the clutch master cylinder to clutch actuator cylinder quick connect fitting.
- Install the clutch master cylinder clip to the brake pressure module valve pipe.
- Apply light pressure to the clutch pedal to couple the pushrod socket to the clutch pedal.
- Connect the clutch pedal position switch electrical connector (1).
- Pump the clutch pedal 3 time prior to starting the vehicle to ensure connection is complete.
- Position and connect the junction block.
- Install the driver's side knee bolster and deflector. Refer to Knee Bolster Replacement in Instrument Panel, Gages, and Console.

Notice: Use the correct fastener in the correct location. Replacement fasteners must be the correct part number for that application. Fasteners requiring replacement or fasteners requiring the use of thread locking compound or sealant are identified in the service procedure. Do not use paints, lubricants, or corrosion inhibitors on fasteners or fastener joint surfaces unless specified. These coatings affect fastener torque and joint clamping force and may damage the fastener. Use the correct tightening sequence and specifications when installing fasteners in order to avoid damage to parts and systems.
Tighten
Tighten the clutch pedal to brake module bolts to 50 N·m
(37 lb ft).

Tighten
Tighten the clutch pedal to clutch pedal bracket bolt to 36 N·m
(27 lb ft).


