For 1990-2009 cars only
Removal Procedure
- Remove the door. Refer to Rear Door Replacement.
- Remove the hinge pins from the hinge by grinding the bottom end of the pin off and driving out the remainder of the pin using a hammer and punch.
- Remove the old bushings from the hinges.
Installation Procedure
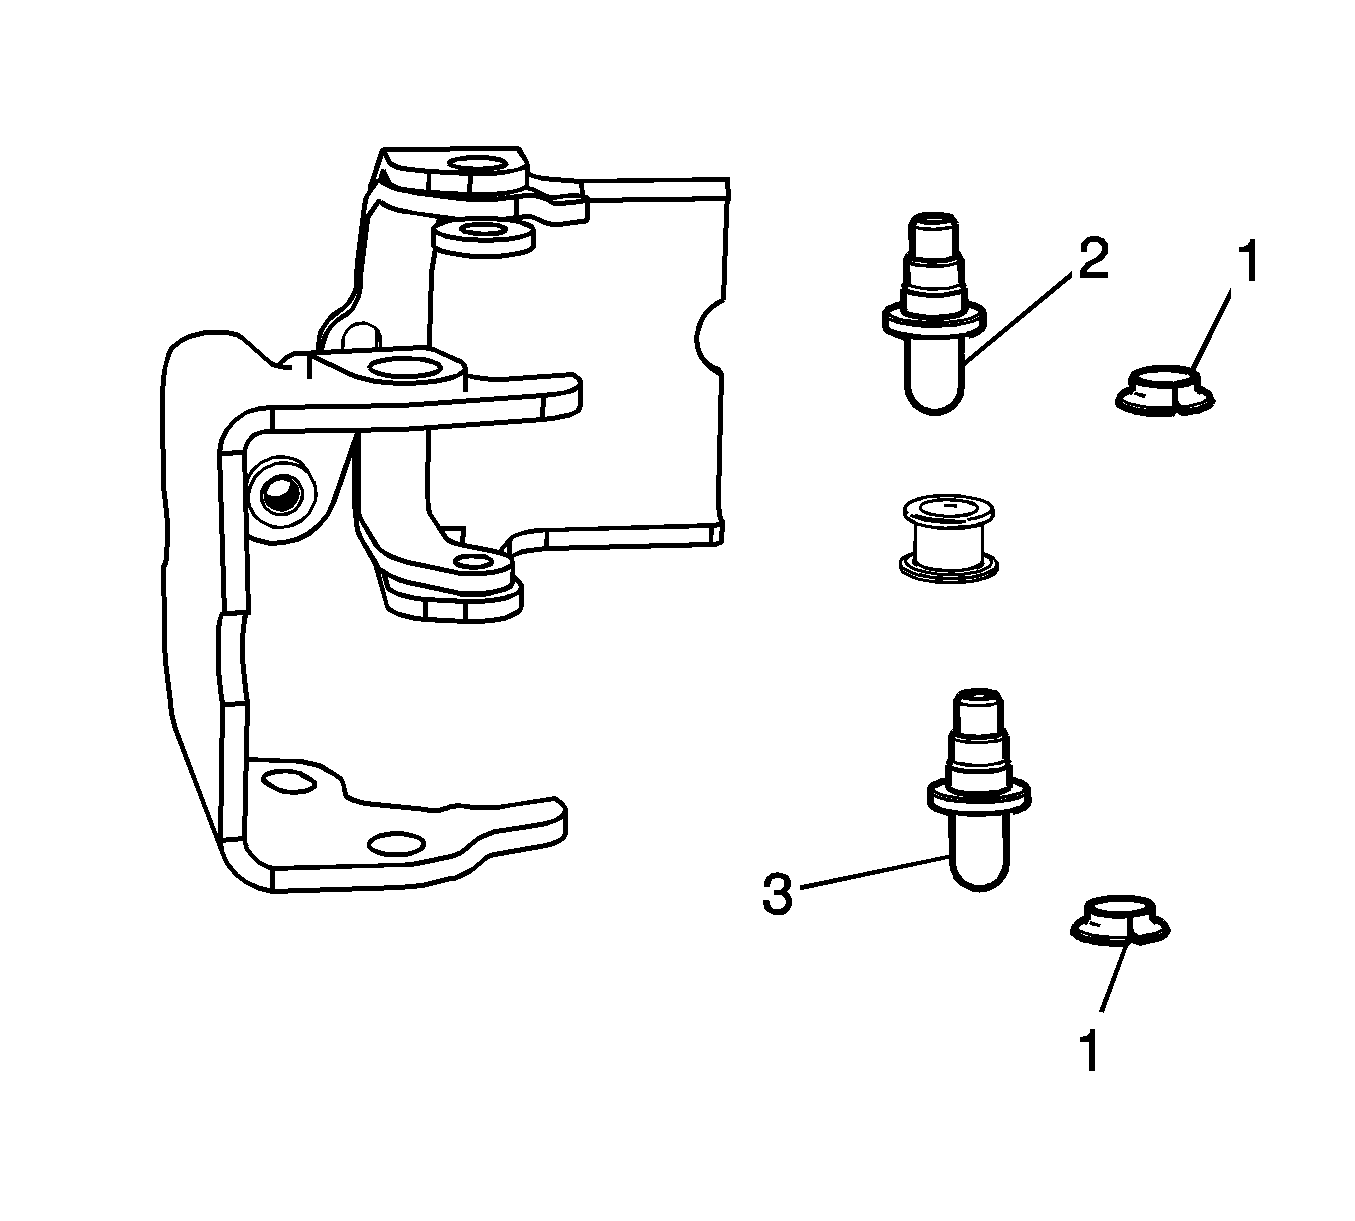
- Install the hinge pin bushings (1) into the hinges.
- Install the shorter hinge pin (3) into the bottom hole in the hinge.
- Install the washer supplied in the kit and a standard 5/16 inch x 18 nut onto the replacement hinge pin.
- Tap the shorter hinge pin (3) into the hinge as far as it will go.
- Tighten the 5/16 inch x 18 nut with a hand wrench, drawing the hinge pin into the hinge until the pin is fully seated.
- Replace the standard 5/16 inch x 18 nut with the lock nut supplied in the kit and finger tighten.
- Tighten the lock nuts.
- Install the longer hinge pin (2) into the top hole in the hinge.
- Install the washer supplied in the kit and a standard 5/16 inch x 18 nut onto the replacement hinge pin.
- Tap the longer hinge pin (2) into the hinge as far as it will go.
- Tighten the 5/16 inch x 18 nut with a hand wrench, drawing the hinge pin into the hinge until the pin is fully seated.
- Replace the standard 5/16 inch x 18 nut with the lock nut supplied in the kit and finger tighten.
- Tighten the lock nuts.
- Install the door. Refer to Rear Door Replacement.
- Lubricate the hinge pins with Goodwrench® Super Lube or equivalent.

Notice: Refer to Fastener Notice in the Preface section.
Tighten
Tighten the nuts to 19 N·m (14 lb ft).
Tighten
Tighten the nuts to 19 N·m (14 lb ft).
