Removal Procedure
Notice: When raising or supporting the engine for any reason, do not use a jack under the oil pan, any sheet metal, or the crankshaft pulley. Due to the small clearance between the oil pan and the oil pump screen, jacking against the oil pan may cause the pan to be bent against the pump screen. This will result in a damaged oil pickup unit.
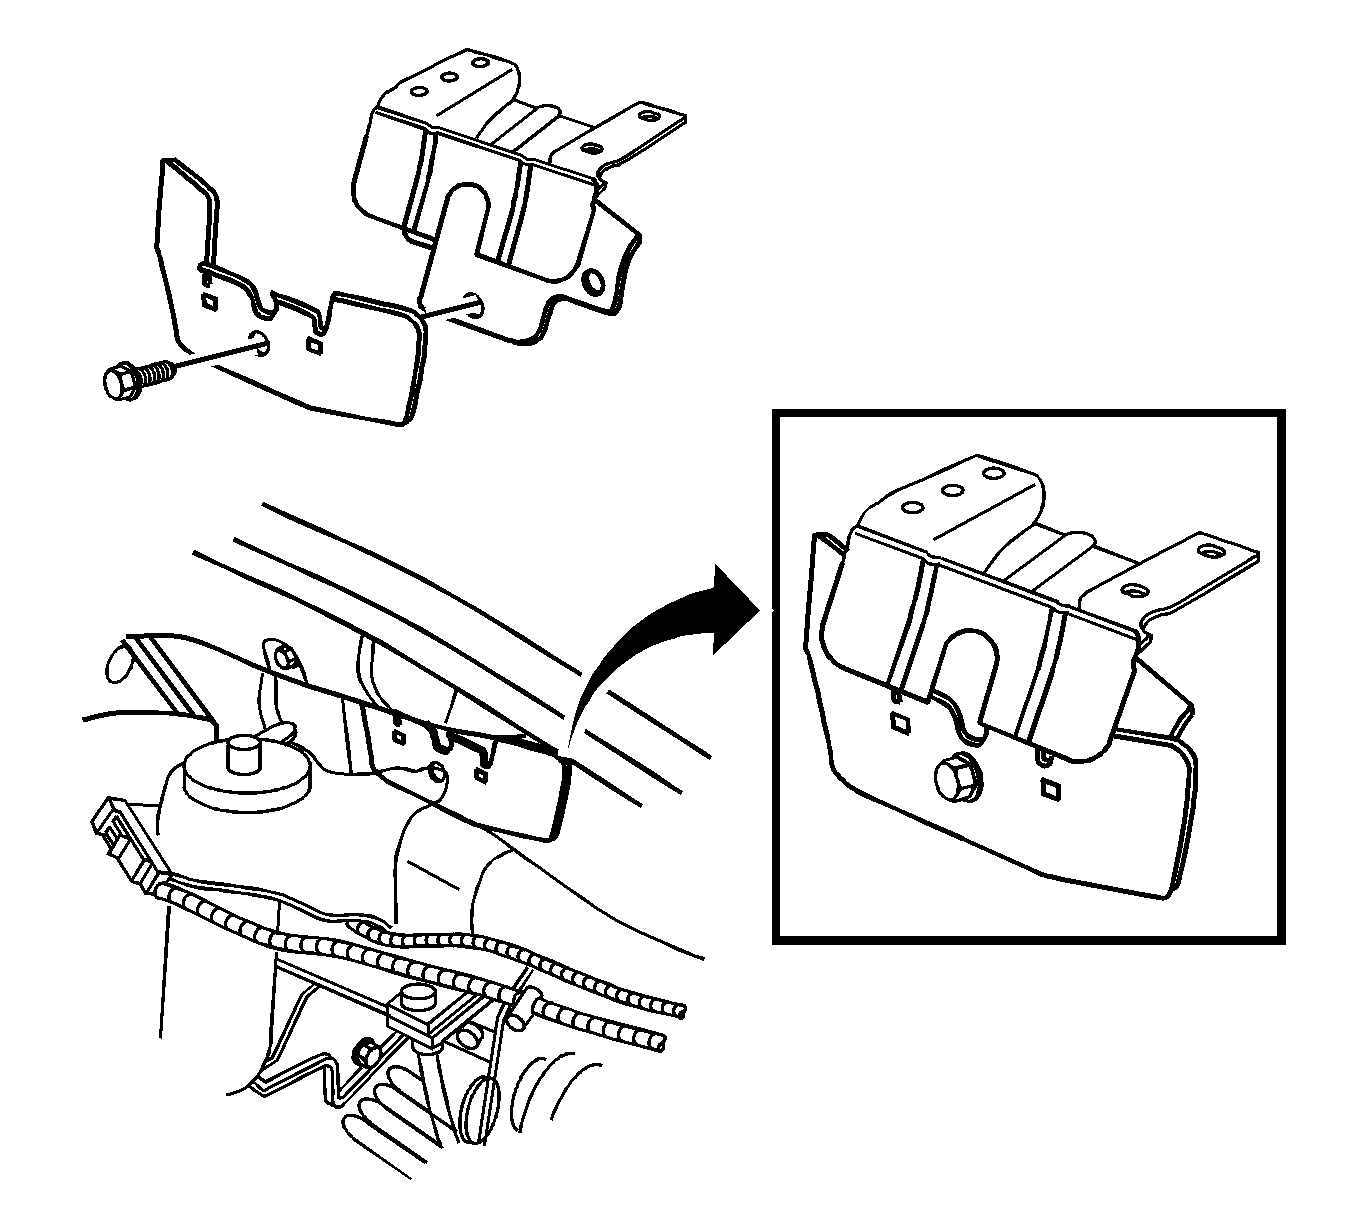
- Remove the engine mount heat shield, if equipped.
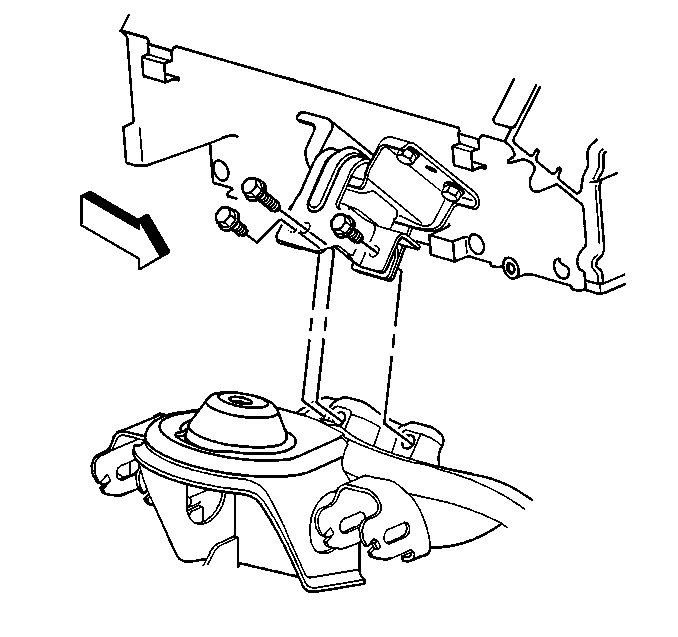
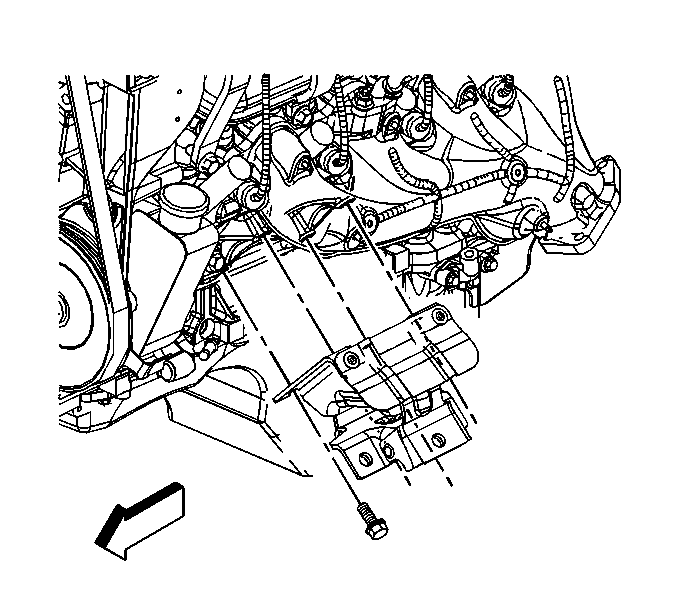
- Remove the engine mount-to-engine mount bracket bolts. (Right side shown, left side similar).
- If vehicle is a 2 wheel drive (2WD), raise the vehicle to a height to work through the front wheelhouse opening.
- If vehicle is a 4 wheel drive (4WD), raise the vehicle in order to remove the front tires and wheels.
- Remove the left front tire and wheel. Refer to Tire and Wheel Removal and Installation in Tires and Wheels.
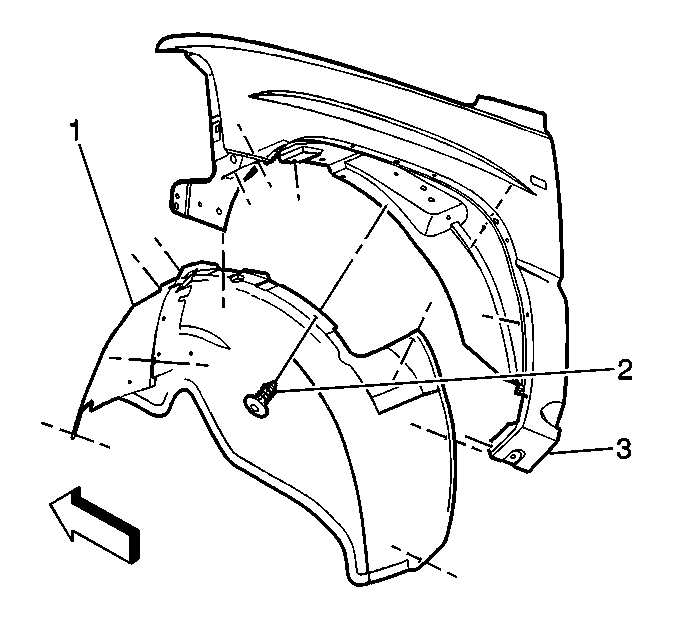
- Remove the wheelhouse inner panel push pin retainers (2).
- Remove the wheelhouse inner panel (1).
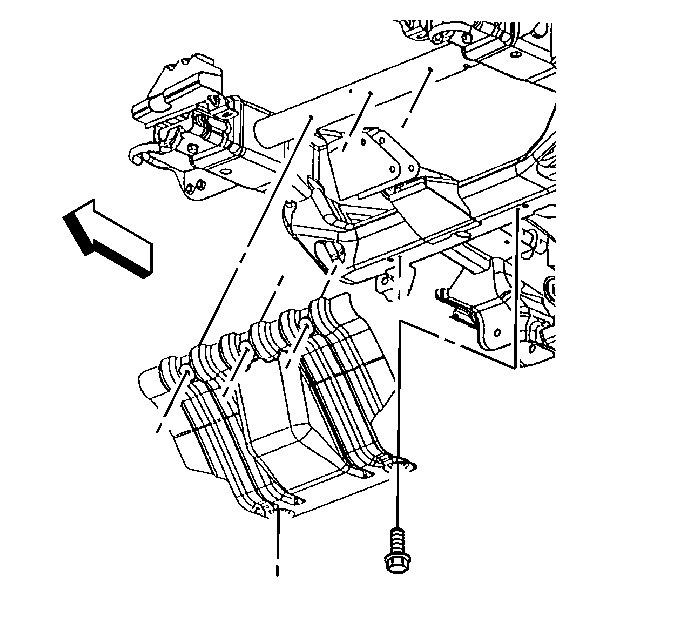
- Remove the engine shield bolts.
- Remove the engine shield.
- Raise and suitably support the engine using adjustable (screw type) jack stands.
- Remove the engine mount bolts.
- For vehicles with 4WD, remove the front propeller shaft. Refer to Front Propeller Shaft Replacement in Propeller Shaft.
- Remove the left engine mount.
Important: DO NOT raise and/or support the engine by the crankshaft balancer, or oil pan.
Installation Procedure
- Position the left engine mount to the engine.
- Install the engine mount bolts.
- Lower the engine.
- Remove the adjustable jack stands.
- Install the front propeller shaft. Refer to Front Propeller Shaft Replacement in Propeller Shaft.
- Position the engine shield to the vehicle.
- Install the engine shield bolts.
- Lower the vehicle.
- Install the engine mount-to-engine mount bracket bolts. (Right side shown, left side similar).
- Install the engine mount heat shield, if equipped.
- Install the left front tire and wheel. Refer to Tire and Wheel Removal and Installation in Tires and Wheels.
- Install the wheelhouse inner panel push pin retainers (2).
- Install the wheelhouse inner panel (1).
- Lower the vehicle.

Notice: Use the correct fastener in the correct location. Replacement fasteners must be the correct part number for that application. Fasteners requiring replacement or fasteners requiring the use of thread locking compound or sealant are identified in the service procedure. Do not use paints, lubricants, or corrosion inhibitors on fasteners or fastener joint surfaces unless specified. These coatings affect fastener torque and joint clamping force and may damage the fastener. Use the correct tightening sequence and specifications when installing fasteners in order to avoid damage to parts and systems.
Tighten
Tighten the engine mount bolts to 50 N·m (37 lb ft).

Tighten
Tighten the engine shield bolts to 20 N·m (15 lb ft).


Tighten
Tighten the engine mount-to-engine mount bracket bolts to 65 N·m(48 lb ft).

