Removal Procedure
- Remove the air cleaner outlet duct. Refer to Air Cleaner Outlet Duct Replacement .
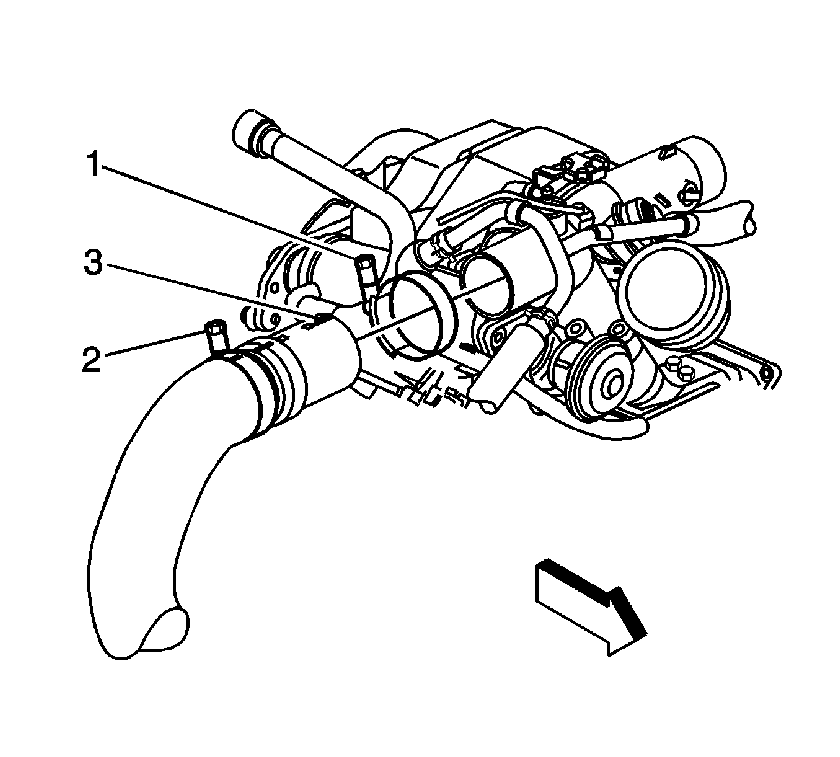
- Loosen the charged air cooler outlet duct clamp (1).
- Remove the charged air cooler outlet duct.
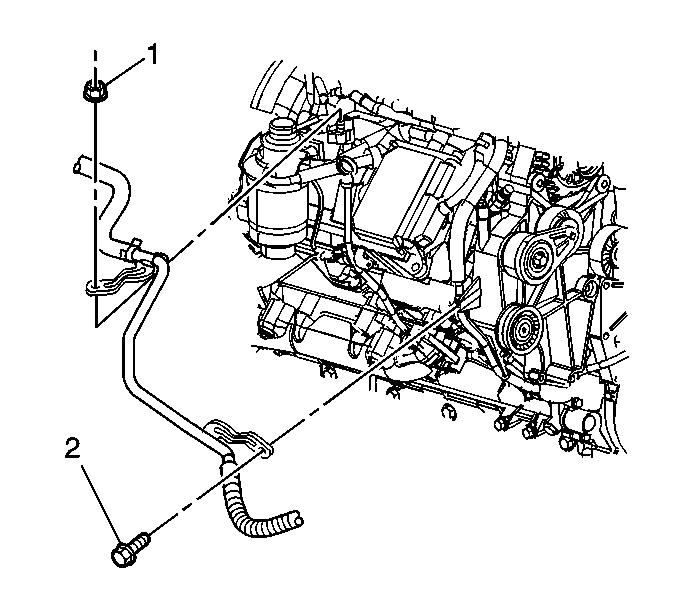
- Remove the heater outlet hose bolt (2) from the generator bracket.
- Remove the fuel filter. Refer to Fuel Filter Replacement .
- Remove the fuel injection control module. Refer to Fuel Injector Control Module Replacement .
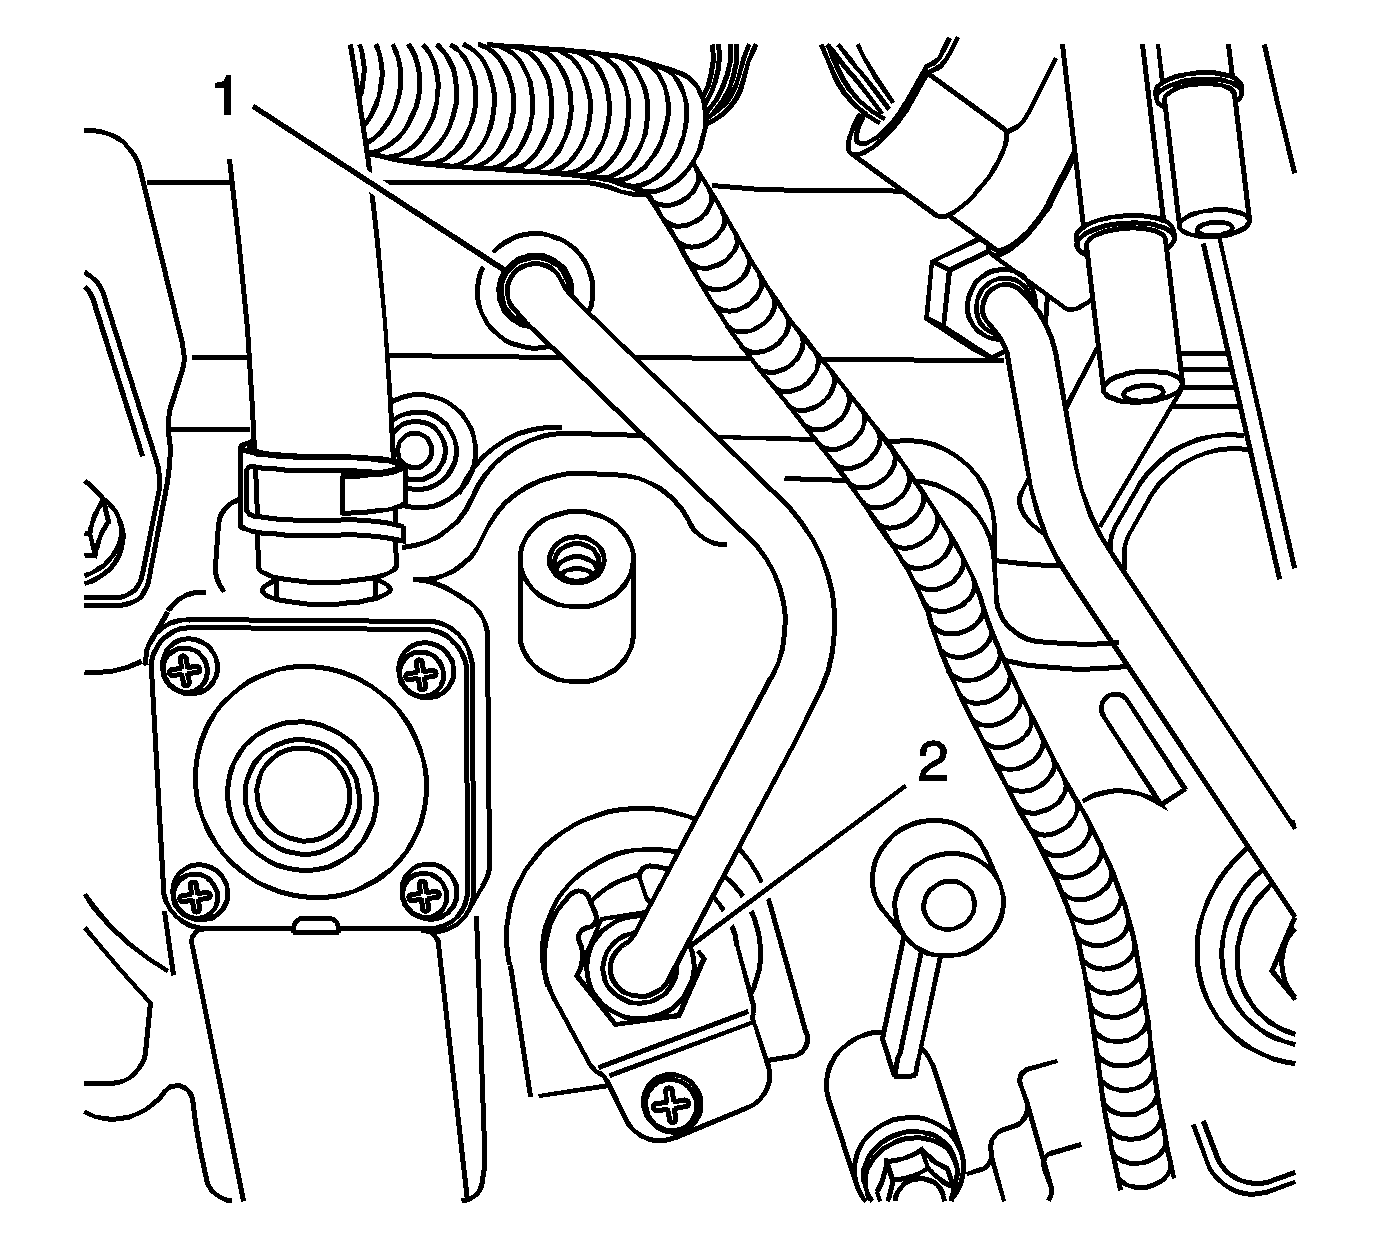
- Position the heater outlet hose out of the way.
- Remove exhaust gas recirculation (EGR) valve. Refer to Exhaust Gas Recirculation Valve Replacement .
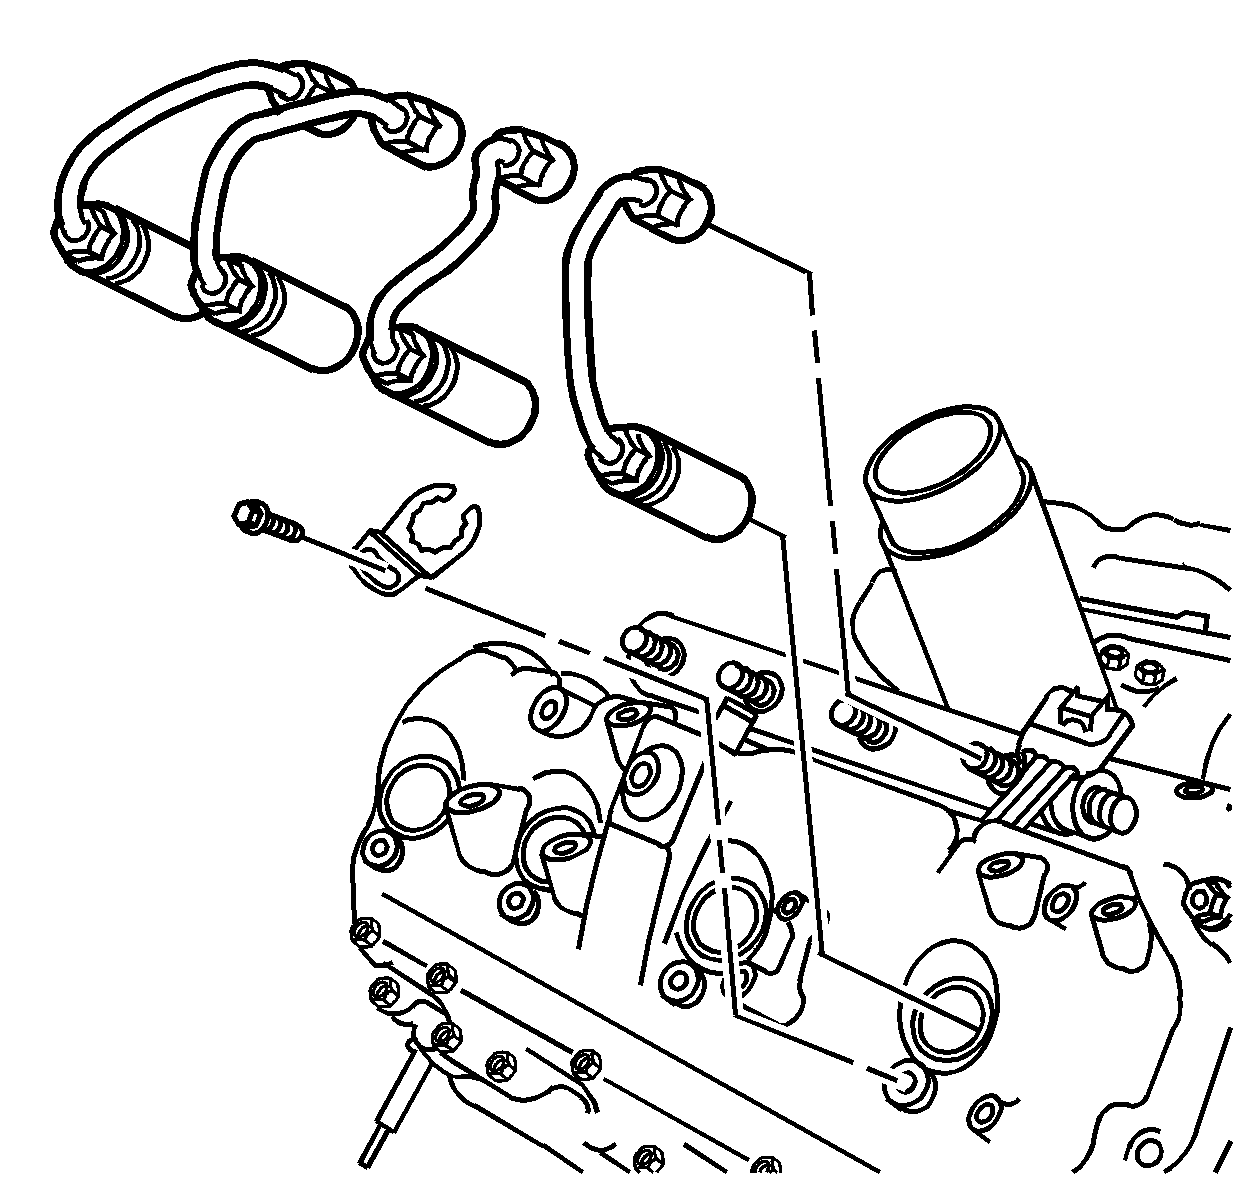
- Before removing the fuel injector lines, use compressed air to blow any debris from between the injector line and fittings (1, 2). Wipe the fittings clean of debris.
- Spray lithium grease, GM P/N 12346293 or equivalent, between the fuel injector line and fittings (1, 2) to assist in containing any debris during removal.
- Remove the fuel injector feed pipe retainer bolts and retainers.
- Remove fuel injector feed pipes.
Important: Do not use a screwdriver or other tool to pry the hose loose. The hose can be torn or damaged. Loosen the hose by twisting.
Notice: DO NOT use compressed air to clean debris from the fuel injector inlet after the fuel line is removed. Using compressed air can allow debris to enter the fuel injector inlet and damage the fuel injector.
Installation Procedure
- Install the fuel injector feed pipes.
- Tighten the fuel injector feed pipe fittings (1, 2).
- Install the fuel injector feed pipe retainers and bolts.
- Install EGR valve. Refer to Exhaust Gas Recirculation Valve Replacement .
- Position the heater outlet hose.
- Install the fuel filter. Refer to Fuel Filter Replacement .
- Install the fuel injection control module. Refer to Fuel Injector Control Module Replacement .
- Install the heater outlet hose bolt (2) to the generator bracket.
- Install the charged air cooler outlet duct to the intake.
- Align the mark on the duct (3) with the mark on the turbocharger.
- Position the clamp (1) as shown for proper clearance.
- Install the air cleaner outlet duct. Refer to Air Cleaner Outlet Duct Replacement .
Notice: Refer to Fastener Notice in the Preface section.
Notice: Ensure proper torquing of the fuel injector line. An under-torqued fuel injector line will not seal properly and an over-torqued fuel injector line may damage the fuel injector fitting. An improperly sealed or damaged fuel injector line or fuel injector fitting will cause a fuel leak.
Tighten
Tighten the fittings to 41 N·m (30 lb ft).
Tighten
Tighten the screws to 4 N·m (35 lb in).
Tighten
Tighten the bolt to 21 N·m (15 lb ft).
Tighten
Tighten the clamp to 6 N·m (53 lb in).
