For 1990-2009 cars only
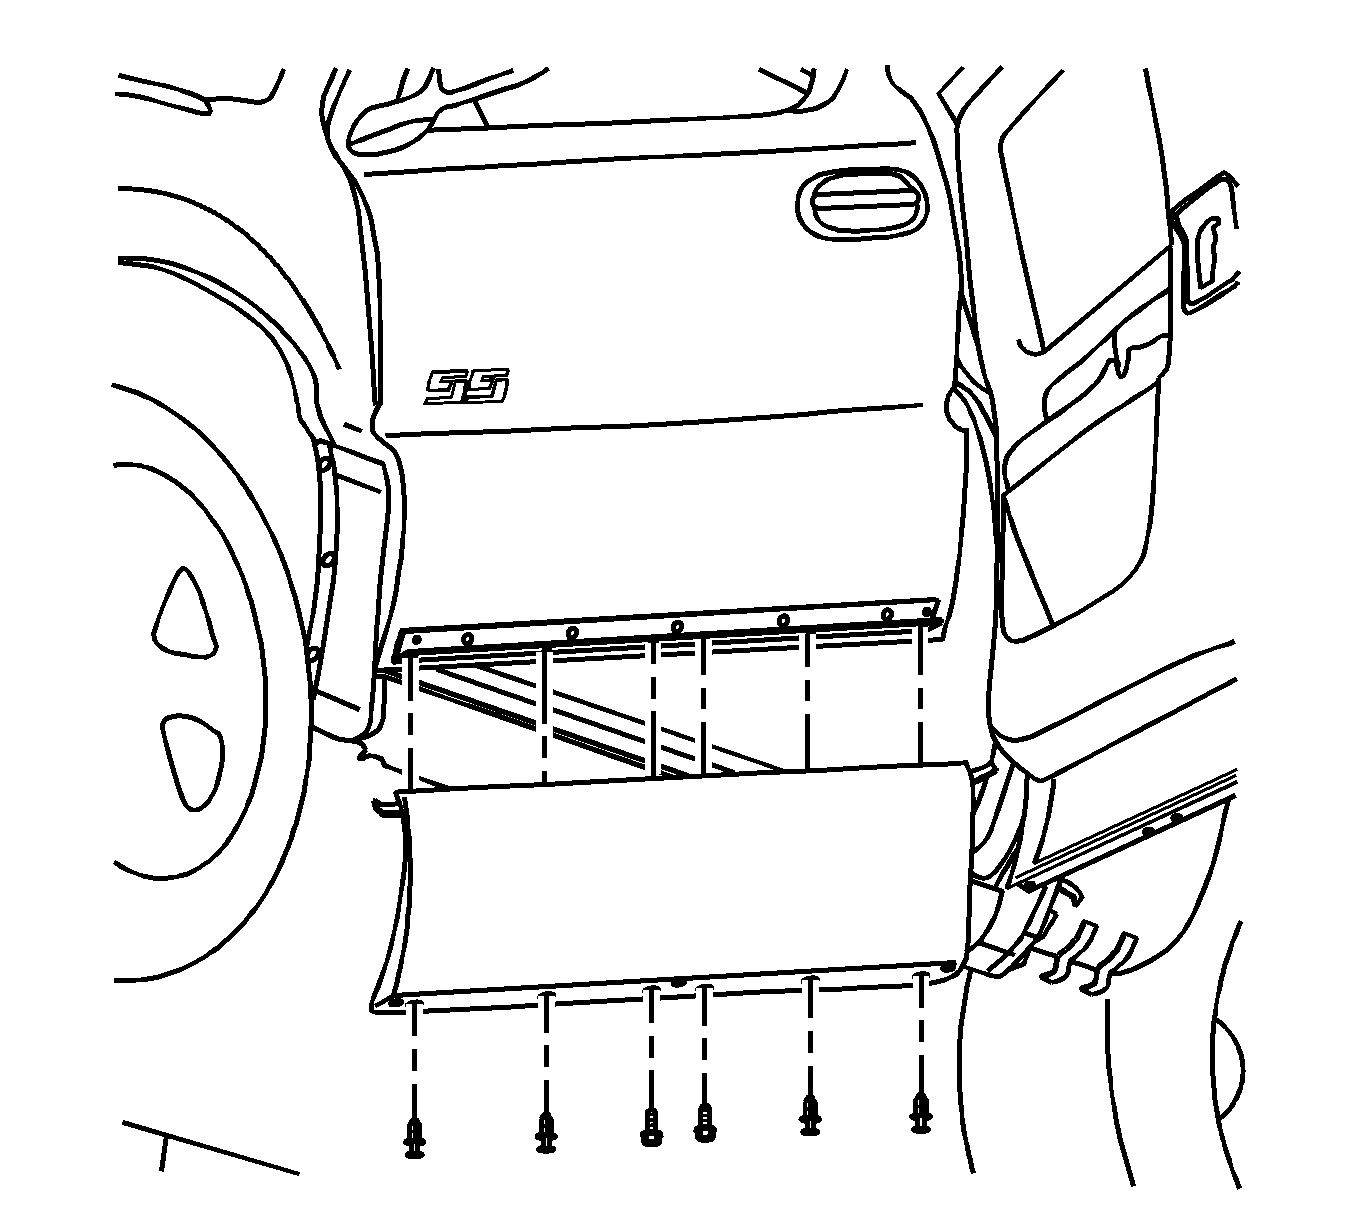
Front Side Door Molding Replacement SS
Tools Required
J 25070 Heat Gun
Removal Procedure
- Remove the 2 screws.
- Remove the 4 push-pins.
- Heat the body side molding using a J 25070 . Hold the J 25070 approximately 152 mm (6 in) from the surface. Apply heat using a circular motion for about 30 seconds.
- Starting from one end of the molding, peel off the body off the molding from the panel surface using a flat-bladed tool.
- Remove all adhesive from the body panel using a 3M™ ScotchBrite molding adhesive remover disk, P/N 07501, or equivalent.

Important: Be careful not to scratch or chip the paint.
Installation Procedure
- Clean the area where the replacement molding is to be mounted. Use a suitable solvent such as flash naphtha or a mixture of 50 percent isopropyl alcohol and 50 percent water.
- Dry the area thoroughly.
- Warm the body panel to a temperature range of 16-41°C (60-105°F) with a heat lamp or J 25070 .
- Peel off the adhesive tape protective lining.
- Align push-pin holes with holes in bracket.
- Press on the top part of the molding so that the tape adheres to the body panel.
- Install the 4 push-pins.
- Install the 2 screws.

Notice: Refer to Fastener Notice in the Preface section.
Tighten
Tighten the screws to 1.9 N·m (16.8 lb in).
