If a tire goes flat, avoid further tire and wheel damage by driving slowly to a level place. Turn on the hazard warning flashers. See Hazard Warning Flashers .
Caution: Changing a tire can be dangerous. The vehicle
can slip off the jack and roll over or fall on you or other people. You and they could
be badly injured or even killed. Find a level place to change your tire. To help prevent
the vehicle from moving:
To be even more certain the vehicle will not move, put blocks at the front and
rear of the tire farthest away from the one being changed. That would be the tire
on the other side, at the opposite end of the vehicle.
When the vehicle has a flat tire (B), use the following example as a guide to assist you in the placement of wheel blocks (A).
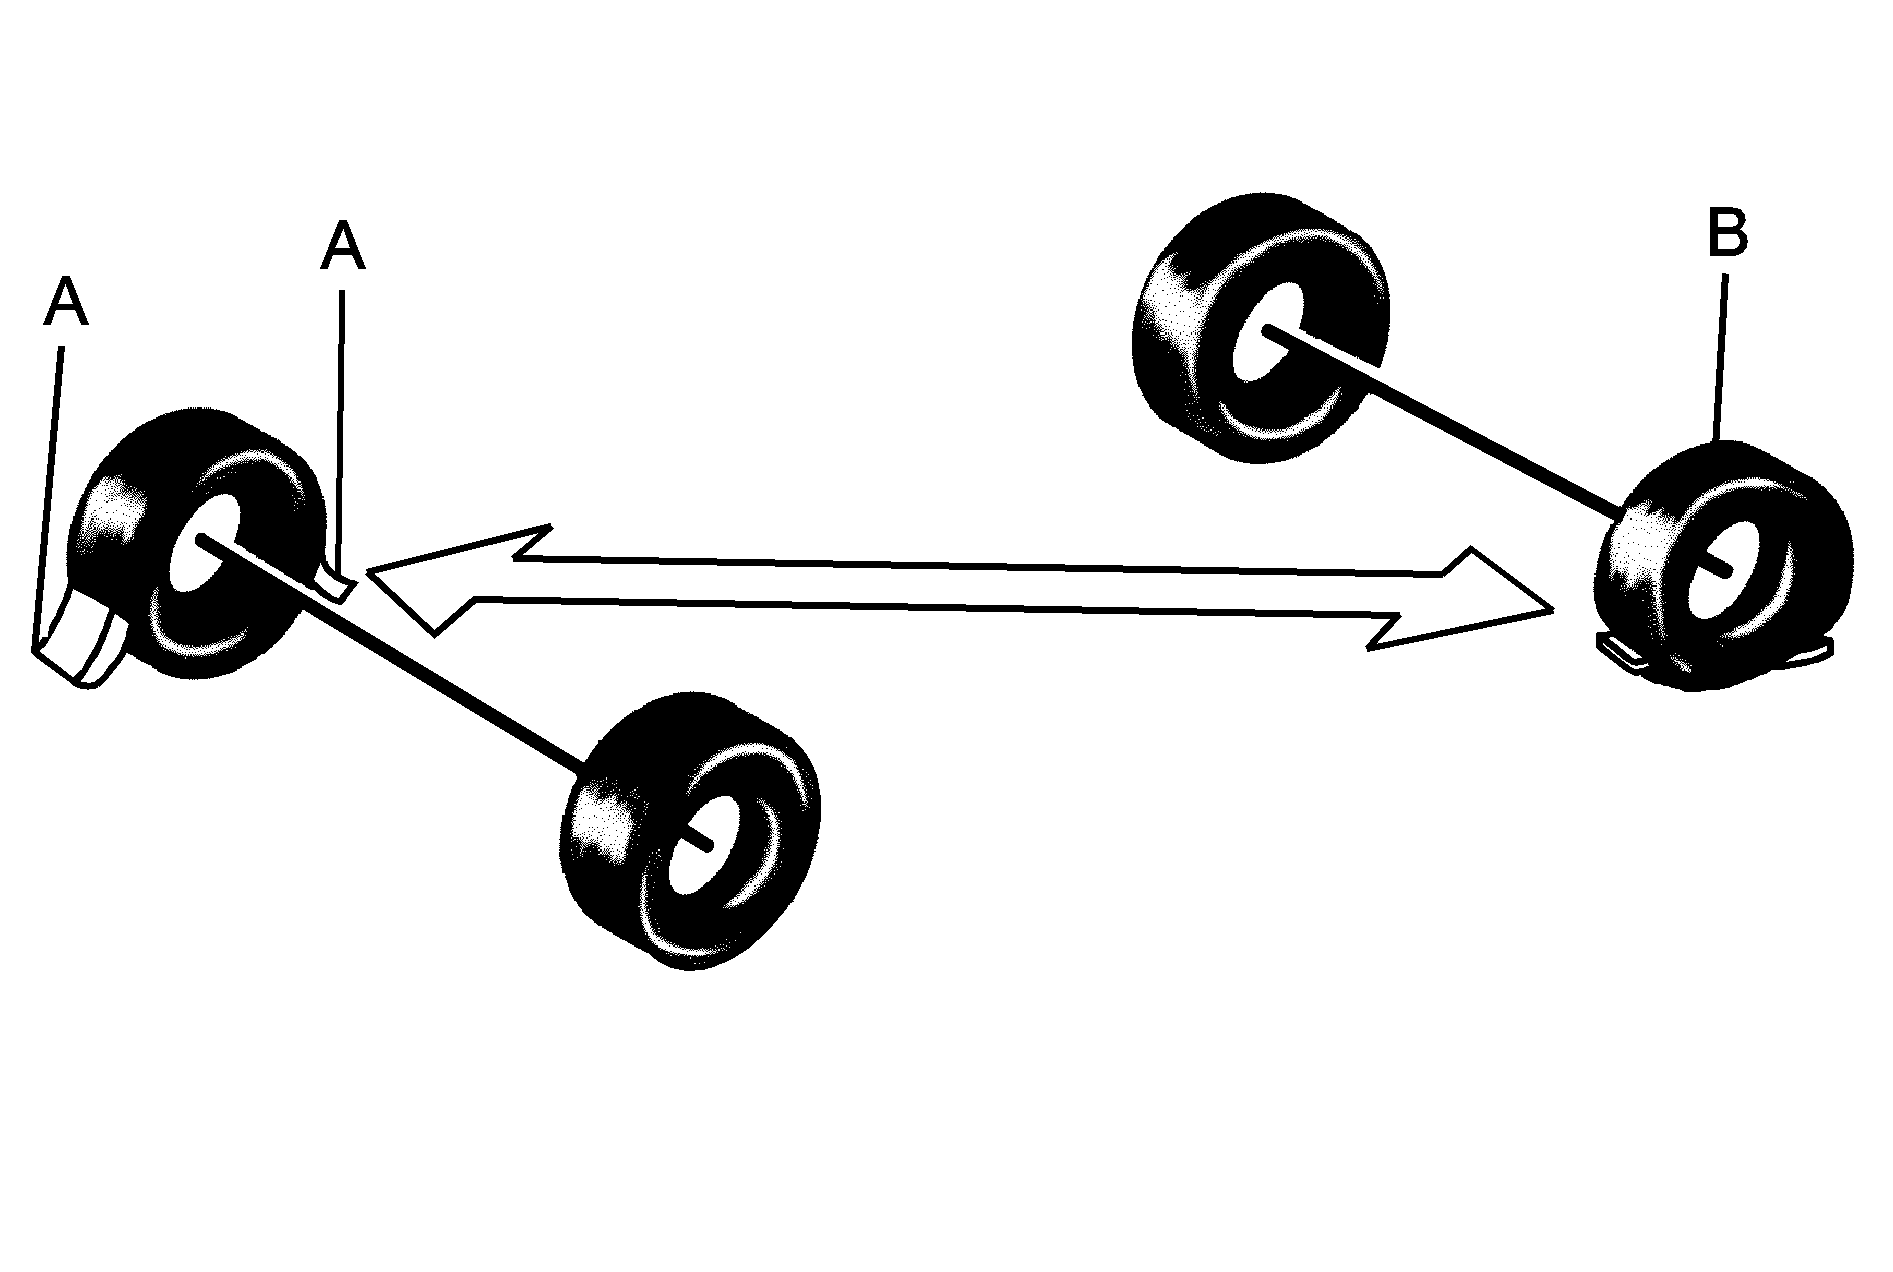
Wheel Block
Flat Tire
The following information explains how to use the jack and change a tire.
Removing the Jack and Tools
Your hybrid vehicle requires a different procedure to remove the jack and tools from the vehicle. See "Changing a Flat Tire" in the owner manual Index for complete instructions on changing a flat tire.
The equipment is under the passenger's side second row seat behind the battery box. You must first fold the seat cushion before removing the jack and tools. Use the following procedure:
- Pull up and out on the release strap located under the seat cushion.
- Fold the seat cushion upward until it latches with the seatback.
- Push and pull on the seat cushion to make sure the seat is secure.
- Turn the wing nut (B) counterclockwise until loosened and flip the black retaining clip back to remove the storage bag and tools (C) from the vehicle.
- Release the jack and wheel blocks (A) from the holder as an assembly by turning the yellow knob on the jack counterclockwise to lower the jack head.
- Pull the jack back toward the seat bracket.
- Turn the jack upside down so the small wing nut holding the wheel blocks is facing the battery box.
- Pulling the jack out this way will reduce the potential of scratching the battery cover.
- Loosen the wing nut on top of the wheel blocks by turning it counterclockwise to separate the wheel blocks from the jack.
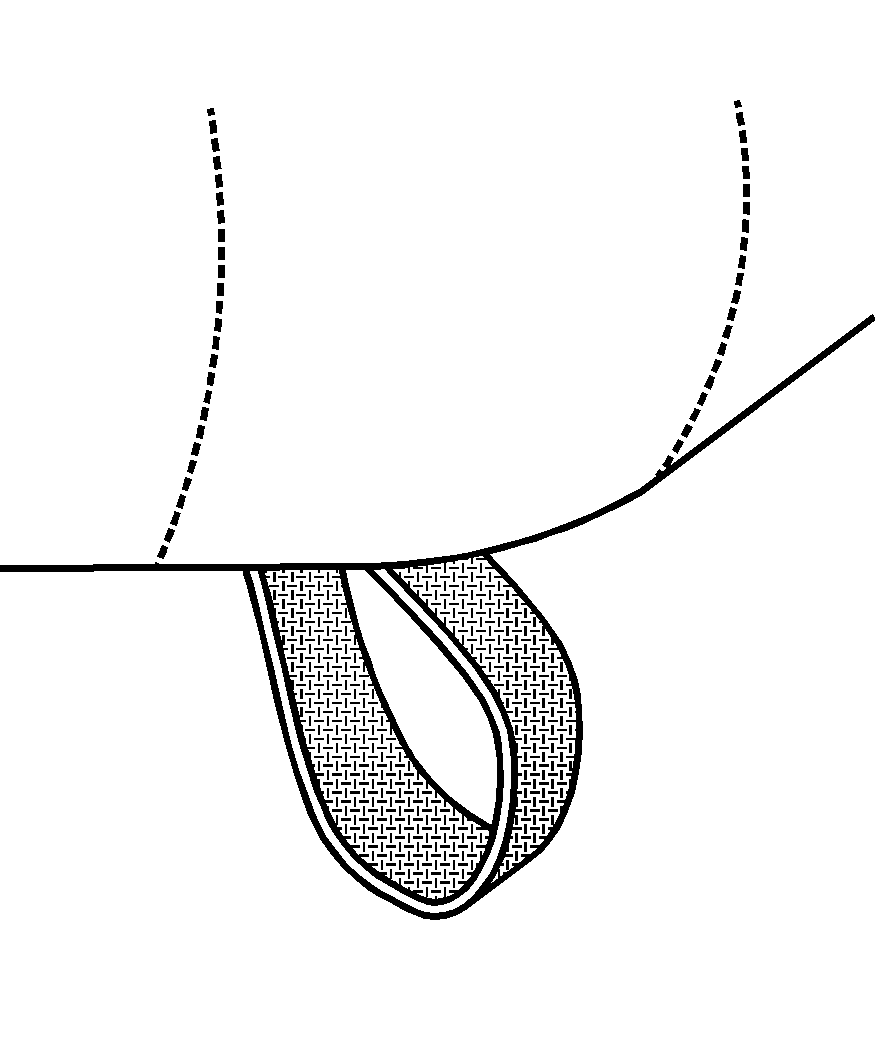
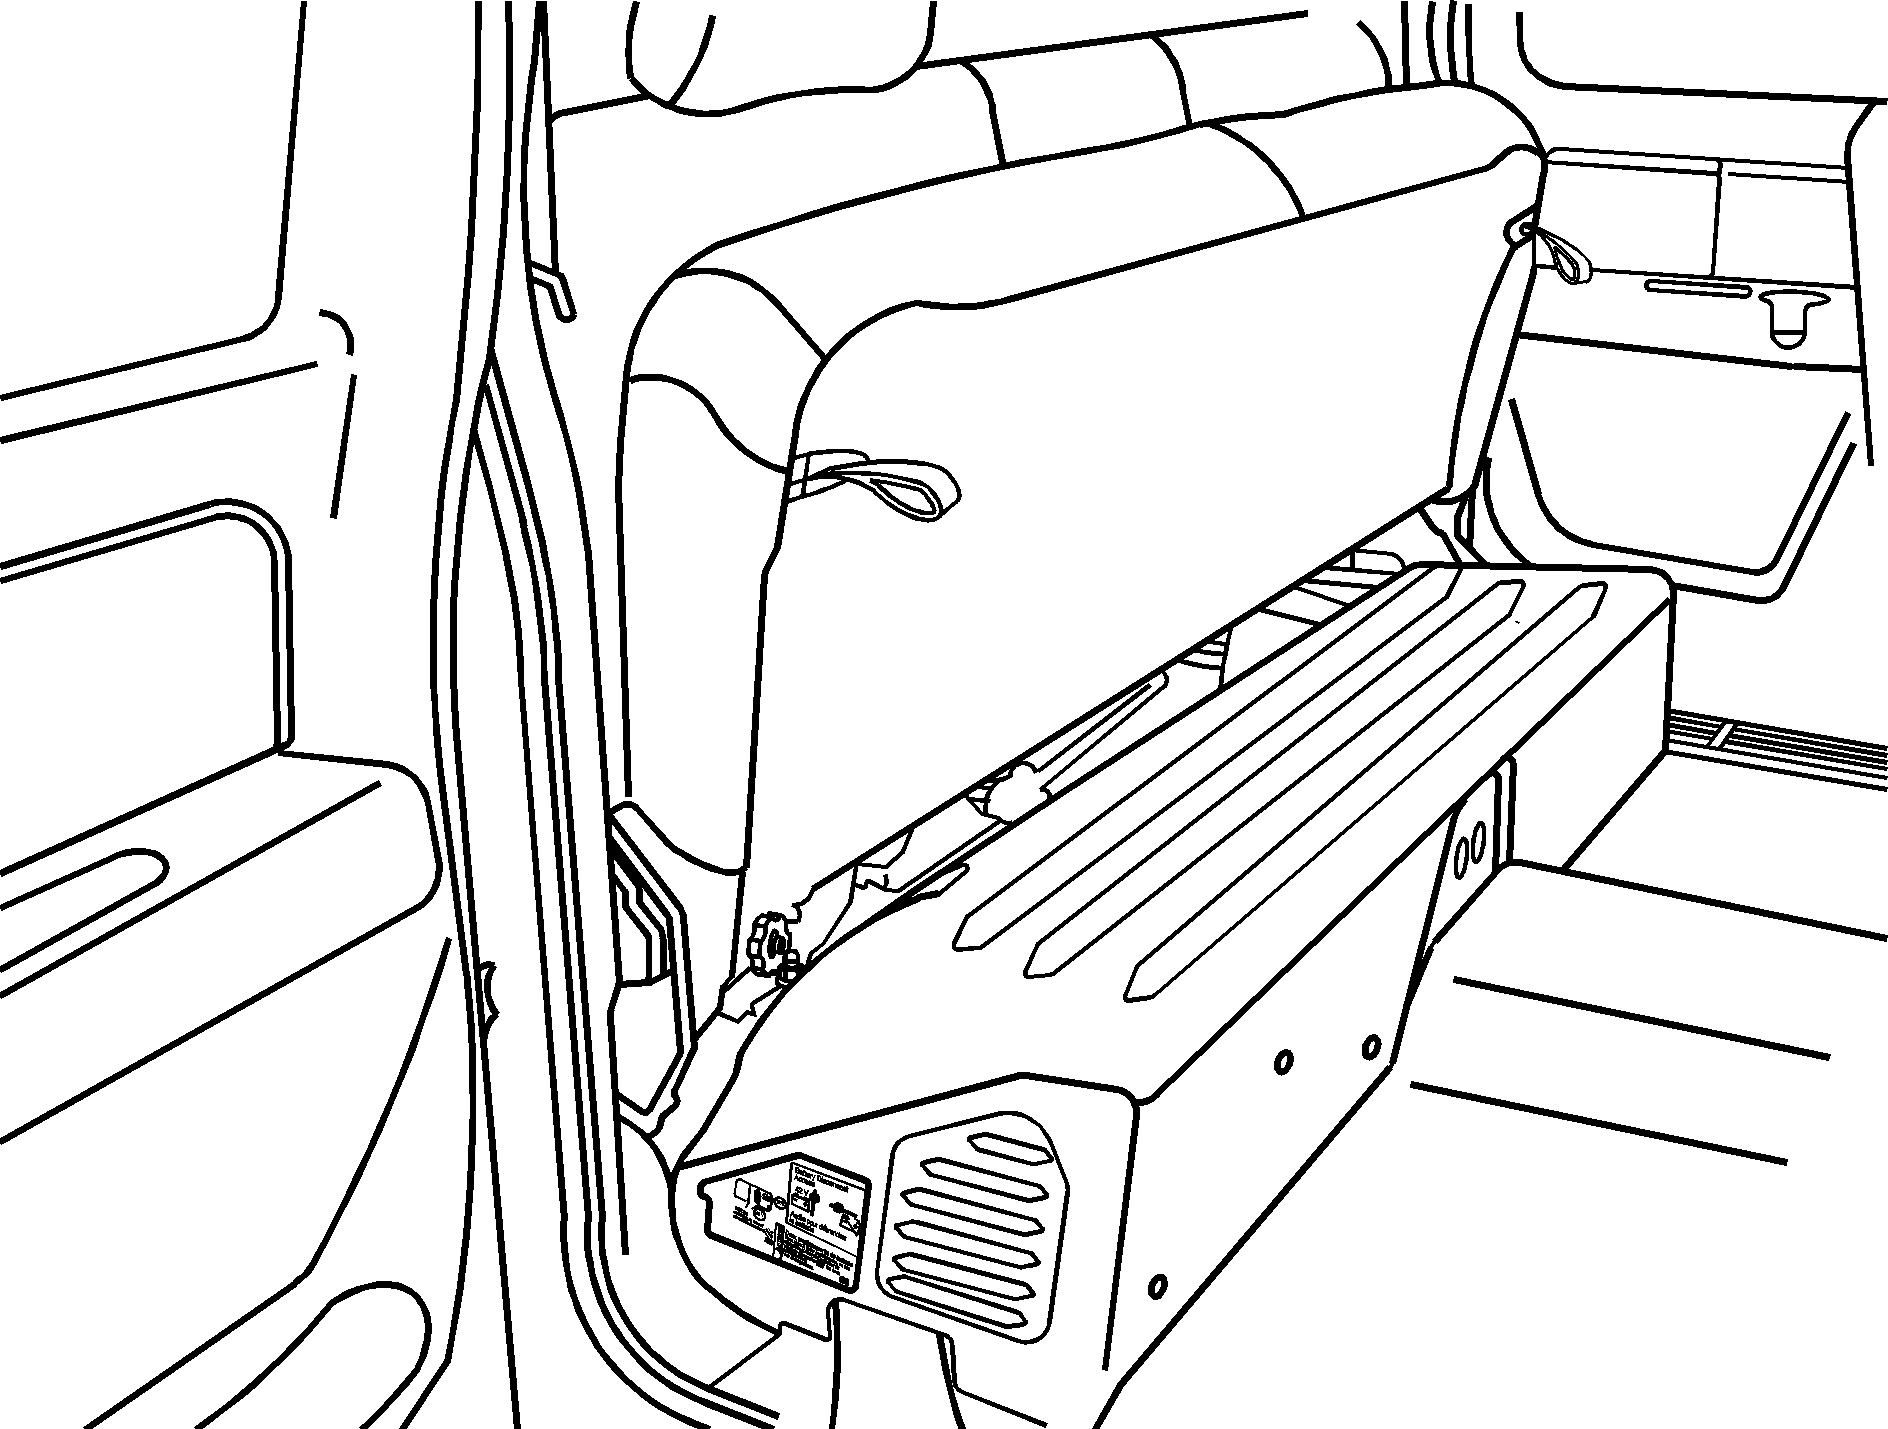
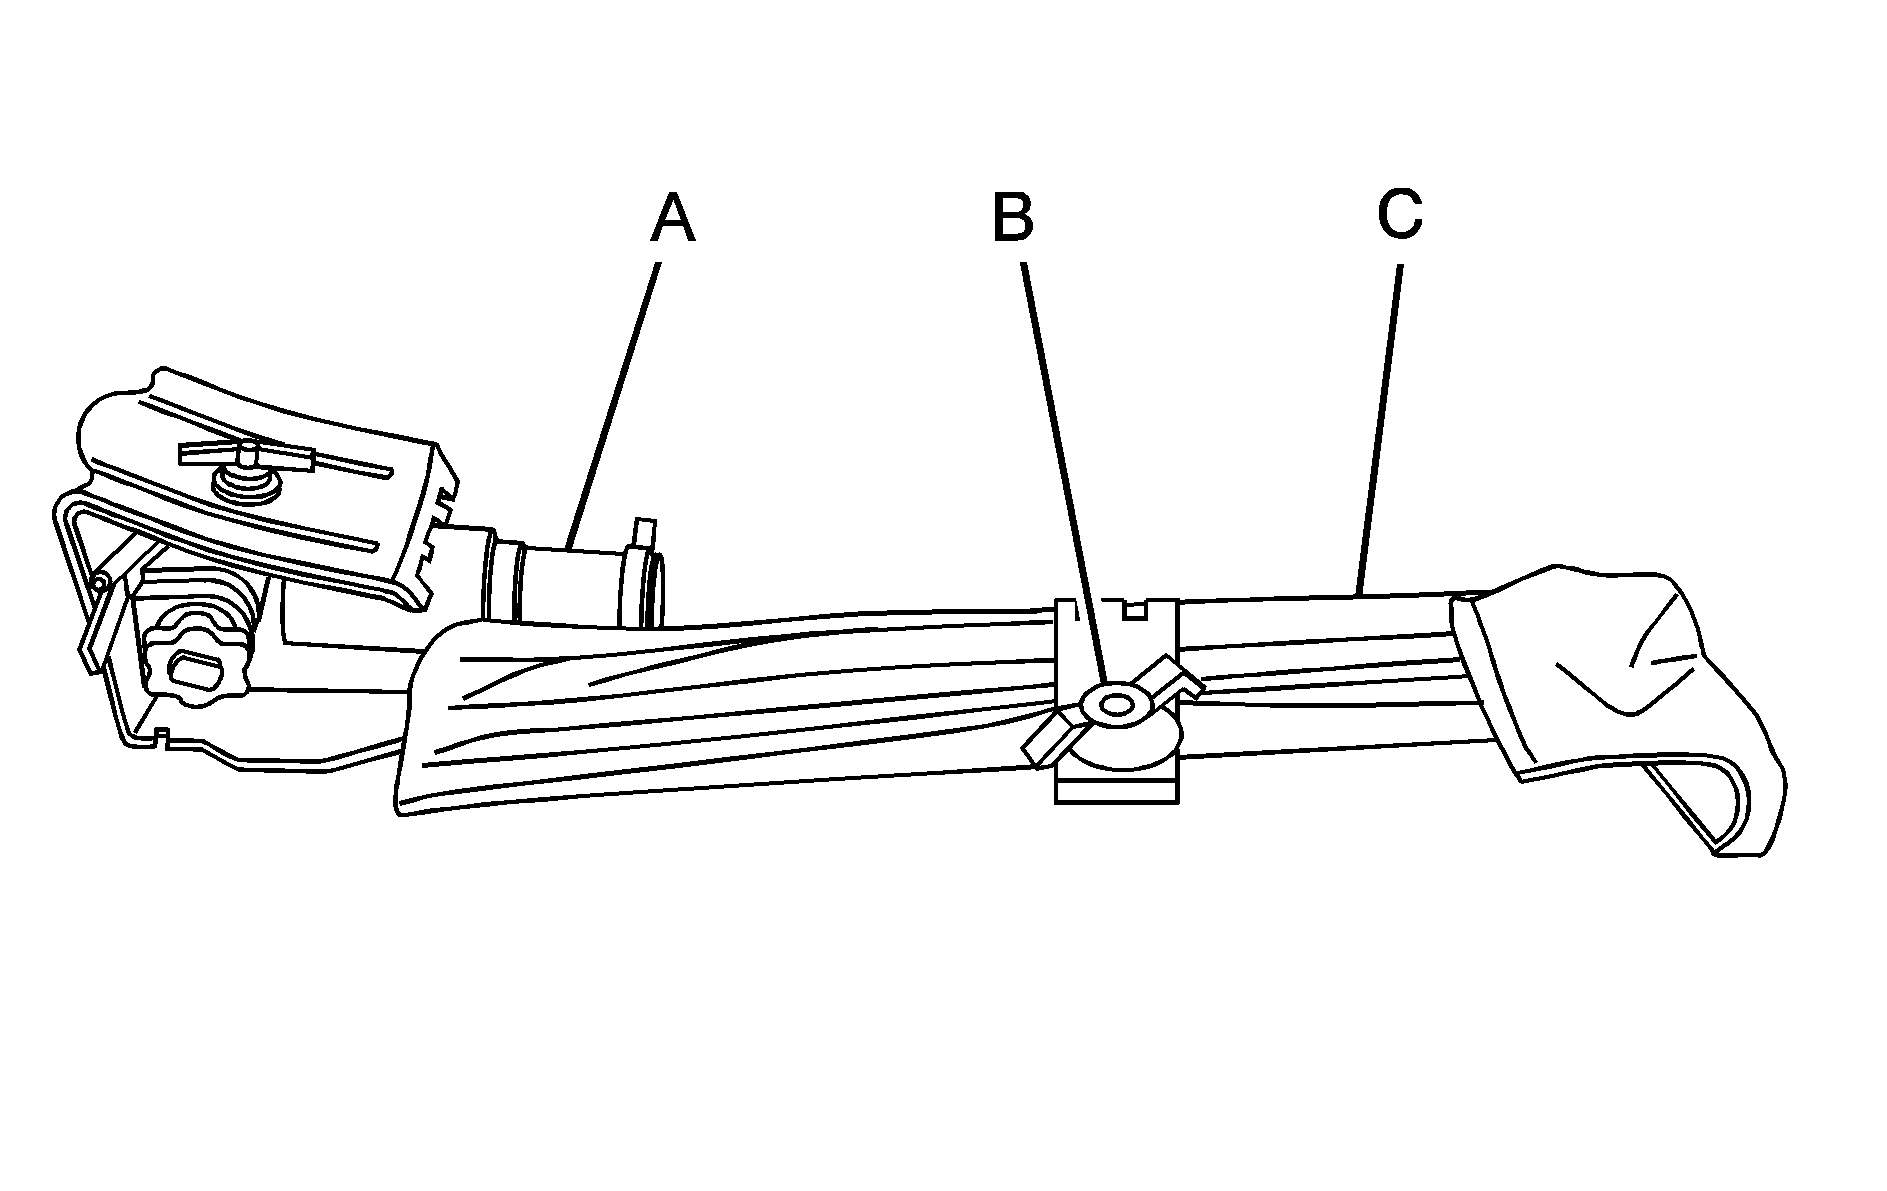
Jack and Wheel Blocks
Wing Nut
Tool Kit
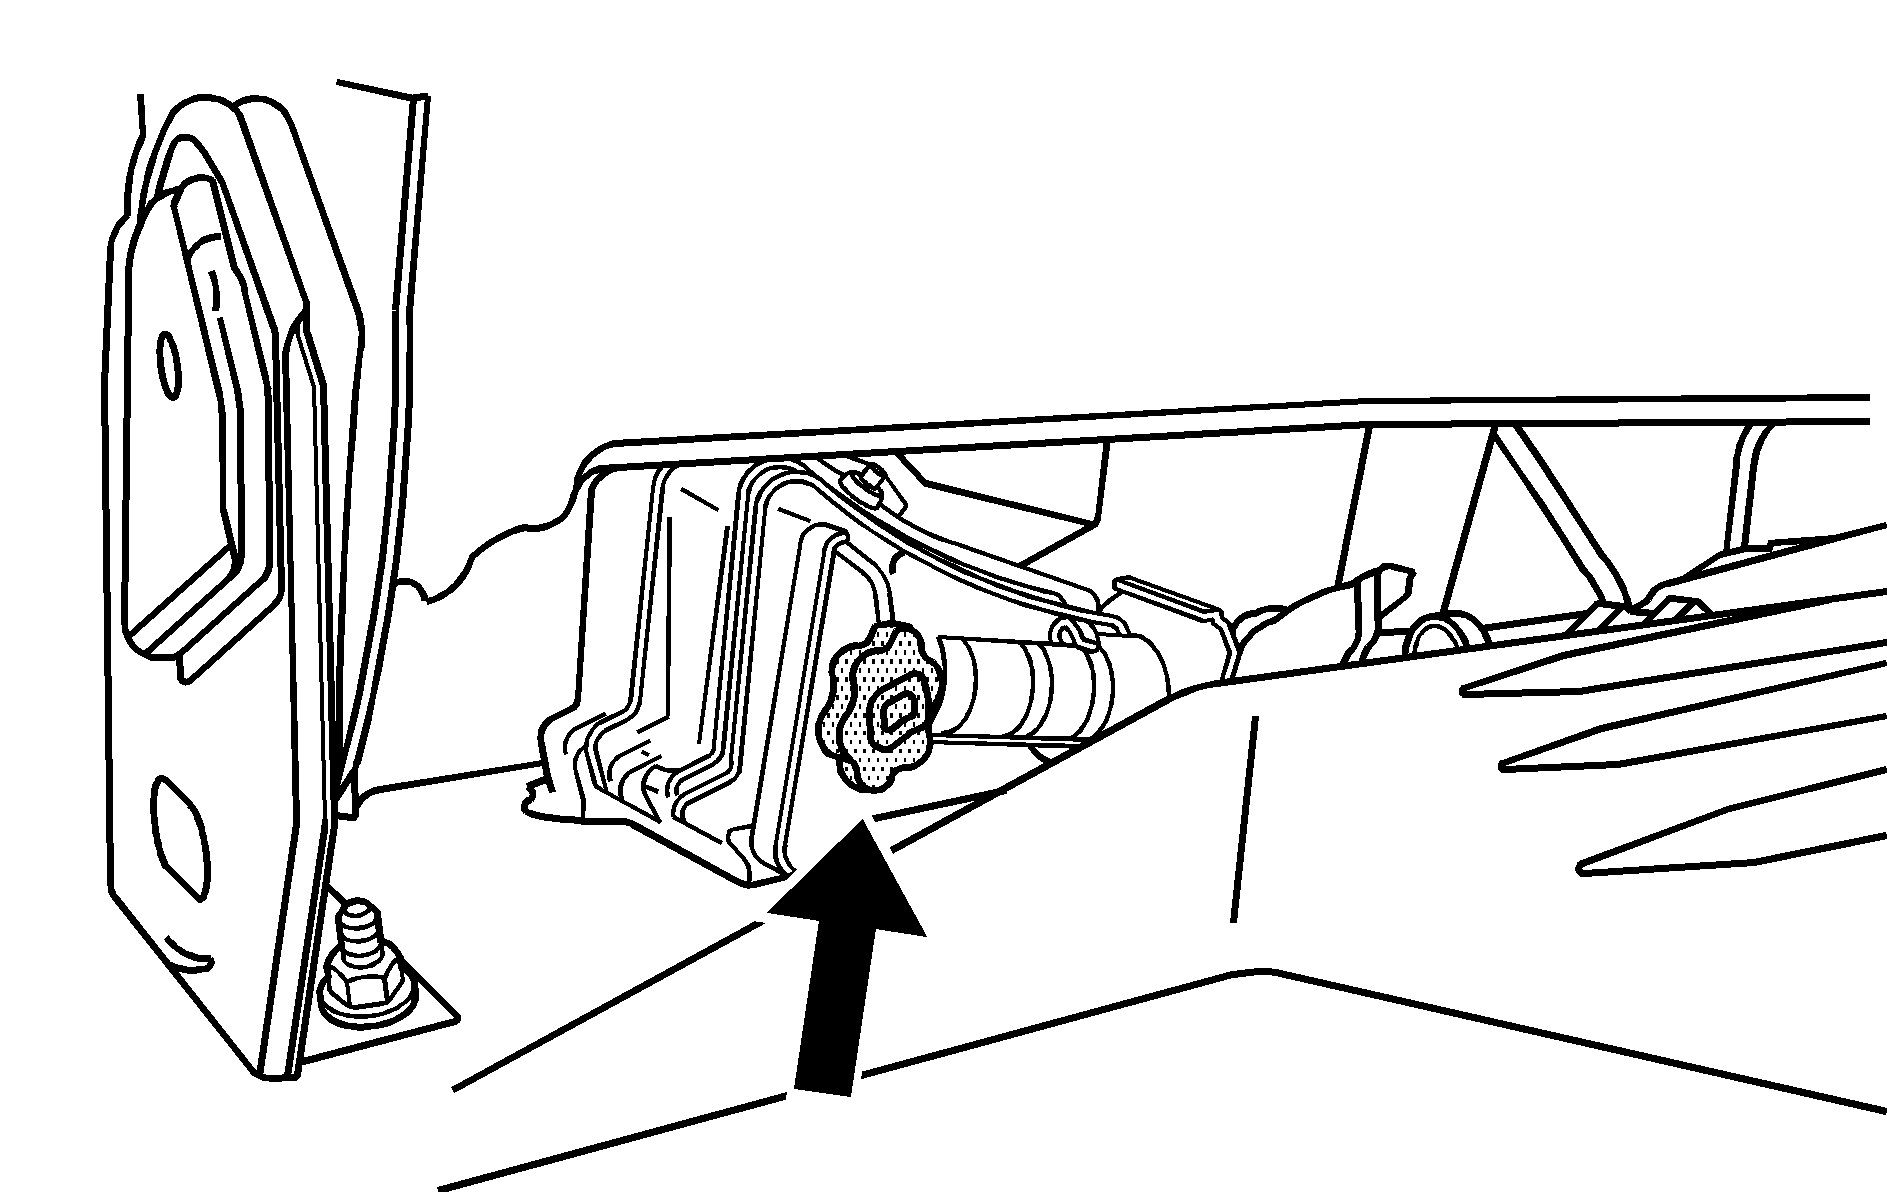
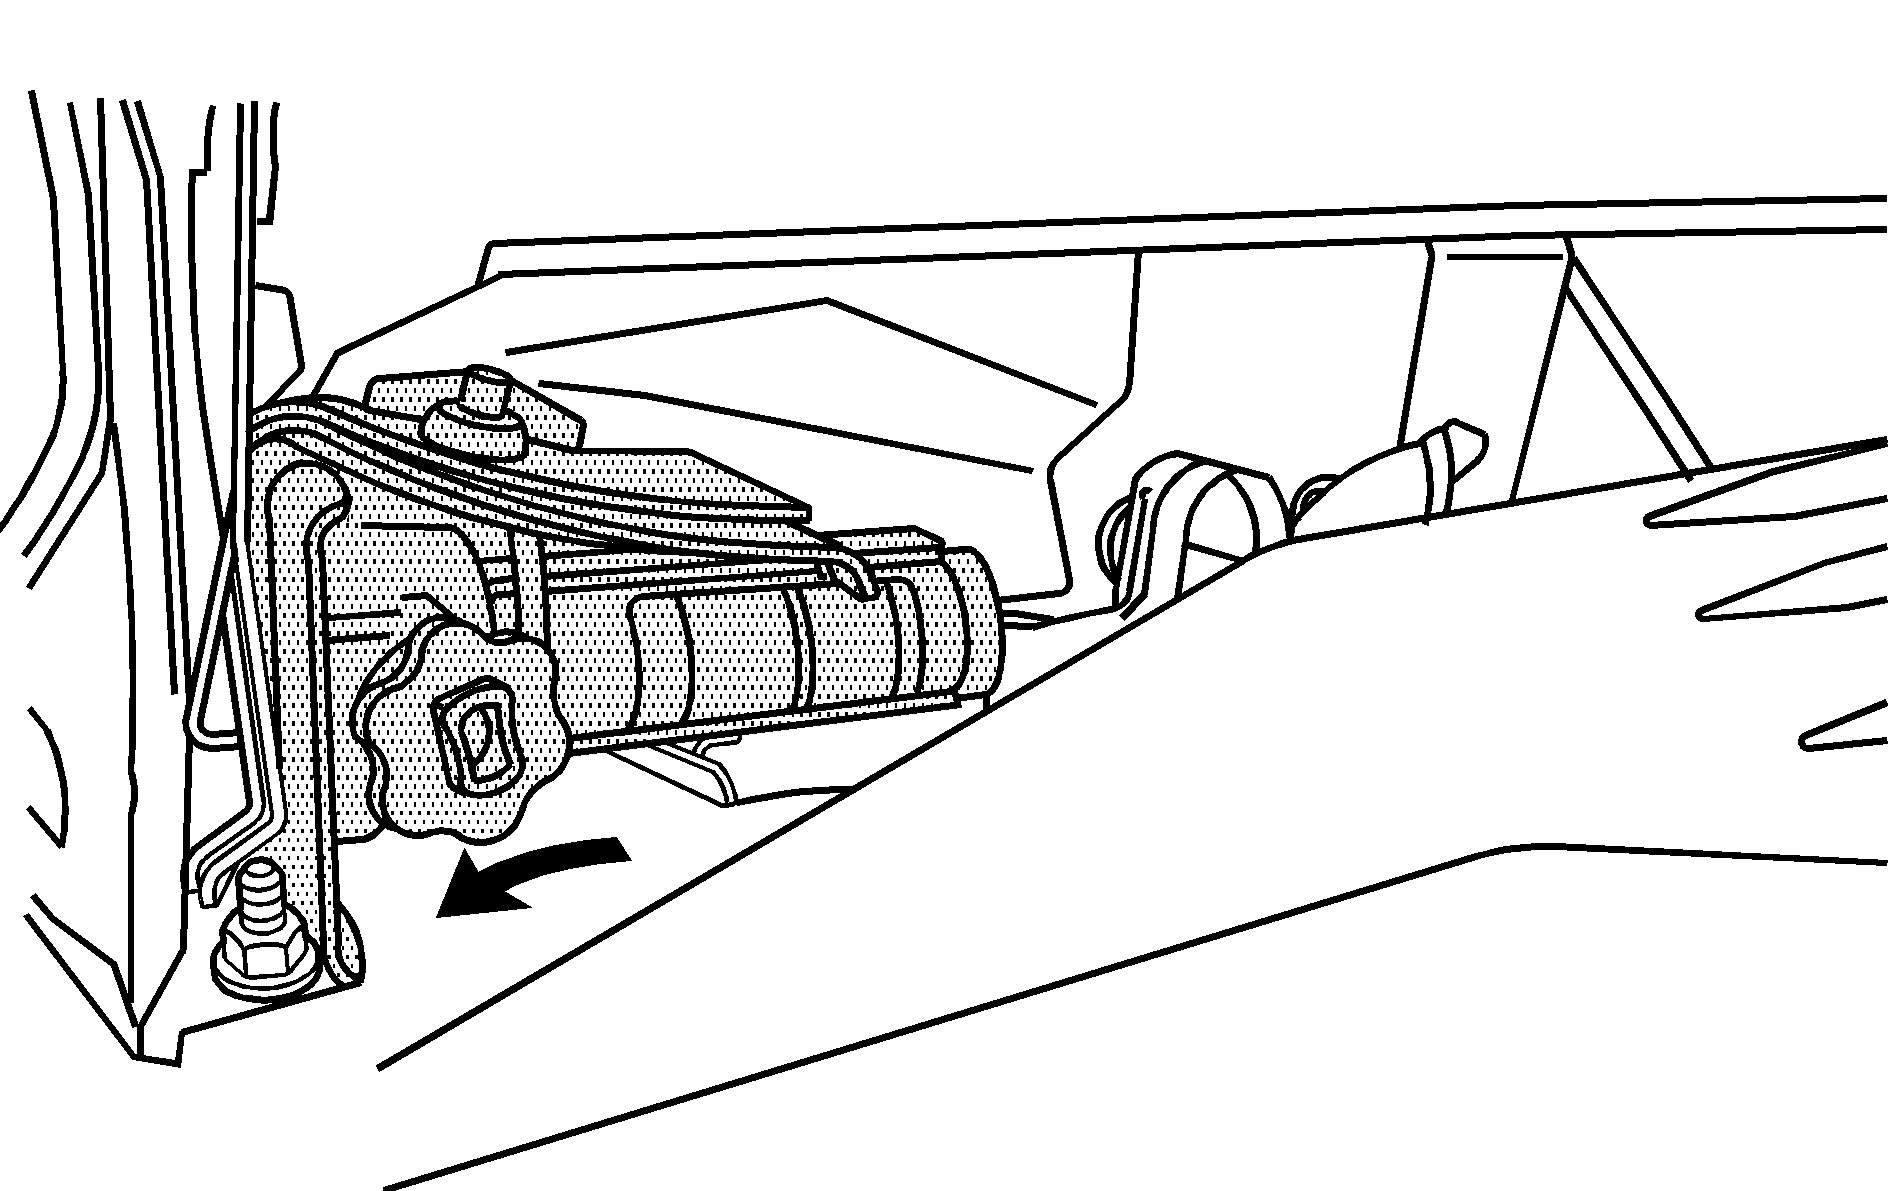
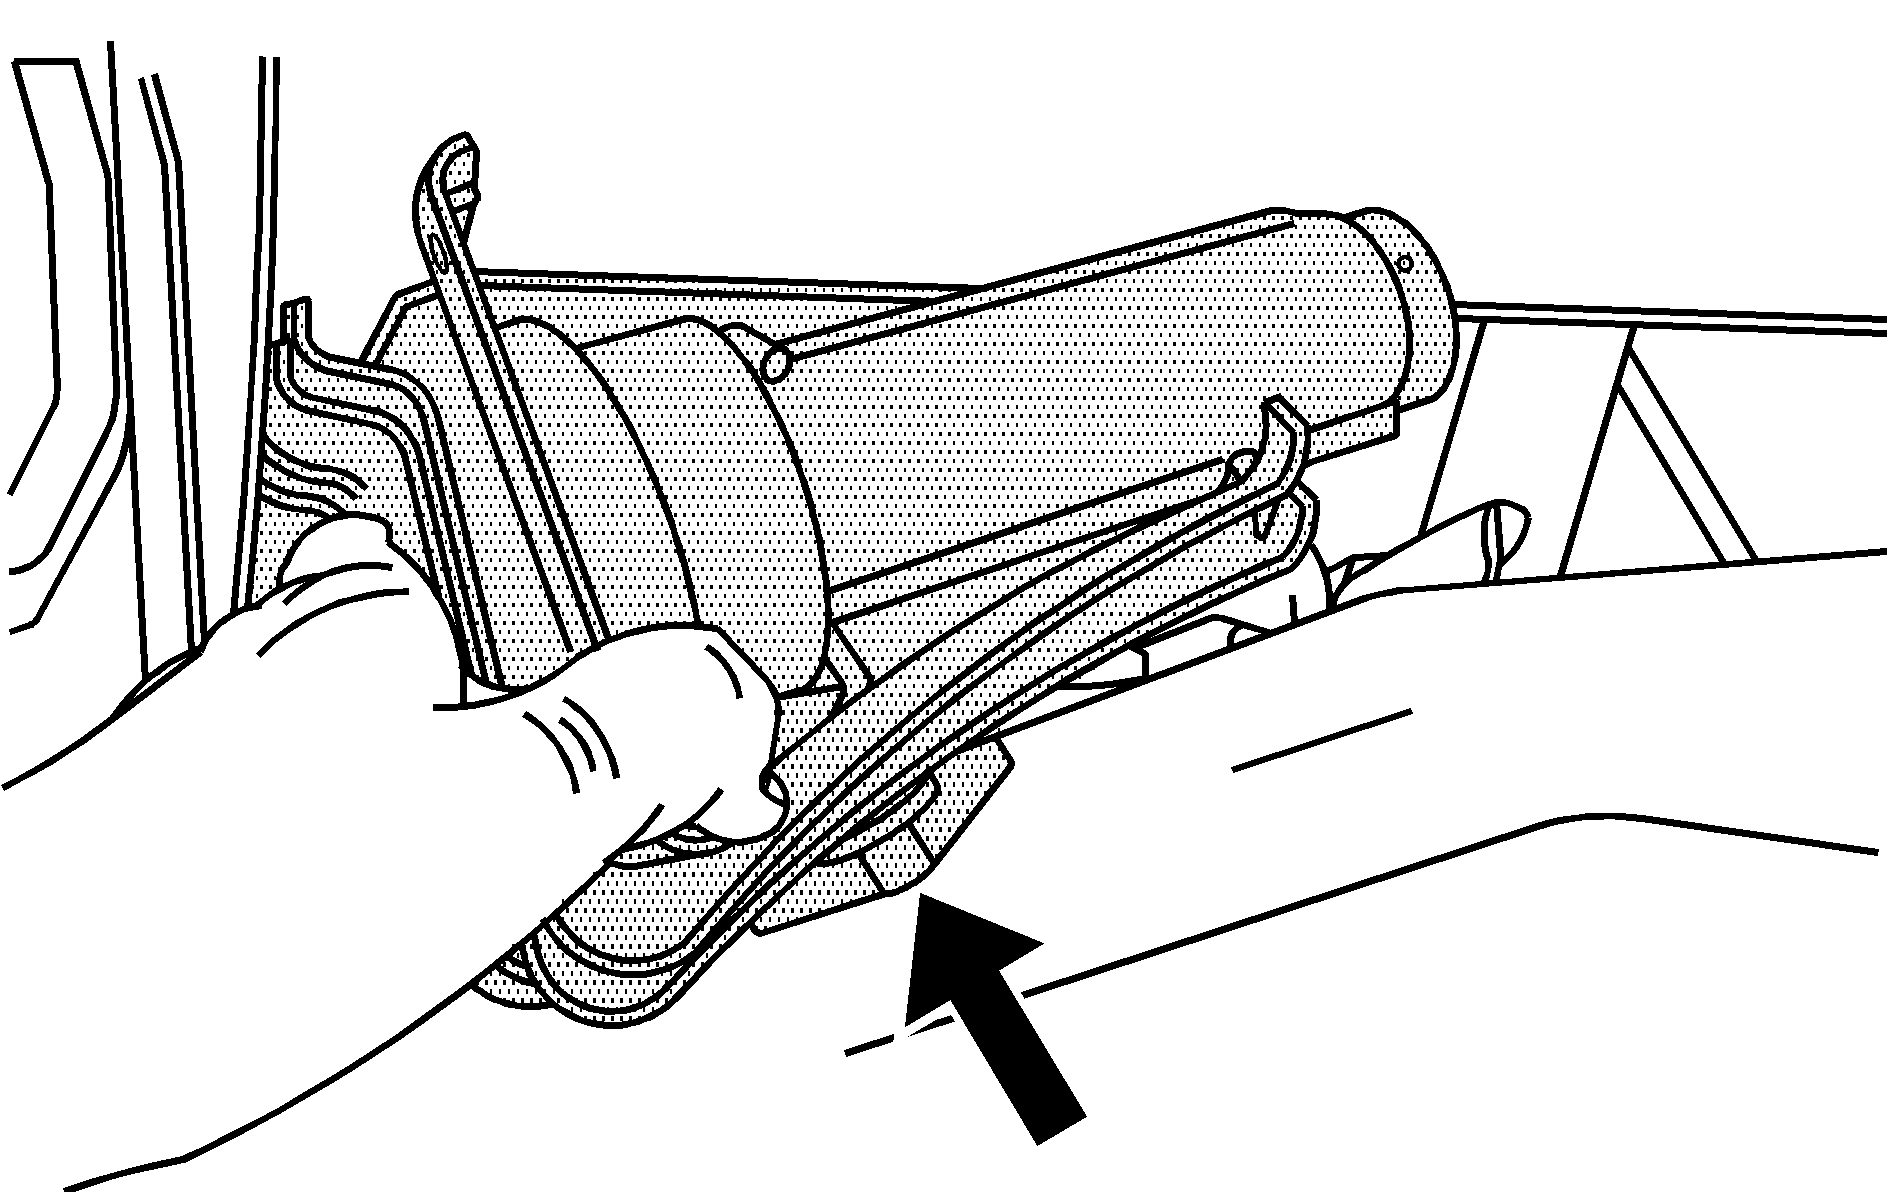
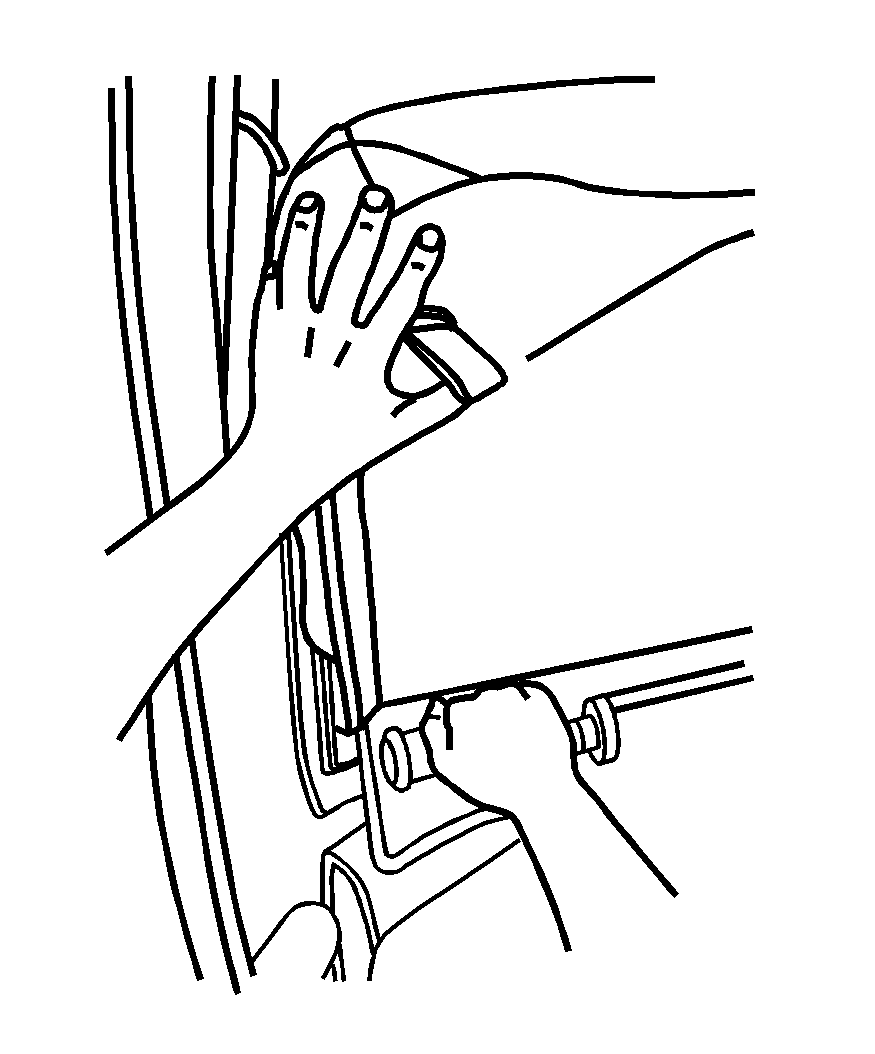
Push the seat cushion back while pulling the jack out.
When you are finished, place the tools in the storage bag and reinstall the tools in the vehicle by reversing the removal procedure. Reinstall the wheel blocks to the jack and reinstall the jack back into the vehicle by reversing the removal procedure.
