SHIMMY - SHAKE COMMENT REVISED IDLER ARM INSPECTION

VEHICLES AFFECTED: ALL 1983-87 'G' AND 'M' VANS
Sometimes an idler arm check is made because of a shimmy complaint. In these cases, be sure to check the other possible causes such as dynamic wheel/tire imbalance, wheel run out, road surface irregularities, etc.
A number of "G" and "M" van idler arms have been replaced that inspection has revealed were not defective. To help prevent the unnecessary customer dissatisfaction involved in replacing these idler arms, the inspection procedure below should be followed.
Note: The equipment necessary to perform the inspection procedure is as follows:
. A spring scale capable of reading 110 N or 25 lbs (Kent-Moore P/N J-34913).
. Dial indicator with magnetic base or suitable scale for measuring deflection.
Inspection Procedure
1. Raise the front of the vehicle and support it with jack stands at the lower control arms. The wheels must be free to rotate and the steering mechanism free to turn.
2. Position the wheels straight ahead.
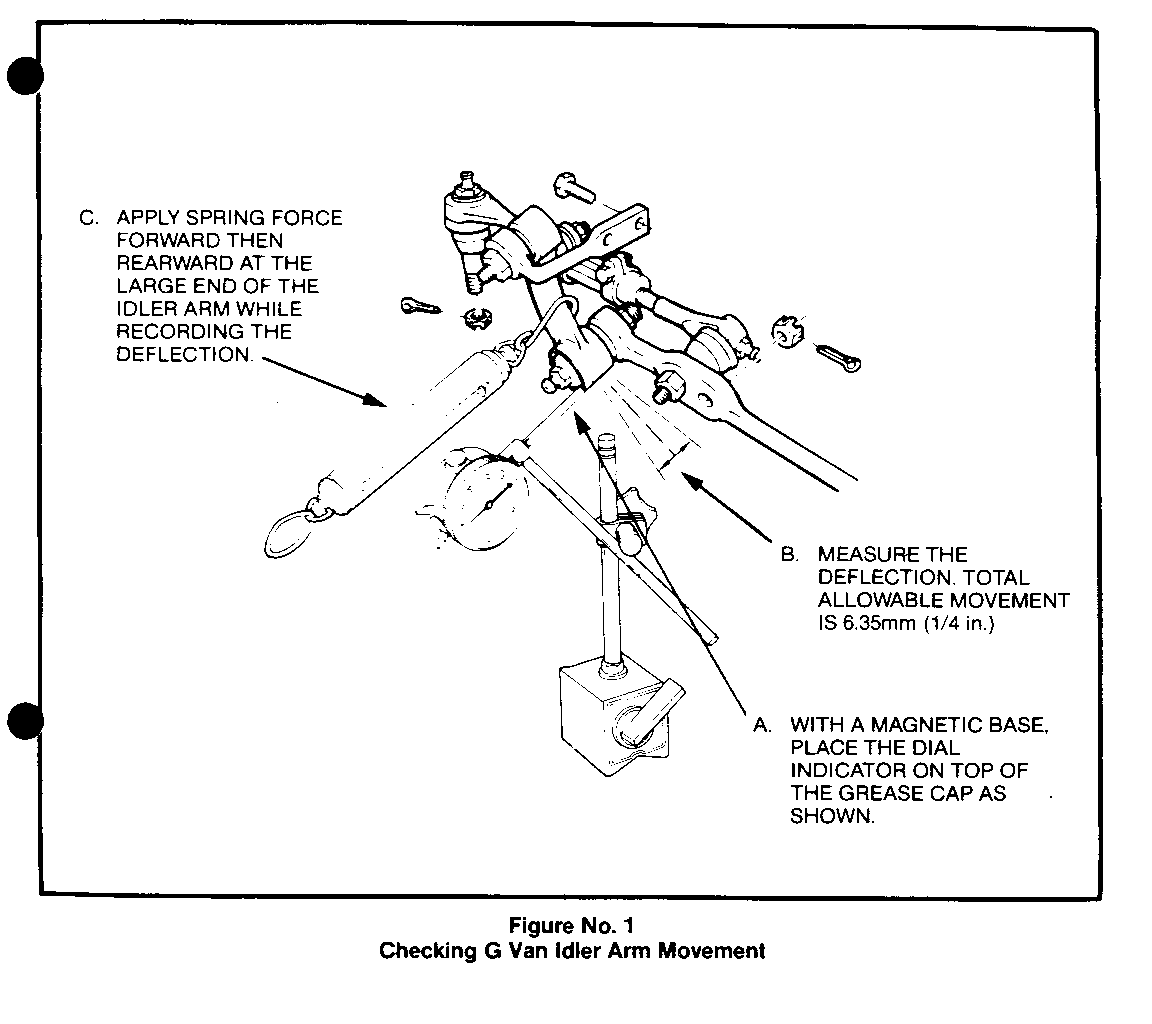
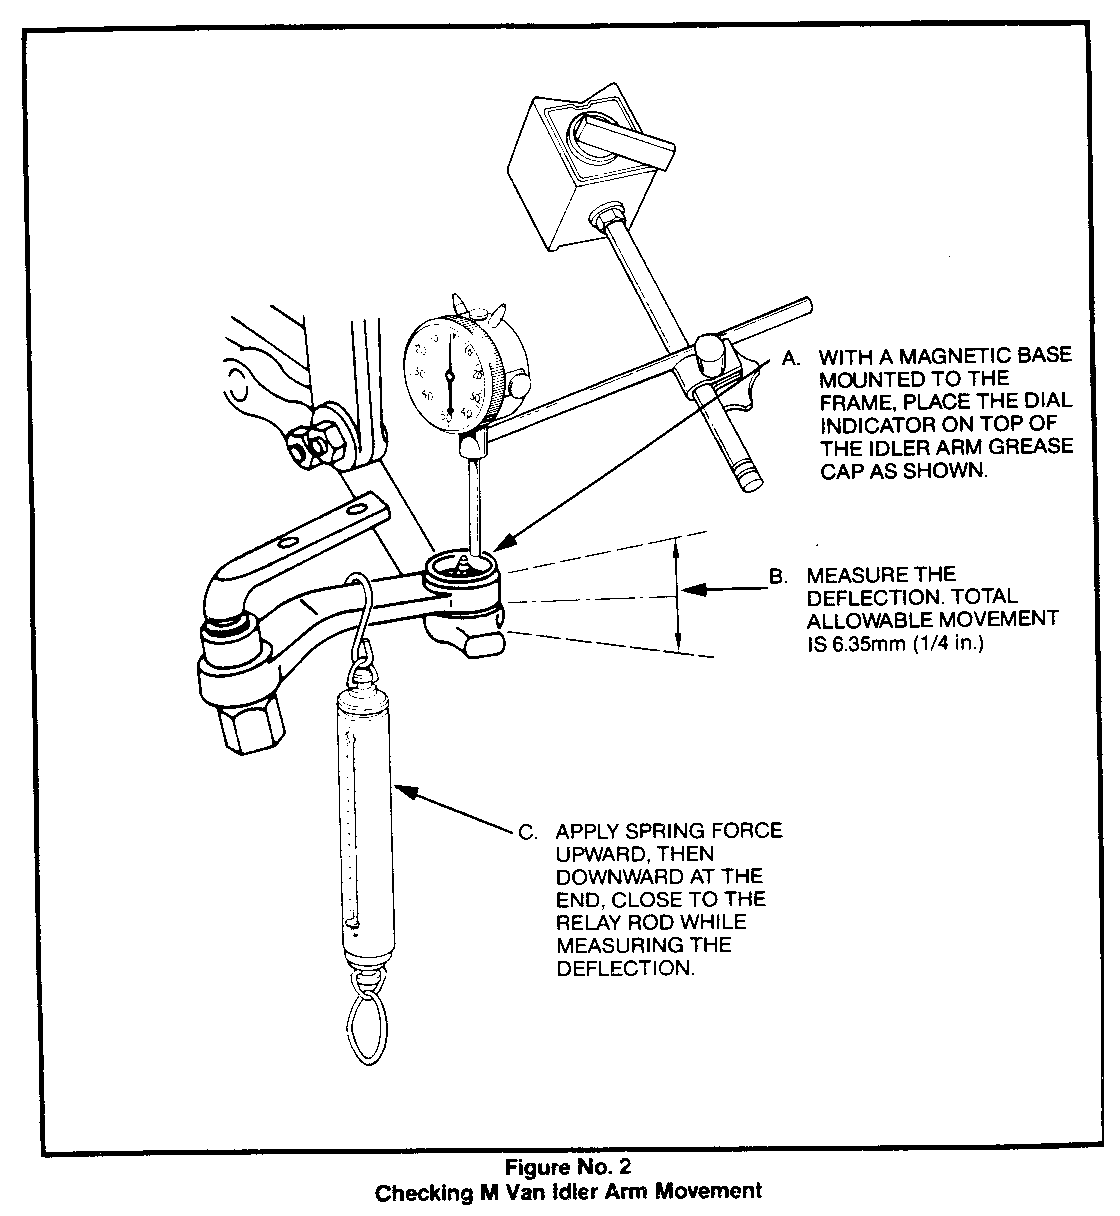
3. Place the dial indicator on top of the idler arm grease cap as shown in Figures No. 1 and 2 when measuring the deflection of the idler arm.
4. FOR G VANS - Place a spring sc.ale at the relay rod end of the idler arm (Figure No. 1). Using the spring scale, exert 110 N (25 lbs) force forward then rearward while measuring the total distance the arm moves.
FOR M VANS - Place a spring scale at the relay rod end of the idler arm (Figure No. 2). Using the spring scale, exert 110 N (25 lbs) force upward then downward while measuring the total distance the arm moves.
5. The allowable deflection is +/- 3.18mm (1/8 inch) each direction for a total of 6.35 mm (1/4 inch).
6. Replace only those idler arms which exceed a total movement of 6.35 mm (1/4 inch).
It is important to ensure that the correct load (force) is applied when making the measurements with the dial indicator. Using too much force will cause movement in excess of the allowables given even on a serviceable arm.
Moving the front tire and wheel assemblies back and forth to cause the idler arms to move is NOT an acceptable method for making this check. There is no way to determine the amount of force being applied to the arm using this method.
Note: This information is contained in the light duty service manuals, Section 3Bl-Steering Linkage. The idler arm inspection procedure in that section is the same as above.


General Motors bulletins are intended for use by professional technicians, not a "do-it-yourselfer". They are written to inform those technicians of conditions that may occur on some vehicles, or to provide information that could assist in the proper service of a vehicle. Properly trained technicians have the equipment, tools, safety instructions and know-how to do a job properly and safely. If a condition is described, do not assume that the bulletin applies to your vehicle, or that your vehicle will have that condition. See a General Motors dealer servicing your brand of General Motors vehicle for information on whether your vehicle may benefit from the information.
